Configuring BI Publisher for Secure Socket Layer (SSL) Communication
It is strongly recommended that you enable Secure Socket Layer (HTTPS) on the middle tier hosting the Web services because the trusted username/password that is passed can be intercepted.
This also pertains to Web services that are used for communication between BI Publisher and Oracle BI Presentation Services.
Tasks for enabling SSL with BI Publisher:
-
Adding the Virtualize Property to the Identity Store Configuration
-
Updating the JDBC Connection String to the Oracle BI EE Data Source
For information about configuring SSL for Oracle BI EE, see Enabling End-to-End SSL in the Security Guide for Oracle Business Intelligence Enterprise Edition.
Importing Certificates for Web Services Protected by SSL
If you make calls to Web services that are protected through Secure Sockets Layer (SSL), then you must export the certificate from the Web server hosting the Web service and import it into the Java keystore on the computer that is running BI Publisher.
To import certificates for Web services:
These steps should not be required if the server certificate is linked to some certificate authority (such as Verisign). But if the Web service server is using a self-generated certificate (for example, in a testing environment), then these steps are required.
Adding the Virtualize Property to the Identity Store Configuration
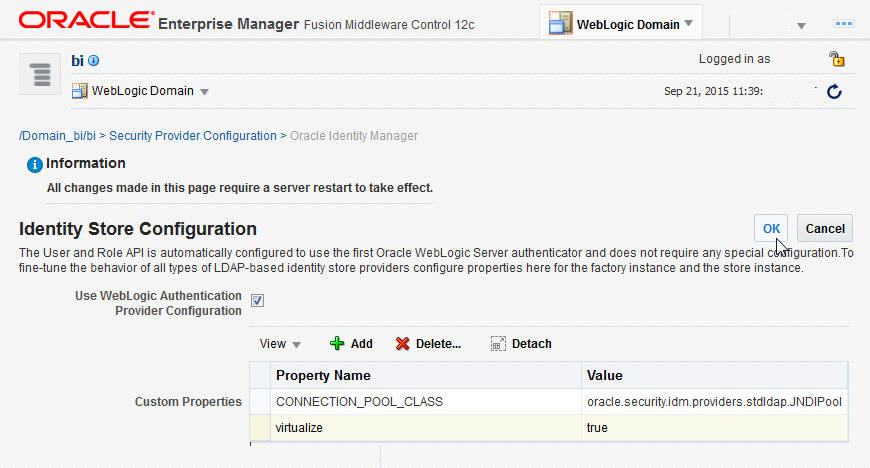
You must add the property "virtualize" to the Identity Store Configuration in Fusion Middleware Control to enable SSL for BI Publisher.
To add the virtualize property:
-
Log in to Fusion Middleware Control 12c:
https://<Host>/<SecureAdminPort>/em -
Select WebLogic Domain, Security, and then Security Provider Configuration.
-
Expand the Security Store Provider segment.
-
Expand the Identity Store Provider segment.
-
Click Configure.
-
Click Add (+) to add a new property.
-
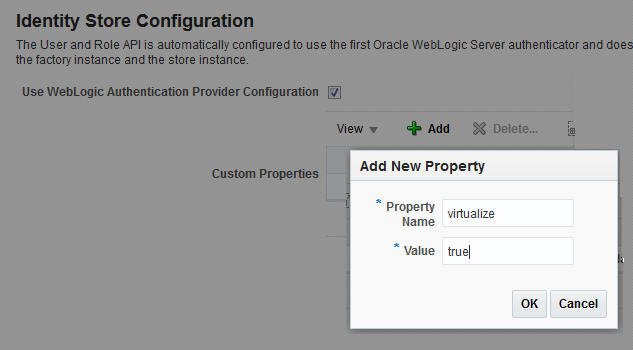
In the Add New Property dialog, enter
Property Name — virtualize
Value — true
-
-
On the Identity Store Provide page, click OK.
-
Confirm that the property is added to the
jps-config.xmlfile:-
Open the
jps-config.xmlfile located in<DomainHome>/config/fmwconfig/jps-config.xml -
Ensure that the file contains the line:
<property name="virtualize" value="true"/>
-
Updating the JDBC Connection String to the Oracle BI EE Data Source
For BI Publisher to connect to Oracle BI EE as a data source when SSL is enabled, you must update the default connection string.
Follow the guidelines detailed in Setting Up a JDBC Connection to the Oracle BI Server.
Updating the JMS Configuration
You update the Scheduler JMS configuration to use the SSL URL.
To update the JMS configuration:
-
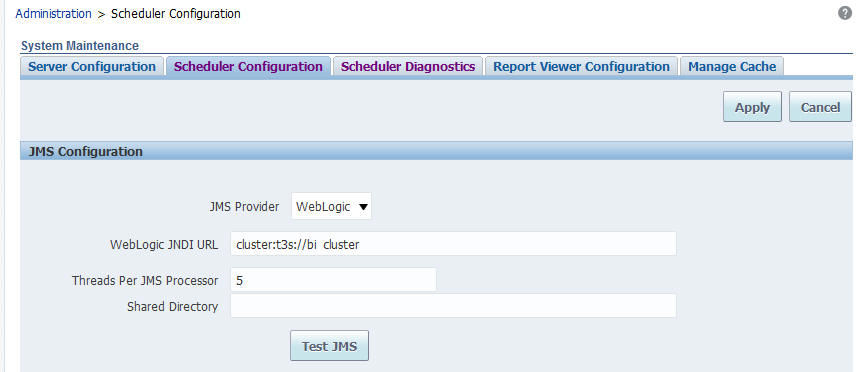
On the BI Publisher Administration page, under System Maintenance, click Scheduler Configuration.
-
Update the WebLogic JNDI URL to use SSL. For example,
- Click Apply.
-
Select the Scheduler Diagnostics tab.
-
Verify that the connection passed diagnostics.
Configuring the Delivery Manager
If you want to use the default certificates built-in with BI Publisher, then no further configuration is required.
SSL works with the default certificate if the server uses the certificate signed by a trusted certificate authority such as Verisign.
If the user uses the SSL with a self-signed certificate, then the certificate information must be entered in the Delivery Configuration page, as described in Configuring Delivery Options. A self-signed certificate means that the certificate is signed by a non-trusted certificate authority (usually the user).


