Integrating with Oracle E-Business Suite
BI Publisher can leverage your E-Business Suite security to enable your users to log in to BI Publisher using their E-Business Suite credentials. The BI Publisher security integration recognizes the user's E-Business Suite responsibility and org_id combinations.
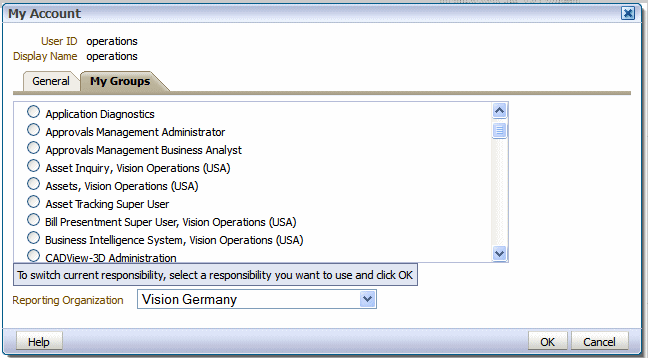
When users log in, they are prompted to select a responsibility. Reports that users run against the E-Business Suite data tables then filter the data based on their responsibility and org_id combination. Users can switch responsibilities and reporting organization while still logged in using the My Account dialog.
When you integrate with the E-Business Suite security, your E-Business Suite responsibilities appear as roles in the BI Publisher security center. You can then add BI Publisher catalog permissions and data access privileges to the imported roles/responsibilities. See Understanding BI Publisher Users, Roles, and Permissions.
Follow these procedures to integrate BI Publisher with Oracle E-Business Suite:
Note:
In this release, users cannot access or execute reports that are stored on the E-Business Suite instance. Reports must reside in the BI Publisher catalog. The E-Business Suite data security is enforced when BI Publisher connects to the E-Business Suite data tables to retrieve the report data.
Oracle BI Publisher relies on information stored in the DBC file to connect to the E-Business Suite instance. Ensure that you can locate and have access to this file. The DBC file is typically located under the $FND_SECURE directory.
Features of the Integration with E-Business Suite Security
When BI Publisher is integrated with E-Business Suite security, certain features are enabled.
-
When users log in to BI Publisher using their E-Business Suite credentials, they are prompted to choose a responsibility, as shown below.
-
Users can switch responsibilities or reporting organizations using the My Account dialog.
-
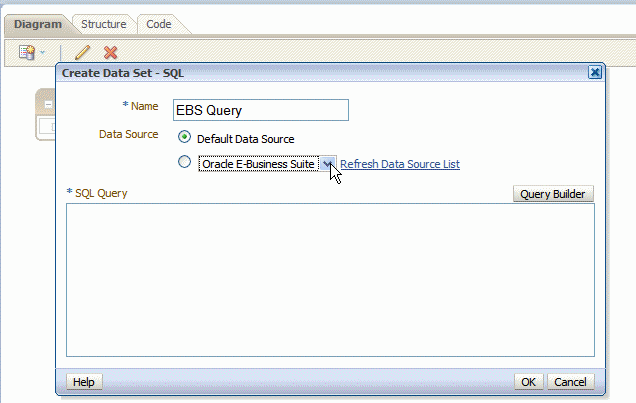
The data source connection to the E-Business Suite instance is automatically configured and available in the data model editor, as shown below.
Configuring BI Publisher to Use E-Business Suite Security
You configure BI Publisher for E-Business Suite Security on the Administration page.
When you restart the system, the E-Business Suite responsibilities to which BI Publisher roles have been assigned are visible as roles in the BI Publisher security center.
Adding Data Sources to the E-Business Suite Roles
To view a report generated from a particular data source, a report consumer's role must be granted access to the data source.
Similarly, to create a data model based on a particular data source, the report author's role must be granted access to the data source.
To grant a role access to a data source:
- On the Administration tab, under Security Configuration, click Roles and Permissions. The responsibilities that are assigned BI Publisher roles in the E-Business Suite instance are displayed as available roles.
- Find the role to which you want to add data sources and click Add Data Sources. The Add Data Sources page is displayed.
- Locate the appropriate data sources in the Available Data Sources list and use the shuttle buttons to move the sources to the Allowed Data Sources list for the role.
- Click Apply.
- Repeat for all roles that need access to report data sources.
Granting Catalog Permissions to the E-Business Suite Roles
For a role to access objects in a folder, you must grant the role permissions to the catalog object.
You can grant permissions at the folder level, so that a role has the same access to every object in a folder, or you can assign access individually to each object in a folder.
See the following sections for more information:
To grant catalog permissions to E-Business Suite roles:
- In the catalog, navigate to a catalog object required for a role.
- Click the More link for the object and then click Permissions to open the Permissions dialog.
- Click Create to open the Add Roles dialog.
- Click Search to populate the list of Available Roles.
- Use the Move button to move the appropriate roles from the Available Roles list to the Selected Roles list.
- Click OK.
- Enable the appropriate permissions for the role by selecting the check boxes.
- If you have selected a folder: To apply the selections to all items within a folder, select Apply permissions to items within this folder.

