Configuring Users, Roles, and Data Access

This chapter details the procedures to configure users, roles, and data access.

Creating Roles

You create roles on the Administration page.

To create a new role in BI Publisher:

  1. Navigate to the BI Publisher Administration page.
  2. Under Security Center, click Roles and Permissions.
  3. Click Create Role.
  4. Enter a name for the role and optionally, enter a description.
  5. Click Apply.
  6. Click Assign Roles to assign roles to the user.
  7. Use the shuttle buttons to move Available Roles to Assigned Roles. Click Apply.
  8. To add a role to a role, click Add Roles.
  9. Use the shuttle buttons to move Available Roles to Included Roles. Click Apply.

To add data sources to a role, see Granting Data Access.

Creating Users and Assigning Roles to a User

You create users in the Administration page.

To create users and assign roles to them:
  1. Navigate to the BI Publisher Administration page.
  2. Under Security Center, click Users.
  3. Click Create User.
  4. Add the User Name and Password for the user.
  5. Click Apply.
  6. Click Assign Roles to assign roles to the user.
  7. Use the shuttle buttons to move Available Roles to Assigned Roles. Click Apply.

Granting Catalog Permissions

For a role to access an object in the catalog, the role must be granted Read permissions on both the object and the folder in which the object resides.

Permissions can be granted at the folder level and applied to all the objects and subfolders it contains, or applied to individual objects.

To grant catalog permissions to a role:

  1. Navigate to the Catalog.
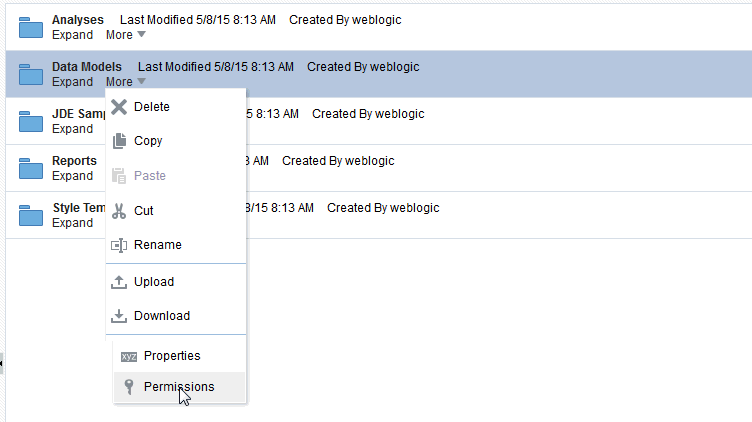
  2. Locate the folder or object on which to grant permissions and click More. From the menu (shown in the figure below), select Permissions. Alternatively, you can select the folder and click Permissions in the Tasks region.

    Note:

    Permissions cannot be granted on the root Shared folder.

  3. On the Permissions dialog, click Create.
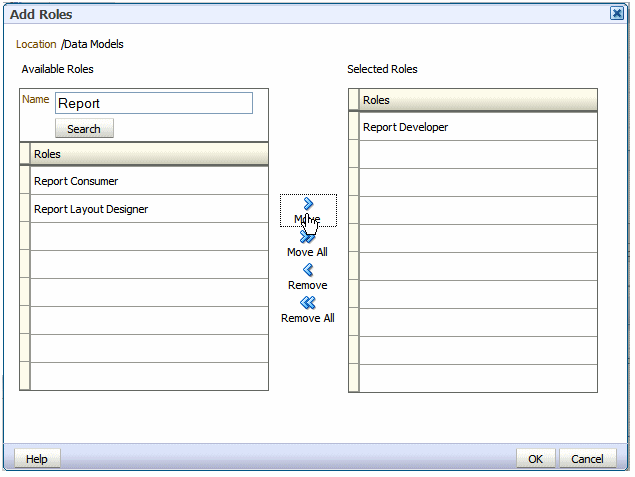
  4. On the Add Roles dialog, enter a search string to find a role, or simply click Search to display all roles. Use the shuttle buttons to move roles from the Available Roles list to the Selected Roles list.
  5. When finished, click OK to return to the Permissions dialog.
  6. On the Permissions dialog, configure the permissions required by the role.

    Note the following:

    • The icon next to the Report Developer role indicates that this role is assigned one of the BI Publisher functional roles (in this case, the BI Publisher Developer role).

    • Once the Report Developer role is assigned access to this folder, the following permissions are automatically granted based on the privileges that comprise the BI Publisher Developer Role: Run report online, Scheduler Report, View Report Output.

  7. If you are granting permissions on a Folder, select Apply permissions to items within this folder, if the permissions should apply to all objects.

Granting Data Access

Roles must be granted access to data sources to run or schedule certain reports or to create or edit certain data models.

A role must be granted access to a data source if the role must:

  • Run or schedule a report built on a data model that retrieves data from the data source

  • Create or edit a data model that retrieves data from the data source

To grant a role access to a data source:
  1. Navigate to the BI Publisher Administration page.
  2. Under Security Center, click Roles and Permissions.
  3. On the Roles and Permissions page, locate the role, then click Add Data Sources.
  4. On the Add Data Sources page you see a region for each of the following types of data sources:
    • Database Connections

    • File Directories

    • LDAP Connections

    • OLAP Connections

  5. Use the shuttle buttons to move the required data sources from the Available Data Sources list to the Allowed Data Sources list.
  6. When finished, click Apply.