2 Getting Started with the Oracle Service Bus Console
This chapter includes the following topics:
2.1 Overview of the Oracle Service Bus Console
Oracle Service Bus Console is a web-based console where you can create and configure most Service Bus resources, test the resources, and activate your changes to the runtime.
You can also import and export Service Bus configuration JAR files. The console utilizes a change session mechanism similar to the WebLogic Server Administration Console in which you can complete your changes within a session. Once you are satisfied with those changes, you can activate them into the runtime. Service Bus components, called resources, are grouped into projects and folders.
2.1.1 Service Bus Sessions
Most of what you do in the Oracle Service Bus Console is done within an open session. Once you make your changes to Service Bus components and projects, resolve any conflicts, and are ready to propagate the changes to the runtime, you can activate the session. Sessions allow team collaboration when services and metadata are being configured in Service Bus. Each team member works in a sandbox session until they are ready to check in the working configuration to the core configuration of the bus. Sessions provide multiple levels of undo, and visibility into conflicts, as multiple users work on the configuration.
The available options on each page vary depending on whether you are in a session. For example, you cannot edit resources outside of a session, and you can only test services when you are working outside of a session. Also, in a session, the Changes page that appears when you open the History tab lists all the changes you have made in that session; outside a session, the page lists no changes.
2.1.2 Oracle Service Bus Console Layout
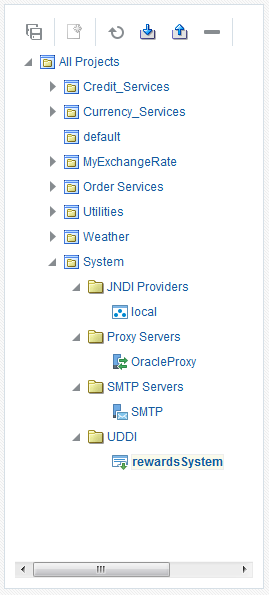
The Oracle Service Bus Console lists all projects, folders, and resources in the Project Navigator in a tree view. Selecting any component in the navigator displays its configuration in an editor. Most editors are divided into tabbed pages, each of which let you configure specific types of properties. Figure 2-1 shows an example of a proxy service displayed in the Proxy Service Definition Editor. The top toolbar provides links to the WebLogic Server Administration Console, Fusion Middleware Control, and online help topics. The editor toolbar lets you save changes, view information about the displayed component, launch the Test Console or Pipeline Editor, and export the WSDL file on which a service is based.
Figure 2-1 Proxy Service Configuration on the Oracle Service Bus Console
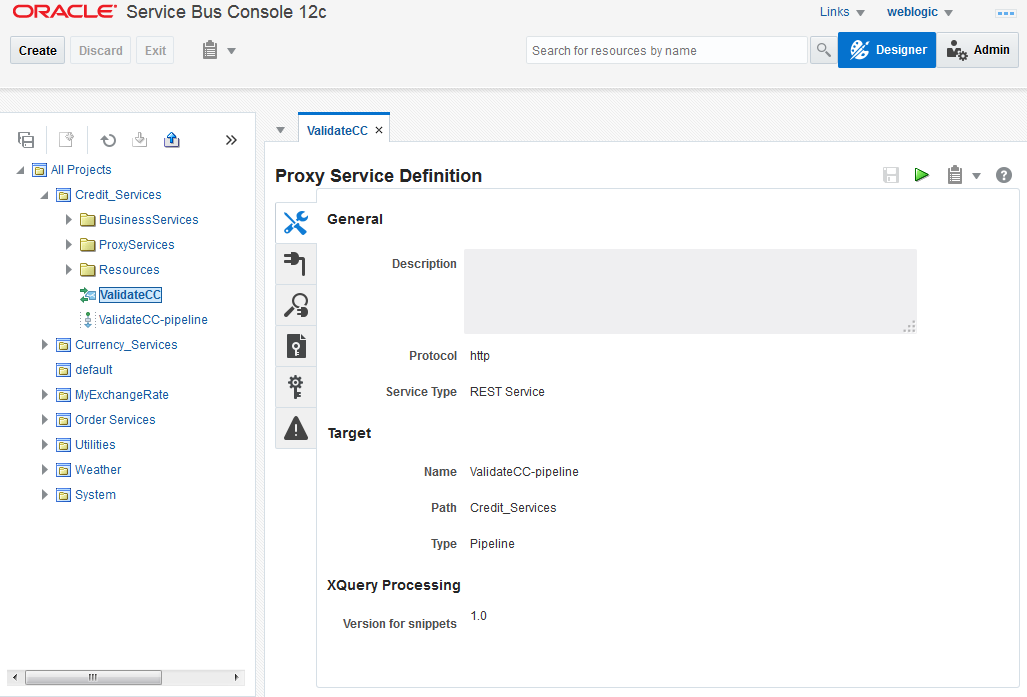
Description of "Figure 2-1 Proxy Service Configuration on the Oracle Service Bus Console"
By selecting any of the auxiliary tabs from the Tools icon, you can view conflicts and a history of changes and activations. Use these tabs to resolve conflicts before activating changes, and to undo actions or even session activations. Figure 2-2 shows the Tools menu expanded and Figure 2-3 shows the History tab with the Changes subtab selected.
Figure 2-3 History Tab with Changes Subtab Selected
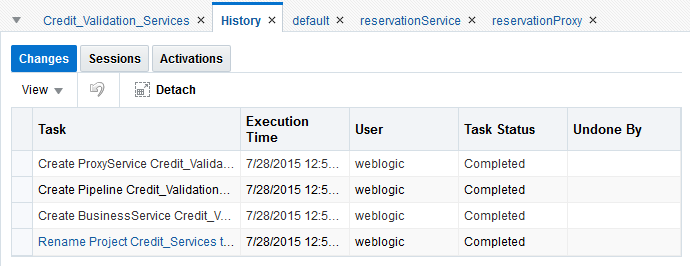
Description of "Figure 2-3 History Tab with Changes Subtab Selected"
2.1.3 Service Bus Projects and Folders
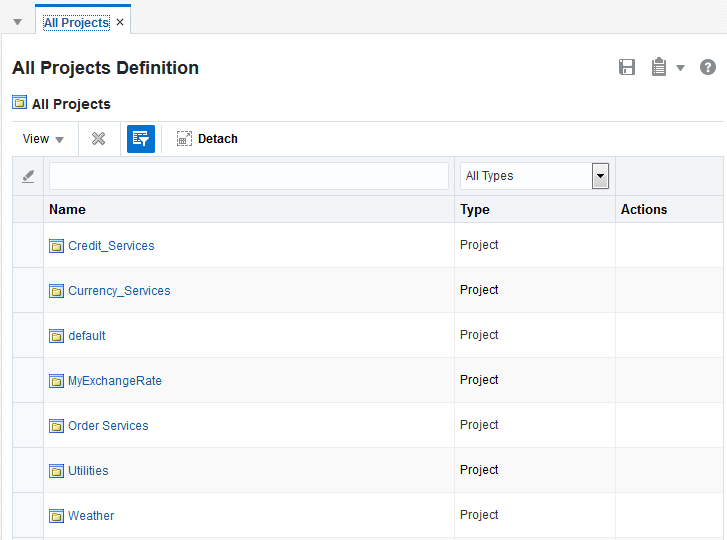
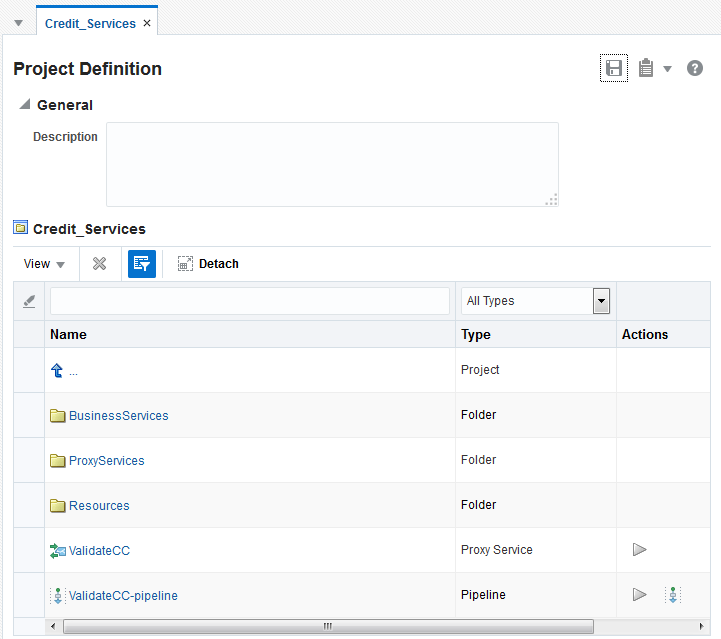
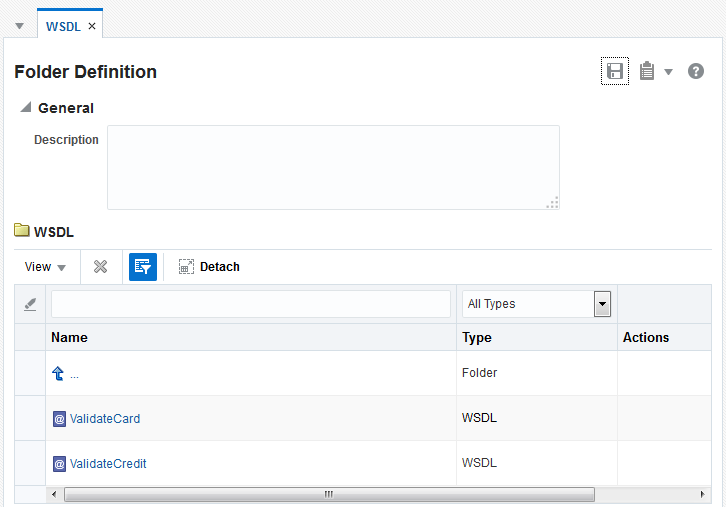
The Project Navigator organizes configurations and resources into projects and folders. You can view all the projects in a domain on the All Projects Definition Editor; all the resources in a project on the Project Definition Editor; and all the resources in a folder on the Folder Definition Editors. On the Project and Folder Definition Editors, you can also take actions against resources, such as launching the Test Console or launching the Pipeline Editor. Click the name of a project, folder, or resource on any of these editors to display the editor for that component.
All Service Bus resources, such as services, WSDL files, and XQuery transformations, reside in only one project. Projects do not overlap. Resources can be created directly under a project, or they can be further organized into folders. However, you can reference any resource regardless of the project in which it resides.
When you create a domain in Service Bus, a default project is automatically created.
2.1.3.1 The System Project
The Project Navigator includes a default project named System, which contains a flat file of global resources such as JNDI providers, SMTP servers, proxy servers, and UDDI registries. The project includes a folder for each type of global resource. You cannot create any projects or folders in the System folder, only global resources. The global resources you create in the System project can be used by the resources in any of the Service Bus projects you create.
2.1.3.2 Projects and Folder Names
Project names and folder names are limited to 64 characters and must follow the guidelines list in Naming Guidelines for Service Bus Components.
The names, length, and levels of nesting of projects and folders are ultimately affected by the limits of your operating system. Creating folders or projects with very long names or deeply nesting folders can fail due to the limitations of the operating system.
2.1.4 Service Bus Resources
The components you create in Service Bus are known as resources. Resources can include proxy and business services that defines the endpoints of the service, and pipelines and split-joins that define the message processing logic for the service. Resources also include supporting resources, such as service accounts, WSDL documents, JNDI providers, MQ connections, and so on. Resources are stored in the projects and folders in which they are created. Some resources can be shared among different projects.
2.1.5 Oracle Service Bus Console Editors
Each type of resource can be configured using an editor in the console that is specific to that type of resource. When you open a resource from the Project Navigator, that resource's definition editor appears, and you can configure the properties for the resource. The definition editors have a standard set of tools in the upper right toolbar, including Save, Save All, Help, Close, and Close All. In addition, each editor includes tools specific to the resource being configured. These tools allow you to perform additional tasks, like launch the Test Console, launch the Pipeline Editor, export a WSDL file, view references, and so on. The following figure shows the Proxy Service Definition Editor.
Figure 2-5 Proxy Service Definition Editor
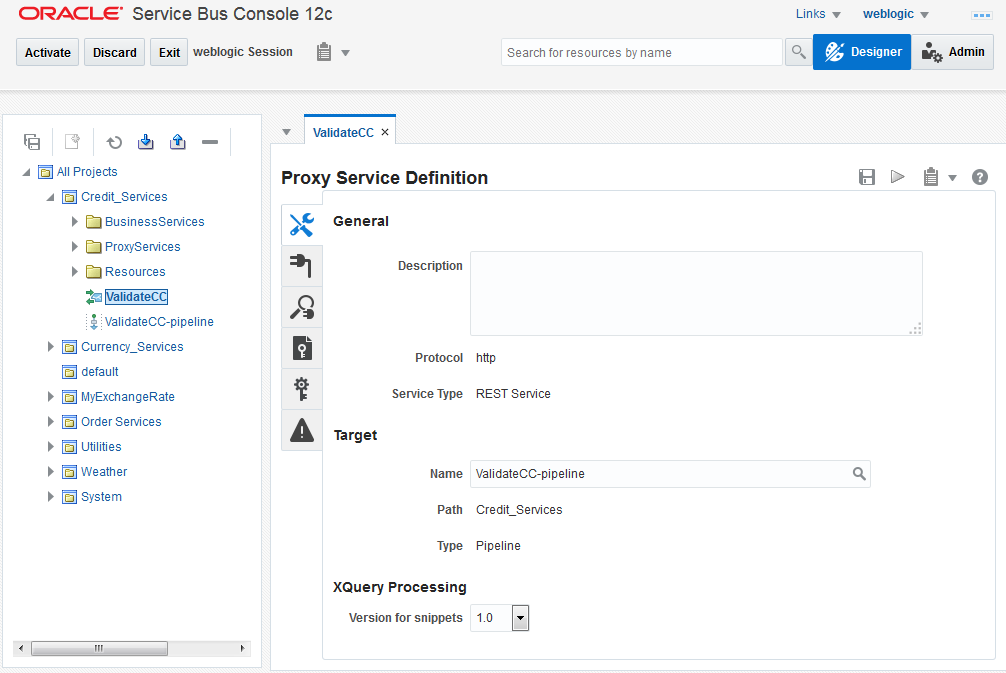
Description of "Figure 2-5 Proxy Service Definition Editor"
2.2 Getting Started
To get started using the Oracle Service Bus Console, you must have a web browser and a login ID and password.
2.2.1 How to Access the Oracle Service Bus Console
You access the Oracle Service Bus Console from a web browser.
To start the Oracle Service Bus Console:
2.3 Working with Sessions
When you create and modify Service Bus resources in the console, you do so within the context of a session.
When you are ready to test your resources, you activate the session to promote them to the runtime. You must save all changes before activating or exiting a session.
To view a history of sessions, see How to View the Existing Sessions.
2.3.1 How to Create a Session
Before making any changes to your Service Bus projects in the Oracle Service Bus Console, you must start a new session or edit an existing session using the buttons in the Sessions toolbar. These buttons change depending on the state of the session. If there is no active session, the Edit button in the figure below is Create. If you are working in a session, the Edit button is Activate.
To create a session:
2.3.2 How to Activate a Session
Creating a session and discarding a session proceeds regardless of other activity in the system. However, if another session is in the process of being activated, an error occurs indicating the user that has the pending WebLogic Server changes.
You cannot activate a session until you have resolved all error conflicts. You can activate a session that has only warnings. For information on resolving conflicts, see Viewing and Resolving Conflicts.
Note:
When you try to activate a session with a JMS endpoint URI on another server (a single server other than the one on which you are working or a Managed Server in a cluster), ensure that the destination server is available. Service Bus does not allow registration of proxy services with the JMS transport if the JMS endpoint URL specifies a destination that is unreachable. In other words, for JMS services, Service Bus checks if the specified connection factory exists; if it does not, a session activation error occurs.
To activate a session:
2.3.3 How to Exit a Session
Exiting a session does not end the session or activate any changes to the runtime. After exiting, the console displays the core configuration that is active in the runtime state. Any changes you made during the session that were not activated are not shown. This behavior also applies if you log out of the console or close your browser. The session and all changes that you have made in the session persist even if you log out or the server is restarted. If you return to the session by clicking Edit, your previous changes reappear and you can continue making changes.
The session ends only after it has been activated or discarded. See How to Activate a Session.
To exit a session:
-
Click Exit at any time to exit the session.
2.4 Working with Projects, Folders, and Resources in Oracle Service Bus Console
Service Bus resources can be organized into separate projects, which are non-hierarchical, disjointed, top-level grouping constructs. All resources (such as services, WSDL files, XQuery transformations, and so on) reside in exactly one non-overlapping project.
You create resources directly under a project or in folders within the project to organize them further. Each folder contains a set of resources and can also contain more folders, like directories in a file system with the project level being the top-level directory. Resources located in one project can reference and use resources that are defined in other projects. You can move resources between projects or folders, and rename or delete them. Service Bus also lets you clone a resource, project, or folder to create a copy of that resource with the specified target identity. Cloning a Service Bus component copies all artifacts in the project or folder to a different location. Service Bus preserves dependencies when resources are renamed or moved, and also adjusts any references to a renamed or moved resource.
2.4.1 How to Locate Services
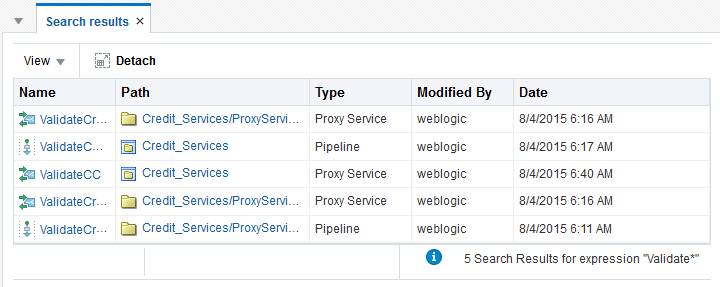
You can find services in the Oracle Service Bus Console by navigating through the projects and folders in the Project Navigator, or you can perform a search for the service you want to find.
Note:
Searches accept wildcard characters. Use an asterisk (*) to represent multiple unknown characters, and use a question mark (?) to represent a single unknown character. The search is case-sensitive.
To search for services in any project:
2.4.2 Working with the Project and Folder Definition Editors
Use the Project and Folder Definition Editors to view information about the projects, folders, and resources in your Service Bus session and in the configuration framework. From these editors, you can view each project in the session, each folder and resource in a project, and each resource in a folder. You can also take actions against certain objects, such as testing a resource, launching the Pipeline Editor, and so on. The available actions depend on the type of resource you are viewing.
2.4.2.1 About Viewing Project, Folder, and Resource Information
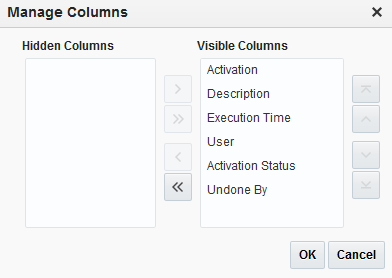
The Project and Folder Definition Editors let you customize the way you view information about Service Bus projects, folders, and resources. In the table views on the editors, you can show and hide columns, change the order of columns, and filter the projects, folders, and resources you see by their names.
2.4.2.4 Viewing the Subfolders and Resources in a Folder
To view the subfolders and resources in a folder:
2.4.2.5 How to Filter Components on the Project and Folder Definition Editors
Service Bus provides a Query by Example feature that lets you filter the projects, folders, or resources displayed on the Project or Folder Definition Editor so you can view only the Service Bus components you need without having to scroll through all the components listed.
To filter components on the Project and Folder Definition Editors:
2.4.3 Create New Projects and Folders for Resources
Resources in the console are grouped in projects. You must create a project before you can create Service Bus resources. You can create folders within projects and within other folders to organize the project components into logical groupings.
2.4.4 Creating Resources with the Resource Gallery
The Resource Gallery collects all of the resources that can be added to the Service Bus console. Use the Resource Gallery to create resources in this release of Oracle Service Bus.
2.4.5 How to Clone Projects, Folders, and Resources
Cloning a project or folder copies all resources in a project or folder to a different location. You can also clone individual resources to copy them to a different folder or project. Service Bus preserves dependencies when an object is cloned, and also adjusts any references.
To clone projects, folders, and resources:
2.4.5.1 What Happens When You Clone a Project
Depending on the name and destination of the new project, the project can be demoted to a folder, merged with an existing project, or merged with an existing folder. If you clone a project into the root location, you must enter a new name for the cloned component. You can clone a project in the following ways. In all cases, the original project remains unchanged.
-
Clone the project with a new name at the All Projects level. The original project and its clone exist as peer projects, and the cloned project contains the same folders and resources as the original.
-
Clone the project using the name of an existing project other than the source project. The folders and resources from the source project are merged with the folders and resources of the project whose name was given to the clone.
-
Clone the project in a new location (in an existing project or project folder) with a unique name. The cloned project is demoted to a folder in the new location and it contains the same folders and resources as the original project.
-
Clone the project in a new location (in an existing project or project folder) with the same name as an existing folder. The contents (subfolders and resources) of the project are merged with the contents of the target folder in the target folder.
2.4.5.2 What Happens When You Clone a Folder
Depending on the name and destination of the new folder, the folder can be converted to a project, merged with an existing project, or merged with an existing folder. If you clone a folder into its current location, you must enter a new name for the cloned component. You can clone a folder in the following ways. In all cases, the original folder remains unchanged.
-
Clone the folder with a new name at the same location as the original folder. The original folder and its clone exist as peers, and the cloned folder contains the same subfolders and resources as the original.
-
Clone the folder using the name of an existing folder other than the source folder. The subfolders and resources from the source folder are merged with the subfolders and resources of the folder whose name was given to the clone. The original folder remains unchanged.
-
Clone the folder in a new location, in an existing project or project folder. In this case, the cloned folder contains the same folders and resources as the original folder. The original folder remains unchanged.
2.4.6 How to Rename Projects, Folders, and Resources
When you rename Service Bus components, any references are automatically updated.
Note:
If you rename a business service imported from the UDDI registry, the service will become detached from the registry.
To rename a Service Bus component:
2.4.7 How to Move Projects, Folders, and Resources
When you move resources to a different location, Service Bus retains any dependencies against that resource. If you move a project into another project, Service Bus converts it to a folder within the second project. Conversely, if you move a folder into the All Projects node, Service Bus converts it to a project.
To move a Service Bus component:
2.4.8 How to Delete Projects, Folders, and Resources
When you delete a project or folder, all resources under the folder are deleted. If any resources under this folder are referenced by resources under a different project or folder, you can still delete it but with a warning confirmation. This might result in conflicts due to unresolved references to the deleted resource.
You can delete Service Bus components from the Project Navigator or from the Project or Folder Definition Editor. When you delete from an editor, you can delete multiple components in the same container at once.
Caution:
If you delete a project or folder that contains a pipeline template resource, all the concrete pipelines derived from that template are unlinked.
2.4.8.1 Deleting a Service Bus Component using the Project Navigator
To delete a Service Bus component using the Project Navigator:
2.5 Viewing and Resolving Conflicts
The Conflicts tab displays diagnostic messages about errors in your configuration, along with any conflicts between changes made in your session and other activated sessions.
A conflict occurs if there is a semantic error in a Service Bus resource or if a resource modified in the current session has already been modified and activated in another session. Two changes to the same resource by two sessions do not cause a conflict until one of the sessions is activated. You can view and resolve conflicts from the Conflicts tab, accessible by clicking the Conflicts icon.
The Conflicts icon in the toolbar displays the number of live conflicts in the session.
The Conflicts tab displays the following sets of information, depending on the nature of the conflicts:
-
Errors: An Error icon denotes non-committable, critical conflicts within your configuration. You cannot commit your changes without resolving the conflicts.
-
Concurrent Updates: A Warning icon denotes committable, non-critical conflicts. These warn you of incompatible changes with other activated sessions.
-
Informational Messages: A Warning icon denotes committable, non-critical conflicts within your configuration.
2.5.1 How to View Conflicts and Errors
The Conflicts tab displays errors in your current Service Bus configuration and reflects any conflicts your changes have with other activations. You can view all conflicts, or just those for the resource displayed in the current resource editor. Click the Conflicts icon to display the Conflicts tab.
2.5.1.1 Viewing All Conflicts and Errors in the Service Bus Console
To view all conflicts and errors:
2.5.2 How to Resolve Conflicts and Errors
You must resolve all error conflicts in a session before you can activate that session. To resolve a conflict, use the information provided in the Errors and Concurrent Updates tables on the Conflicts tab to understand the problem and then modify the component that is causing the conflict.
2.5.2.1 Resolving Concurrent Update Conflicts
If you have a conflict that occurs because a resource was modified in the current session and it was already modified and activated in another session, you can resolve the conflict in one of two ways.
-
To save your changes to the runtime and override the changes deployed in the conflicting session, click Activate in the upper right toolbar.
The changes activated by the conflicting session's user are overwritten by your changes in this session.
-
To restore a component in this session to the state in which it was saved in the runtime, select the component in the Concurrent Updates table and click Synchronize above the table.
The resource in your session is updated with the changes activated in the conflicting session. You can then make your updates and activate your changes.
2.6 Viewing Historical Data
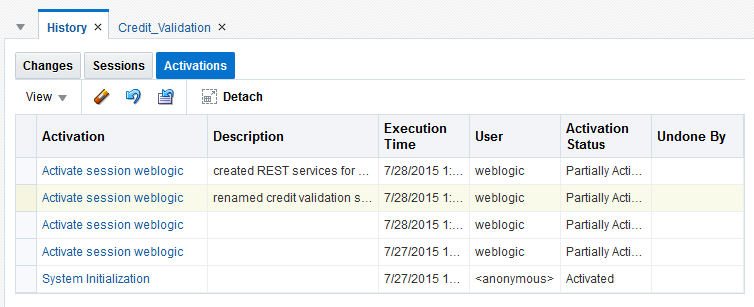
The History tab has three different views: Changes, Sessions, and Activations.
2.6.1 How to View the Changes in the Current Session
The Changes view of the History tab displays different information based on whether or not you are in a session. When you are in a session, the Changes view displays a list of configuration changes that you have made during the current session. When you are outside a session, the Changes view does not display any changes.
To view the changes in the current session:
2.6.2 How to View the Existing Sessions
The Sessions view of the History tab displays a list of all existing sessions within the Oracle Service Bus Console. You can view these sessions if you are currently in a session or outside a session.
You only view all sessions if you are logged in with an Administration role. For more information, see "Defining Access Security for Oracle Service Bus" in Administering Oracle Service Bus.
To view the existing sessions:
2.6.3 How to View the Changes in an Activated Session
The Activations view of the History tab displays a list of all Service Bus activations. For each activation listed, you can view a history of changes that were activated.
To view the changes in an activated session:
2.6.4 How to Purge Activated Sessions
You can purge all sessions activated or only those over a specific period, delimited by start and end dates. This action can only be performed outside a session.
Caution:
Purging session activation history involves deleting data that enables multiple levels of undo. If you purge session activation history for a specific period, you will not be able to undo sessions activated during that period.
To view the changes in an activated session:
2.7 Undoing Changes and Activations
When you are not working in a session, you can view a history of sessions that were previously activated. You can also undo those sessions. If an error in the runtime configuration would result from the undo action, you cannot undo a session that was previously activated. For example, if you attempt to undo a session activation that results in deleting a resource referenced by another resource, that undo action is not allowed.
2.7.1 How to Undo Specific Changes in the Current Session
In the Changes view of the History tab, you can undo specific tasks that you performed during your current session. You can undo any change in the current session. However if you realize you performed an undo operation in error, you can undo that action as well.
To undo specific changes in the current session:
2.7.2 How to Undo a Session Activation
In the Activations view of the History tab, you can undo session activations. If semantic errors result from undoing a session activation, you are prevented from undoing an activation. The alternative is to undo the session activation and have the changes put into a new session. You can then fix the semantic errors and activate the new session. You can also use this capability of undoing into a session to explore the ramifications of undoing a session activation. You can examine all the changes that result, and determine whether to undo the activation. Service Bus lets you undo multiple levels of session activation, constrained only by your system resources.
To undo a session activation:
2.8 Viewing References
The References tab displays information about resources that either reference other resources or are referenced by other resources.
For projects and folders, the References tab lists the following:
-
Resources outside of the current project or folder that are referenced by resources inside the project or folder.
-
Resources outside of the current project or folder that reference resources inside the project or folder.
For any project, folder, or resource in the console, click the References icon in the upper right on the editor to view information about these references on the References tab.
2.9 Customizing the Appearance of the Oracle Service Bus Console
Several editors in the console display information in tables. You can customize how tables display this information.
2.9.1 How to Customize Table Views
The menu bar above each table lets you specify which columns to display and in what order. You can also specify the sort order for the columns and view the table full-screen.
2.9.1.2 Sorting the Columns in a Table
To sort the columns in a table:
Note:
The default sort order for any table is determined by the first column in the table.
- In the upper left of the table, click View and select Sort.
- Select Advanced Sort.
- In the Sort By field, select the column name by which to sort first, and then select either Ascending or Descending.
- In the Then By field, select the column name by which to sort second, and then select either Ascending or Descending.
- Click OK.
2.9.1.3 Reordering Columns in a Table
To reorder the columns in a table:
- In the upper left of the table, click View and select Reorder Columns.
- On the Reorder Columns dialog, use the up and down arrows to change the order of the columns.
- When you are done, click OK.
Tip:
You can also move a column by clicking on the column heading and dragging it to a new location in the table.

