3.2 Deploying Web Service Applications
The following is an overview of the basic procedure for deploying a web service application using the Oracle Enterprise Manager Fusion Middleware Control.
To deploy a web service application:
- In the navigation pane, expand WebLogic Domain.
- Expand the domain in which you want to deploy the web service, and then select the instance of the server on which you want to deploy it.
- In the content pane, select WebLogic Server then Deployments.
- On the Deployments page, click Deploy.
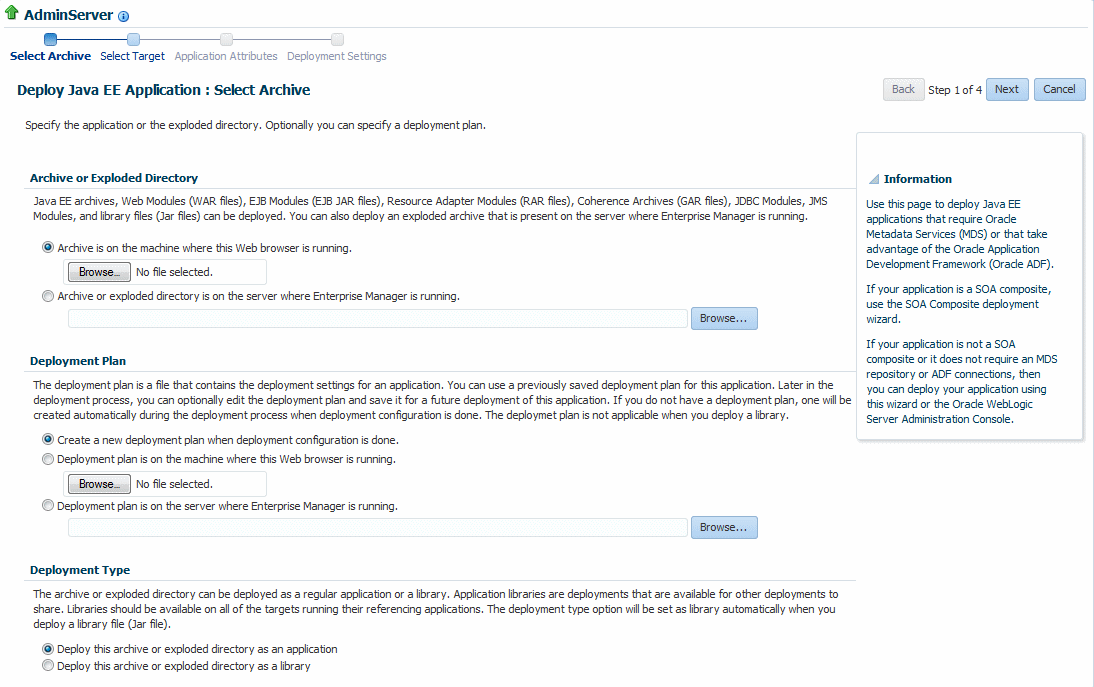
The first screen of the Deploy process is displayed, as shown in Figure 3-1.
- Select one of the following Archive or Exploded Directory options:
-
Archive is on the machine where this web browser is running.
-
Archive or exploded directory is on the server where Enterprise Manager is running.
-
- Select one of the following Deployment Plan options:
-
Automatically create a new deployment plan
-
Deployment plan is present on local host
-
Deployment plan is already present on the server where Enterprise Manager is running
A deployment plan is an XML file that you use to configure an application for deployment to a specific environment. If you do not already have a deployment plan for the web service application you are deploying, one is created for you when you deploy the application.
-
- Select one of the following Deployment Type options:
-
Deploy this archive or exploded directory as an application
-
Deploy this archive or exploded directory as a library
-
- Click Next.
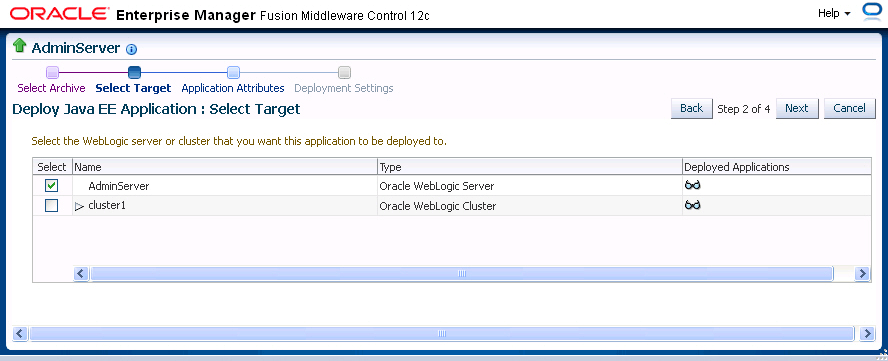
- On the Select Target page, select the target (WebLogic server or cluster) to which you want this application deployed, and click Next.
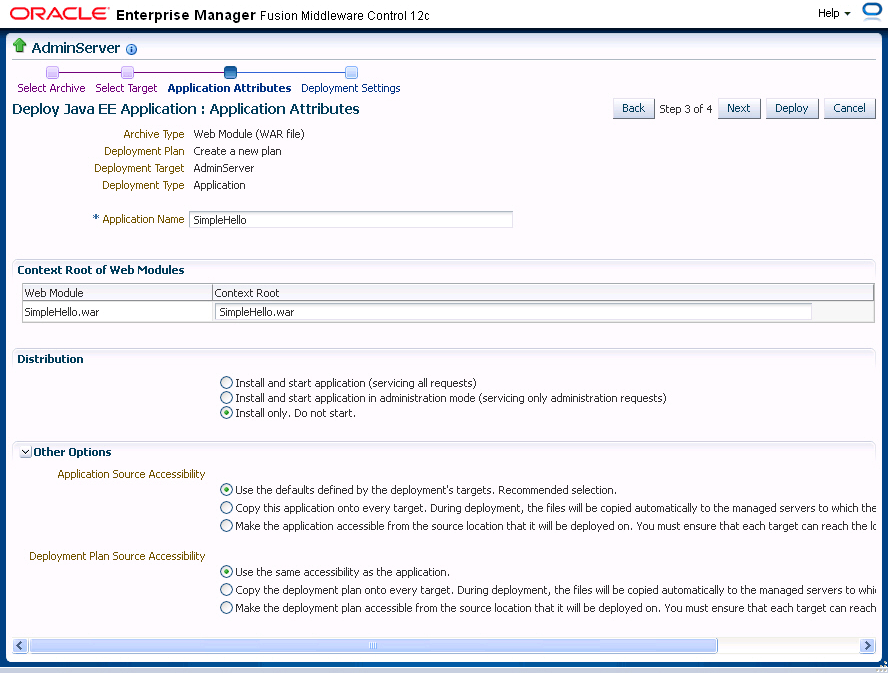
- On the Application Attributes page, enter the attributes for this web service application, and click Next. Application Name is the only required attribute.
However, if you want to be able to redeploy this web service application later without first having to undeploy it, you must also assign a version number.
The context root is the URI for the web module. Each web module or EJB module that contains web services may have a context root.
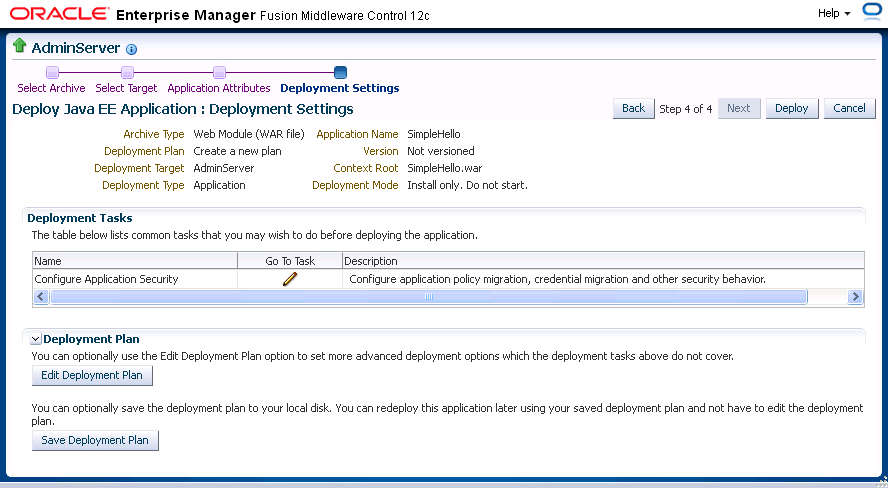
- On the Deployment Settings page, edit the deployment settings for this web service application, as shown in Figure 3-4.
- To save a copy of the deployment plan to your local system, click Save Deployment Plan.
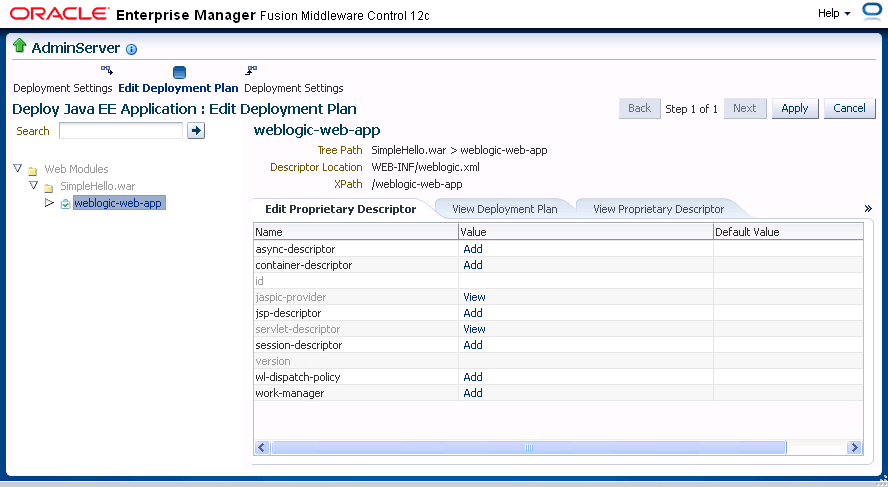
- To edit the deployment plan, possibly to add advanced deployment options, click Edit Deployment Plan. If you do so, the Edit Deployment Plan screen is displayed, as shown in Figure 3-5. After making changes to the deployment plan, click Apply to make the change effective.
- Click Deploy on the Deployment Settings page. If successful, the Deployment Succeeded screen is displayed.
