15 Using Events and Timeouts in BPEL Processes
This chapter includes the following sections:
15.1 Introduction to Event and Timeout Concepts
Because web services can take a long time to return a response, a BPEL process service component must be able to time out and continue with the rest of the flow after a period.
This chapter provides an example of how to program a BPEL process service component to wait one minute for a response from a web service named Star Loan that provides loan offers. If Star Loan does not respond in one minute, then the BPEL process service component automatically selects an offer from another web service named United Loan. In the real world, the time limit is more like 48 hours. However, for this example, you do not want to wait that long to see if your BPEL process service component is working properly.
Because asynchronous web services can take a long time to return a response, a BPEL process service component must be able to time out, or give up waiting, and continue with the rest of the flow after a certain amount of time.
You can use a pick activity to configure a BPEL flow to either wait a specified amount of time or to continue performing its duties. To set an expiration period for the time, you can use the wait activity.
15.2 Selecting Between Continuing or Waiting on a Process with a Pick Activity
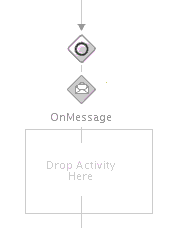
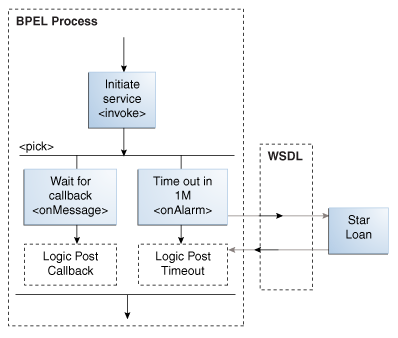
The pick activity provides two branches, each one with a condition. The branch that has its condition satisfied first is executed. In the following example, one branch's condition is to receive a loan offer, and the other branch's condition is to wait a specified amount of time.
Figure 15-1 provides an overview. The following activities take place (in order of priority):
-
An invoke activity initiates a service, in this case, a request for a loan offer from Star Loan.
-
The pick activity begins next. It has the following conditions:
-
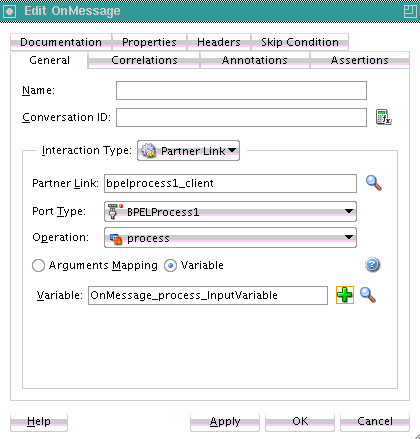
onMessage
This condition has code for receiving a reply in the form of a loan offer from the Star Loan web service. The onMessage code matches the code for receiving a response from the Star Loan web service before a timeout was added.
-
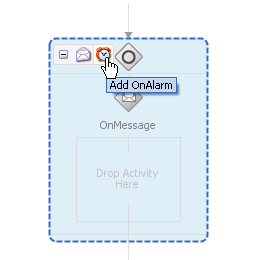
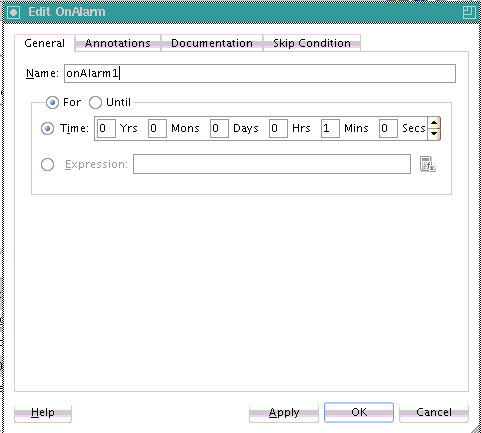
onAlarm
This condition has code for a timeout of one minute. This time is defined as
PT1M, which means to wait one minute before timing out. In this timeout setting:-
Sis for seconds -
Mfor one minute -
His for hour -
Dis for day -
Yis for year
In the unlikely event that you want a time limit of
1year,3days, and15seconds, you enter it asPT1Y3D15S. The remainder of the code sets the loan variables selected and approved tofalse, sets the annual percentage rate (APR) at0.0, and copies this information into theloanOffervariable.The time duration format is specified by the BPEL standard. For more detailed information on the time duration format, see the duration section of the most current XML Schema Part 2: Datatypes document at:
http://www.w3.org/TR/xmlschema-2/#duration
-
-
-
The pick activity condition that completes first is the one that the BPEL process service component executes. The other branch is not executed.
Figure 15-1 Overview of the Pick Activity
Description of "Figure 15-1 Overview of the Pick Activity"
An onMessage branch is similar to a receive activity in that it receives messages. However, you can define a pick activity with multiple onMessage branches that can wait for similar partner links and port types, but have different operations. Therefore, separate threads and parallel processes can be invoked for each operation. This differs from the receive activity in which there is only one operation. Another difference is that you can create a new instance of a business process with a receive activity (by selecting the Create Instance check box), but you cannot do this with a pick activity.
Note:
You can also create onMessage branches in BPEL 1.1 scope activities and onAlarm branches in BPEL 1.1 and 2.0 scope activities. Expand the Scope activity in Oracle JDeveloper, and browse the icons on the left side to find the branch you want to add.
15.2.2 What Happens When You Create a Pick Activity
The code segment in the following example defines the pick activity for this operation after design completion:
  <pick>
        <!--  receive the result of the remote process -->
        <onMessage partnerLink="LoanService"
            portType="services:LoanServiceCallback"
            operation="onResult" variable="loanOffer">

        <assign>
        <copy>
            <from variable="loanOffer" part="payload"/>
            <to variable="output" part="payload"/>
        </copy>
        </assign>

       </onMessage>
       <!--  wait for one minute, then timesout -->
       <onAlarm for="PT1M">
            <assign>
                <copy>
                    <from>
                        <loanOffer xmlns="http://www.autoloan.com/ns/autoloan">
                            <providerName>Expired</providerName>
                            <selected type="boolean">false</selected>
                            <approved type="boolean">false</approved>
                            <APR type="double">0.0</APR>
                        </loanOffer>
                    </from>
                    <to variable="loanOffer" part="payload"/>
                </copy>
            </assign>
       </onAlarm>
</pick>
15.2.3 What You May Need to Know About Simultaneous onMessage Branches in BPEL 2.0
Oracle BPEL Process Manager's implementation of BPEL 2.0 does not support simultaneous onMessage branches of a pick activity.
When a process has a pick activity with two onMessage branches as its starting activity (both with initiate set to join in their correlation definitions) and an invoking process that posts the invocations one after the other, it is assumed that both invocations reach the same instance of the invoked process. However, in Oracle BPEL Process Manager's implementation of BPEL 2.0, two instances of the invoked process are created for each invocation.
This is the expected behavior, but it differs from what is described in the BPEL 2.0 specification.
For example, assume you have synchronous BPEL process A, which has a flow activity with two parallel branches:
-
Branch one invokes operation processMessage1 on asynchronous BPEL process B.
-
Branch two invokes operation processMessage2 on asynchronous BPEL process B. The invocation occurs after a five second wait. BPEL process A then waits on a callback from BPEL process B and returns the output back to the client.
The idea is to create one instance of the invoked process and ensure that the second invocation happens after the first instance is already active and running.
BPEL process B has a pick activity with createInstance set to yes. The pick activity has two onMessage branches within it:
-
One branch is for the processMessage1 operation. For this operation, it goes to sleep for about 10 seconds.
-
The other branch is for the processMessage2 operation. For this operation, it waits for five seconds.
Both operations have the same input message type and correlation is defined with initiate set to join.The expectation is that the processMessage1 invocation is invoked immediately and the BPEL process B instance is created, which should sleep for ten seconds. After five seconds, the invoking process should then post the processMessage2 invocation to BPEL process B and this invocation should go to the already existing instance instead of creating a new one (since the correlation ID is the same and initiate is set to join).
However, for each invocation, a new instance of BPEL process B is created and the result cannot be predicted.
-
If the processMessage2 operation branch finishes first, then the subsequent assign operation fails because the input variable from processMessage1 is assumed to be null (for that instance).
-
If the processMessage1 operation branch finishes first, then the process returns callback data with only partial information (does not include the input from processMessage2).
In Oracle BPEL Process Manager's implementation, either one of the two operations (processMessage1 or processMessage2) creates a new instance. This is implemented so that database queries do not need to be made to see if there are already instances created.
The workaround is to create two processes that are initiated by the two different operations.
15.3 Setting Timeouts for Request-Reply and In-Only Operations in Receive Activities
You can provide a timeout setting for the following types of operations in BPEL versions 1.1 and 2.0:
-
Request-reply (synchronous) operations.
-
In-only receive (asynchronous) operations. In this scenario, the receive activity must be a midprocess activity and not the activity that creates a new instance (that is, the Create Instance check box in the Receive dialog is selected).
This provides an alternative to using the onMessage and onAlarm branches of a pick activity to specify a timeout duration for partner callbacks.
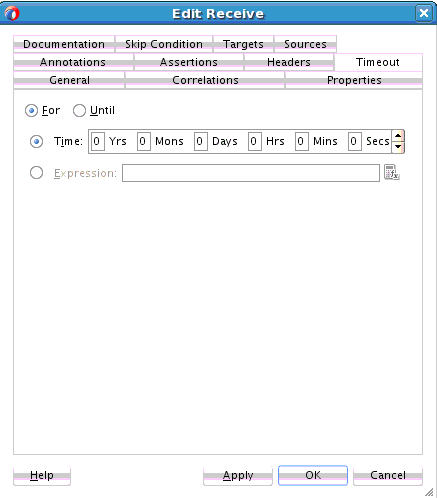
Figure 15-6 shows the Timeout tab of a midprocess receive activity in which you set a timeout.
Figure 15-6 Timeout Tab of a Receive Activity
Description of "Figure 15-6 Timeout Tab of a Receive Activity"
For information about key concepts to understand before setting timeouts for request-reply and in-only operations in receive activities, see What You May Need to Know About Setting Timeouts for Request-Reply and In-Only Operations.
For information about how to set a timeout in a receive activity in Oracle JDeveloper, see How to Set Timeouts in Receive Activities.
15.3.1 How to Set Timeouts in Receive Activities
Set timeouts in the following scenarios:
-
The Create Instance check box is deselected.
-
The receive activity is in the middle of the BPEL process (in most cases)
To set timeouts in receive activities:
15.3.2 What Happens When You Set Timeouts in Receive Activities
The code segment in the .bpel file defines the specific operation after design completion.
For example, if you specified that the activity expects an inbound message to arrive no later than five minutes after the activity has started execution, the syntax displays as shown in the following example:
<bpelx:for="'PT5M'"/>
For example, if you specified that the activity expects an inbound message to arrive no later than January 24, 2010 11:00 AM UTC+1 after the activity has started execution, the syntax displays as shown in the following code:
<bpelx:until="'2010-01-24T11:00:00-08:00'"/>
For example, if you specified an XPath expression to obtain a value for a timeout relative from when the activity is invoked, syntax similar to that shown in the following code can display:
<bpelx:for="bpws:getVariableData('inputVariable','payload','/tns:waitValue/tns:for
')"/>
15.3.3 What You May Need to Know About Setting Timeouts for Request-Reply and In-Only Operations
The following sections describe request-reply and in-only timeout operations functionality:
-
Timeout settings relative from activity invocation
-
Timeout settings as an absolute date time
-
Timeout settings computed dynamically with an XPath expression
-
bpelx:timeoutfault thrown during an activity timeout -
Events added to the BPEL instance audit trail during an activity timeout
-
Recoverable timeout activities during a server restart
15.3.3.1 Timeout Settings Relative from When the Activity is Invoked
You can specify a timeout setting relative from when the activity is invoked. This setting is specified as a relative duration using the syntax shown in the following example for BPEL 1.1.
<receive | bpelx:for="duration-expr">
    standard-elements
</receive>
For BPEL 2.0, the syntax is as shown in the following example:
<receive | <bpelx:for>'duration-expr'</bpelx:for>
    standard-elements
</receive>
This type uses the bpelx:for attribute to specify a static value or an XPath expression that must evaluate to an XML schema type duration. Only one of the bpelx:for or bpelx:until attributes is permitted for an activity.
If the XPath expression evaluates to a negative duration, the timeout is ignored and an event is logged to the instance audit trail indicating that the duration value is invalid.
Once a valid duration value is retrieved, the expiration date for the activity is set to the current node time (or cluster time after this is available), plus the duration value. For example, the duration value bpelx:for="'PT5M'" specifies that the activity expects an inbound message to arrive no later than five minutes after the activity has started execution.
Note:
The timeout setting attribute does not apply to the onMessage branch of a pick activity because the same functionality currently exists with the onMessage and onAlarm branches of that activity.
Timeout durations can only be specified on the following:
-
Midprocess receive activities
-
Receive activities that do not specify
createInstance="true"
A receive activity can only time out after it has been instantiated, which is not the case with entry receive activities.
15.3.3.2 Timeout Settings as an Absolute Date Time
You can specify a timeout setting as an absolute deadline for request-response receive activities. For BPEL 2.0, the syntax is as shown in the following example:
<receive <bpelx:until>"deadline-expr"</bpelx:until>
</receive>
For BPEL 1.1, the syntax is as shown in the following example:
<receive bpelx:until="deadline-expr">
    standard-elements
</receive>
The expected expiration time for the bpelx:until attribute must be at least two seconds ahead of the current time. Otherwise, the timer scheduling is ignored and skipped, just as if the timer was never specified.
The bpelx:until attribute specifies a static value or an XPath expression that must evaluate to an XML schema type datetime or date. Only one of the bpelx:for or bpelx:until attributes is permitted for an activity.
XPath version 1.0 is not XML schema-aware. Therefore, none of the built-in functions of XPath version 1.0 can create or manipulate dateTime or date values. However, it is possible to perform one of the following:
-
Write a constant (literal) that conforms to XML schema definitions and use that as a deadline value.
-
Extract a field from a variable (part) of one of these types and use that as a deadline value.
XPath version 1.0 treats that literal as a string literal, but the result can be interpreted as a lexical representation of a dateTime or date value.
Once a valid datetime or date value has been retrieved, the expiration date for the activity is set to the specified date. For example, the datetime value bpelx:until="'2009-12-24T18:00+01:00'" specifies that the activity expects an inbound message to arrive no later than Dec 24, 2009 6:00 pm UTC+1 after the activity has started execution.
Note:
The timeout setting attribute does not apply to the onMessage branch of a pick activity because the same functionality currently exists with the onMessage and onAlarm branches of the pick activity.
Timeout dates can only be specified on the following activities:
-
Midprocess receives
-
Receive activities that do not specify
createInstance="true"
A receive activity can only time out after it has been instantiated, which is not the case with entry receive activities.
15.3.3.3 Timeout Settings Computed Dynamically with an XPath Expression
The timeout setting for request-response receives, in-only receives (callback), and onMessage branches of pick activities can be set using an XPath expression instead of entering a static duration or datetime value. In this case, the value of the expression must return either:
-
A string that can be interpreted as a static XML duration or
datetimevalue -
An XML schema duration or
datetimetype
The following example shows the syntax for using XPath expressions in BPEL 1.1.
<bpelx:for="bpws:getVariableData('input', 'payload',
 '/tns:waitValue/tns:for')"/>

<bpelx:until="bpws:getVariableData('input', 'payload',
 '/tns:waitValue/tns:until')"/>
If the returned expression value cannot be interpreted as an XML schema duration or datetime type, an event is logged in the instance audit trail indicating that an invalid duration and datetime value was specified, and no activity expiration time can be set.
15.3.3.4 bpelx:timeout Fault Thrown During an Activity Timeout
If a valid XML schema duration or datetime value is returned from the bpelx:for or bpelx:until attribute, a bpelx:timeout fault is thrown from the timed-out activity. This fault can be caught by any catch or catchAll block and handled like a regular BPEL fault. The message of the fault is the name of the activity. In addition, an event is logged to the instance audit trail indicating that the activity has timed out because the expected callback message failed to be received before the timeout duration.
If the activity receives a callback from the partner before the timeout period, no fault is thrown. If a callback is received while the activity is being timed out, the callback message is not delivered to the activity and is marked as canceled in the delivery message table. If a timeout action is attempted at the same time that a callback message is handled, the timeout action is ignored. As of 11g Release 1, instances are locked optimistically (as opposed to pessimistic locking in Release 10g). Therefore, the second action in line is still performed.
The bpelx:timeout fault can be thrown from a BPEL component if the component WSDL declares the fault on the operation. If the fault is not declared on the operation, the fault is converted into a FabricInvocationException runtime fault. This fault can be caught by any caller components (including BPEL components), but the fault type is no longer bpelx:timeout. (However, the fault message string still indicates that the fault was originally a timeout fault.)
15.3.3.5 Event Added to the BPEL Instance Audit Trail During an Activity Timeout
Once a bpelx:timeout fault is thrown from a timed-out activity, an event is logged to the instance audit trail indicating that the activity has timed out, as opposed to having received the expected callback message from its partner.
15.3.3.6 Recoverable Timeout Activities During a Server Restart (Refresh Expiration Alarm Table)
Activities that specify a valid timeout duration or datetime are likely implemented in a similar manner to wait and onAlarm activities with an expiration date for the underlying work item object. If the node that scheduled these activities with the scheduler goes down (either through graceful shutdown or abrupt termination), all these activities must be rescheduled with the scheduler upon server restart.
It is not possible to have a single node (the master node) in the cluster be responsible for rescheduling these activities upon node shutdown.
15.4 Setting an Expiration Time with a Wait Activity
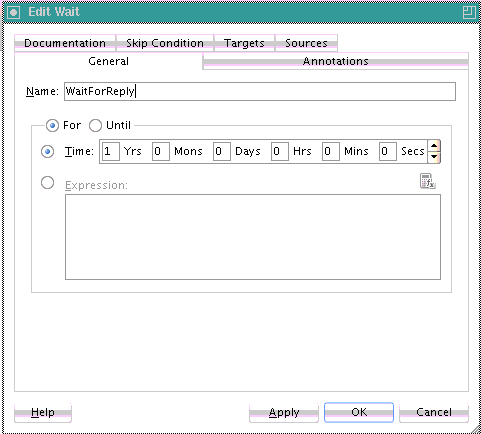
The wait activity allows a process to wait for a given time period or until a time limit has been reached. Exactly one of the expiration criteria must be specified. A typical use of this activity is to invoke an operation at a certain time. You typically enter an expression that is dependent on the state of a process.
When specifying a time period for waiting, note the following:
-
Wait times cannot be guaranteed if they are scheduled with other events that require processing. Due to this additional processing, the actual wait time can be greater than the wait time specified in the BPEL process.
-
Wait times of less than two seconds are ignored by the server. Wait times above two seconds, but less than one minute, may not get executed in the exact, specified time. However, wait times in minutes do execute in the specified time.
-
The default value of
2seconds for wait times is specified with the MinBPELWait property in the System MBean Browser of Oracle Enterprise Manager Fusion Middleware Control. You can set this property to any value and the wait delay is bypassed for any waits less than MinBPELWait.
Note:
Quartz version 1.6 is supported for scheduling expiration events on wait activities.
15.4.1 How To Specify the Minimum Wait Time
You can specify the minimum time duration for a BPEL process to perform a wait that involves a dehydration. If the wait duration is less than or equal to the value, BPEL continues executing activities in the same thread and transaction.
To specify the minimum wait time:
- From the SOA Infrastructure menu, select SOA Administration > BPEL Properties.
- At the bottom of the BPEL Service Engine Properties page, click More BPEL Configuration Properties.
- Click MinBPELWait.
- In the Value field, specify a value in seconds.
- Click Apply.
- Click Return.
15.4.3 What Happens When You Create a Wait Activity
Exactly one of the expiration criteria must be specified, as shown in the following example for BPEL 2.0.
<wait <for>'duration-expr'</for> | <until>'duration-expr'</until>
    standard-elements
  </wait>
The following example shows the BPEL 1.1 syntax.
<wait (for="duration-expr" | until="deadline-expr") standard-attributes>
    standard-elements
  </wait>
15.5 Specifying Events to Wait for Message Arrival with an OnEvent Branch in BPEL 2.0
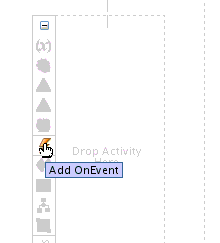
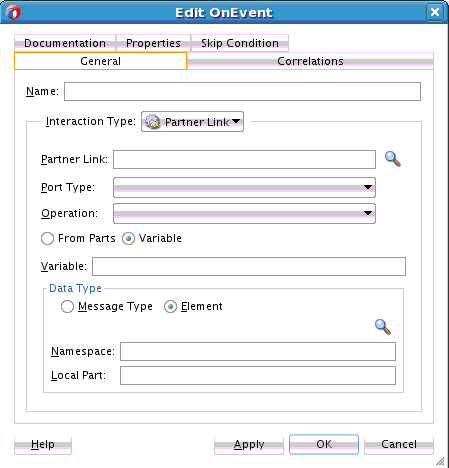
You can create an onEvent branch in a scope activity that causes a specified event to wait for a message to arrive. For example, assume you have a credit request process that is initiated by a customer's credit request message. The request may be completely processed without the need for further interaction, and the results submitted to the customer. In some cases, however, the customer may want to inquire about the status of the credit request, modify the request content, or cancel the request entirely while it is being processed. You cannot expect these interactions to occur only at specific points in the business processing. An event handler such as an onEvent branch enables the business process to accept requests (such as status request, modification request, or cancellation request) to arrive in parallel to the primary business logic flow.
The onEvent event handlers are associated with an enclosed scope. The onEvent event handlers are enabled when their scope is initialized and disabled when their scope ends. When enabled, any number of events can occur. They are processed in parallel to the scope's primary activity and in parallel to each other. Message events also represent service operations exposed by a process and modeled as onEvent elements. Event handlers cannot create new process instances. Therefore, message events are always received by a process instance that is already active.
15.5.1 How to Create an onEvent Branch in a Scope Activity
To create an onEvent branch in a scope activity:
15.5.2 What Happens When You Create an OnEvent Branch
The following example provides an overview of onEvent branches in the .bpel file after design completion. The onEvent branches inquire about the status of the credit request, modify the request content, or cancel the request entirely while it is being processed.
<process name="creditRequestProcess" . . .>
   . . .
   <eventHandlers>
      <onEvent partnerLink="requestCreditScore"
         operation="queryCreditRequestStatus" ...>
         <scope name="scopeStatus">...</scope>
      </onEvent>
      <onEvent partnerLink="requestCreditScore"
         operation="modifyCreditRequest" ...>
         <scope name="scopeRequest">...</scope>
      </onEvent>
      <onEvent partnerLink="requestCreditScore"
         operation="cancelCreditRequest" ...>
         <scope name="scopeCancel">...</scope>
      </onEvent>
   </eventHandlers>
   . . .
</process>
15.6 Setting Timeouts for Durable Synchronous Processes
For durable synchronous processes that connect to a remote database, you must increase the SyncMaxWaitTime timeout property in the System MBean Browser of Oracle Enterprise Manager Fusion Middleware Control.
For information on setting this property, see Specifying Transaction Timeout Values in Durable Synchronous Processes.
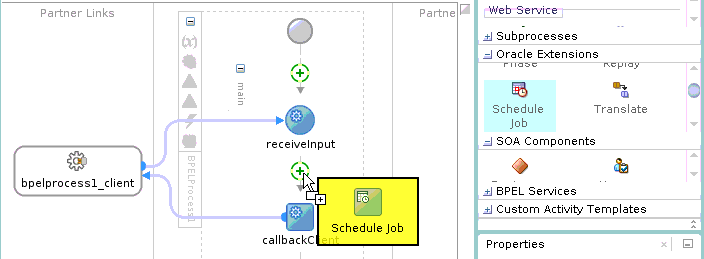
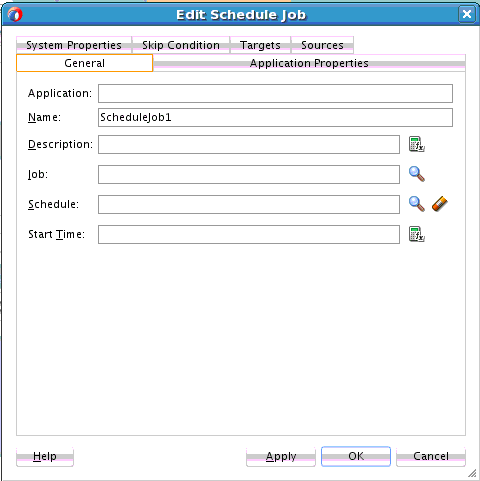
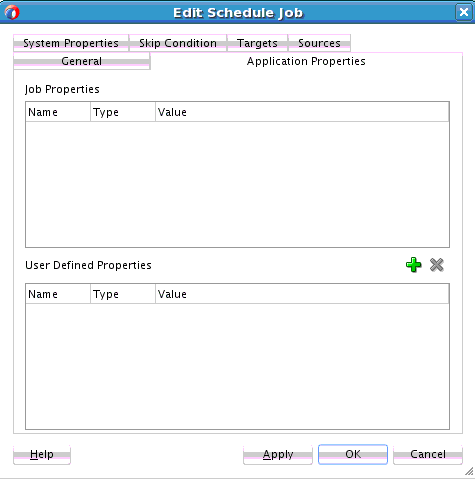
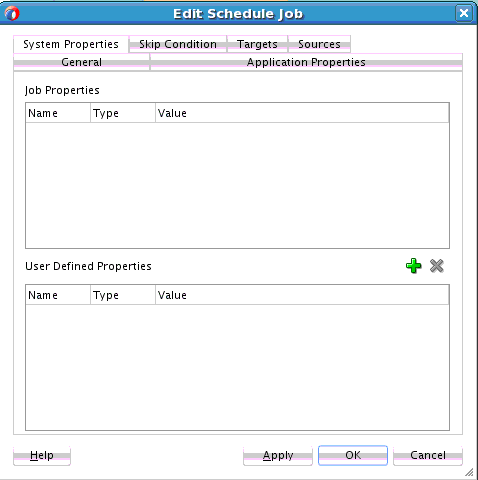
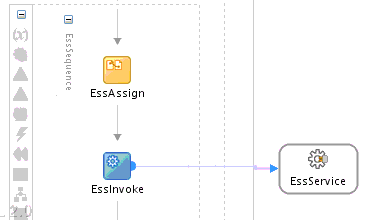
15.7 Invoking an Oracle Enterprise Scheduler Job in a BPEL Process
You can invoke an Oracle Enterprise Scheduler job in a BPEL process. An Oracle Enterprise Scheduler job is a unit of work in the form of either Java, a database stored procedure, or any executable. A job definition is associated with Oracle Enterprise Scheduler, which describes how to execute the job. An Oracle Enterprise Scheduler web service submits the job from within a BPEL process and associates a schedule with that job request.
The scheduled Oracle Enterprise Scheduler job resides in a runtime environment and is accessible with an Oracle Metadata Services Repository (MDS Repository) connection, using database-based access.
Note:
This section describes how to submit a job from a BPEL process, and not how to wait for the job to complete. If you want the BPEL process to wait for the job to complete, you must invoke the web service to request a callback when the job completes and then perform a receive to get the callback. For more information, see Chapter "Using the Oracle Enterprise Scheduler Web Service" of Developing Applications for Oracle Enterprise Scheduler.
15.7.1 How to Create Oracle Database and SOA-MDS Connections
To create Oracle database and SOA-MDS connections:
-
Create a SOA composite application. For information, see Creating a SOA Application.
-
Create a BPEL process in the SOA Composite Editor (for this example, a synchronous BPEL process is created). For information, see How to Add a BPEL Process Service Component.
-
Double-click the BPEL process in the SOA Composite Editor.
Oracle BPEL Designer is displayed.
-
Create an Oracle database connection. This is required for querying Oracle Enterprise Scheduler jobs.
-
From the File main menu, select New > Application.
-
From the Categories list, select Connection.
-
Select Database Connection.
The Create Database Connection wizard is displayed.
-
Complete the dialogs of the Create Database Connection wizard to create the connection to the Scheduler Oracle Metadata Services Repository database for the runtime server where Oracle Enterprise Scheduler is deployed, and click Finish.
-
-
Create a SOA-MDS connection. A database-based MDS Repository is used for retrieving the jobs to select.
-
From the File main menu, select New > Application.
-
From the Categories list, select Connection.
-
Select SOA-MDS Connection.
The Create SOA-MDS Connection dialog is displayed.
-
From the Connection Type list, select DB Based MDS.
-
From the Connection list, ensure that the database connection created in Step 4 is displayed.
-
From the Select MDS partition list, select the partition that includes Oracle Enterprise Scheduler jobs. For jobs defined in the Oracle Enterprise Scheduler predeployed native hosting application, the MDS partition name is essUserMetadata.
-
Complete the remaining fields of the dialog to create the SOA-MDS connection, and click OK.
-
