82 Introducing WebCenter Sites Tools and Utilities
For developing and maintaining your websites, you use tools and utilities such as WebCenter Sites Explorer Tool, CatalogMover, XMLPost Property Management Tool, together with the WebCenter Sites browser-based interface.
Topics:
82.1 Oracle WebCenter Sites Explorer
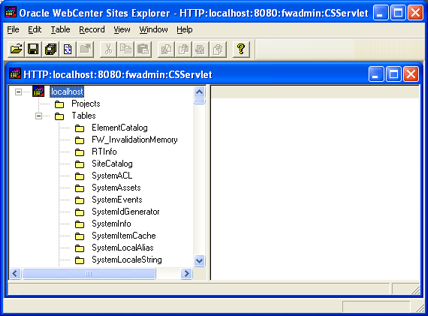
Oracle WebCenter Sites Explorer tool, a Microsoft Windows application, for viewing and editing tables and rows in the WebCenter Sites database, and for creating and editing executable elements (or files) written in XML or JSP.
You use Oracle WebCenter Sites Explorer to do the following:
-
Add entries to tables
-
Edit rows within tables
-
Track revisions to rows of tables
-
Create and drop WebCenter Sites tables
-
Organize tables and folders into projects
-
Preview
SiteCatalogrecords as pages in a browser -
Export and import records as integrated
.csetype files -
Export and import tables and projects in
.zipfiles
Oracle WebCenter Sites Explorer is installed along with WebCenter Sites.
82.2 Connecting to a WebCenter Sites Database
You can use Oracle WebCenter Sites Explorer on any remote Microsoft Windows computer simply by copying the Oracle WebCenter Sites Explorer directory from a computer on which WebCenter Sites is installed (<domain home>/wcsites/clients/oracle.wcsites.explorer.zip) to a directory on the remote computer.
You then unzip oracle.wcsites.explorer.zip and start the Oracle WebCenter Sites Explorer executable file (ContentServerExplorer.exe). Log in to WebCenter Sites by supplying a user name, password, host name, port, and protocol information.
To connect to a system that is running WebCenter Sites:
You may want to create a shortcut on your Windows desktop to Oracle WebCenter Sites Explorer. For instructions about using Oracle WebCenter Sites Explorer, see the Oracle WebCenter Sites Explorer online help and sections in this guide that describe specific tasks requiring Oracle WebCenter Sites Explorer.
82.3 CatalogMover
You use the CatalogMover tool to export and import WebCenter Sites database tables, including the ElementCatalog and SiteCatalog tables. You can export and import database tables as either HTML files or ZIP files.
You can use CatalogMover through either the Windows interface described in the following sections, or the command line interface described in Command Line Interface.
Note:
In previous versions of WebCenter Sites, tables in the WebCenter Sites database were called catalogs. This term still applies to the names of some database tables and to the CatalogMover tool itself.
Topics:
82.3.1 Starting CatalogMover
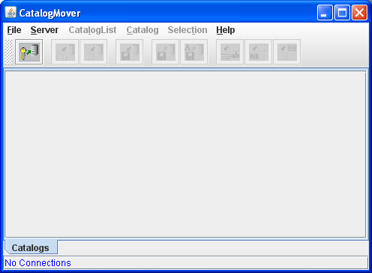
To start CatalogMover, run the following scripts at the MS DOS prompt or in a UNIX shell:
-
Windows:
catalogmover.bat -
Solaris:
catalogmover.shThe CatalogMover utility opens.
82.3.2 Connecting to WebCenter Sites
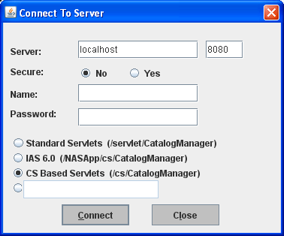
Before using CatalogMover, you must first connect to a WebCenter Sites system.
82.3.3 CatalogMover Menu Commands
CatalogMover includes the following menu commands:
File Menu
-
Exit: Disconnect from WebCenter Sites and close CatalogMover.
Server Menu
-
Connect: Display the Connect to Server dialog.
-
Reconnect: Display the Connect to Server dialog and renew the current WebCenter Sites connection.
-
Disconnect: Disconnect from WebCenter Sites.
-
Purge Temporary Tables: Purge imported tables before committing.
-
Commit Individual Tables: Commit imported tables to the database.
-
Normalize Filenames on Export: Enable CatalogMover's file name normalization behavior, which changes the names of files that are being moved to names that match their corresponding ID numbers. File names are not altered if this feature is not enabled.
CatalogList Menu
-
Load: Display a list of all tables in the database.
82.3.4 Catalog Menu
-
Load: Load into local memory a table from the list.
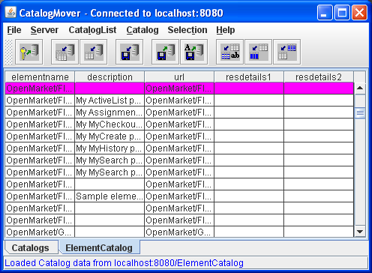
This figure shows a loaded
ElementCatalogtable.Figure 82-4 ElementCatalog Table in CatalogMover
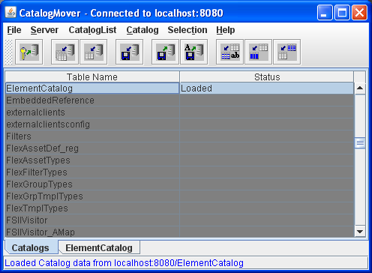
Description of "Figure 82-4 ElementCatalog Table in CatalogMover"Select the ElementCatalog tab to view all rows in the table, and to select specific rows for export.
-
Refresh: Update the loaded tables from the WebCenter Sites database.
-
Auto Import Catalog(s): Import a previously exported ZIP file.
-
Import Catalog: Import into the local database a table that was exported from another WebCenter Sites database.
-
Export Catalog Rows: Export the selected rows in the loaded table.
Selection Menu
-
Select All Rows: Select all rows in the currently displayed table.
-
Deselect All Rows: Deselect all rows in the currently displayed table.
-
Select Rows By SubString: Select rows in the currently displayed table by typing a portion of any field value string that uniquely identifies a set of rows.
Help Menu
-
About: Display version information about the WebCenter Sites installation.
82.3.5 Exporting Tables
Exporting is the process of retrieving table rows and their content from the database and saving them in local HTML files and associated data directories. CatalogMover creates one HTML file per table.
This section includes the following topics:
82.3.5.2 Selecting Rows for Export
You can select specific rows for export in a loaded table by clicking them, or you can search for specific rows by substring.
To search for and select rows according to a substring:
82.3.6 Importing Tables
Importing is the process of sending locally stored HTML files and the associated data to the server. You can select a particular HTML file to import, or you can choose to import all HTML files.
This section includes the following topics:
82.3.6.1 Importing HTML Files Previously Exported
To import HTML files that have been previously exported from another table:
82.3.6.2 Importing a Previously Exported ZIP File
You can import table rows stored in an exported ZIP file to your server using CatalogMover.
To import a previously exported ZIP file:
- While connected to your database, choose Catalog then Auto Import Catalogs.
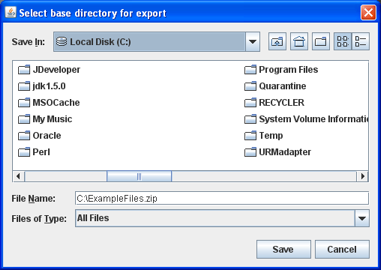
- In the dialog, navigate to the directory where you previously exported the table rows. To see the ZIP file, change the Files by Type menu to all files.
- Select the ZIP file and click Save. The rows contained in the ZIP file are automatically imported to your database.
82.3.7 Command Line Interface
Parameters described in the table below allow CatalogMover to perform functions without displaying a GUI. The parameter is followed by a space followed by the value.
Table 82-1 Command Line Interface Parameters
| Parameters | Description |
|---|---|
|
|
Display command line parameters |
|
|
User name |
|
|
Password |
|
|
Servername to connect |
|
|
Base URL: either
or
|
|
|
Table name: Used when exporting to designate tables to export, use multiple |
|
|
Function to perform: Legal values are |
|
|
Directory: When exporting, directory to contain exported tables. When importing all, directory containing all tables to import. |
|
|
File containing table to import: Can either be an HTML file or a ZIP file generated by export. |
|
|
Upload directory to be used if creating a table. |
|
|
ACL list: Comma-separated list of ACLs to be used if creating a table. |
82.4 Property Management Tool
The Property Management Tool includes an easy-to-use form that you use when you want to search for, view, modify, and add properties in the wcs_properties.json file.
Topics:
82.4.1 Accessing the Property Management Tool
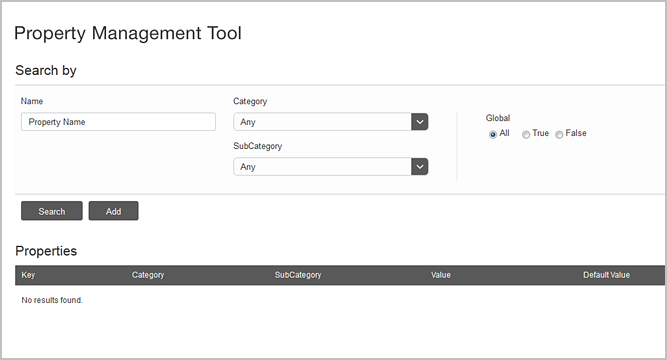
The Search by section of the Property Management Tool enables you to search for the full or partial name of a property. You can also search by the Category assigned to the property in the wcs_properties.json file.
When you click Search, the Properties section of the form lists all the properties that match the search criteria you enters in the Search by section of the form.
The Key column displays the name of the property, the Category column displays the category assigned to the property, the SubCategory column displays the sub category (if any) assigned to the property, the Value column shows the value to which the property is currently set. and the Default Value column displays the recommended value for the property.
Note:
The wcs_properties.json file contains a release number string, ft.version, which contains a value such as 4.0.0. that is set by WebCenter Sites.
Do not modify this property, it is for reference only.
82.4.3 Adding Properties to the wcs_properties.json File
In certain cases, you might need to add properties to the wcs_properties.json file. In such cases, use the Property Management Tool to add properties to this file.
- Open the Property Management Tool.
- In the Search by section of the form, click Add.
- Enter values for the new property. See Adding Properties in the Property Files Reference for Oracle WebCenter Sites.
- Click Save.
- Stop and restart the application server so the new property can take effect.
82.5 About Importing with XMLPost
You use the XMLPost utility to import data into the WebCenter Sites database. This utility is based on the WebCenter Sites FormPoster Java class and it is delivered with the WebCenter Sites base product. It imports data using the HTTP POST protocol.
To import assets, you use XMLPost with posting elements that are delivered with WebCenter Sites.
Topics:
