40 Using Different Output Modes
showPrintablePageBehavior tag and how to create emailable pages with the request parameter org.apache.myfaces.trinidad.agent.email=true.This chapter includes the following sections:
40.1 About Using Different Output Modes
The entire page of the web pages that comprise an ADF application may not be suitable for printing, but ADF supports rendering of the content so it is appropriate for print or email.
ADF Faces enables you to output your page in a simplified mode either for printing or for emailing. For example, you may want users to be able to print a page (or a portion of a page), but instead of printing the page exactly as it is rendered in a web browser, you want to remove items that are not needed on a printed page, such as scroll bars and buttons. If a page is to be emailed, the page must be simplified so that email clients can correctly display it.
Note:
By default, when the ADF Faces framework detects that an application is being crawled by a search engine, it outputs pages in a simplified format for the crawler, similar to that for an emailable page. If you want to generate special content for web crawlers, you can use the EL-reachable Agent interface to detect when an agent is crawling the site, and then direct the agent to a specified link, for example:
<c:if test="#{requestContext.agent.type ==  'webcrawler'}">
  <af:link text="This Link is rendered only for web crawlers"
             destination="http://www.newPage.com"/>
</c:if>
For more information, see the Trinidad Javadoc.
For displaying printable pages, ADF Faces offers the showPrintablePageBehavior tag that, when used in conjunction with a command component, enables users to view a simplified version of a page in their browser, which they can then print.
For email support, ADF Faces provides an API that can be used to convert a page to one that is suitable for display in the Microsoft Outlook 2007, Mozilla Thunderbird 10.0.5, or Gmail email clients.
Tip:
The current output mode (email or printable) can be reached from AdfFacesContext. Because this context is EL-reachable, you can use EL to bind to the output mode from the JSP page. For example, you might allow a graphic to be rendered only if the current mode is not email using the following expression:
<af:activeImage source="/images/stockChart.gif" rendered="#{adfFacesContext.outputMode != "email"}"/>
You can determine the current mode using AdfFacesContext.getOutputMode().
40.1.1 Output Mode Use Cases
Most web pages are not suitable for print or for emailing, but users may need that functionality. For example, in the File Explorer application, you could place a button component inside the toolbar of the panelCollection component that contains a table, as shown in Figure 40-1.
Figure 40-1 Button to Print Part of a Page

When the user clicks the button, the page is displayed in a new browser window (or tab, depending on the browser) in a simplified form, as shown in Figure 40-2.
Figure 40-2 Printable Version of the Page

Only the contents of the table are displayed for printing. All extraneous components, such as the toolbar, buttons, and scroll bars, are not rendered.
There may be occasions when you need a page in your application to be emailed. For example, purchase orders created on the web are often emailed to the purchaser at the end of the session. However, because email clients do not support external stylesheets which are used to render to web browsers, you can't email the same page, as it would not be rendered correctly.
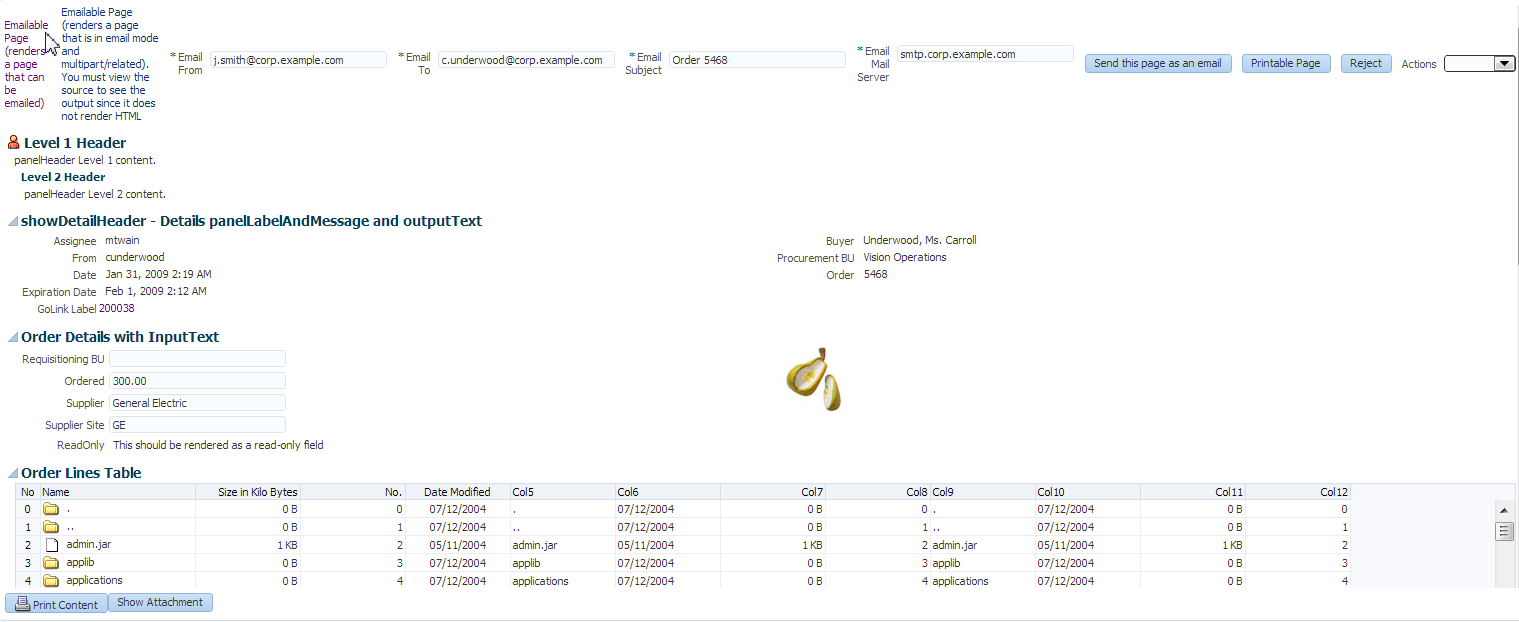
Say you have a page that displays a purchase order, as shown in Figure 40-3.
Figure 40-3 Purchase Order Web Page

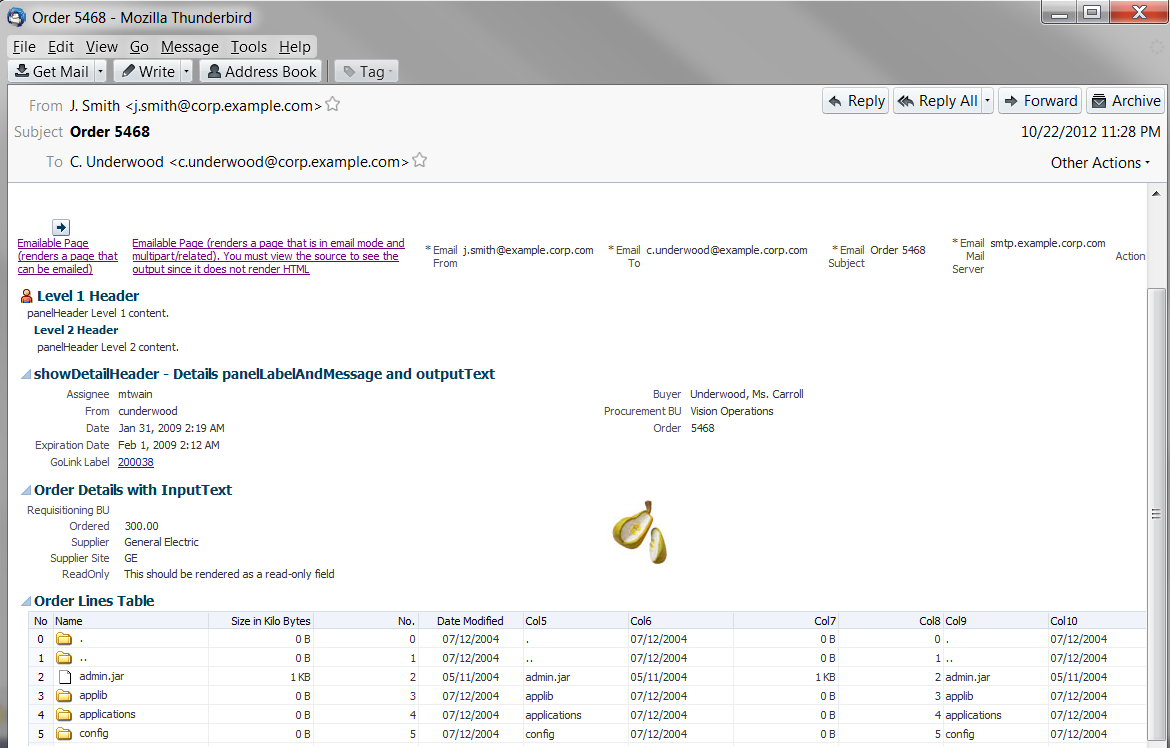
When the user clicks the Emailable Page link at the top, an actionListener method or another service appends org.apache.myfaces.trinidad.agent.email=true to the current URL and emails the page. Figure 40-4 shows the page as it appears in an email client.
Figure 40-4 Page in an Email Client

40.2 Displaying a Page for Print
You can specify whether or not ADF Faces components that display in a web page should be printed when the ADF application user prints the web page.
The ADF Faces framework enables you to print versions of your pages that are suitable for printing when you place the showPrintablePageBehavior tag as a child to a command component. When clicked, the framework walks up the component tree, starting with the component that is the parent to the printableBehavior tag, until it reaches a panelSplitter, panelAccordion, or popup component, or the root of the tree (whichever comes first). The tree is rendered from there. Additionally, certain components that are not needed on a printed page (such as buttons and scrollbars) are omitted.
When the command component is clicked, the action event is canceled. Instead, a request is made to the server for the printable version of the page.
40.2.1 How to Use the showPrintablePageBehavior Tag
You use the showPrintablePageBehavior tag as a direct child of a command component.
Before you begin:
It may be helpful to have an understanding of how components will display in a printable page. For more information, see Displaying a Page for Print.
To use the showPrintablePageBehavior tag:
40.3 Creating Emailable Pages
Not all ADF Faces components that display in a web page of an ADF application can be rendered as output for email. However, ADF Faces supports proper rendering of a large number of components for a variety of email clients.
There may be occasions when you need a page in your application to be emailed. For example, purchase orders created on the web are often emailed to the purchaser at the end of the session. However, because email clients do not support external stylesheets which are used to render to web browsers, you can't email the same page, as it would not be rendered correctly.
The ADF Faces framework provides you with automatic conversion of a JSF page so that it will render correctly in the Microsoft Outlook 2007, Mozilla Thunderbird 10.0.5, or Gmail email clients.
Not all components can be rendered in an email client. The following components can be converted so that they can render properly in an email client:
-
document -
panelHeader -
panelFormLayout -
panelGroupLayout -
panelList -
spacer -
showDetailHeader -
inputText(renders as readOnly) -
inputComboBoxListOfValues(renders as readOnly) -
inputNumberSlider(renders as readOnly) -
inputNumberSpinbox(renders as readOnly) -
inputRangeSlider(renders as readOnly) -
outputText -
selectOneChoice(renders as readOnly) -
panelLabelAndMessage -
image -
tree -
table -
treeTable -
column -
link(renders as text)
The emailable page will render all rows in a table and all nodes in a treeTable with each node expanded in the page, up to a limit. The default number of rows to display is 50. The maximum number of rows that a view object will retrieve is limited by the data layer (through the MaxFetchSize property) or the application layer (through the rowLimit property specified in adf-config.xml). The rowLimit property is a global upper bound for all view object queries in the application. If MaxFetchSize is specified, rowLimit is ignored for that view object. You can also specify the maximum rows to display using the table attribute rows for emailable pages. The rows value will be used only if it is less than the defined value of MaxFetchSize or rowLimit. For tree and treeTable, use nonScrollableRows to limit the number of rows to display.
Note:
If you include thePanelGroupLayout component while creating an emailable page, remove the <td width="100%"></td> entry within the <table>… </table> element in the HTML source. Otherwise, the footer row will not render properly in the email client.By default, the emailable page will display with styles inlined directly on the relevant HTML element's style attribute rather than using an internal stylesheet. You can configure this behavior by setting the web.xml parameter oracle.adf.view.DEFAULT_EMAIL_MODE to either internal or inline.
40.3.1 How to Create an Emailable Page
You notify the ADF Faces framework to convert your page to be rendered in an email client by appending a request parameter to the URL for the page to be emailed.
Before you begin:
It may be helpful to have an understanding of how components will display in an emailable page. For more information, see Creating Emailable Pages.
To create an emailable page:
40.3.2 How to Test the Rendering of a Page in an Email Client
Before you complete the development of a page, you may want to test how the page will render in an email client. You can easily do this using a Button component.
To test an emailable page:
40.3.3 What Happens at Runtime: How ADF Faces Converts JSF Pages to Emailable Pages
When the ADF Faces framework receives the request parameter org.apache.myfaces.trinidad.agent.email=true in the Render Response phase, the associated phase listener sets an internal flag that notifies the framework to do the following:
-
Remove any JavaScript from the HTML.
-
Add all CSS to the page, but only for components included on the page and global styles (those without the pipe character (
|) in the name). -
Remove the CSS link from the HTML.
-
Convert all relative links to absolute links.
-
Render images with absolute URLs.
-
Inline the style information onto each HTML element rather than creating an internal stylesheet.
Additionally, if you add the parameter oracle.adf.view.rich.render.emailContentType=multipart/related the framework will convert the HTML to MIME (multipart/related) and inline the images so the email can be viewed offline. The full request parameter would be:
org.apache.myfaces.trinidad.agent.email=true&oracle.adf.view.rich.render.emailContentType=multipart/related
