注意:
- 此教程需要访问 Oracle Cloud。要注册免费账户,请参阅开始使用 Oracle Cloud Infrastructure Free Tier 。
- 它使用 Oracle Cloud Infrastructure 身份证明、租户和区间示例值。完成实验室时,请将这些值替换为特定于您的云环境的值。
使用 Ruby on Rails Web 应用以编程方式访问 OCI 生成式 AI 服务
简介
Oracle Cloud Infrastructure Generative AI (OCI Generative AI) 是一款革命性的新人工智能工具,可以改变我们与技术交互的方式。它是一个大型语言模型,它训练有素的大量文本数据,并学习根据它之前的单词来预测序列中的下一个单词。这使 OCI Generative AI 可以对文本提示生成类似人类的响应,使其成为创建自然语言的强大工具。
OCI Generative AI 的一个令人印象深刻的功能是它能够理解复杂主题并提供深入的解释和响应。如今,每个组织都希望在应用中利用生成式 AI 的强大功能,并为客户提供创新产品。
在本教程中,我们将讨论并了解 OCI 如何帮助全球各地的组织利用 OCI 的生成式 AI 功能。在本教程中,我们将使用 Ruby on Rails (RoR) 作为开发框架,并将调用基于 Ruby 编程语言的 OCI Generative AI API。
目标
-
为用户设置 OCI API 密钥,GitLab 代理将基于该密钥连接到 OCI 租户。
-
创建和配置计算实例,以便将其用于 RoR 开发。
-
设置 RoR 应用程序,编写适当的代码来调用和显示 OCI Generative AI 服务。
先决条件
-
在 Oracle Cloud Infrastructure Identity and Access Management (OCI IAM) 中允许访问 OCI 和策略。用户应有权访问他们希望使用 Terraform 代码创建或更新的相应资源。
-
了解 Ruby 和 RoR 及其基于 Model View Controller (MVC) Web 应用程序开发的工作方法。
-
对软件开发敏捷方法的基本理解。
任务 1:设置 Oracle Cloud Infrastructure API 密钥
-
使用服务账户或管理员用户登录 OCI 租户,然后转到用户设置。
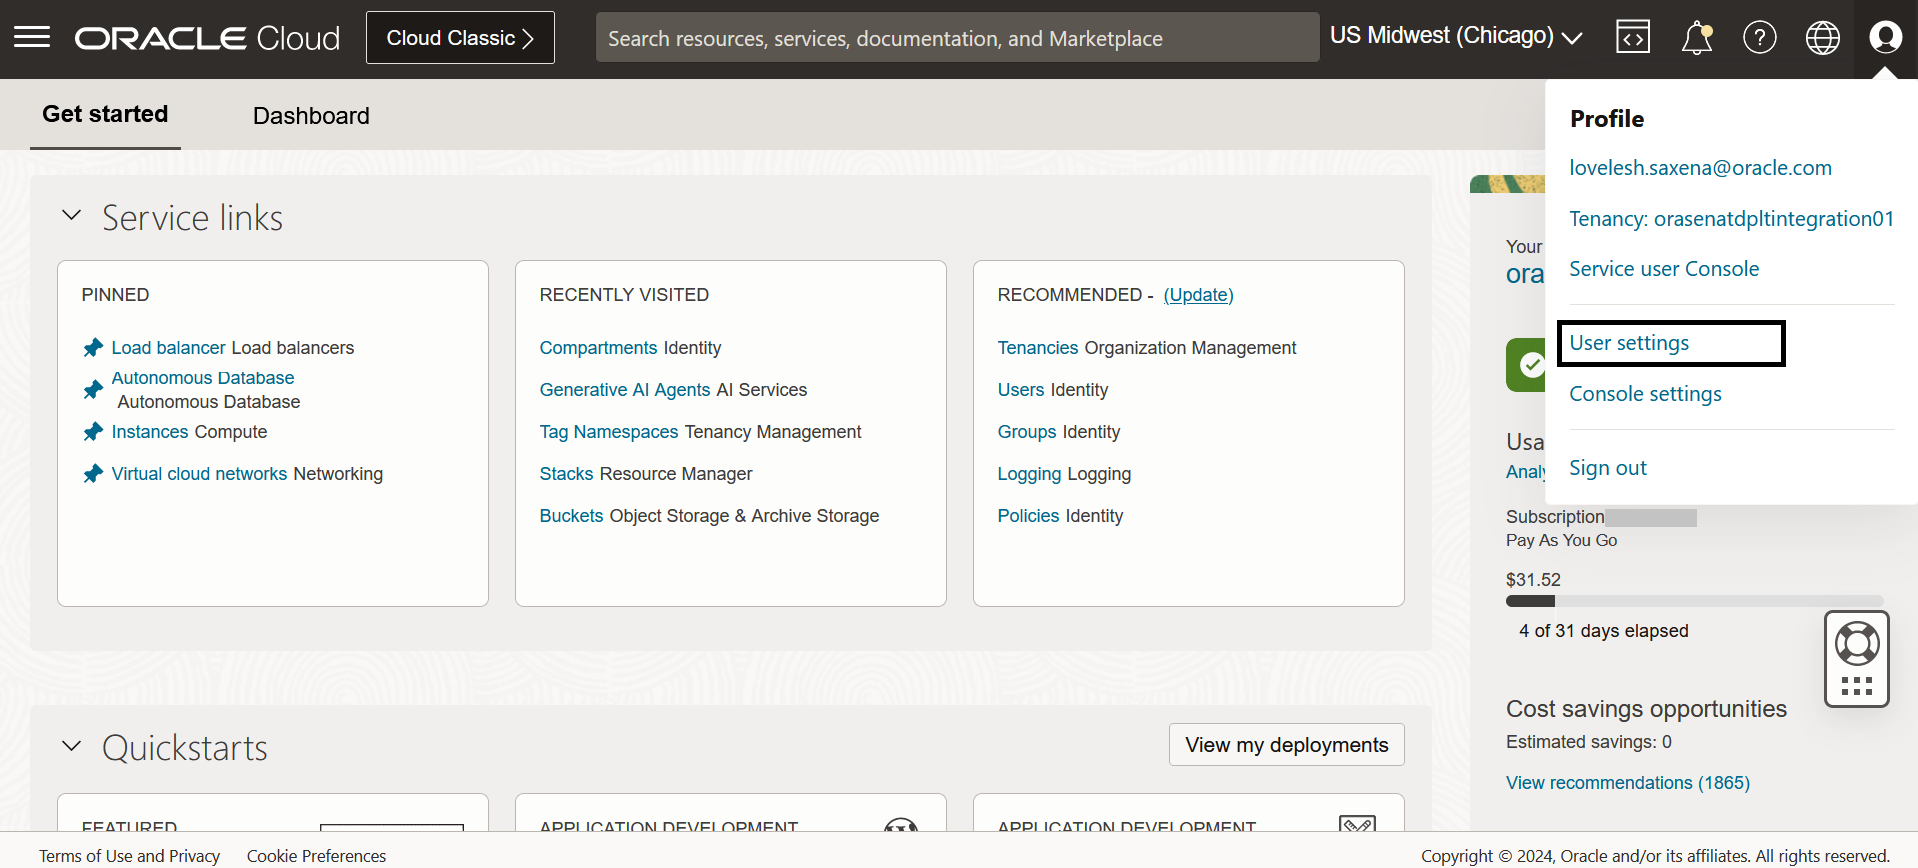
或者
从 OCI IAM 控制台转至用户。确保用户拥有在 OCI 上创建和更新基础设施所需的所有访问权限。
-
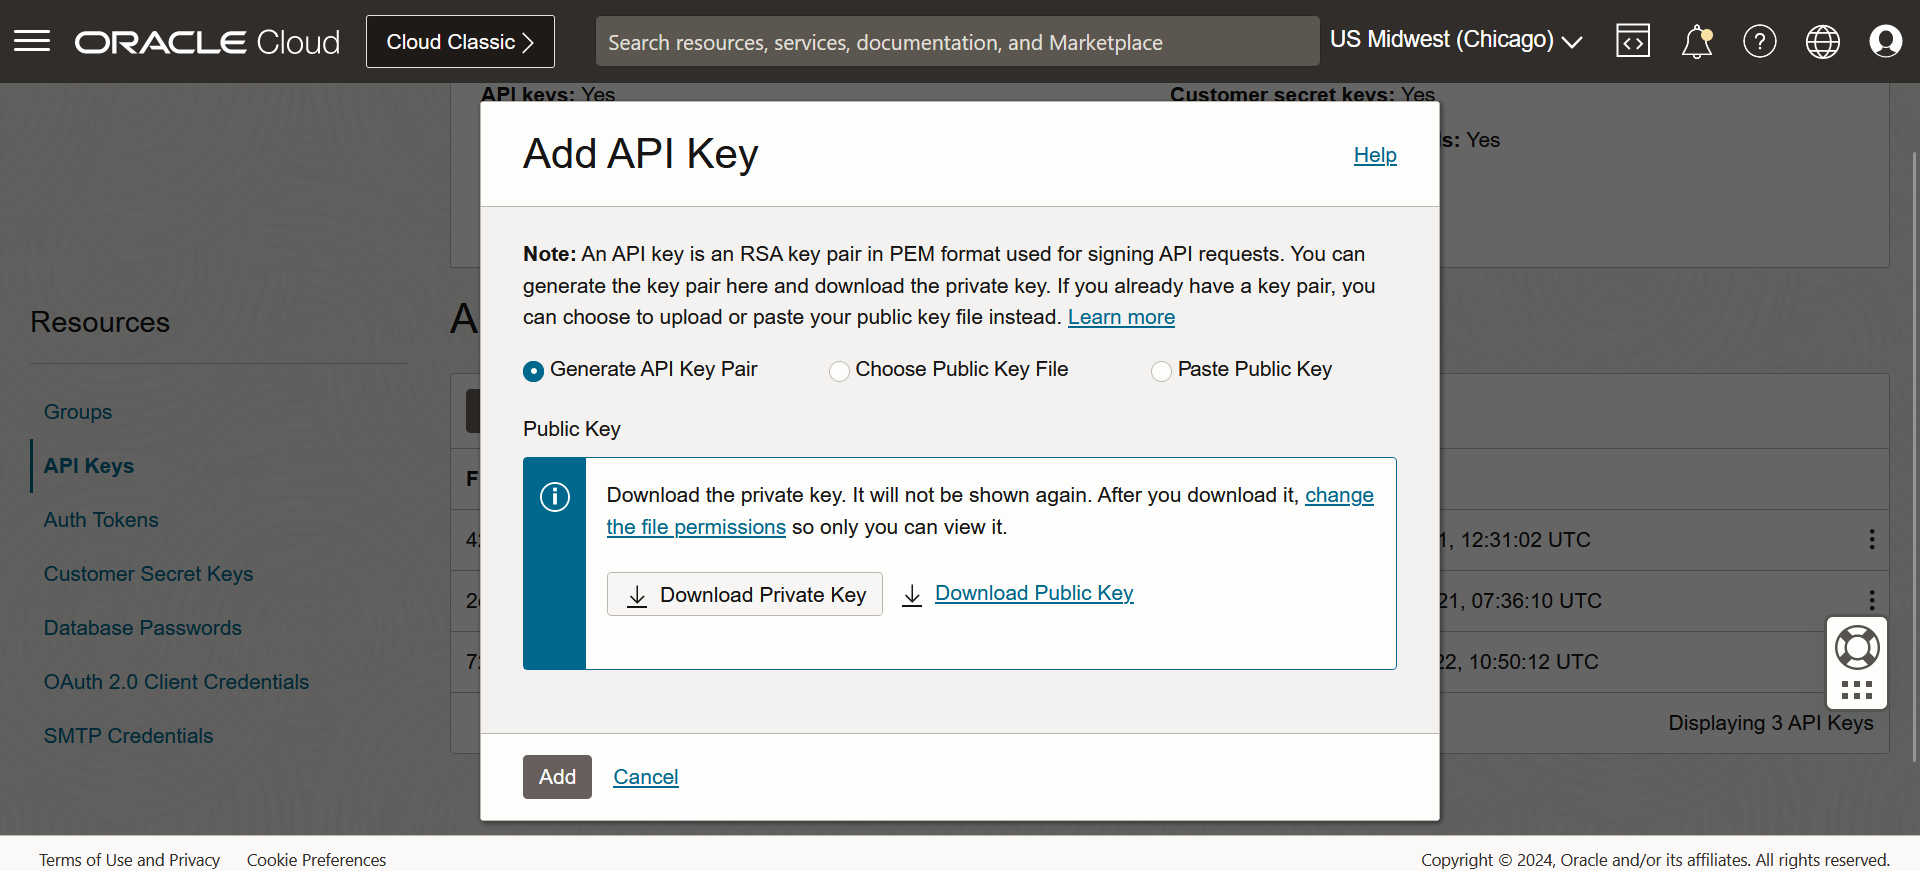
转到用户的资源部分,单击 API 密钥和添加 API 密钥。选择以下选项:下载新的公共密钥和私钥、上载公共密钥或粘贴公共密钥。
-
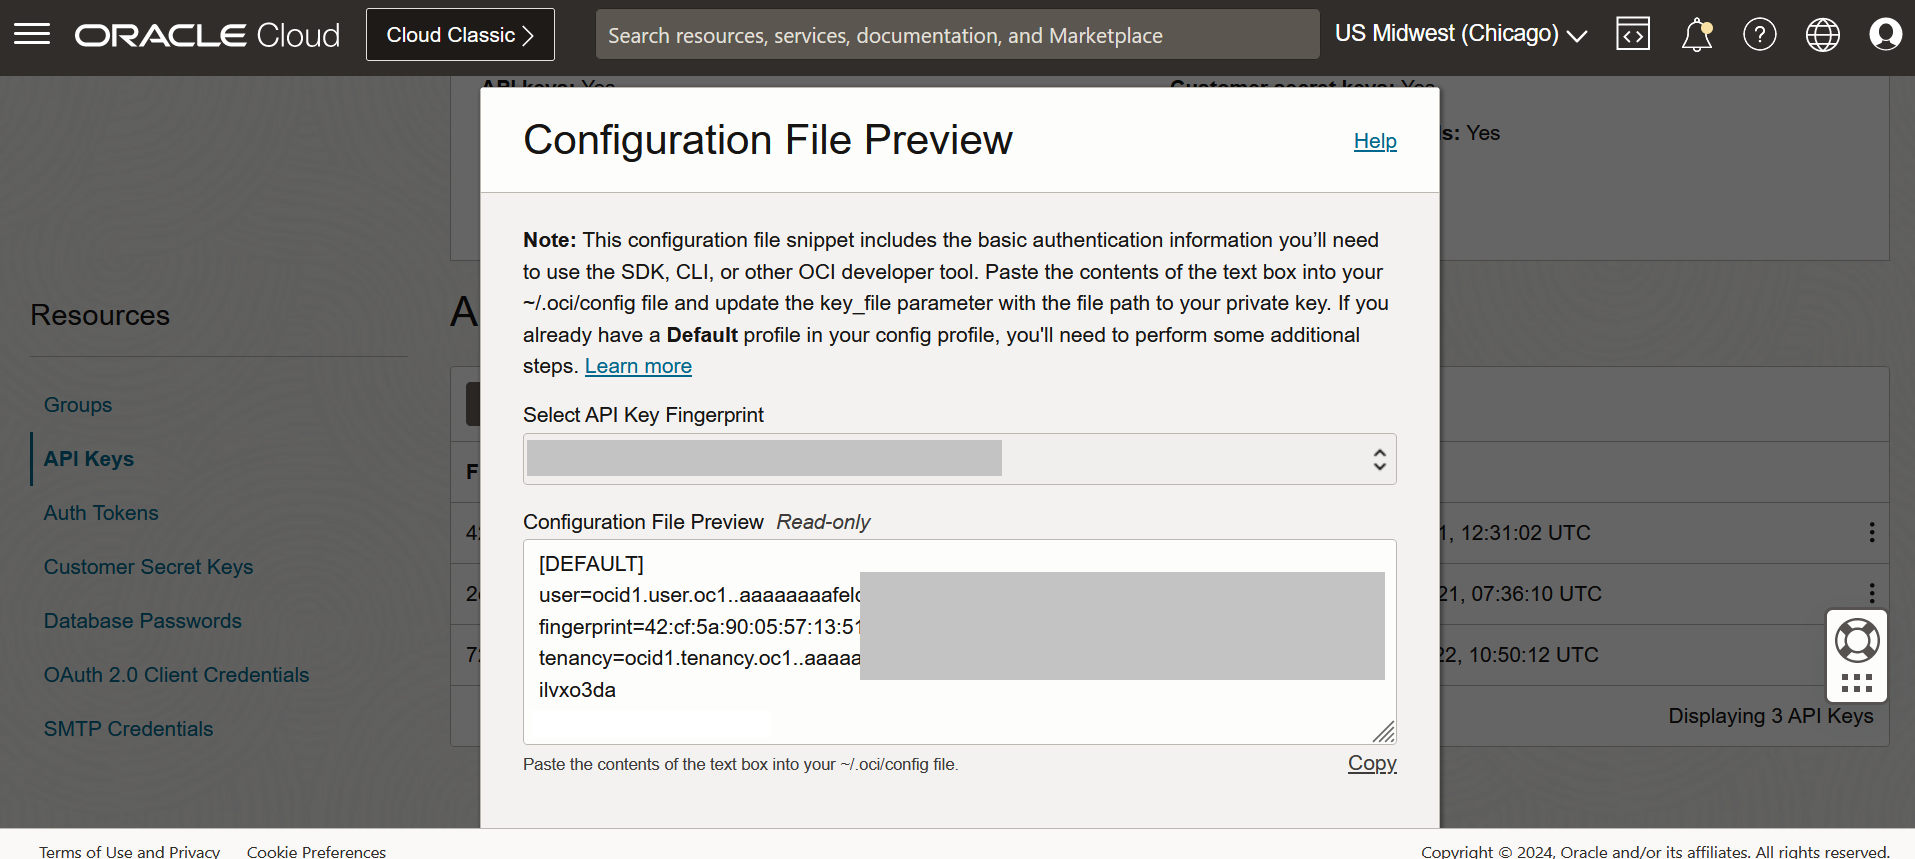
将密钥保存在方便的位置,并保存配置文件,如以下页面中所示。使用 Ruby SDK 连接到租户时,您需要提供此配置文件和私钥。
注:
-
截至目前,OCI 在
US-CHICAGO-1区域中支持生成式 AI 服务。因此,请确保在租户中启用并订阅此区域。 -
要从 OCI 计算实例调用 OCI 服务,OCI 提供了使用实例主体的更安全方式。避免将用户 API 密钥用作优秀实践。有关更多信息,请参见 Calling Services from an Instance 。
-
任务 2:创建和配置要用于 RoR 开发的 OCI 计算实例
-
请转至在 OCI 上启动 Windows 实例,在 OCI 上创建 Windows 计算实例。
-
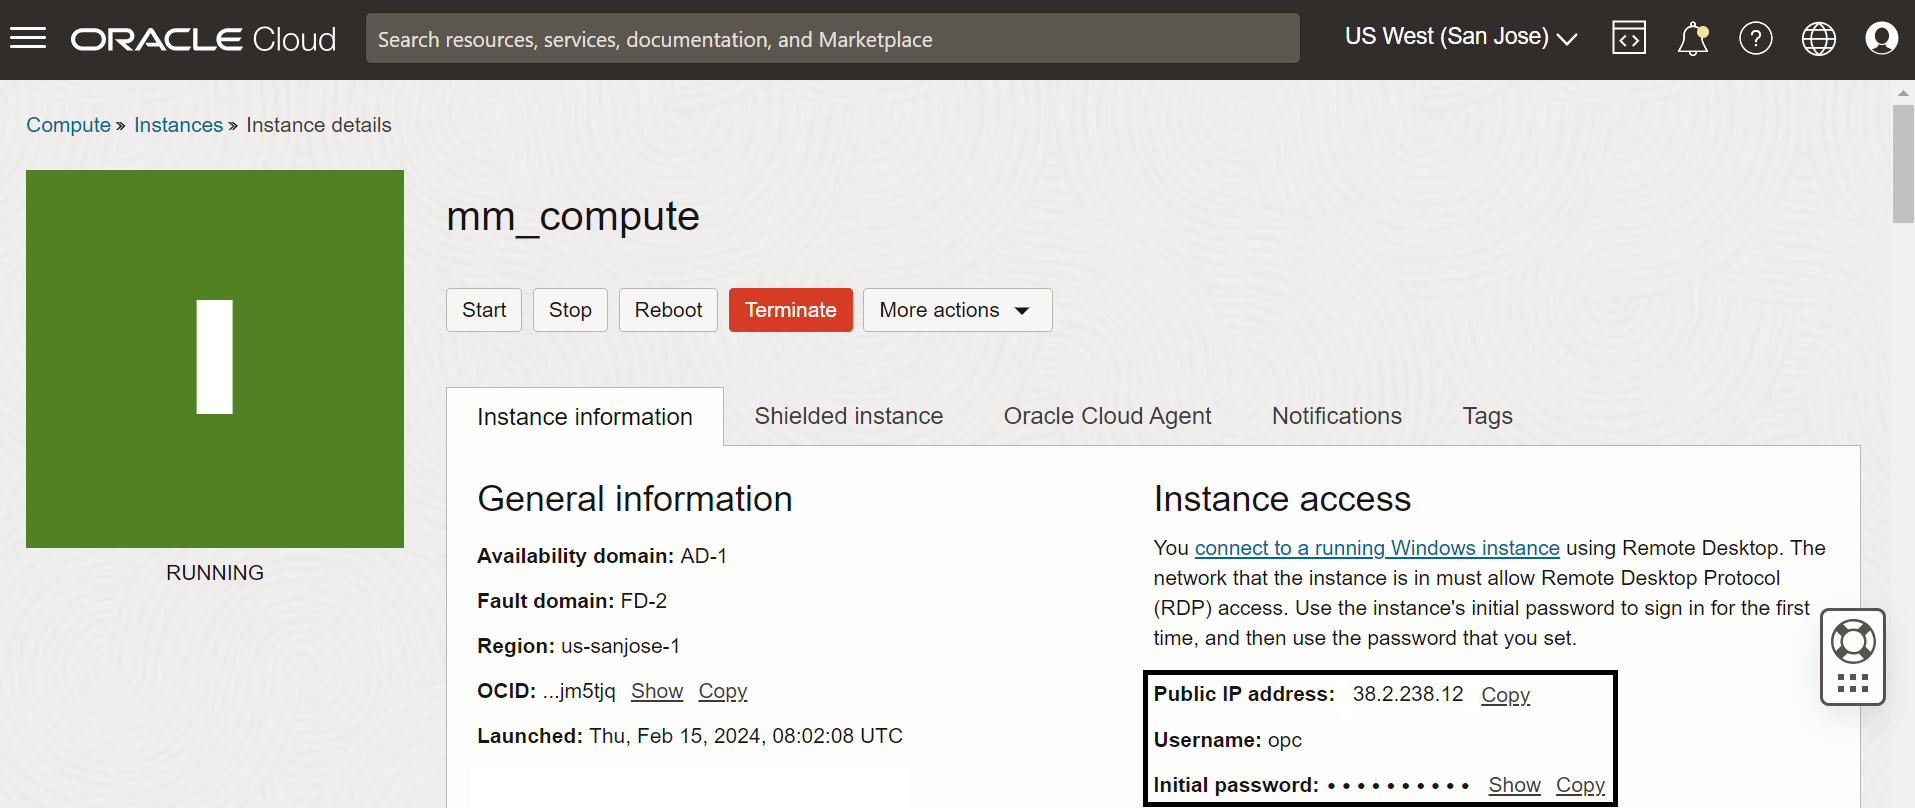
创建 Windows 实例后,使用初始密码登录,如下面的屏幕截图中所示。
-
登录到 Windows 计算实例后,安装并配置 Ruby、Ruby on Rails,并使用 rails 命令创建新应用程序。
rails new GenAIApp转到应用程序目录并运行以下命令以使滑轨应用程序服务器启动并运行。您应该能够访问
http://127.0.0.1:3000上的默认 Rails 应用程序。cd GenAIApp rails server -b 0.0.0.0 -
转到用户主目录(即
c:/users/opc),然后为 Ruby SDK 创建config文件。配置在任务 1.3 中下载的配置文件,同时放置下载的私钥文件。有关详细信息,请参阅 Oracle Cloud Infrastructure Ruby SDK 。注:
-
您必须在首次登录 OCI 计算实例时重置 Windows 密码。请记住新密码,因为下次登录时需要使用此密码。
-
要从网络外部访问 Rails 应用程序,必须打开端口
3000,还必须从创建的计算实例关闭 Windows 防火墙。
-
任务 3:设置 RoR 应用程序,编写适当的代码来调用和显示 OCI 生成式 AI 服务
-
在您能够运行您的 Rails 应用程序并在本地和从所需的网络访问它之后,我们的第一步是为应用程序设置所需的宝石。打开
Gemfile并更新其内容,如下面的代码片段中所示。Gemfile:source 'https://rubygems.org' git_source(:github) { |repo| "https://github.com/#{repo}.git" } ruby '3.2.3' # Bundle edge Rails instead: gem 'rails', github: 'rails/rails', branch: 'main' gem 'rails', '~> 6.1.4', '>= 6.1.4.1' # Gem for OCI SDK gem 'oci' # Use sqlite3 as the database for Active Record gem 'sqlite3', '~> 1.4' # Use Puma as the app server gem 'puma', '~> 5.0' # Use SCSS for stylesheets gem 'sass-rails', '>= 6' # Transpile app-like JavaScript. Read more: https://github.com/rails/webpacker gem 'webpacker', '~> 5.0' # Turbolinks makes navigating your web application faster. Read more: https://github.com/turbolinks/turbolinks gem 'turbolinks', '~> 5' # Build JSON APIs with ease. Read more: https://github.com/rails/jbuilder gem 'jbuilder', '~> 2.7' # Use Redis adapter to run Action Cable in production # gem 'redis', '~> 4.0' # Use Active Model has_secure_password # gem 'bcrypt', '~> 3.1.7' gem 'tzinfo-data' # Use Active Storage variant # gem 'image_processing', '~> 1.2' # Reduces boot times through caching; required in config/boot.rb gem 'bootsnap', '>= 1.4.4', require: false group :development, :test do # Call 'byebug' anywhere in the code to stop execution and get a debugger console gem 'byebug', platforms: [:mri, :mingw, :x64_mingw] end group :development do # Access an interactive console on exception pages or by calling 'console' anywhere in the code. gem 'web-console', '>= 4.1.0' # Display performance information such as SQL time and flame graphs for each request in your browser. # Can be configured to work on production as well see: https://github.com/MiniProfiler/rack-mini-profiler/blob/master/README.md gem 'rack-mini-profiler', '~> 2.0' end group :test do # Adds support for Capybara system testing and selenium driver gem 'capybara', '>= 3.26' gem 'selenium-webdriver' # Easy installation and use of web drivers to run system tests with browsers gem 'webdrivers' end # Windows does not include zoneinfo files, so bundle the tzinfo-data gem gem 'tzinfo-data', platforms: [:mingw, :mswin, :x64_mingw, :jruby] -
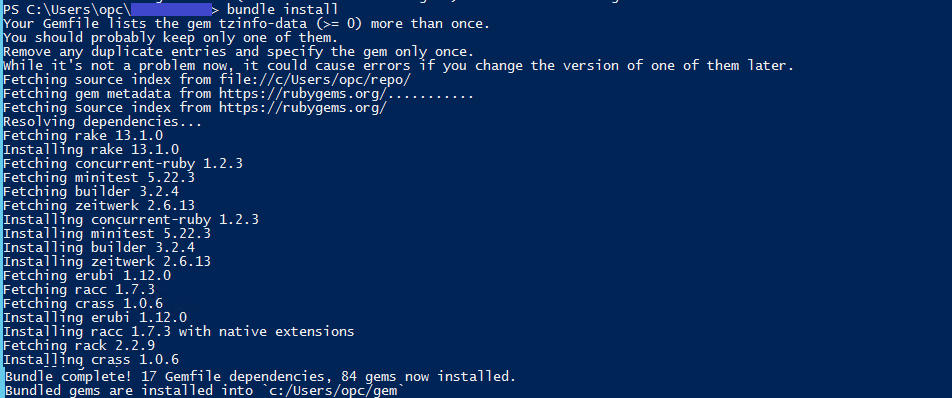
执行
bundle install命令以安装所有软件包。bundle install您的捆绑包安装应显示输出,如下图中所示。
-
完成捆绑包安装后,将路由添加到
routes.rb文件。这将提供在应用程序上公开的 API,调用时需要执行操作。config/routes.rb:Rails.application.routes.draw do root "genai_app#checkin" get "/checkin", to: "genai_app#checkin" post "/checkin", to: "genai_app#checkinpost" end -
我们必须开发应用程序
controller文件的代码,如下所示。这是使用应用程序调用 OCI 生成式 AI API 时将执行的主代码。app/controller/genai_app_controller.rb:require 'oci' class GenAIAppController < ApplicationController def checkin lines = File.readlines("C:/Users/opc/GenAIApp/app/controllers/chatlog.txt") @chatLines = lines end def checkinpost File.open("C:/Users/opc/GenAIApp/app/controllers/chatlog.txt", "a") { |f| f.write "\nusr::#{params[:message]}" } if params[:message].include? "AskAI:" fullMessage = params[:message].split("AskAI:")[1].strip() region = 'us-chicago-1' gen_ai_inference_client = OCI::GenerativeAiInference::GenerativeAiInferenceClient.new(region: region) compartment_id = 'ocid1.compartment.oc1..aaaaaaaasdk6oyucuqzcaixwxtnxzlt6xxxxxxxxxxuzrm6vmdqgh6wipa' # compartmentId that has policies grant permissions for using Generative AI Service model_id = 'cohere.command' prompt = params[:message].split("AskAI:")[1].strip() max_tokens = 500 temperature = 0.75 frequency_penalty = 1.0 top_p = 0.7 details = OCI::GenerativeAiInference::Models::GenerateTextDetails.new('compartment_id': compartment_id, 'serving_mode': OCI::GenerativeAiInference::Models::OnDemandServingMode.new( 'model_id': model_id ), 'inference_request': OCI::GenerativeAiInference::Models:: CohereLlmInferenceRequest.new( 'prompt': prompt, 'is_stream': false, 'max_tokens': max_tokens, 'temperature': temperature, 'top_p': top_p, 'frequency_penalty': frequency_penalty )) response = gen_ai_inference_client.generate_text(details) text_response = response.data.to_s[170...-150] File.open("C:/Users/opc/GenAIApp/app/controllers/chatlog.txt", "a") { |f| f.write "\nnex::#{text_response}" } print(text_response) end redirect_to("/checkin") end end -
更新我们的视图文件的内容。这将用于显示 UI 并调用应用程序上的获取和发布 API 调用。用户将使用此 UI 页与您的应用程序交互。
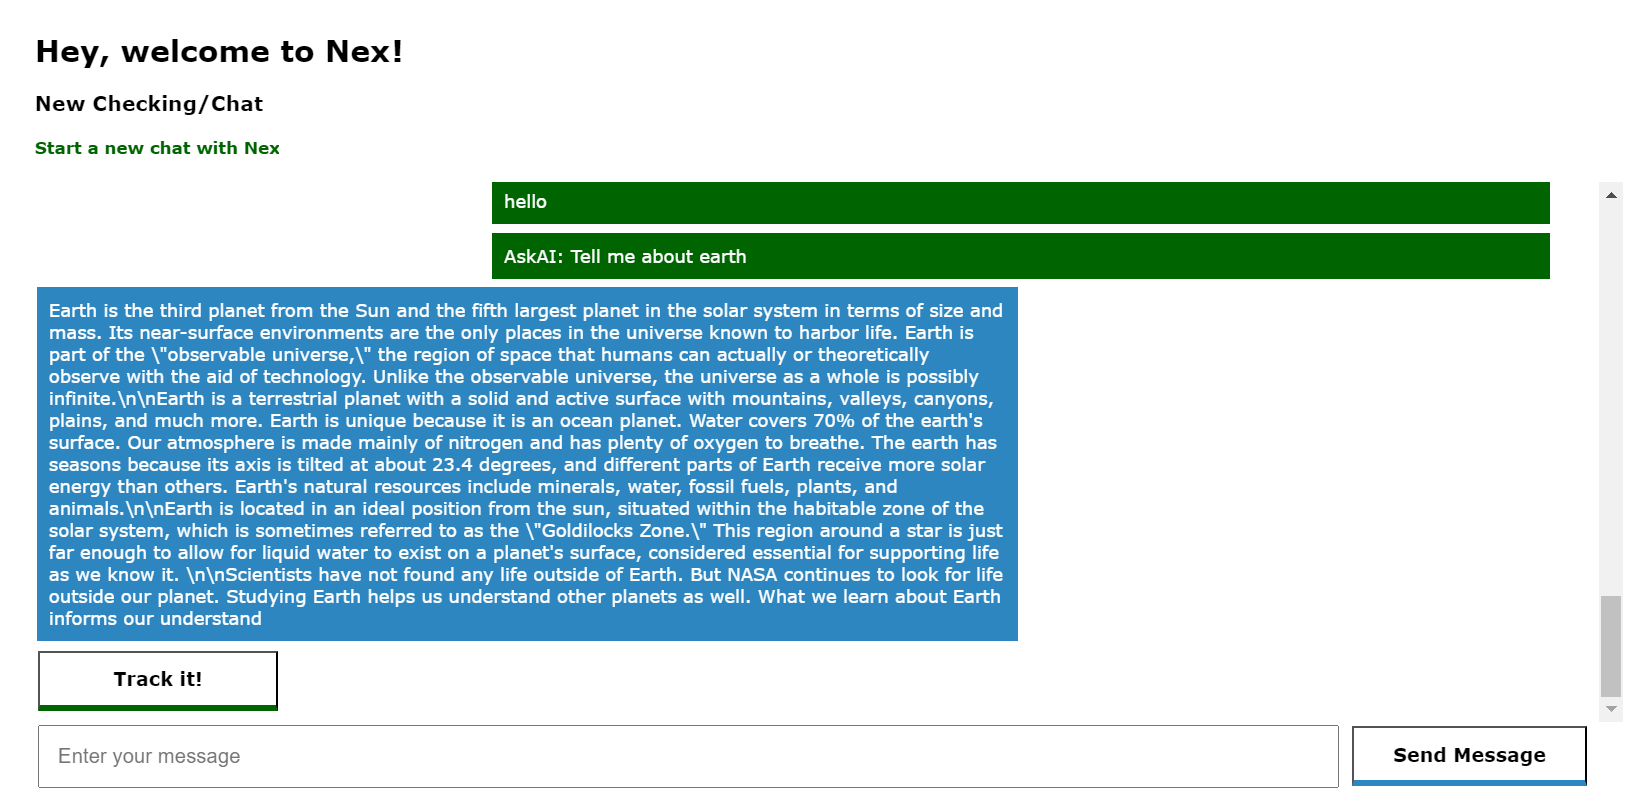
app/view/checkin.html.erb:<style> .greenB { background-color: white; color: black; font-size: 16px; border-bottom: 5px solid darkgreen; text-decoration: none; font-family:verdana; font-weight:bold; width: 100%; height: 50px; display: inline-block; display:flex;/*CSS3*/ align-items:center;/*Vertical align*/ justify-content:center;/*horizontal align*/ } .blueB { background-color: white; color: black; font-size: 16px; border-bottom: 5px solid #2E86C1; text-decoration: none; font-family:verdana; font-weight:bold; width: 100%; height: 50px; display: inline-block; display:flex;/*CSS3*/ align-items:center;/*Vertical align*/ justify-content:center;/*horizontal align*/ } .greenB:hover {background-color: darkgreen; color: white} .blueB:hover {background-color: #2E86C1; color: white} </style> </br> <table width=100%> <tr> <td width=2%> </td> <td width=98%> <div style="color:black;font-family:verdana;font-size:25px;"> <b>Hey, welcome to Nex!</b> </div> </br> <div style="color:black;font-family:verdana;font-size:17px;"> <b>New Checking/Chat</b> </div> </br> <div style="color:darkgreen;font-family:verdana;font-size:14px;padding-bottom:20px;"> <b> Start a new chat with Nex </b> </div> </br> <div style="font-family:verdana;font-size:15px;display:block;height:450px;overflow:auto;"> <% for line in @chatLines do %> <% if line.include? "nex::" %> <table width=90%> <tr> <td width=70% style="color:white;background-color:#2E86C1;padding:10px;"> <%= line.split("nex::")[1] %> </td> <td width=30%> </td> </tr><tr height=2px></tr> </table> <% end %> <% if line.include? "usr::" %> <table width=97%> <tr> <td width=30%> </td> <td width=70% style="color:white;background-color:darkgreen;padding:10px;"> <%= line.split("usr::")[1] %> </td> </tr><tr height=2px></tr> </table> <% end %> <% end %> <table width=90%> <tr> <td width=70%> <%= submit_tag 'Track it!', name: nil, class: "greenB", :style => "width: 200px;" %> </td> <td width=30%> </td> </tr><tr height=5px></tr> </table> </div> <%= form_tag({:controller=>"genai_app", :action=>"checkinpost"}, method: :post) do %> <table width=100%> <tr> <td width=80%> <%= text_field_tag :message, "", :placeholder => "Enter your message", :style => "width: 100%; font-size:17px; padding:15px;" %> </td> <td width=3%> </td> <td width=15%> <%= submit_tag 'Send Message', name: nil, class: "blueB" %> </td> <td width=3%> </td> </tr> </table> <% end %> </td> </tr> </table>进行所有这些更改后,您应该能够查看更新的应用程序,并且还应该能够通过向提示提问来调用 OCI Generative AI。
注:
-
您必须处理所有宝石及其版本,因为在某些情况下,您可能需要根据您的配置更新
Gemfile中的版本。 -
关注网络,以便 Ruby 可以从您的实例连接到所需的 gem 提供商来下载所需的 gem。
-
相关链接
确认
- 作者 -Lovelesh Saxena(首席软件工程架构师)
更多学习资源
浏览 docs.oracle.com/learn 上的其他实验室,或者通过 Oracle Learning YouTube 频道访问更多免费学习内容。此外,请访问 education.oracle.com/learning-explorer 以成为 Oracle Learning Explorer。
有关产品文档,请访问 Oracle 帮助中心。
Access OCI Generative AI Service Programmatically using Ruby on Rails Web Application
F96229-01
April 2024