注意:
- 此教程需要访问 Oracle Cloud。要注册免费账户,请参阅开始使用 Oracle Cloud Infrastructure Free Tier 。
- 它使用 Oracle Cloud Infrastructure 身份证明、租户和区间示例值。完成实验室时,请将这些值替换为特定于您的云环境的值。
使用 CI/CD 管道将 Terraform 代码从 GitLab 资料档案库连接到 OCI 租户
简介
在 Oracle Cloud Infrastructure (OCI) 或任何其他云中工作时,我们需要清楚地了解每个位置的自动化方向,而基础设施供应则需要有一个重要的自动化。
用户希望使用 Terraform 预配云基础设施,并且在涉及某些代码时,他们希望在代码存储库中使用敏捷开发实践来管理云基础设施,并以完整的 DevOps 方法进行管理。在使用初始代码设置存储库后,任何开发人员都可以提交新代码,并部署从连续集成和持续交付/部署 (CI/CD) 管道触发的新基础设施。
在本教程中,我们将了解以敏捷的开发方式配置 Terraform 自动化托管基础设施管道所需的所有步骤,并使用 GitLab 作为存储库提供商。同样的过程也适用于 GitHub 和 Azure DevOps 等其他提供商。
目标
-
使用敏捷开发实践配置 Terraform 自动化托管基础设施管道。
-
为用户设置 API 密钥,GitLab 代理将基于该密钥连接到 OCI 租户。
-
设置 GitLab 资料档案库,其中将推送所有 Terraform 代码,并设置用于获取 OCI 租户详细信息的初始 Terraform 代码。
-
设置基于 YAML 的 CI/CD 管道,该管道将在资料档案库中推送和批准新代码后立即触发 Terraform 操作。
先决条件
-
允许在 Oracle Cloud Infrastructure Identity and Access Management (OCI IAM) 中访问 OCI 和策略。用户应有权访问他们希望使用 Terraform 代码创建或更新的相应资源。
-
访问 GitLab 以创建资料档案库、后续管道和代码推送。
-
对软件开发敏捷方法的基本理解。
任务 1:设置 API 密钥
-
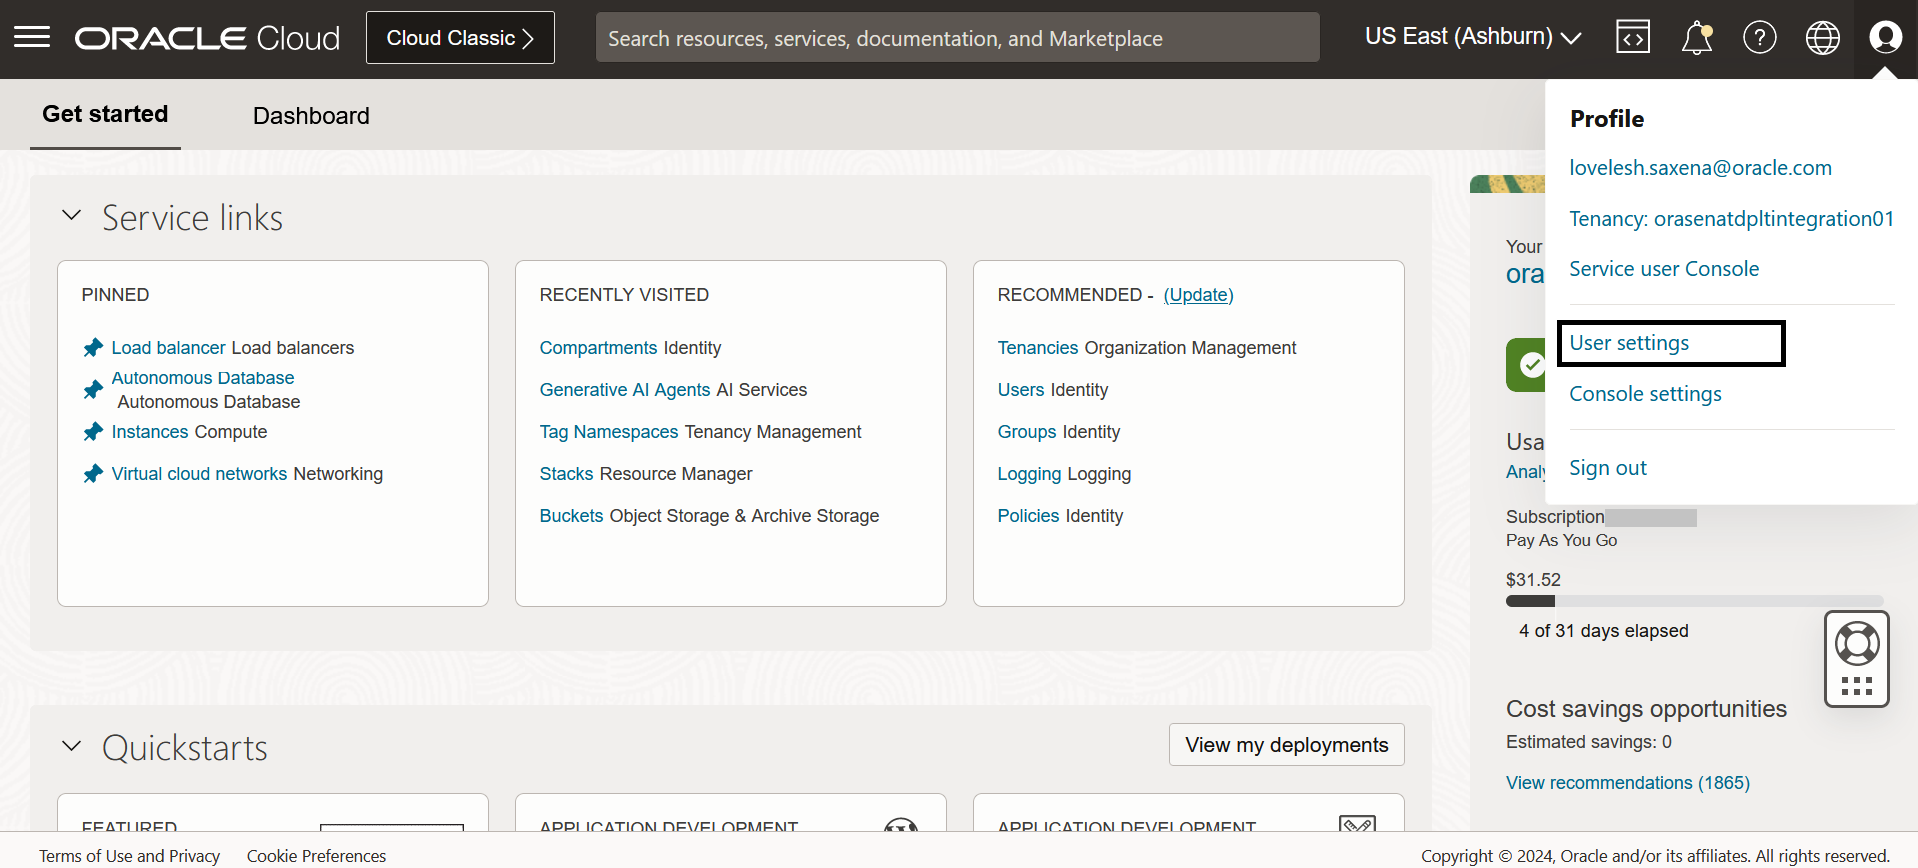
使用服务账户或管理员用户登录 OCI 租户,然后转到用户设置。

或者
您也可以从 OCI IAM 控制台转至用户。确保此用户具有在 OCI 上创建或更新基础设施所需的所有访问权限。
-
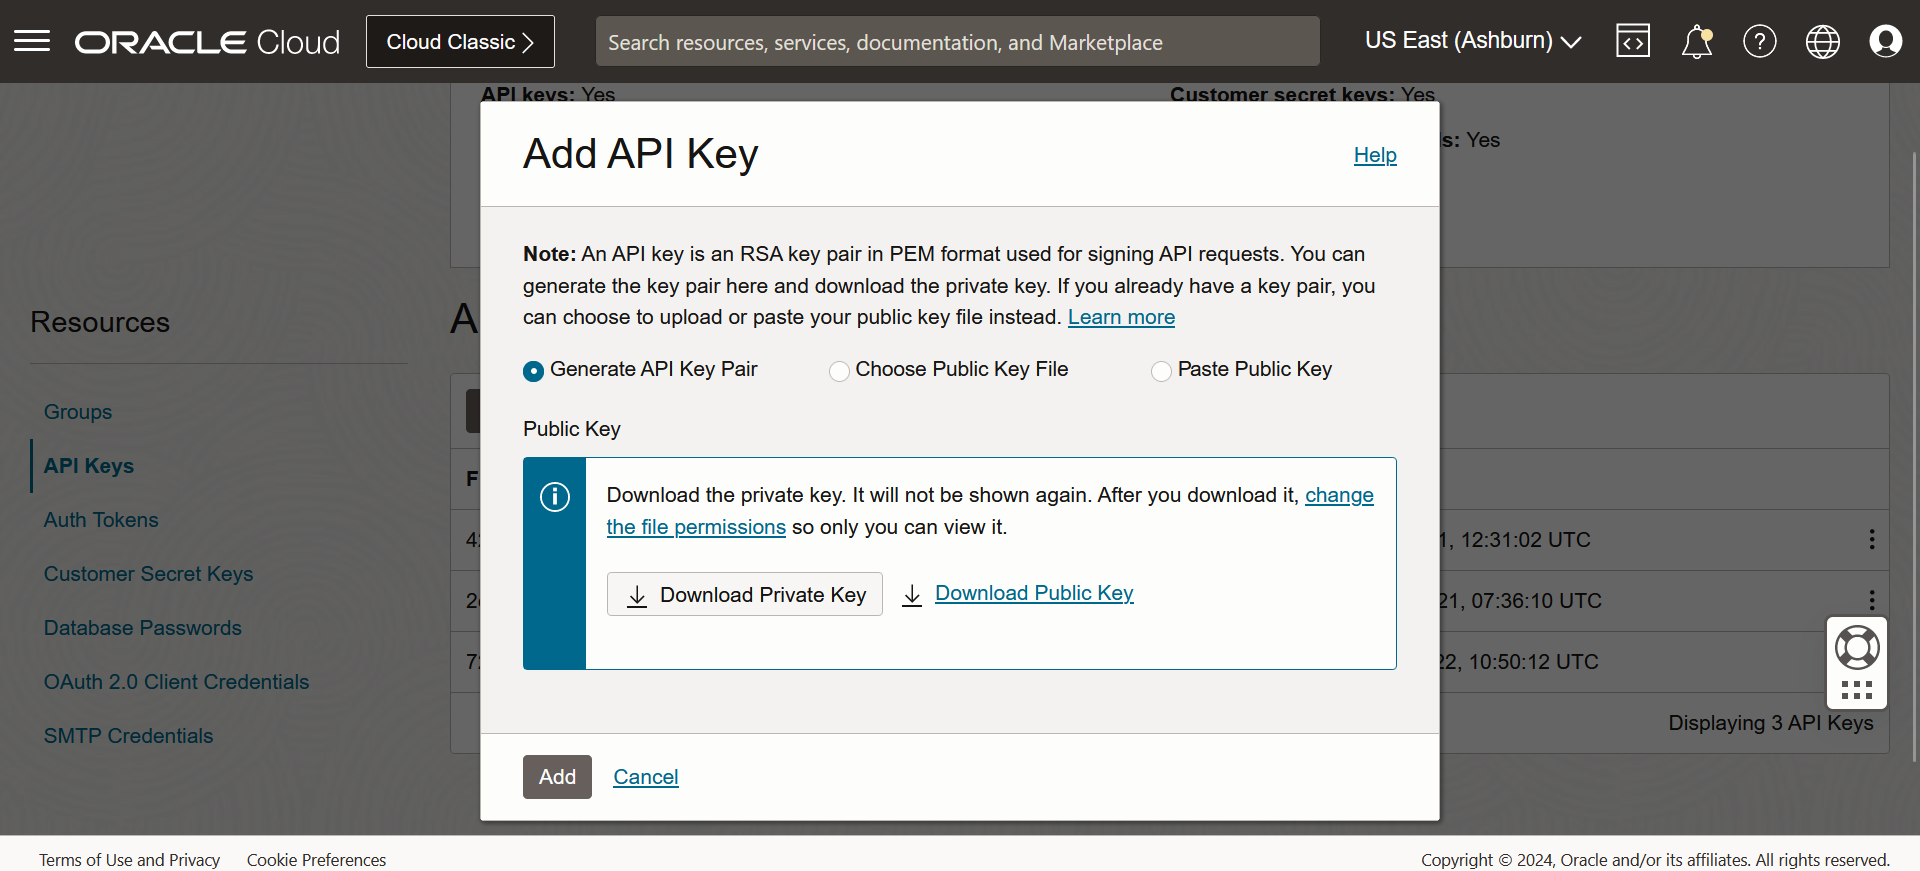
转到用户的资源部分,单击 API 密钥和添加 API 密钥。在这里,您可以选择下载新的公钥和私钥,上传您的公钥或粘贴您的公钥。

-
选择任一选项后,将密钥保存在方便的位置,然后保存配置文件,如下图中所示。使用 Terraform 连接到租户时,您需要此配置文件和私有密钥。

任务 2:使用 Terraform 代码设置 GitLab 资料档案库
-
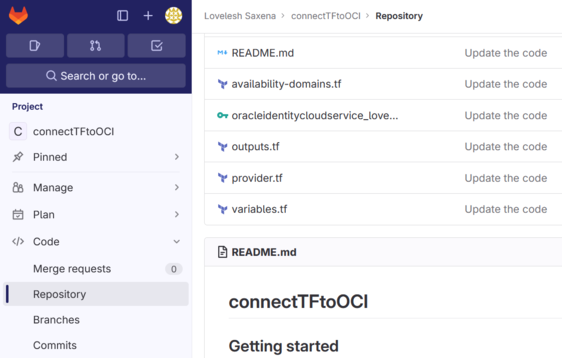
在 GitLab 上创建资料档案库,我们将使用此资料档案库推送 Terraform 代码。

-
开发连接到租户所需的 Terraform 代码。在本教程中,我们将使用 Terraform 代码连接到租户并获取可用性域的详细信息。
-
provider.tf.provider "oci" { tenancy_ocid = var.tenancy_ocid user_ocid = var.user_ocid fingerprint = var.fingerprint private_key_path = var.private_key_path region = var.region } terraform { required_providers { oci = { version = ">= 3.0.0" } } } -
variables.tf.variable "tenancy_ocid" { type = string default = "ocid1.tenancy.oc1..aaaaaaaacko" } variable "user_ocid" { type = string default = "ocid1.user.oc1..aaaaaaaafelq" } variable "fingerprint" { type = string default = "72:d4:6c:f8:89" } variable "private_key_path" { type = string default = "oracleidentitycloudservice_user_key.pem" } variable "region" { type = string default = "us-ashburn-1" } -
oracleidentitycloudservice_user_key.pem.content of your private key -
availability-domains.tf.data "oci_identity_availability_domains" "ads" { #Required compartment_id = var.tenancy_ocid } -
outputs.tf.# The "name" of the availability domain to be used for the compute instance. output "name-of-first-availability-domains" { value = data.oci_identity_availability_domains.ads.availability_domains[0].name }
注:使用已保存配置文件中的值在
variables.tf文件中输入参数值。 -
任务 3:根据代码合并设置基于 YAML 的 CI/CD 管道和触发器
-
将 Terraform 代码推送到 GitLab 存储库后,我们来创建管道并使用
yaml文件进行配置。
-
在系统信息库中创建
.gitlab-ci.yml文件并添加以下代码。build-job: stage: build script: - echo "Hello Gitlab" - uname -r - yum install -y yum-utils - yum-config-manager --add-repo https://rpm.releases.hashicorp.com/RHEL/hashicorp.repo - sed -i 's/$releasever/7/g' /etc/yum.repos.d/hashicorp.repo - yum -y install terraform - pwd - ls -ltra - terraform init - terraform plan - terraform apply -auto-approve test-job1: stage: test script: - echo "This job tests something" test-job2: stage: test script: - echo "This job tests something, but takes more time than test-job1." - echo "After the echo commands complete, it runs the sleep command for 20 seconds" - echo "which simulates a test that runs 20 seconds longer than test-job1" - sleep 5 deploy-prod: stage: deploy script: - echo "This job deploys something from the main branch." environment: dev注:
- 所有 Terraform 命令
init、plan和apply都在构建阶段执行,但您可以在所需的阶段相应地使用它们。 - 此演示
yml文件基于运行 Oracle Linux 7 的 GitLab 代理。根据您的代理 OS 和网络可用性检查 Terraform 模块的可用性。
- 所有 Terraform 命令
相关链接
确认
- 作者 -Lovelesh Saxena(首席软件工程架构师)
更多学习资源
浏览 docs.oracle.com/learn 上的其他实验室,或者通过 Oracle Learning YouTube 频道访问更多免费学习内容。此外,请访问 education.oracle.com/learning-explorer 以成为 Oracle Learning Explorer。
有关产品文档,请访问 Oracle 帮助中心。
Connect Terraform Code from a GitLab Repository to an OCI Tenancy using a CI/CD Pipeline
F94452-01
March 2024
Copyright © 2024, Oracle and/or its affiliates.