附註:
- 此教學課程需要存取 Oracle Cloud。若要註冊免費帳戶,請參閱開始使用 Oracle Cloud Infrastructure Free Tier 。
- 它使用 Oracle Cloud Infrastructure 憑證、租用戶及區間的範例值。完成實驗室時,請以雲端環境特有的值取代這些值。
使用 Oracle Cloud Infrastructure 中的 Pulumi 部署運算執行處理和 VCN
簡介
在本教學課程中,我們將使用 Pulumi 部署運算執行處理和虛擬雲端網路 (VCN)。藉由 Pulumi 的簡易性與 Oracle Cloud Infrastructure (OCI) 健全的基礎架構,您將學習以輕鬆的方式自動化部署程序。您將瞭解如何輕鬆部署和管理 OCI 資源,解除鎖定雲端部署中的新可能性。
目標
- 在 OCI 中使用 Pulumi Infrastructure 作為程式碼 (IaC) 工具部署運算執行處理和 VCN 資源。
必要條件
- 安裝並設定 Pulumi、OCI 提供者及設定 OCI 的環境變數。如需詳細資訊,請參閱在 Oracle Cloud Infrastructure 上安裝並設定 Pulumi Infrastructure as Code 。
作業 1:建立 VCN
使用 Pulumi 部署 VCN。
-
為 Pulumi 專案建立新目錄。
-
開啟終端機或指令提示。
-
瀏覽到您要建立 Pulumi 專案的目錄。您可以使用
cd指令變更目錄。 -
為您的專案建立一個新目錄。
舉例而言:
mkdir my-oci-project
cd my-oci-project
-
-
執行下列命令,使用 OCI Python 樣板建立新的 Pulumi 專案。在這裡,我們將使用 python 作為脈衝的程式設計語言,但您可以使用您選擇的任何支援程式設計語言。
pulumi new oci-python -
Pulumi 會要求您設定專案。輸入必要的資訊,例如您的專案名稱、專案說明和堆疊名稱,然後按一下輸入。
舉例而言:
Project name: my-oci-project Project description: This is an example of OCI Compute and VCN deployment Stack name: Dev -
複製和自訂程式碼。
-
Pulumi 會在您的專案目錄中建立名為
__main__.py的基本 Python 檔案。 -
使用文字編輯器或 IDE VS Code 開啟此檔案。
-
使用 Pulumi 的 Python SDK 撰寫您的 OCI 基礎架構程式碼,並定義您的 VCN、子網路、安全群組等等。例如,將提供的 Python 程式碼複製到名為
__main__.py的新檔案中,然後使用實際的 OCI 區間 ID 和顯示名稱取代預留位置值來自訂程式碼。這些變更可確保您的資源在正確的區間中建立,並且有意義的名稱。"""A OCI Python Pulumi program""" import pulumi import pulumi_oci as oci from pulumi_oci import core from pulumi_oci import identity # Create a New VCN test_vcn = oci.core.Vcn("test_vcn", compartment_id="ocid1.compartment.oc1...xx...xxx", cidr_block="10.0.0.0/16", display_name="ocinetwork", dns_label="ocinetwork" ) #Code block for InternetGateway test_internet_gateway = oci.core.InternetGateway("test_internet_gateway", compartment_id="ocid1.compartment.oc1...xx...xxx", vcn_id=test_vcn.id, enabled="true", display_name="internet_gateway") #Code block for route table and attach to IG test_route_table = oci.core.RouteTable("test_route_table", compartment_id="ocid1.compartment.oc1...xx...xxx", vcn_id=test_vcn.id, display_name="route_table_ig", route_rules=[oci.core.RouteTableRouteRuleArgs( network_entity_id=test_internet_gateway.id, destination="0.0.0.0/0", destination_type="CIDR_BLOCK", )]) #Code block for security list security_list_resource = oci.core.SecurityList("securityListResource", compartment_id="ocid1.compartment.oc1...xx...xxx", vcn_id=test_vcn.id, display_name="sc_list", egress_security_rules=[oci.core.SecurityListEgressSecurityRuleArgs( destination="0.0.0.0/0", protocol="all", destination_type="CIDR_BLOCK", stateless=False, )], ingress_security_rules=[ oci.core.SecurityListIngressSecurityRuleArgs( protocol="6", source="0.0.0.0/0", description="Sor SSH", tcp_options=oci.core.SecurityListIngressSecurityRuleTcpOptionsArgs( max=22, min=22, ), source_type="CIDR_BLOCK", stateless=False, ), oci.core.SecurityListIngressSecurityRuleArgs( protocol="1", source="0.0.0.0/0", description="ICMP", icmp_options=oci.core.SecurityListIngressSecurityRuleIcmpOptionsArgs( type=3, code=4, ), source_type="CIDR_BLOCK", stateless=False, ) ] ) # Create a Public Subnet test_public_subnet = oci.core.Subnet("test_public_subnet", cidr_block="10.0.0.0/24", compartment_id="ocid1.compartment.oc1...xx...xxx", vcn_id=test_vcn.id , display_name="public_subnet", dns_label="publicsubnet", prohibit_internet_ingress="False", prohibit_public_ip_on_vnic="False", route_table_id=test_route_table.id, security_list_ids=[security_list_resource.id]) # Create a Private Subnet test_Private_subnet = oci.core.Subnet("test_private_subnet", cidr_block="10.0.1.0/24", compartment_id="ocid1.compartment.oc1...xx...xxx", vcn_id=test_vcn.id , display_name="private_subnet", dns_label="privatesubnet", prohibit_internet_ingress="true", prohibit_public_ip_on_vnic="true")
此程式碼會佈建 OCI 中的 VCN 及其關聯的資源。它會建立網際網路閘道、將路由表連附至路由,以及設定控制網路流量的安全清單。此外,它還會在 VCN 內建立公用子網路和專用子網路,每個子網路都有特定的網路組態,例如 CIDR 區塊和 DNS 標籤。它可確保專用子網路禁止對執行處理進行網際網路存取和公用 IP 指定,進而增強網路安全性。
-
-
部署 VCN 程式碼。
-
執行下列命令以部署 VCN 資源。
pulumi up -
Pulumi 將會偵測程式碼中定義的資源,並提示您確認部署。複查變更,並在出現提示時輸入
yes以繼續。
-
-
部署完成後,請確認已在 OCI 中佈建您的 VCN 和其他資源。您可以檢查 OCI 主控台,或使用 Oracle Cloud Infrastructure 命令行介面 (OCI CLI) 列出區間中的資源。
作業 2:建立運算執行處理
讓我們透過使用 Pulumi 將 OCI Compute 執行處理新增至您現有的 VCN,擴展 OCI 部署。
-
若要存取 Pulumi 專案,請瀏覽至包含 Pulumi 專案的目錄並開啟
__main__.py檔案。 -
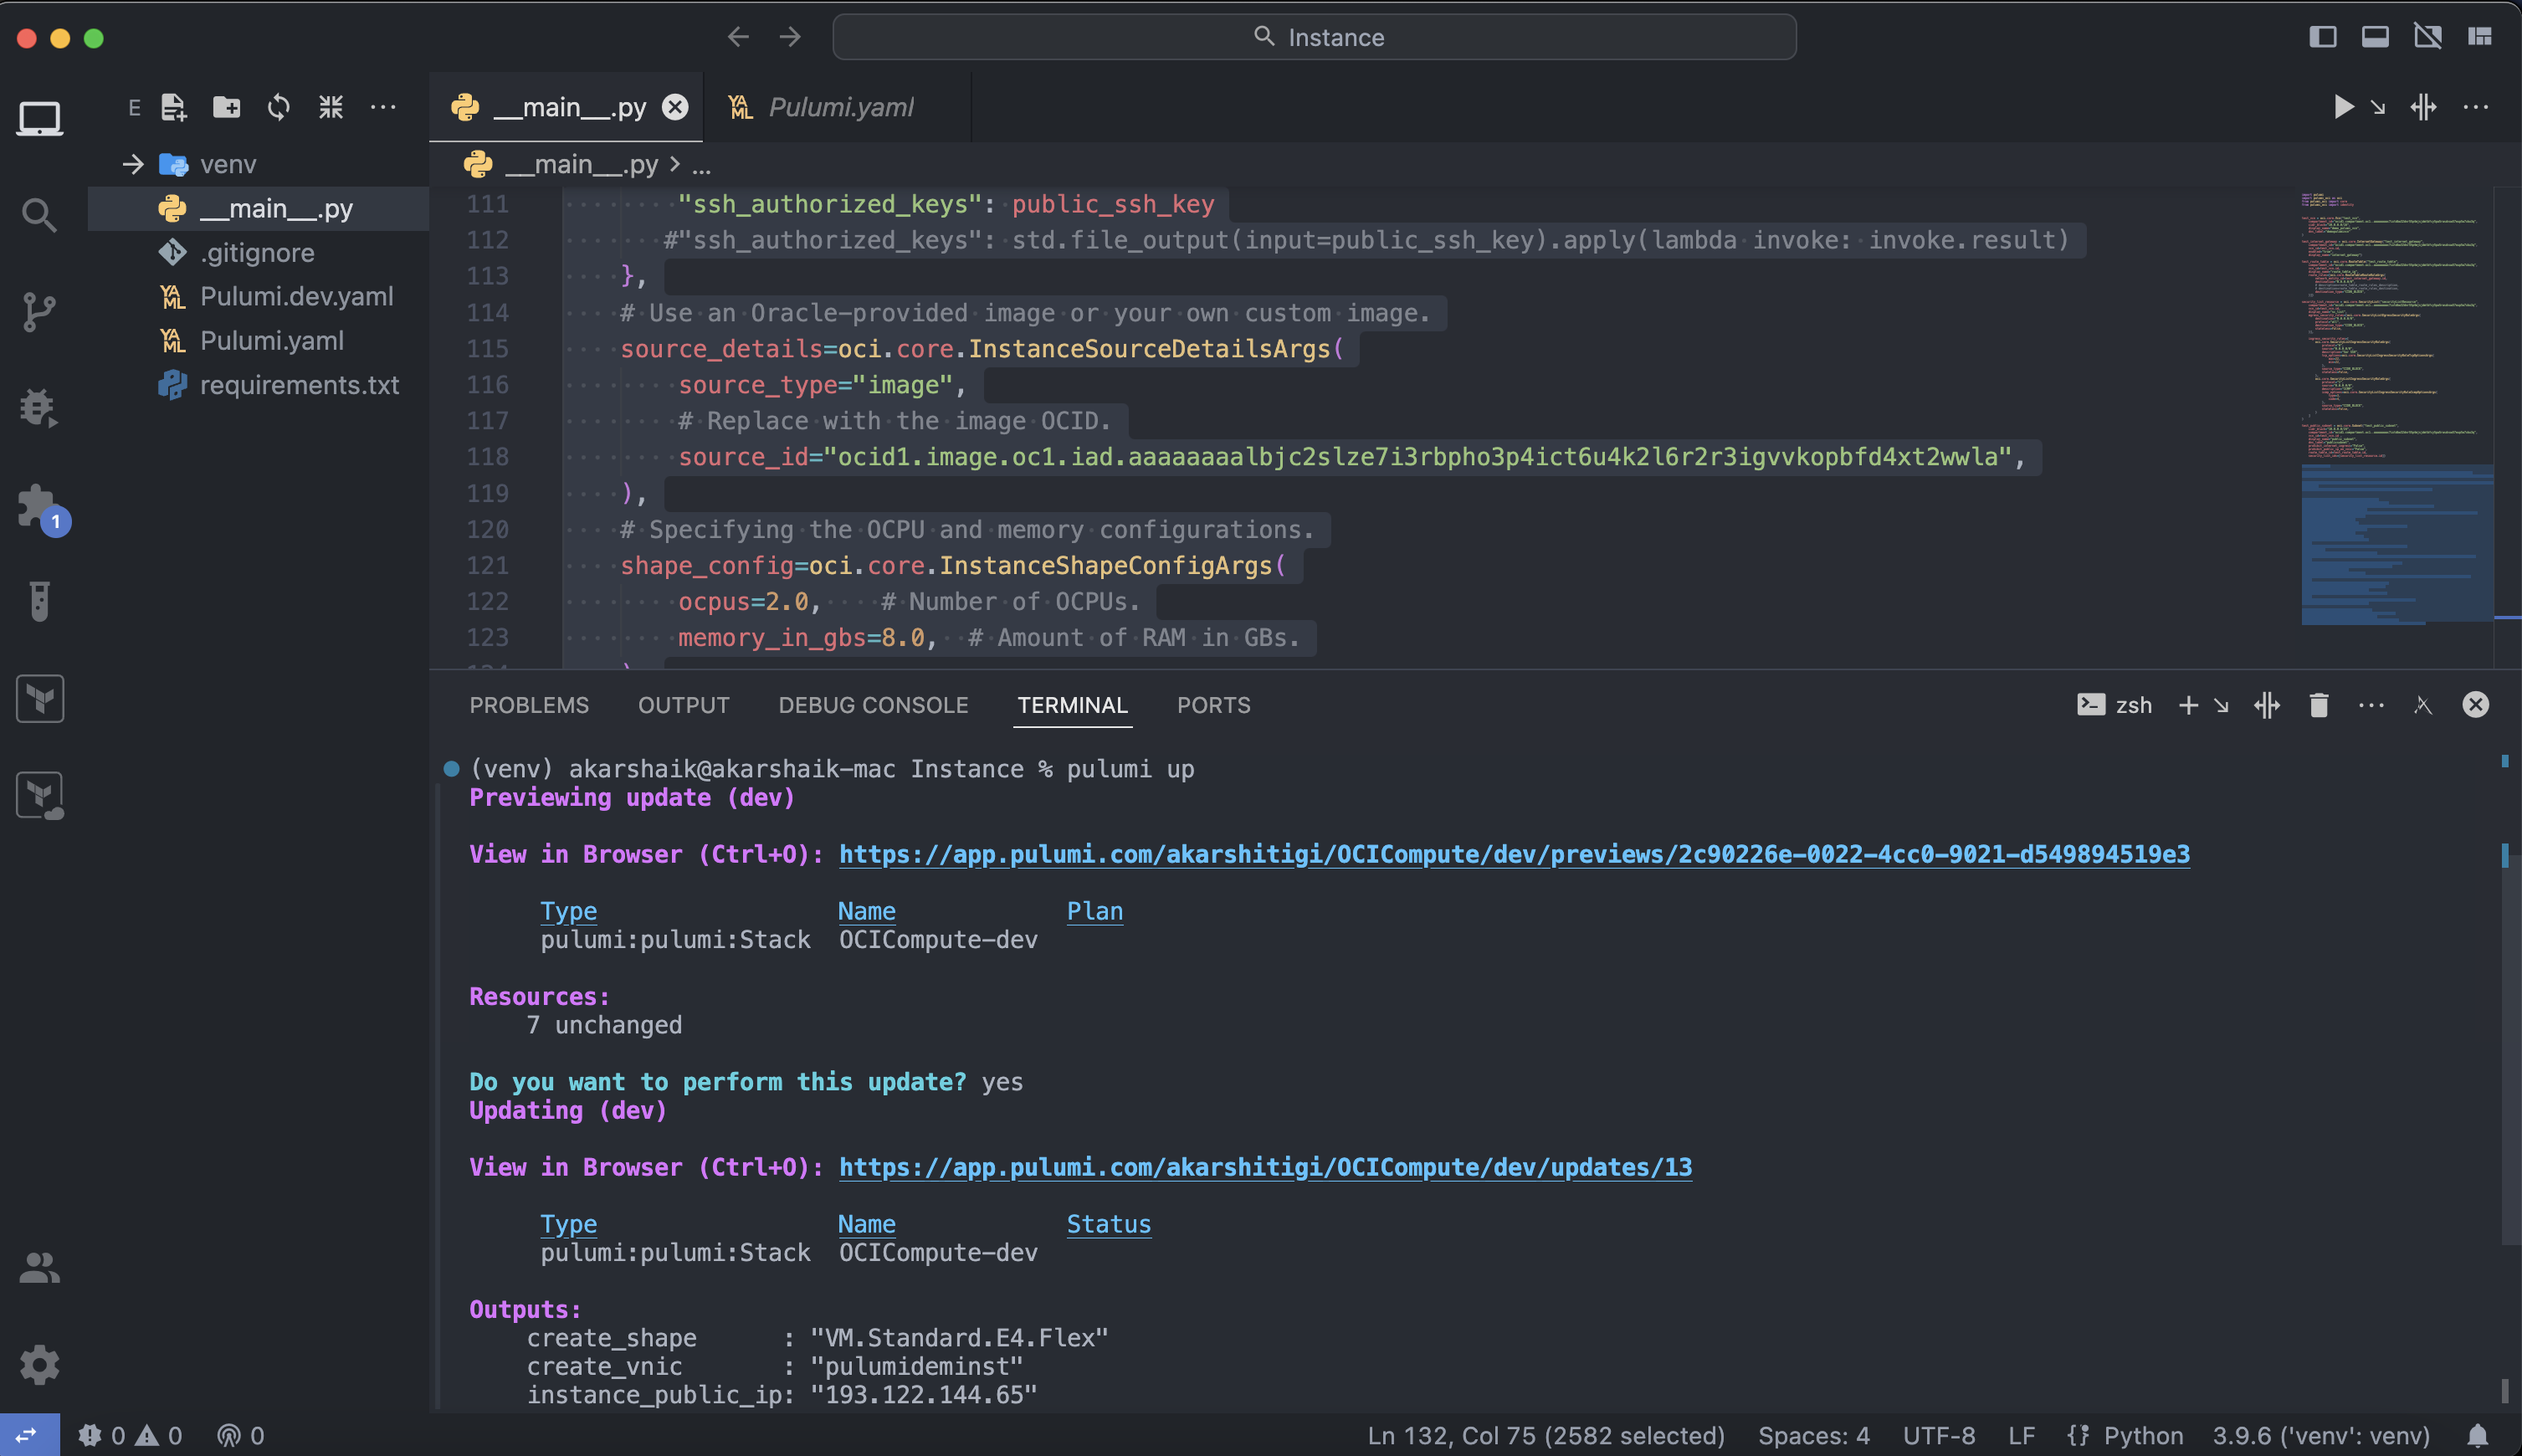
複製下列程式碼並將它貼到
__main__.py檔案中,以便在您現有的 VCN 部署程式碼之後進行更新。# Create a Compute Instance compartment_id = "ocid1.compartment.oc1..xxxxxx" test_availability_domains = oci.identity.get_availability_domains(compartment_id="ocid1.compartment.oc1.xxx") public_ssh_key = "Copy and Paste the Public SSH Key" instance = oci.core.Instance("my-vm-instance", # Replace with your desired availability domain. availability_domain=test_availability_domains.availability_domains[0].name, # Replace with your compartment ID. compartment_id="ocid1.compartment.oc1..xxxxxxxx", # Using VM.Standard.E4.Flex shape. shape="VM.Standard.E4.Flex", # Replace with your subnet ID. create_vnic_details=oci.core.InstanceCreateVnicDetailsArgs( assign_private_dns_record=True, assign_public_ip="true", display_name="pulumideminst", subnet_id=test_public_subnet.id, ), # Metadata for the instance, including SSH keys for access. metadata={ "ssh_authorized_keys": public_ssh_key #"ssh_authorized_keys": std.file_output(input=public_ssh_key).apply(lambda invoke: invoke.result) }, # Use an Oracle-provided image or your own custom image. source_details=oci.core.InstanceSourceDetailsArgs( source_type="image", # Replace with the image OCID. source_id="ocid1.image.oc1.iad.aaaaaaaalbjc2slze7i3rbpho3p4ict6u4k2l6r2r3igvvkopbfd4xt2wwla", ), # Specifying the OCPU and memory configurations. shape_config=oci.core.InstanceShapeConfigArgs( ocpus=2.0, # Number of OCPUs. memory_in_gbs=8.0, # Amount of RAM in GBs. ), # Additional arguments like display name, can be specified here. display_name="pulumidemo_instance",) # Exporting the public IP of the instance. pulumi.export('instance_public_ip', instance.public_ip), pulumi.export('create_shape', instance.shape) pulumi.export('create_vnic', instance.create_vnic_details) pulumi.export('create_vnic', instance.create_vnic_details["display_name"])將
ocid1.compartment.oc1.xxxxxxx取代為您的區間 ID、將VM.Standard.E4.Flex取代為想要的執行處理資源配置、將ocid1.image.oc1.iad.xxxxxxx取代為想要的映像檔 ID,並將YOUR_SSH_PUBLIC_KEY取代為您的 SSH 公用金鑰。 -
將變更儲存至
__main__.py,並使用 Pulumi 命令行介面部署更新的堆疊。pulumi up -
部署之後,請確認您的運算執行處理是否已在 VCN 內順利佈建。您可以勾選 OCI 主控台,或使用 OCI CLI 列出區間中的執行處理。
-
您現在可以透過 SSH 存取 OCI Compute 執行處理。確定您已設定存取所需的安全群組和規則。

相關連結
認可
- 作者 - Akarsha I K (Cloud Architect)、Maninder Flora (Cloud Architect)
其他學習資源
瀏覽 docs.oracle.com/learn 的其他實驗室,或前往 Oracle Learning YouTube 頻道存取更多免費學習內容。此外,請造訪 education.oracle.com/learning-explorer 以成為 Oracle Learning Explorer。
如需產品文件,請造訪 Oracle Help Center 。
Deploy Compute Instance and VCN using Pulumi in Oracle Cloud Infrastructure
F99047-01
May 2024