2
Installing WebDB 2.2 on Windows NT
This chapter contains the following sections:
2.1 Prerequisites
On Windows NT, you can install WebDB into a local or remote Oracle 8.0.5, 8.0.6, or 8i database. If you are installing WebDB into Oracle 7.3.4, the Oracle 7.3.4 database must be local.
If you are installing in an Oracle Home for the 7.3.4, 8.0.5, or 8.0.6 database, the install program will ask you shut down all Oracle services during the installation process, and restart them afterwards.
Before you install WebDB into Oracle 7.3.4, 8.0.5, 8.0.6, or 8i on Windows NT:
- Review the Release Notes that are provided on your product CD.
- You must have the SYS user password on the database where you plan to install WebDB 2.2.
- The database where you plan to install WebDB must be up and running.
- You must have administrative privileges on the Windows NT machine where you are installing WebDB.
- You must ensure that the
MAX_ENABLED_ROLES parameter is in your INIT.ORA file and set to at least 25.
- You should have tablespaces available with sizes of at least 25-30 MB each. These tablespaces will be used as Temporary and Default tablespaces by the schema in which you install WebDB.
- For each Web site you create with WebDB, you should have a tablespace of at least 10 MB.
In addition, if you are installing WebDB into Oracle8i on Windows NT:
- You must install WebDB 2.2 into a non-8i Oracle Home: for example, an Oracle Home where you have installed an Oracle product other than Oracle8i. If a non-8i Oracle Home does not already exist, the installation program allows you to create one during the installation process.
- You must add a TNS names alias that points to the database where you are installing WebDB 2.2. You add the alias to the
tnsnames.ora file in the new Oracle Home. If the TNS names alias does not already exist, the installation program will allow you to create it during the installation process.
Note:
The installation program verifies that the above two conditions are met.
|
If you are installing WebDB into Oracle 7.34 on Windows NT:
- You must install WebDB into an existing Oracle Home for the 7.3.4 database that contains SQL*Loader.
2.2 WebDB on Windows NT Install
The Oracle WebDB 2.2 install program is designed to allow installation of all WebDB components or installation of selected components. Complete the preliminary steps below before referring to the section that applies to your environment to continue the install process:
2.2.1 Preliminary Steps
The steps in this section are common for both a Windows NT typical install and a Windows NT custom install.
To complete the preliminary steps for installing Oracle WebDB on Windows NT:
- Insert the CD labeled WebDB into your CD-ROM drive.
- From the Start menu on the NT desktop, choose Run.
- Type D:\NT\SETUP.EXE (substitute the appropriate letter of your CD-ROM drive for "D"), then click OK.
- In the Oracle Installation Settings window, type the information requested for each field, then click OK. If you have questions about any field in this window or any other installation window, click Help.

- In the Company Name field, type the name of your company.
An Oracle Home corresponds to the environment in which an Oracle product runs. You typically define an Oracle Home for an Oracle database during installation.
IMPORTANT:
If you are installing on Oracle8i, you must install WebDB into an Oracle Home that is different from the Oracle Home for the 8i database.
The Oracle Home can be one where you have installed an Oracle product other than Oracle8i or a new Oracle Home. Go to Step 5 for information about creating a new Oracle Home.
If you are installing WebDB for the first time in an Oracle Home for the 7.3.4, 8.0.5, 8.0.6 database, the install program will ask you shut down all Oracle services during the installation process, then restart them.
|
- To create a new Oracle Home, type a new name in the Name field. The name can be anything you choose. Then, you must type a path to the new home in the Location field. If the directory doesn't exist, the installation program will create it.
The installation program also automatically creates the new home and installs all required files (for example, SQL*Plus and SQL*Loader).
- Click OK. In the next screen, choose a Typical or Custom install.

- Click OK. The following message appears if you are trying to install in the same Oracle Home location as the Oracle 8.0.5 or 7.3.4 database installation.
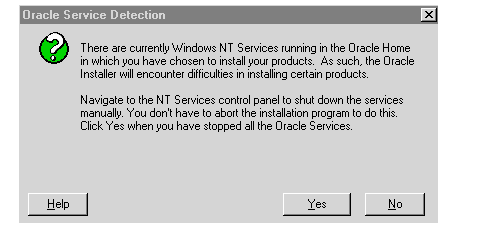
- Without stopping the installation, navigate to the Windows NT desktop, click Start, Settings, Control Panel, then Services. You should see a window similar to the following:
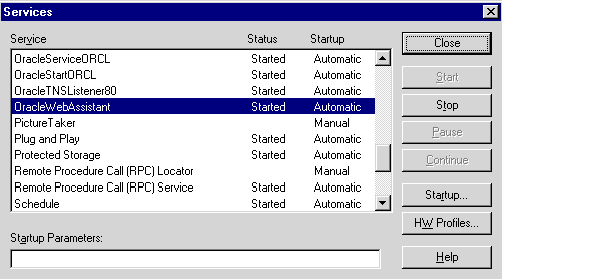
Highlight an Oracle Service and click the Stop button. Repeat this step for every Oracle Service that is currently started.
- Navigate back to the screen shown in Step 7 and click Yes to continue installation.
- The installation program continues installing required dependencies into the Oracle Home. When it is finished, the following message appears:
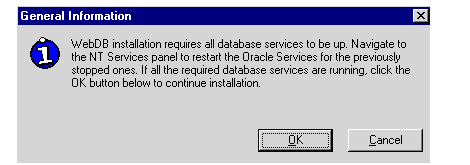
- Without stopping the installation, navigate back to the Services window shown in Step 8.
- Highlight an Oracle Service in the Services list, then click Start to restart it. Repeat this step until you have restarted all stopped Oracle services.
- Navigate back to the screen shown in Step 10 and click OK to continue installation.
2.2.2 WebDB on Windows NT Typical Install
Make sure that you have performed the steps in Section 2.2, "WebDB on Windows NT Install" before continuing with this section.
To perform a typical install of Oracle WebDB on Windows NT:
- If you selected Typical Install in Step 6, you must specify the database where you are installing WebDB.
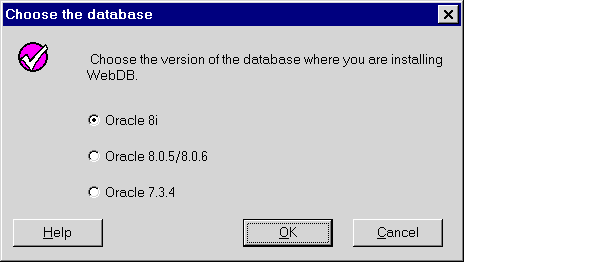
- Click Oracle 8i if you are installing WebDB into a local or remote version of the Oracle8i database.
- Click Oracle 8.0.5 or 8.0.6 if you are installing WebDB into a local or remote version of the Oracle database.
- Click Oracle 7.3.4 if you are installing WebDB into a local version of the Oracle 7.3.4 database.
- Click OK. If you selected Oracle 8.0.5 or 8.0.6 in the previous step, specify whether the database is local or remote.

- Click OK.
- The following window displays if you selected:
- Oracle 8.0.5 or 8.0.6 in Step 1 and Local in Step 2 or
- Oracle 7.3.4 in Step 1

- The install window displays an additional field, TNS Names Alias if you selected:
- Oracle 8i in Step 1 or
- Oracle 8.0.5 or 8.0.6 in Step 1 and Remote in Step 2
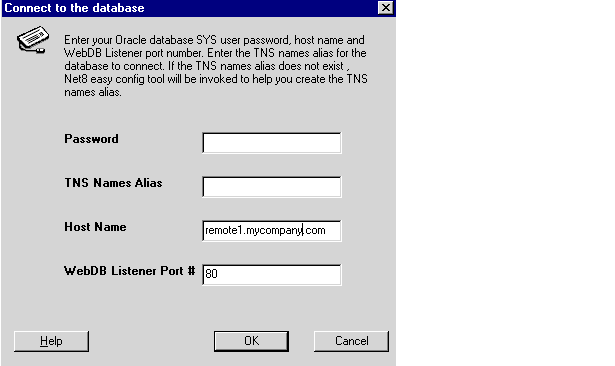
TNS Names Alias is a connect string to a database. It is required if you are installing WebDB into:
- A remotely installed 8.0.5 or 8.0.6 database (that is, a database with a different Oracle Home than the Oracle Home where WebDB will be installed)
- The Oracle8i database (always remote)
If you have not already defined a TNS names alias to the database in your tnsnames.ora file, you can create a new one by typing a new name in the TNS Names Alias field; for example, newalias.
Note:
Make a note of this name. The installation program will start the Oracle Net8 Easy Configuration wizard to help you create the new TNS names alias using this name.
|
- Click OK. The following message displays if you typed:
Click OK. The following message displays if you typed:
- An incorrect TNS names alias to a remote database, or
- A nonexistent TNS names alias in the previous window with the intention of using the Oracle Net8 Easy Configuration wizard to create a new TNS names alias using this name
 .
.
- If the message does not display, this means you already have a TNS names alias configured for your database. Go to Step 19 to continue the installation.
- Click OK. The first window of the Net8 Easy Configuration wizard displays. The wizard guides you through the steps for creating a new TNS names alias or modifying an existing one. To do so, the wizard will modify the
tnsnames.ora file for the Oracle Home you specified earlier in Step 4.
- If you have added comments to the
tnsnames.ora file or installed WebDB into a new Oracle Home, you may see the following message warning that this information may be reorganized or deleted if you continue.
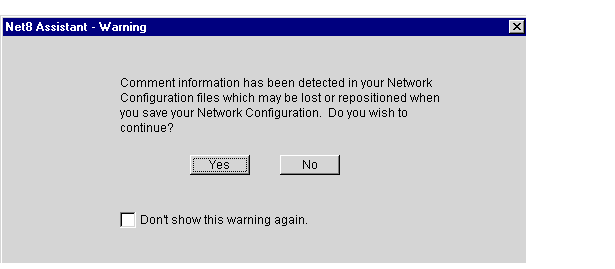
- Click Yes to continue.
- (Not recommended) Click No to stop the configuration assistant and create a TNS names alias manually. You can create a TNS names alias manually by following the instructions in "Creating a TNS Names Alias".
- In the next window, ensure Add New Service is selected. Choosing this option enables you to create a new TNS names alias for the database.

- In New Service Name, type the name of the TNS names alias you specified in the TNS Names Alias field in Step 5.
- Click Next. In the next window, choose the networking protocol that you want to use to communicate with the database.
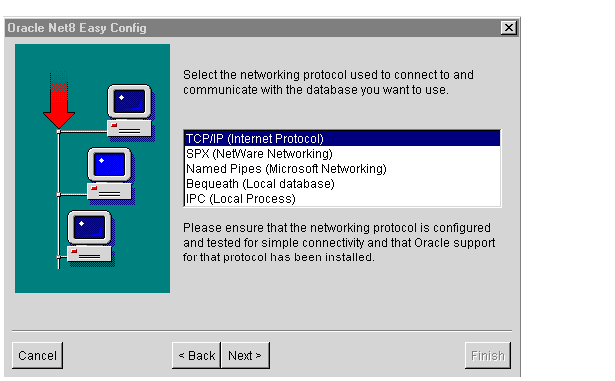
- Click Next. The contents of the next window change depending on your selection in the previous step. For example, if you selected TCP/IP (Internet Protocol) in the previous step, the following window displays:

- Type the host name of the machine where the database is installed and a database port number.
Note This port is for the database and is different from the Listener port name you specified in a previous installation window. Specify 1521 as the database port number unless you know it has changed.
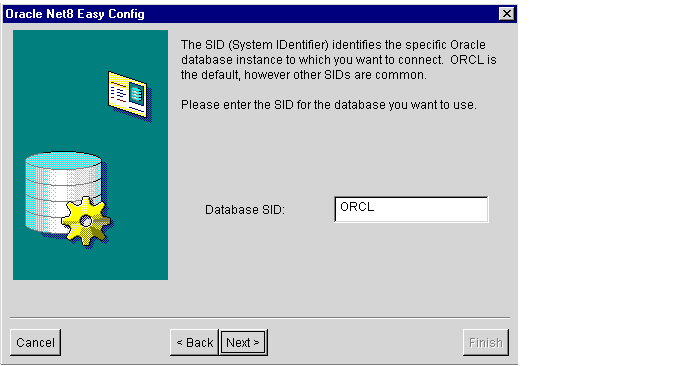
- Click Next. In the next window, type the System Identifier (SID) for the database where you are installing WebDB.
IMPORTANT:
In Windows NT, make sure that the Oracle database SID is for the database into which you are installing Oracle WebDB. If the SID you enter is for another database, connection to the appropriate database may fail.
|
Note:
The SID is shown in the INSTANCE_NAME parameter in the INITSID.ORA database initialization parameter file. In most cases, the Database SID is ORCL.
|
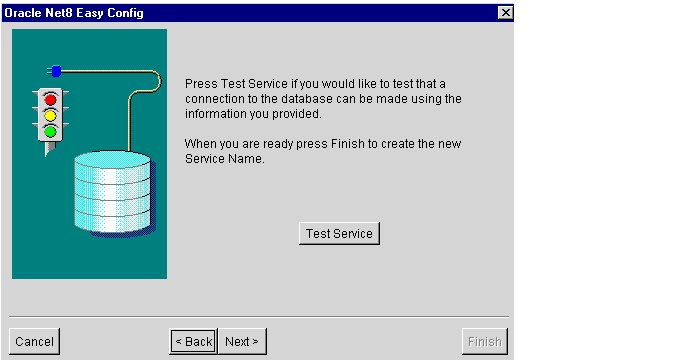
- Click Next. In the next window, click Test Service to test the new TNS names alias you created.
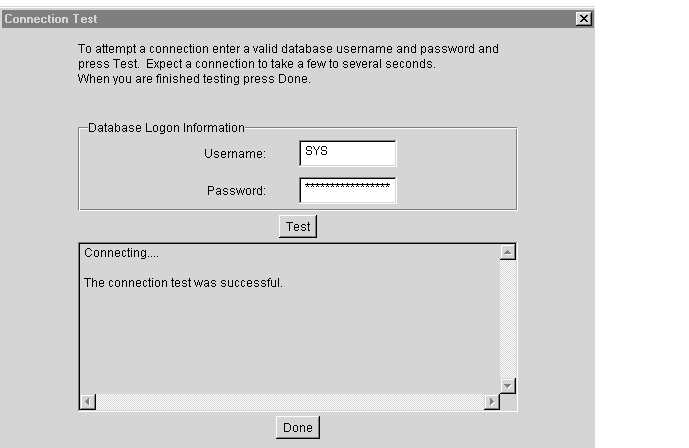
- Type the SYS user name and password for the database where you are installing WebDB and click Test. If the TNS names alias works correctly, you should see a success message similar to the following:
- Click Done, then Next.
- Click OK. In the last Net8 Easy Configuration window, click Finish.
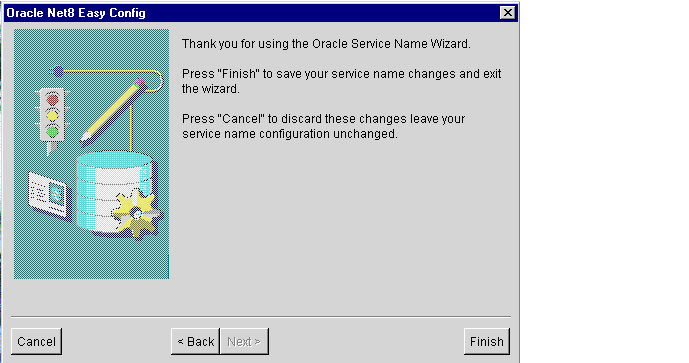
- The following message asks you to confirm that you have successfully created and tested the TNS names alias.

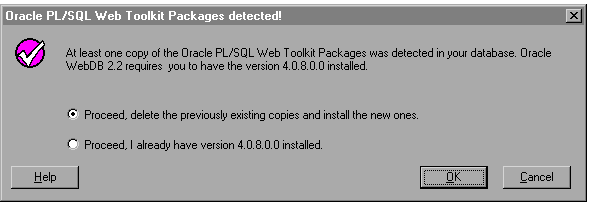
- Click OK. If the install program detects a version of the PL/SQL Web Toolkit, the following window displays.
- In the next window, specify the database schema where you will install WebDB 2.2 and the tablespaces that will be used by this schema.
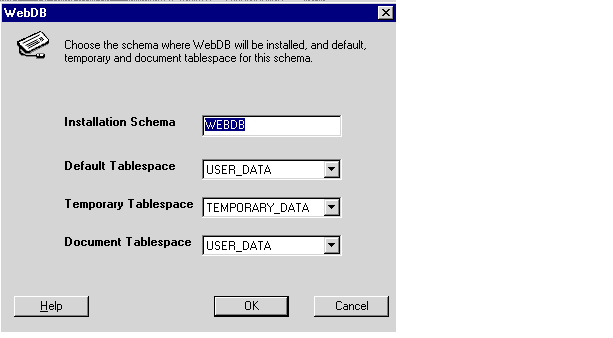
- The Installation Schema is the database schema where WebDB will be installed. You must specify a schema that does not already exist. The installation program will automatically create the new schema for you.
You type the installation schema name to log on to WebDB for the first time.
- The Default Tablespace is used to store any database objects or components created by the WebDB user.
The install program attempts to choose the best tablespace to use for WebDB. If you don't have one of the following default tablespaces in your database, the install program uses the SYSTEM tablespace:
TOOLS
USER_DATA
USER
USERS
USR_DATA
USERDATA
USR
- The Temporary Tablespace is used for creation of temporary table segments for operations performed by the WebDB user such as sorting table rows.
If you don't have one of the following temporary tablespaces in your database, the install program will create temporary storage in the SYSTEM tablespace:
TEMP_DATA
TEMPORARY_DATA
TEMP
TEMPORARY
The Document Tablespace is used to store any items uploaded onto a WebDB Web site. These item types can include files, images, folders, and stored procedures.
Note The Document Tablespace will gradually fill as end users add items to WebDB Web sites. You should choose a tablespace large enough to accommodate these additions or a tablespace that automatically extends itself.
You can choose the same Default, Temporary, or Document Tablespace. For example, you can choose USER_DATA as the Default Tablespace and the Document Tablespace.
- Click OK. If the Installation Schema you specified in the previous step already exists, you must specify a new schema in which to install WebDB 2.2.

- Choose Proceed, let me create a new schema where WebDB 2.2 will be installed, to install WebDB 2.2 into a new schema. Click OK to return to the previous page where you can specify a different Installation Schema.
- Choose Stop, I do not want to install the WebDB packages at this time, then OK if you don't want to install WebDB into a schema other than WebDB. Choosing this option terminates installation.
- After you specify a valid Installation Schema, a message displays the user id and password that you use to log on to WebDB initially after it is installed. In the following example, the user id is WebDB and the password is WebDB.

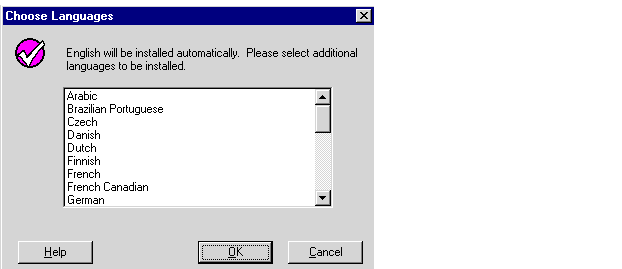
- Choose which language or languages to install in addition to English. After installation, end users can use options in their Web browsers to choose which of these languages will be used to display WebDB. 2.2
You can choose multiple languages by pressing the Shift or Ctrl keys as you choose.
Important:
The language(s) you select from this list must be supported on the database where you are installing WebDB.
|
- Click OK. A message asks if you want to continue installation.

- Click Yes to proceed.
Note:
Please be patient, as this operation may take several minutes to complete.
|
- During installation, the
wdbsvr.cfg and wdbsvr.app files are backed up if they already exist. These files contain configuration information for the WebDB Listener. You can update the contents of these files after installation by navigating to the WebDB Listener settings page. see "Configuring the WebDB Listener and PL/SQL Gateway" for more information.
Note If necessary, the install program automatically updates the
connect_string parameter to point to the appropriate database where you are installing WebDB.

- Click OK to back up the
wdbsvr.cfg and wdbsvr.app files.
- When installation completes, a success message displays.
The message displays two URLs that you type into your Web browser's location or address field to navigate to pages for adjusting the WebDB Listener settings.
Important Make a note of the URLs and user name and password in the message.
- Check the log file for errors that may have occurred during installation; for example, PL/SQL compile errors. The log file is located in
<ORACLE_HOME>\orainst\wdb_install_packages.log
where <ORACLE_HOME> is the Oracle Home location where you installed WebDB.
Additional Information:
If you encounter any problems after installation, see "Troubleshooting" for more information.
|
2.2.3 WebDB on Windows NT Custom Install
The steps in this section are for a Windows NT custom install. You can choose to custom install either Oracle WebDB or Oracle WebDB Listener.
- Make sure that you have performed the steps in Section 2.2.1, "Preliminary Steps" before continuing with this section.
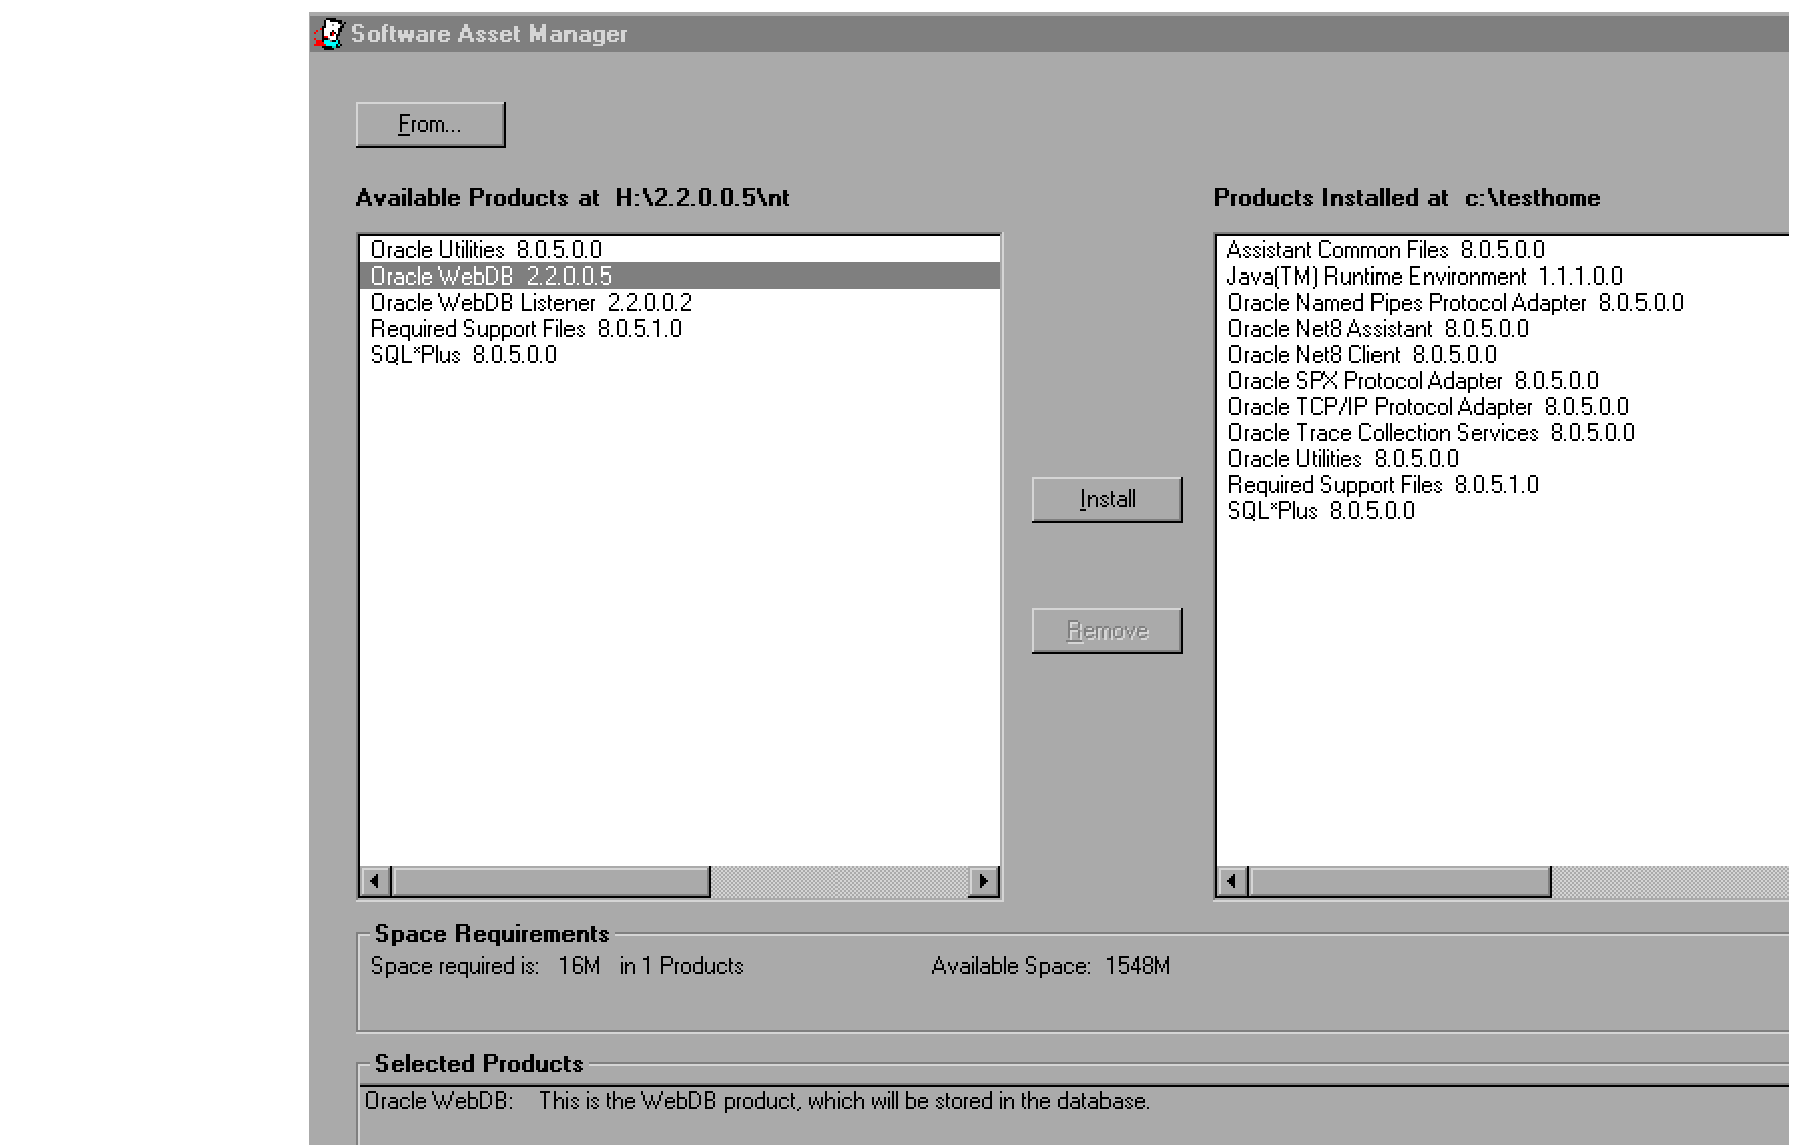
- If you selected Custom Install in Step 6, the Software Asset Manager window displays.
- Available Products lists the WebDB software components you can install.
- Products Installed lists the Oracle Software already installed on your machine
- Select (highlight) one or more WebDB software components to install, then click Install.
- Refer to the appropriate section to continue the custom installation after completing the above three steps in this section:
2.2.3.1 Oracle WebDB Custom Install on Windows NT
This section covers installing the Oracle WebDB Listener only. If you want to install the entire Oracle WebDB product, see "WebDB on Windows NT Typical Install".
To install the Oracle WebDB product:
- If you selected Oracle WebDB in the Software Asset Manager window, WebDB attempts to install the following software components:
If any of the above components or other dependencies are not installed in the Oracle Home you specified in Step 4, a message similar to the following displays.

- Click OK. The components and dependencies shown in the message are required prior to installing WebDB and will be installed along with the WebDB packages.
- The next window asks you for information about the database where you are installing WebDB:

- Click Oracle 8i if you are installing WebDB into a local or remote version the Oracle8i database. Go to Step 7.
- Click Oracle 8.0.5 or 8.0.6 if you are installing WebDB into a local or remote version of the Oracle database.
- Click Oracle 7.3.4 if you are installing WebDB into the Oracle 7.3.4 database. Go to Step 6.
- Click OK. If you selected Oracle 8.0.5 or 8.0.6 in the previous step, specify whether the database is local or remote.

- Click OK.
- The following window displays if you selected:
- Oracle 8.0.5 or 8.0.6 in Step 3 and Local in Step 4 or
- Oracle 7.3.4 in Step 3

- Password is the SYS user password that you use to log on to the Oracle database where you are installing WebDB.
After you finish entering a password, go to Step 23.
- The install window displays an additional field, TNS Names Alias, if you selected:
- Oracle 8i in Step 3 or
- Oracle 8.0.5 or 8.0.6 in Step 3 and Remote in Step 4
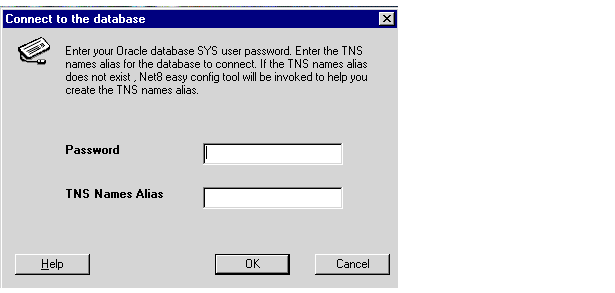
TNS Names Alias is a connect string to a database. If you have not already defined a TNS names alias to the Oracle8i, 8.0.5, or 8.06 database in your tnsnames.ora file, you can create a new one by typing a new name in the TNS Names Alias field; for example, newalias.
Important:
Make a note of this name. The installation program will start the Oracle Net8 Easy Configuration wizard to then help you create the new TNS names alias using this name, beginning in Step 10.
|
- Click OK. The following message displays if you typed:
- An incorrect TNS names alias to a remote database, or
- A nonexistent TNS names alias in the previous window with the intention of using the Oracle Net8 Easy Configuration wizard to create a new TNS names alias using this name.
- If the message does not display, go to Step 23

- Click OK. The first window of the Net8 Easy Configuration Assistant displays. The configuration assistant is a wizard that guides you through the steps for creating a new TNS names alias or modifying an existing one. To do so, the configuration assistant will modify the
tnsnames.ora file for the Oracle Home you specified in Step 4.
- If you have added comments to the
tnsnames.ora file or installed WebDB into a new Oracle Home, you may see the following message warning you that this information may be reorganized or deleted if you continue.

- Click Yes to continue.
- Click No to stop the configuration assistant.
Note You still can create a TNS names alias manually by following the instructions in "Configuring Variables and General Configuration".
- In the next window, ensure Add New Service is selected. Choosing this option enables you to create a new TNS names alias for the database.

- In New Service Name, type the name of the TNS names alias you specified in the TNS Names Alias field in Step 7.
- Click Next. In the next window, choose the networking protocol that you want to use to communicate with the database.

- Click Next. The contents of the next window change depending on your selection in the previous step. For example, if you chose TCP/IP (Internet Protocol) in the previous step, the following window displays:

- Type the host name of the machine where the database is installed and a port number.
Note This port is for the database and is different from the Listener port name you specified in a previous installation window. Specify 1521 as the database port number unless you know it has changed.
- Click Next. In the next window, type the System Identifier (SID) for the database where you are installing WebDB.
Note:
The SID is shown in the INSTANCE_NAME parameter in the INITSID.ORA database initialization parameter file. In most cases, the Database SID is ORCL.
|

- Click Next. In the next window, click Test Service to test the new TNS names alias you created.

- Type the SYS user name and password for the database where you are installing WebDB and click Test. If the TNS names alias works correctly, you should see a success message similar to the following:

Additional Information:
If the Test Service fails, this indicates that the connection to the Oracle database was not successful. To troubleshoot, see "Creating a TNS Names Alias".
|
- Click Done, then Next.
- In the last Net8 Easy Configuration window, click Finish.

- The following message asks you to confirm that you have successfully created and tested the TNS names alias.

- Click OK. If the install program detects a version of the PL/SQL Web Toolkit in the database, you are asked if you want to delete it and install the 4.0.8 version. Version 4.0.8 of the PL/SQL Web Toolkit must be installed in order to install WebDB.

- Choose Proceed, delete the previously existing copies and install the new ones to delete any currently existing versions of the PL/SQL Web Toolkit and install the 4.0.8 version instead.
- Choose Proceed, I already have the 4.0.8.0.0 installed if a 4.0.8 version of the PL/SQL Web Toolkit already exists in the database. Installation will proceed using this version.
- Click OK. In the next window, specify the database schema where you will install WebDB and the tablespaces for this schema.

- The Installation Schema is the database schema where WebDB will be installed. You must specify a schema that does not already exist. The installation program will automatically create the new schema for you.
You type this schema name to log on to WebDB for the first time.
- The Default Tablespace is used to store any database objects or components created by the WebDB user.
The install program attempts to choose the best tablespace to use for WebDB. If you don't have one of the following default tablespaces in your database, the install program uses the SYSTEM tablespace:
TOOLS
USER_DATA
USER
USERS
USR_DATA
USERDATA
- The Temporary Tablespace is used for creation of temporary table segments for operations performed by the WebDB user such as sorting table rows. If you don't have one of the following temporary tablespaces in your database, the install will create temporary storage in the SYSTEM tablespace:
TEMP_DATA
TEMPORARY_DATA
TEMP
TEMPORARY
- The Document Tablespace is used to store any items uploaded to a WebDB Web site. These item types can include files, images, folders, and stored procedures.
Note The Document Tablespace will gradually fill as end users add items to WebDB Web sites. You should choose a tablespace large enough to accommodate these additions, or a tablespace that automatically extends itself.
You can choose the same Default, Temporary, or Document Tablespace. For example, you can choose USER_DATA as the Default Tablespace and the Document Tablespace.
- Click OK. If the Installation Schema you specified in the previous step already exists, you must specify a new schema in which to install WebDB 2.2.

- Choose Proceed, but let me create a new schema where WebDB 2.2 will be installed, then OK to return to the previous page where you can specify a different Installation Schema.
- Choose Stop, I do not want to install the WebDB packages at this time, then OK if you don't want to install WebDB into a different schema. Choosing this option stops installation.
- In the next window, choose which language or languages to install in addition to the default language, English. After installation, end users can use options in their Browsers to choose which of these languages will be used to display WebDB.
You can choose multiple languages by pressing the Shift or Ctrl keys as you choose.
Note Ensure that the database where you are installing WebDB supports the languages you select.

- Click OK. A message asks if you want to continue installation.

- Click Yes to proceed.
Note:
Please be patient, as this operation may take several minutes to complete.
|
- Check the log file for errors that may have occurred during installation. The log file is located in
<ORACLE_HOME>\orainst\wdb_install_packages.log
where ORACLE_HOME is the Oracle Home where you have installed WebDB.
Note:
If connection to the database fails, you may need to edit the connect_string parameter in the wdbsvr.app file which is located in the <ORACLE_HOME>\wdb\listener\cfg directory to point to the appropriate database where you have installed WebDB. Then, you will need to stop and restart WebDB.
|
2.2.3.2 WebDB Listener Custom Install on Windows NT
This section covers installing the Oracle WebDB Listener only. If you want to install the entire Oracle WebDB product, see "WebDB on Windows NT Typical Install".
To install the Oracle WebDB Listener product:
- If you selected WebDB Listener in the Software Asset Manager window (see Step 3), you are prompted for WebDB Listener configuration information.

- The Host Name is the name of the machine on which the WebDB Listener will be installed. You can obtain the host name by typing hostname at a DOS command line prompt.
Note Make sure you enter the fully qualified domain name; for example,
hostname.mycompany.com.
- The Data Access Descriptor Name is a virtual directory that will be used in WebDB URLs. In the following URL:
http://myserver:2000/webdb
myserver is the Host Name
2000 is the Listener Port Number
webdb is the Data Access Descriptor Name
- The WebDB Schema is the name of the database schema in which WebDB was installed.
- The WebDB Listener Port # will be used by the WebDB Listener to transmit data between the database and Web browser.
The default port number is 80. Choose another port number if 80 is being used by another application.
- Click OK. A success message displays when installation completes.
- In the Data Access Descriptor for WebDB, ensure that there is a Connect String (TNS names alias) specified for the database where WebDB is installed.
2.3 Deinstalling WebDB on Windows NT
To deinstall WebDB 2.2 or other software components such as:
- WebDB Listener 2.2
- PL/SQL Web Toolkit 4.0.8
- Required Support Files 8.0.5.1
- SQL*Loader 8.0.5
- SQL*Plus 8.0.5
- Follow Steps 1-4 beginning.
- Click OK. In the next screen, choose Custom Install

- In the Software Asset Manager, select the product or products you want to deinstall (located in the right frame of the window).
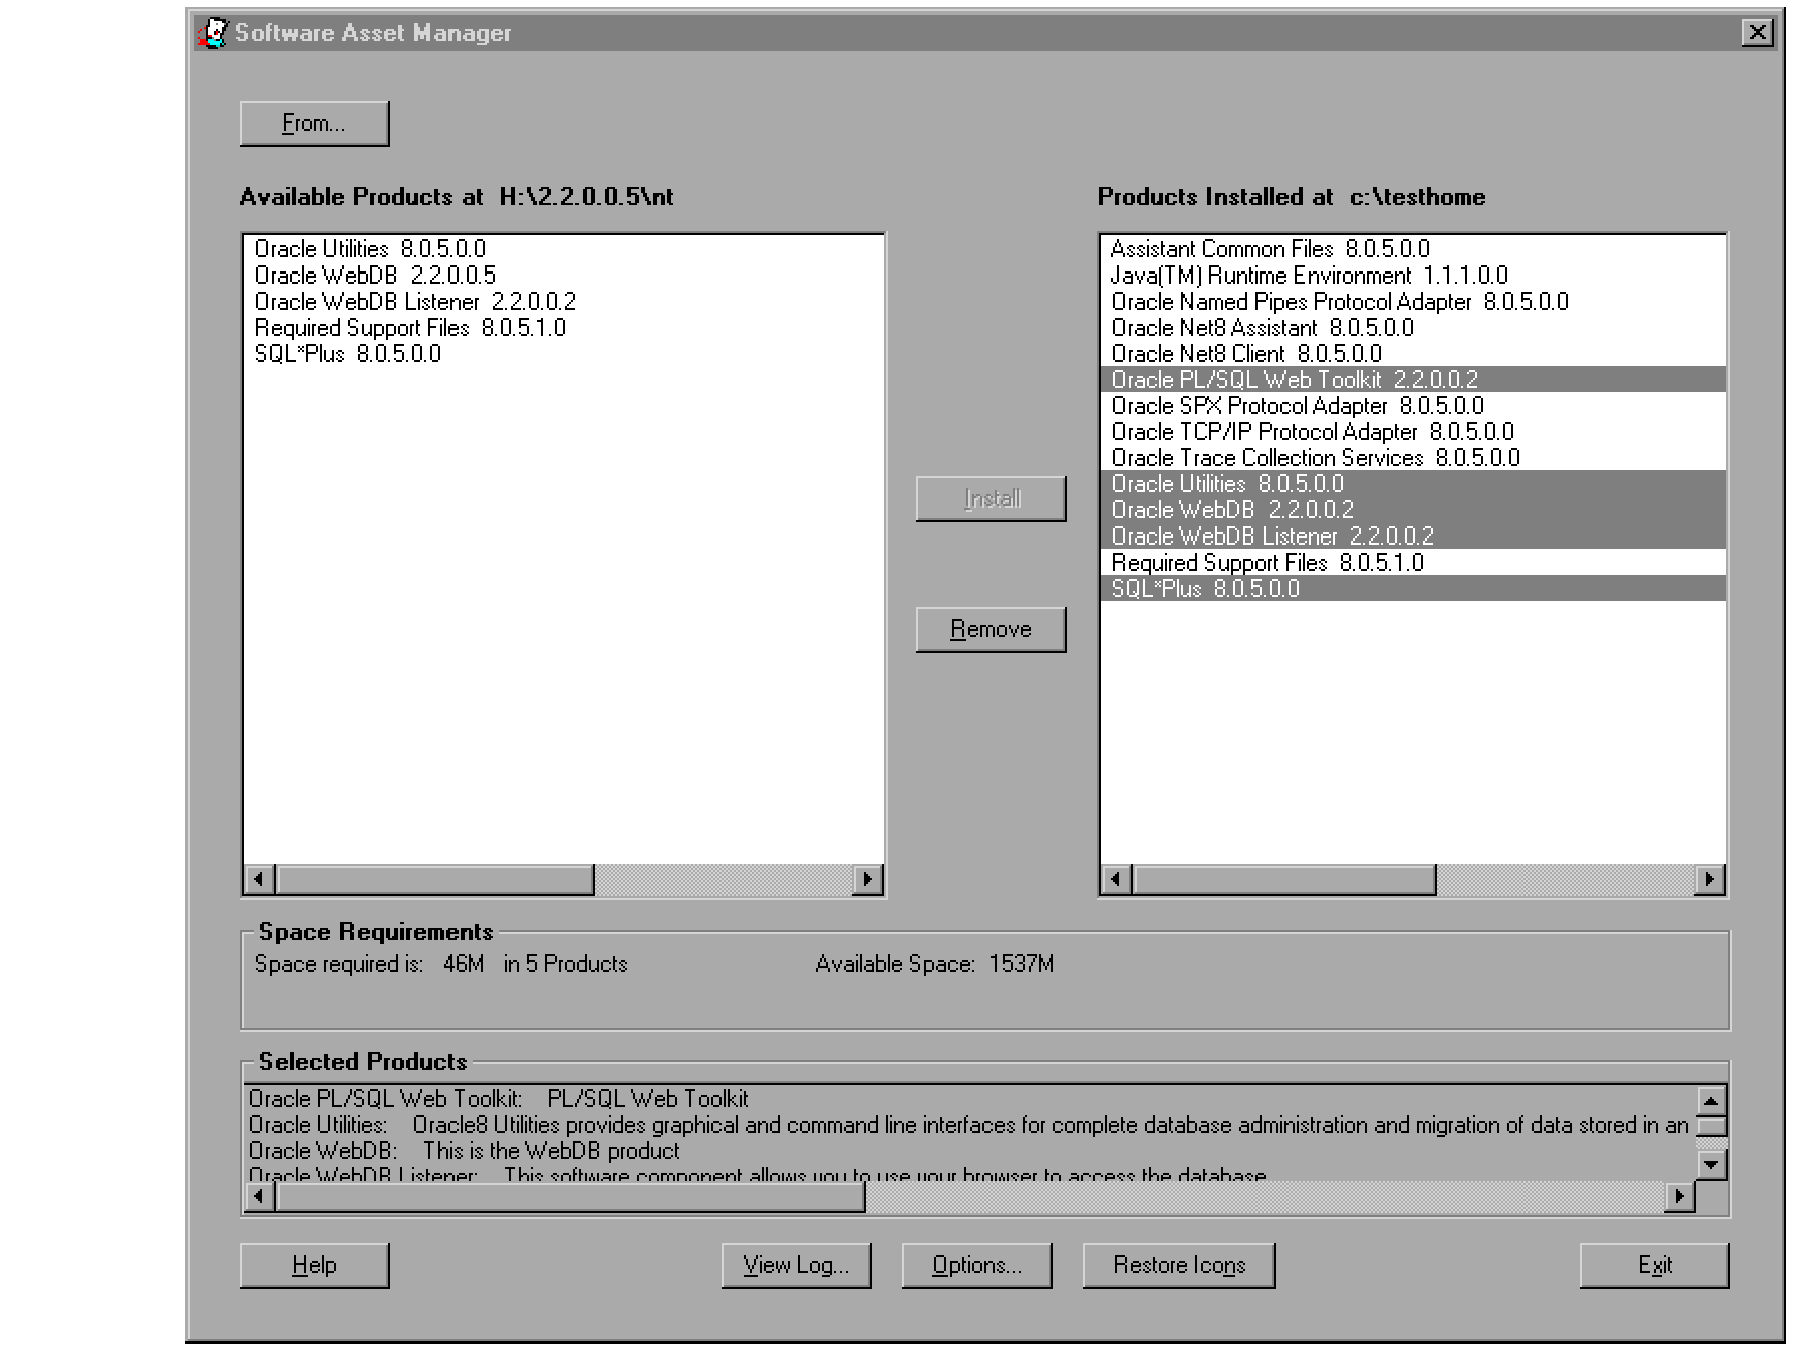
- Click Remove.
- The contents of the next window are different depending on the product or products you are deinstalling. Follow the instructions in the next window and any after that until you deinstall the product.


