3
Installing WebDB 2.2 on Solaris
This chapter contains the following sections:
3.1 Prerequisites
Before you install WebDB on Solaris:
- Review the Release Notes that are provided on your product CD.
- You must have the SYS user password on your Oracle database.
- The database where you plan to install WebDB must be up and running.
- You must install WebDB 2.2 into a new Oracle Home. The installation program allows you to create a new Oracle Home during the installation process.
- You must add a TNS names alias that points to the database where you are installing WebDB 2.2. You add this alias to the
tnsnames.ora file. This file can be located anywhere on the machine where you are installing the WebDB Listener.
To create a TNS names alias, see "Configuring Variables and General Configuration".
- You must set the TNS_ADMIN environment variable to point to the location of
tnsnames.ora file.
In the C shell, for example, you could type the following at a command line prompt:
setenv TNS_ADMIN path
where:
path is the path to the tnsnames.ora file.
Note This command differs depending on the shell.
- You must set the LD_LIBRARY_PATH environment variable to $ORACLE_HOME/lib.
- If you are installing WebDB 2.2 into the Oracle 7.3.4 database, you will be asked to specify the Oracle Home for the database.
- You must check the
MAX_ENABLED_ROLES parameter in your INIT.ORA file to ensure it is set to at least 25.
- You should have tablespaces available with sizes of at least 25-30 MB each. These tablespaces will be used as Temporary and Default tablespaces by the schema in which you install WebDB.
For each Web site you create with WebDB, you should have a tablespace of at least 10 MB.
- You must set your terminal (using the set TERM command) to one of these types:
3151 386 386s 386u 386x
ansi avx3
dec dgd2 dgd4
hft hftc hp iris ncd
sun sun5 tandm
vt100 vt220
wy150 wy50
xsun xsun5
3.2 WebDB on Solaris Install
On Solaris, you can choose to install all Oracle WebDB product components at the same time or install components separately. This section covers installing the entire Oracle WebDB product. If you want to install components separately, refer to the appropriate section:
The install program allows you to install the following WebDB software components:
To install all Oracle WebDB components on Solaris:
- Insert the CD labeled WebDB.
- Navigate to the /orainst/ directory.
- Type the following command:
orainst /m
- You may see a message asking you if you want to update the oratab file. The oratab file stores information about Oracle product instances on your machine. If you want to update the file, set the
ORATAB_FAIL environment variable to true. For more information, click Help.
Click OK to continue installation without updating the oratab file.
- In the next window, you must confirm that you have completed the prerequisite tasks described in "Installing WebDB 2.2 on Solaris".
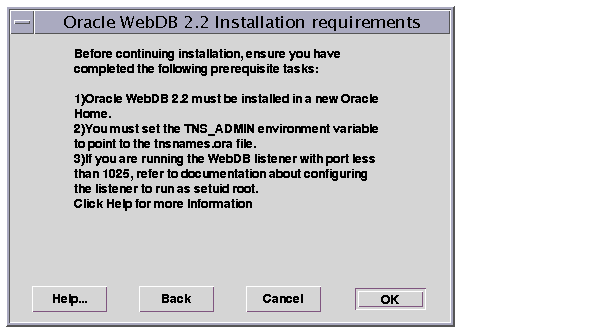
- Click OK if you have completed these requirements. Click Cancel to exit the installation program if you have not.
- In the next window, set paths for the
ORACLE_BASE and ORACLE_HOME environment variables.

- ORACLE_BASE is the directory where you install Oracle products. A product directory (
/ORACLE_BASE/product) and a configuration directory (/ORACLE_BASE/admin) are located under ORACLE_BASE. The product directory contains the ORACLE_HOME and all product files.
- ORACLE_HOME is the directory where WebDB product files will be installed.
IMPORTANT:
You must install WebDB in a new Oracle Home that is different from the Oracle Home for any other Oracle products that are currently installed.
|
To create a new Oracle Home, type the path to the new home in the ORACLE_HOME field. The Oracle Home must be in a directory under the Oracle Base. The installation program automatically creates the new home and all associated files, and provides the required permissions in the location specified by this variable.
For example, if the ORACLE_BASE is /oracle/app, you could create a new Oracle Home by typing /oracle/app/webdb_home.
- The Software Asset Manager window displays.
- Products available lists the WebDB software components you can install.
- Products installed lists the Oracle Software already installed on your machine. Since you are installing WebDB in a new Oracle Home, this list should not have any products listed.
- Select (highlight) one or more WebDB software components to install, then click Install. You can install both products at the same time by highlighting them both.

3.3 Installing WebDB Packages on Solaris
This section covers the steps required for installing the Oracle WebDB packages. If you want to install both the packages and the WebDB Listener, see Section 3.2, "WebDB on Solaris Install".
- If you chose Oracle WebDB in the Software Asset Manager (see Step 9), you must specify the database where you are installing WebDB.

- Click Oracle 8i if you are installing WebDB into a local or remote version of the Oracle8i database. Go to Step 3.
- Click Oracle 8.0.5 or 8.0.6 if you are installing WebDB into a local or remote version of the Oracle database. Go to Step 3.
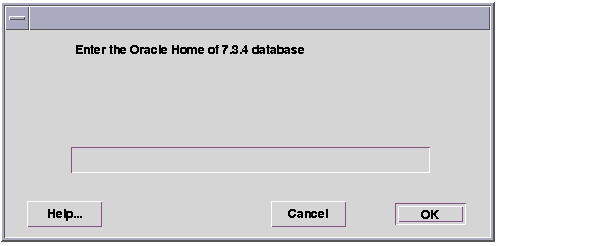
- Click Oracle 7.3.4 if you are installing WebDB into a local version of the Oracle 7.3.4 database.
- Click OK. If you selected Oracle 7.3.4 in the previous window, specify the Oracle Home where the Oracle 7.3.4 database is installed, and click OK.
- In the next window, enter the SYS user password that you use to log on to the Oracle database where you are installing WebDB.

- Password is the SYS user password that you use to log on to the Oracle database where you are installing WebDB.
- TNS Names Alias is a connect string defined for the database where you are installing WebDB.
Note This is the TNS names alias that you added to the tnsnames.ora file to fulfill one of the installation prerequisites. For more information, see the installation prerequisites under "Installing WebDB 2.2 on Solaris".
See "Creating a TNS Names Alias" for more information.
- Click OK. If the installation program detects a version of the PL/SQL Web Toolkit in the database, you must delete them and install the 4.0.8 version.
- Click OK. In the next window, specify a schema where the PL/SQL Toolkit will be installed.
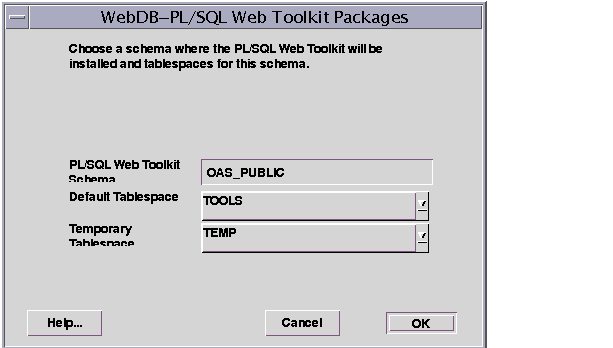
- PL/SQL Web Toolkit Schema is the name of the database schema where the PL/SQL Web Toolkit will be installed.
- The Default Tablespace will be used to store any database objects or components created by the PL/SQLWeb Toolkit user.
The install program attempts to choose the best tablespace to use for WebDB. If you don't have one of the following default tablespaces in your database, the install program uses the SYSTEM tablespace:
TOOLS
USER_DATA
USER
USERS
USR_DATA
USERDATA
- The Temporary Tablespace will be used for creation of temporary table segments for operations performed by the PL/SQL Web Toolkit schema such as sorting table rows.
If you don't have one of the following temporary tablespaces in your database, the install will create temporary storage in the SYSTEM tablespace:
TEMP_DATA
TEMPORARY_DATA
TEMP
TEMPORARY
- Click OK. In the next installation window, specify a schema where WebDB 2.2 will be installed.
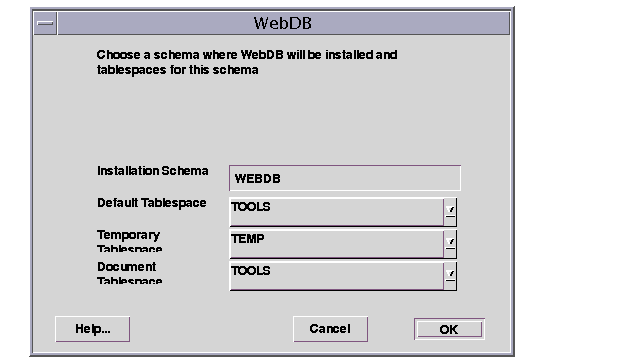
- The Installation Schema is the database schema where WebDB will be installed. You must specify a schema that does not already exist. The installation program will automatically create the new schema for you.
You use this schema name to log on to WebDB for the first time.
- The Default Tablespace will be used to store any database objects or components created by the WebDB user.
The install program attempts to choose the best tablespace to use for WebDB. If you don't have one of the following default tablespaces in your database, the install program uses the SYSTEM tablespace:
TOOLS
USER_DATA
USER
USERS
USR_DATA
USERDATA
- The Temporary Tablespace will be used for creation of temporary table segments for operations performed by the WebDB user such as sorting table rows.
If you don't have one of the following temporary tablespaces in your database, the install will create temporary storage in the SYSTEM tablespace:
TEMP_DATA
TEMPORARY_DATA
TEMP
TEMPORARY
- The Document Tablespace will be used to store any items uploaded to a WebDB Web site. These item types can include files, images, folders, and stored procedures.
Note The Document Tablespace will gradually fill as end users add items to WebDB Web sites. You should choose a tablespace large enough to accommodate these additions.
You can choose the same Default, Temporary, or Document tablespace. For example, you can choose USER_DATA as the Default Tablespace and the Document Tablespace.
- Click OK. If the Installation Schema you specified in the previous step already exists, you must specify a new schema in which to install WebDB 2.2.
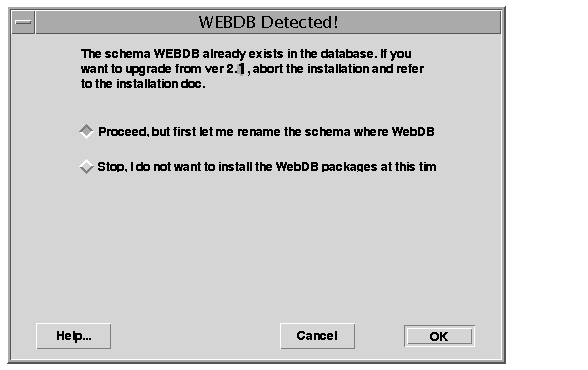
- Choose Proceed, but first let me rename the schema where WebDB 2.2 will be installed to install WebDB 2.2 into a new schema. Click OK to return to the previous page where you can specify a different Installation Schema.
- Choose Stop, I do not want to install the WebDB packages at this time, then click OK if you don't want to install WebDB into a schema other than WebDB. Choosing this option stops installation.
- After you choose a valid Installation Schema, a message displays the user id and password that you will use to log on to WebDB after it is installed.
- Click OK. In the next window, choose which language or languages to install in addition to the default, English.
You can choose multiple languages. After installation, end users can select which of these languages will be used to display WebDB.
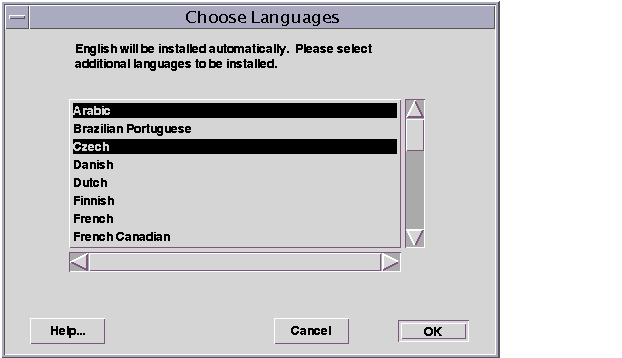
- Click OK to start installation. Press Ctrl + C to cancel installation.
Note:
Please be patient, as this operation may take awhile to complete.
|
- When installation completes, a success message displays. Make a note of the user name and password in the message.
- Click OK. The following message asks you to run the root.sh script as a root administrative user after you exit the installation program.

- Click OK.
- Check the log file for errors that may have occurred during installation; for example, PL/SQL compile errors. The log file is located in
oracle_home/orainst/wdb_install_packages.log
where oracle_home is the Oracle Home where you installed WebDB.
Note:
If connection to the database fails, you may need to edit the connect_string parameter in the wdbsvr.app file to point to the appropriate database where you have installed WebDB. Then, you will need to stop and restart WebDB.
|
- See "Troubleshooting" for more information.
3.4 Installing WebDB Listener on Solaris
This section covers the steps required for installing the Oracle WebDB Listener. If you want to install both the Listener and the WebDB packages, see Section 3.2, "WebDB on Solaris Install".
- If you choose to install the WebDB Listener in the Software Asset Manager (see Step 9), you are prompted for Listener configuration information.
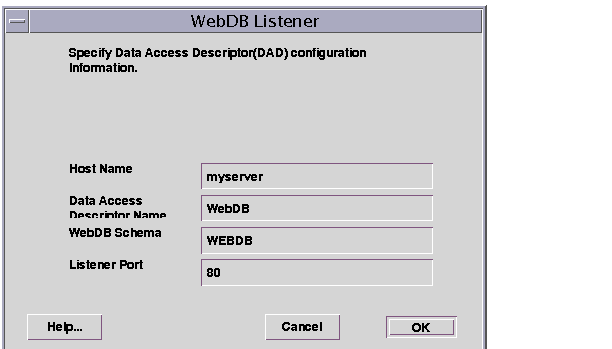
- The Host Name is the name of the machine on which the WebDB Listener will be installed. You can obtain the host name by typing hostname at a command line prompt.
- The Data Access Descriptor Name is a virtual directory that will be used in WebDB URLs. In the following URL:
http://myserver:2000/webdb
myserver is the Host Name
2000 is the Listener Port Number
webdb is the Data Access Descriptor Name
- The WebDB Schema is the name of the database schema in which WebDB is installed.
- The Listener Port will be used by the WebDB Listener to transmit data between the database and Web browser.
The default port number is 80. Choose another port number if 80 is being used by another application.
Important:
You must have Root administrative privileges in order to run the WebDB Listener on a privileged port (less than 1025). You can also run the Listener as setuid root. See "Running the WebDB Listener as setuid root".
|
- Click OK. Installation of the WebDB Listener begins. During installation, you may be asked if you want to back up the
wdbsvr_cfg and wdbsvr_app files, if they already exist. These files are used to configure the Listener. For more information, see "Configuring Variables and General Configuration".

- Click OK to back up the files.
- A success message displays when installation of the Listener completes.
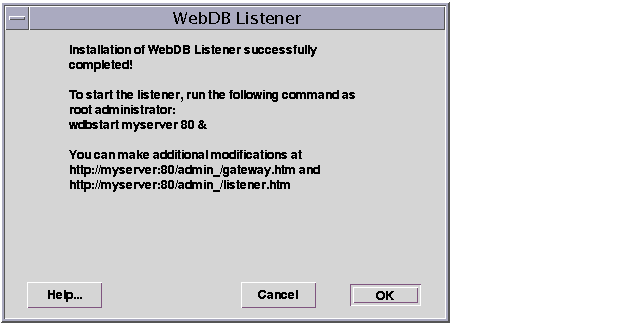
The message displays:
Make a note of the URLs shown in the message.
- Click OK.
- In the Data Access Descriptor for WebDB, ensure that there is a Connect String (TNS names alias) specified for the database where WebDB is installed.
Notes:
- If connection to the database fails, you may need to edit the
connect_string parameter in the WebDB gateway settings file, wdbsvr.app, file to point to the appropriate database where you have installed WebDB. Then, you will need to stop and restart WebDB.
- If the WebDB Listener fails to start, you may need to set the WV_GATEWAY_CFG environment variable to point to the WebDB Gateway configuration file. See "Environment Variable Check List".
|
3.4.1 Running the WebDB Listener as setuid root
If you specified a privileged port for the WebDB Listener (less than 1025) when installing WebDB 2.2 on Solaris, you must run the Listener as a root administrative user, or as setuid root.
Running the Listener as setuid root allows you to run the Listener on a privileged port while logged on to Solaris as the Oracle user.
To set up your environment to run as setuid root:
- Create symbolic links to all the libs in Oracle_Home/lib (where Oracle Home is the Oracle Home where you installed WebDB 2.2) from /usr/lib.
- Log on to Solaris as the root user.
- From the command line, type the following commands and press the Enter key:
chown root Oracle Home/bin/wdblsnr

chmod +s Oracle Home/bin/wdblsnr
3.5 Deinstalling WebDB on Solaris
When removing any WebDB components, Oracle recommends that you use the installation program since removing a component any other way may not update the installer's inventory file. Thus, if you try to install WebDB components on a subsequent install and the component is reflected in the inventory file, the component may not install and you may get a partial installation.
To deinstall WebDB 2.2 or other software components such as:
- WebDB Listener 2.2
- PL/SQL Web Toolkit 4.0.8
- Required Support Files 8.0.5.1
- SQL*Loader 8.0.5
- SQL*Plus 8.0.5
- Follow Steps 1-8 beginning.
- Click OK. In the next screen, select the product or products you want to deinstall in the Products installed list on the right side of the window.

- Click Remove.
- The contents of the next window are different depending on which product you are deinstalling. Follow the instructions in the next window and any after that until you deinstall the selected product(s).


