| Oracle® VM Server User's Guide Release 2.2 Part Number E15444-04 |
|
|
PDF · Mobi · ePub |
| Oracle® VM Server User's Guide Release 2.2 Part Number E15444-04 |
|
|
PDF · Mobi · ePub |
This Chapter contains information on how to create a guest virtual machine using Oracle VM Server. You can create paravirtualized guests and hardware virtualized guests using a template, or using the command-line tool virt-install. The virt-install tool can be used as an interactive shell, or all parameters can be given at the same time from the command-line. You can enter multiple parameters to the virt-install tool in the format:
virt-install [options]
Appendix A, "Command-Line Tools" lists the virt-install command-line tool parameters.
You can also create guest virtual machines using Oracle VM Manager, and is the recommended method for creating guests. See the Oracle VM Manager User's Guide for information on creating guests with Oracle VM Manager.
Oracle recommends you create paravirtualized guests if possible, as the performance of a paravirtualized guest is superior to that of a hardware virtualized guest.
Before you create a guest virtual machine, you should have access to an installation tree, or a template. You may also need a host IP address, and a hostname.
This Chapter contains:
See the Oracle VM Server Release Notes for a list of the supported guest operating systems you can create.
You cannot create a paravirtualized guest virtual machine from a local hard disk or CD-ROM using either the virt-install command-line tool, or Oracle VM Manager. You can, however, create an installation tree, and mount it as an NFS share. or make it available via HTTP or FTP. For example, to create mount an ISO file and make it available via NFS:
# mkdir -p /el/EL5-x86
# mount -o ro,loop /path/to/Enterprise-R5-x86-dvd.iso /el/EL5-x86
# exportfs *:/el/EL5-x86/
When you create the guest virtual machine, enter the installation location as:
nfs:example.com:/el/EL5-x86
Similarly, to set up an installation tree that can be accessed via HTTP on a computer named example.com, enter
# cd /var/www/html
# mkdir EL5-x86
# mount -o ro,loop /path/to/Enterprise-R5-x86-dvd.iso EL5-x86
When you create the guest virtual machine, enter the installation location as:
http://example.com/EL5-x86
Note:
If you have multiple ISO files (CDs), you can mount each ISO file (CD) and copy the contents into a single directory. All the ISO files are then available from the same location.You can create a guest using a template. You can also register a template in Oracle VM Manager and use it to create guests. See the Oracle VM Manager User's Guide for information about using templates with Oracle VM Manager.
A template is compressed as a .tgz file. A template must contain the basic guest configuration files, vm.cfg and system.img. Templates are often hosted on an FTP or HTTP server. The following example shows you how to download an Oracle Linux template from an HTTP server, and use it to create a guest.
To create a guest virtual machine from a template:
Log in to the Oracle VM Server as the root user.
Download the Oracle VM template .zip file to an Oracle VM Server and place it in the /OVS/seed_pool directory.
Use the unzip tool to uncompress the file. The unzip tool can be downloaded from:
Extract the .tgz file. This step creates a directory with the name of the template. This directory contains the files for the template. For example:
# cd /OVS/seed_pool
# tar xzf OVM_template_name.tgz
This creates the following directory structure:
/OVS/seed_pool/OVM_template_name
         |
         |- System.img               (operating system image file)
         |- extra.img                (optional additional image file(s))
         |- vm.cfg                   (virtual machine configuration file)
         |- README
Change directory to where the virtual machine files are located
# cd /OVS/seed_pool/OVM_template_name
Run the following commands to generate a new MAC address:
# export PYTHONPATH=/opt/ovs-agent-2.3; python -c "from OVSCommons import randomMAC; print randomMAC()"
Edit the vm.cfg file and change the line starting with vif to:
vif = [ 'mac=00:16:3E:xx:xx:xx', ] # for PVM
or
vif = [ 'type=netfront, mac=00:16:3E:xx:xx:xx', ] # for PVHVM
Where 00:16:3E:xx:xx:xx is the MAC address generated in 6.
Create and start up the guest virtual machine from the Oracle VM Server command line:
# xm create vm.cfg
Connect to the guest virtual machine's console using VNC:
Find out the VNC port number by running the following:
# xm list -l OVM_template_name |grep location
This displays the port number assigned to the guest virtual machine's VNC console. There may be more than one line, but there should be a line that looks similar to:
(location 0.0.0.0:5901)
Use the port number (5901 in this example) when connecting to the guest virtual machine using VNC Viewer.
Connect to the guest virtual machine using any VNC Viewer from another computer. For example, on Oracle Linux, use the command:
# vncviewer hostname:vnc_port
Where hostname is the IP address or host name of the Oracle VM Server, and vnc_port is the port number found out in a.
Complete any guest virtual machine configuration required by the template.
The guest is created and started.
The following example shows how to create a paravirtualized or hardware virtualized guest using the virt-install command-line tool. This procedure uses an interactive session. You can also pass virt-install parameters at the same time as command-line options. In particular, kickstart options can be passed with:
virt-install -x ks=options
To create a paravirtualized or hardware virtualized guest interactively:
Open a command-line shell as root, and start the interactive install process by running the virt-install command-line tool:
# virt-install
If the host is capable of creating a hardware virtualized guest, the following question is displayed:
Would you like a fully virtualized guest (yes or no)?
Creating a hardware (fully) virtualized guest enables you to run unmodified operating systems, such as Microsoft Windows. Enter no to create a paravirtualized guest, or enter yes to create a hardware virtualized guest. Press Enter.
The following question is displayed:
What is the name of your virtual machine?
This is the label that identifies the guest. It is used as the guest's configuration file name and stored as /etc/xen/name. This label is also used with a number of xm commands. Enter the name of the guest, for example enter
myguest
The configuration file is created. Press Enter.
The following question is displayed:
How much RAM should be allocated (in megabytes)? Setting the RAM to a value less than 256 megabytes is not recommended.
You are prompted to enter the RAM size to be allocated to the guest. RAM is allocated solely to the guest, and not taken from dom0. To check the amount of RAM available on your computer, run the xm info command and review the free_memory column. Free memory is displayed in Megabytes. This is the total amount of RAM that can be allocated to guests. Enter the amount of RAM to be allocated for the guest in Megabytes, for example, enter
1024
Press Enter.
The following question is displayed:
What would you like to use as the disk (path)?
The guest sees the disk storage allocated in virt-install as a single virtual hard disk, analogous to a physical hard disk. This appears as hda and can be partitioned and managed in the guest exactly as if it were regular physical hardware. Enter the absolute local path and file name of the file to serve as the disk image for the guest, for example, enter
/OVS/running_pool/myguest/System.img
This is exported as a full disk to your guest. Press Enter.
If the file specified in the previous step does not exist, the following question is displayed:
How large would you like the disk to be (in gigabytes)?
Enter the size of the virtual disk for the guest in Gigabytes. For the purpose of this example, enter 8 Gigabytes. For example, enter
8
Press Enter.
The following question is displayed:
Would you like to enable graphics support (yes or no)?
Graphics support determines whether a virtual graphics card is available to the guest. If you are creating a hardware virtualized guest, you should always answer yes to this question. If you are creating a paravirtualized guest, you can answer yes, or no. Press Enter.
The virt-install utility requests different install locations for paravirtualized and hardware virtualized guests. Paravirtualized guests can be installed from an installation tree using NFS, FTP, and HTTP. Hardware virtualized guests can be installed from an ISO file on dom0.
If you are creating a paravirtualized guest, the following question is displayed:
What is the install location?
This is the path to an Oracle Linux installation tree, in the format used by Anaconda. NFS, FTP, and HTTP locations are supported. For example:
nfs:example.com:/path/to/tree/
http://example.com/path/to/tree/
ftp://example.com/path/to/tree/
Enter the path to an installation tree, for example
http://example.com/EL5-x86
Press Enter.
Note:
The installation location must be a location on the network. It is not possible to perform the installation from a local disk or CD-ROM. See Section 4.2, "Creating an Installation Tree".If you are creating a hardware virtualized guest, the following question is displayed:
What would you like to use for the virtual CD image?
This is the path to an ISO file on the file system on dom0. For example:
/mypath/myISO.iso
Press Enter.
Note:
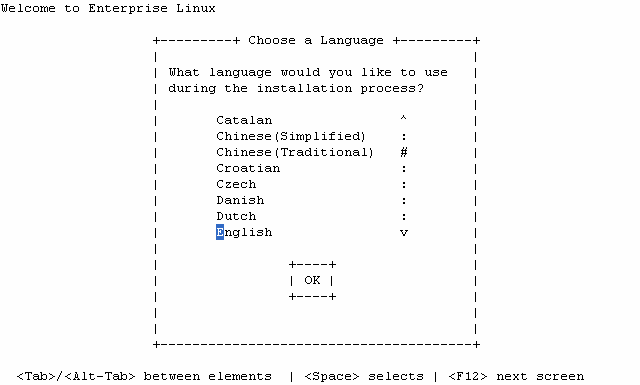
NFS, FTP and HTTP locations are not supported. Do not mount the ISO file, virt-install will mount the ISO file and begin the installation from it.The guest operating system installer starts. If you enabled graphics support in 7, a VNC window is displayed and the graphical installer is displayed. If you did not enable graphics support, a text-based installer is displayed. For example, a text-based installation of Oracle Linux displays:
Follow the prompts to complete the guest operating system installation.
To manually create a paravirtualized guest:
Create the root file system.
Populate the root file system.
Configure the guest.
To create the root file system:
Create a root partition for the guest. The root partition may be a:
Physical partition
Logical Volume Manager-backed Virtual Block Device
File-backed Virtual Block Device
Select one of the following options to create the root file system.
Using a physical disk partition
Create a disk partition for the guest root.
Make a file system on the partition.
Using a Logical Volume Manager-backed Virtual Block Device
A particularly appealing solution is to use a Logical Volume Manager (LVM) volume as backing for a guest file system, as this allows dynamic growing and shrinking of volumes, snapshots, and other features.
To initialize a partition to support LVM volumes, enter
# pvcreate /dev/sda10
Create a volume group named vg on the physical partition:
# vgcreate vg /dev/sda10
Create a logical volume of 4 Gigabytes named myvmdisk1:
# lvcreate -L4096M -n myvmdisk1 vg
You now have a /dev/vg/myvmdisk1. Make a file system on the partition:
# mkfs -t ext3 /dev/vg/myvmdisk1
Using a file-backed Virtual Block Device
To create a 4 Gigabyte file-backed virtual block device, enter
# dd if=/dev/zero of=vm1disk bs=1k seek=4096k count=1
Make a file system in the disk file:
# mkfs -t ext3 vm1disk
The tool requests that you confirm the creation of the file system. Enter y to confirm the creation of the file system.
The root file system for the guest may be populated in a number of ways:
Copying the root file system of dom0
Installing an operating system
To copy the root file system of dom0, mount the guest root partition to /mnt:
# mount -t <File system type> <Guest Root Partition> /mnt
Copy the root file system from dom0 to domU:
# rsync -avH /boot /mnt
# rsync -avH /root /mnt
# rsync -avH /dev /mnt
# rsync -avH /var /mnt
# rsync -avH /etc /mnt
# rsync -avH /usr /mnt
# rsync -avH /bin /mnt
# rsync -avH /sbin /mnt
# rsync -avH /lib /mnt
If your computer is a 64 bit computer, enter
# rsync -avH /lib64 /mnt
Then continue for all computers:
# rsync -avH /selinux /mnt
# mkdir /mnt/{proc,sys,home,tmp}
# chmod 777 /mnt/tmp
# unmount /mnt
Install an operating system. This may be done a number of ways.
Install an Oracle VM Server-enabled operating system from CD-ROMs.
Install an Oracle VM Server-enabled operating system from a network drive, or PXE (Preboot Execution Environment) install.
After you create the root file system for the guest, modify the guest configuration files to reflect its configuration. For example, update /etc/hosts, /etc/fstab and any network configuration files.
Modify the following guest configuration files to configure the guest:
Edit /mnt/etc/fstab to reflect the mounted file system in the guest.
/dev/sda1 / ext3 defaults 1 1
none /dev/pts devpts gid=5,mode=620 0 0
none /dev/shm tmpfs defaults 0 0
none /proc proc defaults 0 0
none /sys sysfs defaults 0 0
/dev/hda1 is the root of domU as set up in the configuration file.
Edit /mnt/etc/sysconfig/network to include a valid host name.
GATEWAY is the same value as dom0.
Hostname is the name of the virtual machine, for example, mycomputer.example.com. Make sure the name you use is unique and not being used by another machine.
NETWORKING=yes
HOSTNAME=mycomputer.example.com
GATEWAY=139.185.48.1
Edit the /mnt/etc/hosts file to include the IP address and hostname. Make sure the IP address you use is unique and not being used by another computer.
127.0.0.1 localhost.localdomain localhost
139.185.48.212  mycomputer.example.com  hostname
Edit the /mnt/etc/sysconfig/network-scripts/ifcfg-eth0 file. Use the same MAC address as the vif. If more than one MAC address is exported to the guest operating system, you must to configure more network interfaces, for example, eth1, eth2 in dom0.
The NETMASK and BROADCAST address must match the corresponding network interface in dom0.
HWADDR is same as the MAC address vif.
IPADDR is the same as in the /mnt/etc/hosts file.
DEVICE=eth0
BOOTPROTO=static
HWADDR=00:50:56:02:ff:d3
IPADDR=10.1.1.1
NETMASK=255.255.254.0
BROADCAST=10.1.1.255
ONBOOT=yes
TYPE=Ethernet
Move /lib/tls to /lib/tls.disabled.
# mv /mnt/lib/tls /mnt/lib/tls.disabled
Unmount /mnt.
# unmount /mnt
Create the guest.
# xm create -c /etc/xen/domain-config-file
Get the console of the guest.
#xm console [Domainname|DomainID]
The guest virtual machine is created and running.
To create a hardware virtualized guest manually:
Install the operating system on a disk by CD-ROM pack or network install method (PXE install).
Create the guest configuration file, /etc/xen/domain.cfg. This is the minimum (without advanced options) hardware virtualized guest configuration file. Modify this file to suit your configuration.
#Config File for Full virtualization
import os, re
arch = os.uname()[4]
if re.search('64', arch):
  arch_libdir = 'lib64'
else:
  arch_libdir = 'lib'
# Kernel for hvm domain will be hvmloader
kernel="/usr/lib/xen/boot/hvmloader"
builder='hvm'
# Memory in MB  for HVM guest domU
memory=3000
# Name of domain
name="hvm-dom"
# No of virtual cpus
vcpus=4
# Mac address and corresponding bridge
vif=[ 'mac=00:50:56:1e:34:b5 , bridge=xenbr0' ]
# Disk in which Guest OS is installed
disk=[ 'phy:/dev/cciss/c0d1,hda,w' ]
# Here /dev/cciss/c0d1  is the disk onwhich OS is installed.
device_model='/usr/' + arch_libdir + '/xen/bin/qemu-dm'
# Enable vnc library
sdl=0
vnc=1
# Vncviewer no is 1
vncviewer=1
# Password to access the vnc for this guest
vncpasswd="welcome"
vnclisten="0.0.0.0"
ne2000=1
serial='pty'
# Enable USB
usb=1
usbdevice='mouse'
See Appendix C, "Guest Configuration" for a more configuration file examples.
Mount the guest root file system to /mnt to enable you to modify the configuration files.
Edit /mnt/etc/sysconfig/network to specify the host name.
GATEWAY is same as dom0.
Hostname is the name of the virtual machine, for example, mycomputer.example.com. Make sure the name you use is unique and not being used by another computer.
NETWORKING=yes
HOSTNAME=mycomputer.example.com
GATEWAY=10.1.1.1
Edit the /mnt/etc/hosts file to include the hostname and IP address. Make sure that the IP address you use is unique and not being used by another machine.
127.0.0.1 localhost.localdomain localhost
10.1.1.1  mycomputer.example.com  hostname
Edit /mnt/etc/sysconfig/network-scripts/ifcfg-eth0.
Use the same MAC address as you use for the vif. If more than one MAC address is exported to the guest operating system, you must configure more network interfaces, for example, eth1, eth2.
The NETMASK and BROADCAST address must match the corresponding network interface in dom0.
HWADDR is same as the MAC address in vif.
IPADDR is as in the /mnt/etc/hosts file.
DEVICE=eth0
BOOTPROTO=static
HWADDR=00:50:56:02:ff:d3
IPADDR=10.1.1.1
NETMASK=255.255.254.0
BROADCAST=10.1.1.255
ONBOOT=yes
TYPE=Ethernet
The /etc/fstab file does not require modification with a hardware virtualized guest. Hardware virtualized guests boot as a normal operating system. It reads the partition table as usual at boot time.
Unmount /mnt.
# unmount /mnt
Create the guest.
# xm create -c /etc/xen/domain-config-file
Use VNCViewer to display the guest.
# vncviewer hostname_of_dom0
# password : welcome
The guest is displayed.
You may want to convert a hardware virtualized guest to a paravirtualized guest. This example uses Oracle Enterprise Linux 4 Update 5 as it does not support a direct installation as a paravirtualized guest, and paravirtual drivers are available for this operating system. This procedure gives an example of installing Oracle Enterprise Linux as a hardware virtualized guest, then converting it to a paravirtualized guest.
To create an Oracle Enterprise Linux 4, Update 5, paravirtualized guest:
Copy the Oracle Enterprise-R4-U5-x86_64-dvd.iso image to the local file system of the Oracle VM Server computer
# ls -l /root/Enterprise-R4-U5-x86_64-dvd.iso
-rw-r--r-- 1 root root 2530611200 Aug  2 13:03 /root/Enterprise-R4-U5-x86_64-dvd.iso
Create a logical volume, which will be used as the guest disk image.
# lvcreate -L8G -n el4u5 VolGroup00
Run the virt-install command-line tool to create a hardware virtualized machine domU, and install the Oracle Enterprise Linux operating system.
# virt-install -n el4u5 -f /dev/VolGroup00/el4u5 -v -c /root/Enterprise-R4-U5-x86_64-dvd.iso -r 512 --vnc
If you see this error message:
main: unable to connect to host: Connection refused (111)
You must run VNCViewer to reconnect to the guest console:
# vncviewer :0
The Oracle Enterprise Linux install begins. From the installation choices, select the following:
Installation type: Server
Package selection: Default.
Partition layout type: Make sure the guest has a single root partition. Do not configure the virtual disk using LVM. Do not create a swap partition, or other partitions mounted at other locations such as /usr or /boot.
Firewall: Disable.
SELinux: Disable.
Network: Configure the network settings for either DHCP or a fixed IP address.
When the Oracle Enterprise Linux installation is complete, restart the guest. If the guest does not restart automatically, use the xm command-line tool to restart it, for example:
# xm list
Name    ID   Mem VCPUs      State   Time(s)
Domain-0 0   944     2     r-----   5670.8
# xm create el4u5

Using config file "/etc/xen/el4u5".
Started domain el4u5
# vncviewer :0
Take note of the guest IP address, or hostname if assigned via DHCP.
Copy the domU kernel for Oracle Enterprise Linux 4 Update 5, which can be found in the directory extra_kernels/EL4U5PV_64 on the Oracle VM Server installation CD-ROM, to the guest:
# cd extra_kernels/EL4U5PV_64/
# scp kernel-xenU-version.EL.x86_64.rpm 10.1.1.1:
Log in to the guest as root and replace the contents of the /etc/modprobe.conf file with:
alias scsi_hostadapter xenblk
alias eth0 xennet
Install the kernel-xenU RPM:
# rpm -ivh kernel-xenU-version.EL.x86_64.rpm
warning: kernel-xenU-version.EL.x86_64.rpm: V3 DSA signature: NOKEY, key ID b38a8516
Preparing...                ########################################### [100%]
   1:kernel-xenU            ########################################### [100%]
WARNING: No module xenblk found for kernel version.ELxenU, continuing anyway
Edit the /boot/grub/grub.conf file in the guest and change the default to point to this entry:
title Enterprise Linux Enterprise Linux AS (version.ELxenU)
        root (hd0,0)
        kernel /boot/vmlinuz-version.ELxenU ro root=LABEL=/
        initrd /boot/initrd-version.ELxenU.img
Shut down the guest. Modify the host configuration file /etc/xen/el4u5 to an entry similar to:
name = "el4u5"
memory = "512"
disk = [ 'phy:/dev/VolGroup00/el4u5,hda,w', ]
bootloader="/usr/bin/pygrub"
vcpus=1
on_reboot   = 'restart'
on_crash    = 'restart'
Restart the guest, using the xm command-line tool:
# xm create -c el4u5
The hardware configuration is displayed.
Remove the configuration for the network adapter and keyboard.
Log in to the guest, and delete the /etc/sysconfig/hwconf file.
Shut down the guest.
Modify the guest configuration file /etc/xen/el4u5 to add a vif entry similar to:
name = "el4u5"
memory = "512"
disk = [ 'phy:/dev/VolGroup00/el4u5,hda,w', ]
vif = [ 'bridge=xenbr0', ]
bootloader="/usr/bin/pygrub"
vcpus=1
on_reboot   = 'restart'
on_crash    = 'restart'
Start the guest and log in as root. Run the command:
# ifconfig eth0
Take note of the HWaddr (MAC address).
Replace the contents of the /etc/sysconfig/network-scripts/ifcfg-eth0 file with:
TYPE=Ethernet
DEVICE=eth0
BOOTPROTO=dhcp
ONBOOT=yes
HWADDR=xx:xx:xx:xx:xx:xx
Replace xx:xx:xx:xx:xx:xx with the actual MAC address reported by the ifconfig command in the guest.
On the host, edit the domU configuration file /etc/xen/el4u5, and add the MAC address to the vif entry:
vif = [ 'mac=xx:xx:xx:xx:xx:xx, bridge=xenbr0', ]
Replace xx:xx:xx:xx:xx:xx with the actual MAC address reported by the ifconfig command in the guest.
Start the guest with the xm create command, for example
# xm create /etc/xen/el4u5
The guest is now ready for use.
For optimized performance, you can install paravirtualized drivers on hardware virtualized guests. Paravirtual drivers are optimized and improve the performance of the operating system in a guest virtual machine.
Installing Oracle Linux Release 4 Update 4 as a hardware virtualized guest may require that you install paravirtual drivers for your hardware. This section lists the steps for installing these paravirtual drivers.
To install the paravirtual drivers for Windows operating systems, see the Oracle VM Windows Paravirtual Drivers Installation Guide.
To install paravirtual drivers for Oracle Linux guest operating systems:
Download and install the paravirtual drivers from the Oracle Unbreakable Linux Network (ULN):
http://linux.oracle.com/
Search for package name kmod-xenpv-kernel_type. For example, if you are running the hugemem kernel in the guest, install the drivers with:
# up2date kmod-xenpv-hugemem
Modify the /etc/modprobe.conf file to comment out existing eth0 line and add the following lines:
alias scsi_hostadapter xen_vbd
alias eth0 xen_vnif
Run depmod.
Edit the /etc/xen/vm.cfg file to replace the vif entry to:
vif = [ '', ] # for PVM
or
vif = [ 'type=netfront, ', ] # for PVHVM
Shut down the domain:
# xm shutdown mydomain
Start the domain:
# xm create /OVS/running_pool/myguest/vm.cfg
When prompted by kudzu, remove the old network configuration.
In the newly booted guest operating system, run the following command to find the new MAC address for eth0:
# ifconfig eth0
Edit the /etc/xen/vm.cfg file to add the new MAC address:
vif = [ 'mac=xx:xx:xx:xx:xx:xx, bridge=xenbr0', ] # for HVM
or
vif = [ 'type=netfront, mac=xx:xx:xx:xx:xx:xx, bridge=xenbr0', ] # for PVHVM
Create or edit the /etc/sysconfig/network-scripts/ifcfg-eth0 file with the following contents:
TYPE=Ethernet
DEVICE=eth0
BOOTPROTO=dhcp
ONBOOT=yes
HWADDR=xx:xx:xx:xx:xx:xx
Create a new initrd image. Use the kernel version for your guest operating system.
# mkinitrd -f /boot/initrd-version.ELsmp.img version.ELsmp --omit-scsi-modules --with=xen-vbd --with=xen-vnif --preload xen-vbd --preload xen-vnif
Reboot the domain.
Edit the /boot/grub/grub.conf file and add the following to the end of the kernel line.
kernel /vmlinuz-version.el5 ro root=LABEL=/ clock=pit nohpet nopmtimer hda=noprobe hdb=noprobe ide0=noprobe
|
Copyright © 2008, 2011, Oracle and/or its affiliates. All rights reserved. Legal Notices |
|