 Common Elements Used in This Chapter
This chapter provides a list of common elements and discusses how to:
Process U.S. withholding.
Process U.K. withholding.
Process Japanese withholding.
Process Australian Taxation Office (ATO) withholding.
Common Elements Used in This Chapter|
Entity |
Tax authority. |
|
Type |
Definition of a withholding at the highest level in PeopleSoft Payables. For example, in the U.S. 1099 is a withholding type. |
|
Jurisdiction |
An additional level of classification between the withholding type and the class. |
|
Class |
A subdivision (activity) of each withholding type, such as Rent or Royalties. |
|
Withholding Class Combination |
The combination of withholding entity, type, jurisdiction, and class. |
Processing U.S. Withholding
This section provides an overview of the 1099 withholding process, lists prerequisites and common elements, and discusses how to:
Generating the 1099 Report Post, Report, and Copy B processes.
Run the 1099 Withholding to Send Detail Report.
Run the Withholding Sent File process.
Process correction files.
Process replacement files.
 Understanding 1099 Withholding
In the United States, accounts payable departments create 1099 forms and electronic files each calendar year to report various tax liabilities for vendors. 1099 income encompasses multiple categories, although the primary category for PeopleSoft Payables is likely to be non-employee compensation.
PeopleSoft enables you to provide the U.S. Internal Revenue Service (IRS) with withholding information based on the transactions that occurred during the reporting year.
Note. Refer to IRS Publication 1220 as the definitive resource for 1099 rules and regulations.
This section discusses:
Supported 1099 reports.
Adjustment process.
1099 reporting process flow.
Filing requirements.
Taxpayer Identification Number (TIN).
PeopleSoft Payables supports the following 1099 reports:
1099–MISC
1099– I (interest income)
1099–G (government payments)
You can make adjustments to your withholding using the:
Withhold Adjustments page.
Withholding Update Application Engine process (AP_WTHD_UPDT).
See Adjusting Withholding Manually.
See Processing Withholding Updates.
For efficient withholding processing, run payment and withholding posting throughout the year.
To create your 1099 files for the Internal Revenue Service and Copy B reports for your vendors:
(Optional) Run the Withholding Mismatch Report (APY9010).
This report shows all mismatched voucher lines for the selected vendor location.
(Optional) Manually update incorrect withholding on the voucher lines using the Withhold Adjustments page or the Withholding Update pages and process.
(Optional) Rerun the Withholding Mismatch Report.
(Optional) Run the Duplicate Vendors report (APY3215) and make adjustments, if necessary, to combine withholding totals for vendors with duplicate Taxpayer Identification Numbers (TINs).
Run the 1099 Job (AP_1099) to populate the withholding 1099 table, run the withholding 1099 report, and create the 1099 Copy B forms.
The 1099 Report Post process populates the withholding 1099 table by extracting data from the withhold transaction table and inserting it into the withholding 1099 table.
The 1099 Report process compares the information in the withholding transaction tables to the information that you have already sent to the IRS and populates a third table with the information that needs to be sent to the IRS for the current year. This enables you to process corrections and replacements in addition to original submissions.
The 1099 Report Copy B Sort process generates the selected forms and sorts the information in specified order.
Note. You can run these processes individually as well.
Create and print the 1099-MISC, 1099-G, and 1099-INT Crystal report forms.
Note. You can run these reports forms using the same run control as the 1099 processes.
Generate a 1099 Withholding to Send Detail Report.
This report is a summary of the data stored in the withholding detail table (WTHD_TO_SND_DTL). It is a replica of the file you are sending to the IRS.
Run the Withholding Sent File Application Engine process (WTHD_SENT) once you have sent your file to the IRS.
This process records all of the data you sent to the IRS.
See Reporting on Duplicate Vendors.
See Running the Withholding Mismatch Report.
Since IRS filing requirements are subject to change, please refer to IRS publication 1220 for the current requirements.
The IRS enables you to file using magnetic or electronic media. PeopleSoft Payables automatically formats the files according to the latest IRS requirements.
In certain cases, the IRS acts as a forwarding agent for states that participate in the Combined Federal/State Filing Program. Consult current IRS publications for information.
The IRS enables you to send a test file before you send your regular file. Test files should contain a sample of each record you are required to file. You can create test files using PeopleSoft Payables.
Taxpayer Identification Number (TIN)
Every vendor in the United States must have a Taxpayer Identification Number (TIN). For individuals, this is their Social Security Number (SSN). For businesses, this is a Federal EIN. For sole proprietorships and partnerships, you have a choice between the person's SSN or the Federal EIN.
PrerequisitesBefore you begin, you must:
Define a withholding calendar and the withholding controls.
Complete all withholding setup, including the applicable 1099 piggyback states.
Set up withholding vendors.
Enter, post, and pay vouchers; run the Payment Posting Application Engine process (AP_PSTPYMNT) and the Withholding Posting Application Engine process (AP_WTHD).
(Optional) Run the Withholding Mismatch Report and update withholding manually using the Withhold Adjustments page or via the Withholding Update pages and process.
(Optional) Run the Duplicate Vendors report to review any TINs, names, addresses, and so forth, that are shared with more than one vendor for a specified entity over a specified period.
See Also
Processing Withholding in PeopleSoft Payables
Maintaining Vendor Information
Common Elements Used in This Section|
Vendor ID |
Enter to specify a particular vendor. |
|
Start Date and End Date |
Limit a search to information between the start and end date. |
|
Control SetID and Control ID |
Generate a different IRS file with each control ID. You must enter a setID before you select the control ID. |
|
Report ID |
Defaults as US_REPORT. |
Pages Used to Process U.S. Withholding|
Page Name |
Definition Name |
Navigation |
Usage |
|
RPT_1099_JOB |
Vendors, 1099/Global Withholding, 1099 Reports, Withhold 1099 Report Job, 1099 Report Post / Report / Copy B |
Request to run the 1099 Job (AP_1099), that includes the 1099 Report Post Application Engine process (1099_RPT_PST), the 1099 Report Application Engine process (AP_APY1099), and the 1099 Copy B Sort Application Engine process (AP_COPYB_RPT). You can also select to run these processes individually. In addition, you can select to run the 1099 report forms (1099-MISC, 1099-G, and 1099-INT) separately or as part of the same run control request. |
|
|
TO_SEND_RPT |
Vendors, 1099/Global Withholding, 1099 Reports, 1099 to Send Detail, 1099 to Send Report |
Define run parameters for the 1099 Withholding to Send Detail Report (APY8056). Use the report to review a summary of the data stored in the withholding detail table (WTHD_TO_SND_DTL). The report lists all the information created by the 1099 reporting process and is a replica of the data in the file you are sending to the IRS. You must complete the 1099 Report process—with the exception of sending the file—for the report to accurately summarize your data. |
|
|
WTHD_SENT |
Vendors, 1099/Global Withholding, 1099 Reports, Withholding Sent File, Withhold Sent |
Request a run of the Withholding Sent File Application Engine process (WTHD_SENT). This process finalizes the 1099 reporting and file creation process. It records all the data in the file you have sent. Do not run this process until you send your file to the IRS. You can only run it once for each time you run the withholding report. The system uses this information when creating correction or replacement files. |
Generating the 1099 Report Post, Report, and Copy B Processes
Access the 1099 Report Post / Report / Copy B page (Vendors, 1099/Global Withholding, 1099 Reports, Withhold 1099 Report Job, 1099 Report Post / Report / Copy B).
The 1099 Report Post / Report / Copy B page is divided into three sections; 1099 Report Post, 1099 Report, and 1099 Report Copy B Sort. Each section corresponds to the three 1099 processes, respectively (1099_RPT_PST, AP_APY1099, and AP_COPYB_RPT).
Note. The 1099 Report Post / Report / Copy B page is for U.S. reporting. The Withhold Reports page is for global reporting. The person who controls security for your PeopleSoft pages defines security for these pages so that your users can access whichever reports are applicable for the company.
1099 Report Post
Parameters common to all three processes are listed in this group box. You must complete these parameters to run the 1099 Job or any of the three 1099 processes.
|
Report Date |
Displays today's date by default. |
|
Include Manual Overrides |
Select to include manually adjusted or updated withholding transactions. This is usually selected for 1099 reporting. |
|
Control SetID and Control ID |
Select the withholding control setID and control ID to use to create 1099 reporting. The system uses the payor data for the specified control ID you entered on the Report Control Information - Payor Data page. This data must match the information the IRS has on file. In particular, the tax ID, transmitter control code, and name data should be the same, since the 1099 Report process pulls the header information for the IRS file from this page. |
|
Calendar SetID and Calendar ID |
Select the calendar you want to use. You must create an annual calendar with one period for the entire year to use for 1099 reporting. |
|
Fiscal Year and Period |
Enter the fiscal year and period for the calendar you specified. The system uses this information to determine which transactions to include in the posting. It selects all transactions with a payment date in the specified period. For 1099 reporting, the period is defined as a calendar year. |
When you run the 1099 Report Post process, the system extracts the withholding transaction data and populates the Withholding 1099 Report table.
1099 Report
You must complete these parameters to run the 1099 Job or the 1099 Report process. You do not have to complete these parameters if you are running the 1099 Report Post process or the 1099 Copy B Sort process individually.
|
Type of File/Return |
Select the type of the file or return to create. Options include: Orig/Corr (original or correction): Select if you have not yet sent a file to the IRS or you are sending a correction file after sending an incorrect one. Replace: Select if the IRS requests a replacement file. Test: Select if you are sending a test file. |
|
Replacement Character |
Enter the character the IRS sends you as a replacement character to include in the file if you need to send a replacement file. |
When you run the 1099 Report process, the process creates the file for the IRS and stores it in the directory specified on the Process Scheduler. You can send the file to the IRS using the new Filing Information Returns Electronically (FIRE) system.
The 1099 Report process automatically produces an electronic file and moves data to a reporting table to produce Copy B reports.
Note. The naming convention for the IRS tax file is IRSTAX_<FILE_EXTENSION>_<WTHD_CNTL_ID>_<PROCESS_INSTANCE>.TXT
(for example, IRS_001_CORP_1234.TXT) for all platforms except for MVS. Because
of the 8-character name limit for the MVS platform, the system truncates the
file name after 8 characters (for example, IRS_001_.TXT).
You can view the IRS tax file from the Report Manager.
1099 Report Copy B Sort
You must complete these parameters to run the 1099 Job or the 1099 Copy B Sort process. You do not have to complete these parameters if you are running the 1099 Report Post process or the 1099 Report process individually.
|
Withhold Type |
Select the type of 1099 report you want to generate from: 1099G for 1099-G (government payments) report. 1099I for 1099-I (interest income) report. 1099M for 1099-MISC (miscellaneous) report. All for all supported 1099 reports. |
|
Mask TIN |
Select this checkbox to mask social security numbers on the Copy B report. |
|
Vendor Select Option |
Select from these options: Select All: The report runs for all vendors in the control setID defined in the 1099 Report Post group box. Specify: The report runs for all vendors you specify in the Vendor Payees grid at the bottom of the page. |
|
AP 1099 sort order |
Select to sort the report by Name, TIN, or Vendor ID. |
You can select to run the AP_COPYB_RPT Application Engine process followed by the appropriate 1099 Crystal reports (for the 1099-MISC Copy B, 1099-INT Copy B, or 1099-G Copy B) separately. Or you can select the PRINT 1099 COPY B job (APCOPYB), which runs the Application Engine process together with the 1099 Crystal reports in the correct order.
Running the 1099 Withholding to Send Detail Report
Access the 1099 to Send Report page (Vendors, 1099/Global Withholding, 1099 Reports, 1099 to Send Detail, 1099 to Send Report).
Note. This report will be blank if you do not run the 1099 Report process first. Also, be aware that the balances on this report may not balance against the information provided in the Vendor Withholding Balances Control Report (APY3012), since the report includes vendors that have been updated from withholding applicable to non-withholding applicable.
|
Fiscal Year |
Enter the applicable fiscal year. |
Running the Withholding Sent File Process
Access the Withhold Sent page (Vendors, 1099/Global Withholding, 1099 Reports, Withholding Sent File, Withhold Sent).
Note. You do not need to run this process if you are sending a test file to the IRS. The test file is a viable IRS file, but the information generated for the test does not need to be stored in the online system.
Processing Correction Files
If you determine that you reported incorrect data for a vendor or a group of vendors, you need to create a correction file. To correct the transaction data within the PeopleSoft Payables system, do one of the following:
Adjust the individual voucher lines for the vendor using the Withholding Invoice Line Update page and running the Withholding Update process.
Enter an adjustment on the Withhold Adjustments page.
Enter a new voucher.
To complete the correction process:
Run the 1099 Job.
The system generates the 1099 report showing only the corrections and the appropriate 1099 Copy B forms.
Run the 1099 Withholding to Send Detail Report.
Run the Withholding Sent File process.
Processing Replacement Files
Once you send a file to the IRS and run the Withholding Sent File process, you are finished with the 1099 reporting process unless the IRS rejects the file because of formatting errors. In that case, the IRS may tell you what is invalid in the file either through contact information you provide or on their internet page, where the file is stored. Make the necessary changes and resubmit the file.
To do this, access the 1099 Report Post / Report / Copy B page, complete the parameters in the 1099 Report Post and the 1099 Report group boxes. In the 1099 Report group box, select Replace in the Type of File/Return field, and enter the replacement character provided to you by the IRS in the Replacement Character field.
Run the 1099 Report Post and the 1099 Report processes. The system generates a new replacement file that you can send to the IRS. You must run the Withholding Sent File process after creating the replacement file.
Note. You can create a replacement file only if one and only one original file was sent to the IRS.
Processing U.K. Withholding
To set up U.K. withholding, use the Withholding Codes component (WTHD_CODE).
This section provides an overview of the U.K. Construction Industry Scheme (CIS) and discusses how to:
Set up withholding entities for CIS.
Define CIS withholding requirements for the entity.
Define business units as collection agents for CIS.
Define withholding codes for CIS.
Set up withholding rules for CIS.
Set up withholding vendors CIS.
Enter address information for CIS vendors.
Set up contractor details for CIS.
Set up tax calendars.
Generate reports for CIS.
Generate payments to HM Revenue & Customs.
Understanding the U.K. CIS
This section describes how to implement the CIS using the Global Withholding features in PeopleSoft Payables.
In the U.K., payments to suppliers for construction operations fall within the scope of the CIS. This scheme states that suppliers (referred to in the scheme as subcontractors) who operate in the construction industry can be paid only if they are holders of either a Registration Card or a Subcontractors Tax Certificate. Registration Card holders have amounts deducted from their payments for labor based on their tax and National Insurance Contribution (NIC) liability. Certificate holders can be paid gross, but details of all the payments must be retained for reporting to the Inland Revenue.
With the legislative changes effective 04/2007, Contractors and sub-contractors will no longer use CIS Vouchers. Contractors must send a monthly return to HM Revenue & Customs including details of payments made within the scheme to all sub-contractors, details of any deductions they have made from payments to sub-contractors, a declaration confirming that employment status has been considered, and a declaration that the verification process has been applied correctly.
Note. Detailed Inland Revenue specifications are available at this web address: http://www.hmrc.gov.uk/new-cis
The withholding setup for the U.K. should be configured as the sample data shown in this table:
|
Type |
Value |
|
Withhold Entity |
HMRC |
|
Withholding Rule |
CIS0 |
|
Withholding Rule |
CISS |
|
Withholding Rule |
CISI |
|
Withholding Type |
CIS07 |
|
Withholding Class |
CISI |
|
Withholding Class |
CISIM |
|
Withholding Class |
CISS |
|
Withholding Class |
CISSM |
|
Withholding Jurisdiction |
UKWTA |
|
Withholding Code |
CISS |
|
Withholding Code |
CISSSM |
|
Withholding Code |
CISI |
|
Withholding Code |
CISIM |
|
Withholding Code |
CIS0 |
Note. Jurisdiction is not needed for CIS processing, but it is a required object in the data structure. We deliver a dummy jurisdiction of UKWTA with the sample data.
Registration cards, of which there are two types, are issued to those that do not qualify for a subcontractor tax certificate. For holders of these cards, a deduction must be made on payments at the prevailing rate that is specified by the government. The two types of registration cards are:
|
CIS4(P) - Permanent Card |
This bears the National Insurance number of the card holder. It has no expiration date. |
|
CIS4(T) - Temporary Card |
This does not bear the National Insurance number and has an expiration date. |
In PeopleSoft Payables, no distinction is made between the two types of registration cards. This is because withholding is triggered by the withholding code and its associated rule, not by attributes that are assigned to the vendor. We recommend that registration card holders use the delivered sample withholding codes (or their equivalents).
Pages Used to Process U.K. Withholding
|
Page Name |
Definition Name |
Navigation |
Usage |
|
WTHD_ENTITY |
Set Up Financials/Supply Chain, Product Related, Procurement Options, Withholding, Withholding Entities, Withholding Entity |
Define the withholding entities (tax authorities). |
|
|
WTHD_ENTITY_FIELDS |
Set Up Financials/Supply Chain, Product Related, Procurement Options, Withholding, Withholding Entities, Entity Fields - Vendor |
Indicate which information the tax authority (entity) requires for your vendors. |
|
|
BU_WTHD_JUR |
Set Up Financials/Supply Chain, Business Unit Related, Procurement, Procurement Control, Withholding |
Specify General Ledger business unit withholding setup. |
|
|
WTHD_CODE |
Set Up Financials/Supply Chain, Product Related, Procurement Options, Withholding, Withholding Codes, Withhold Code |
Define withholding codes. |
|
|
WTHD_RULE |
Set Up Financials/Supply Chain, Product Related, Procurement Options, Withholding, Rules, Withhold Rule |
Establish rules that determine the actions to be taken during withholding. |
|
|
WTHD_TYPE |
Set Up Financials/Supply Chain, Product Related, Procurement Options, Withholding, Types and Classes, Withhold Type |
Define withholding types and associate them with withholding classes. |
|
|
VNDR_GBL_OPT_SEC |
Vendors, Vendor Information, Add/Update, Vendor, Location Click the Global/1099 Withholding link on the Vendor Location page. |
Define withholding control information and reporting information for the vendor location. |
|
|
VNDR_ADDRESS |
Vendors, Vendor Information, Add/Update, Vendor, Address |
Enter an alternate name to be used on withholding transactions. |
|
|
WTHD_CONTROL |
Set Up Financials/Supply Chain, Product Related, Procurement Options, Withholding, Report Control Information, Payor Data |
Enter payor data as defined by your tax authorities. |
|
|
CALENDAR_BUILDER |
Set Up Financials/Supply Chain, Common Definitions, Calendars/Schedules, Calendar Builder |
Create and maintain tax calendars. |
|
|
WTHD_RPT_POST |
Vendors, 1099/Global Withholding, Global Withholding Reports, Create Reporting Information, Withhold Report Post |
Define parameters for running the Withholding Reporting Application Engine process (AP_WTHDRPT) to populate the withholding report table with data from the withholding transaction table based on your report setup. |
|
|
GBR_CIS_RPT_RUN |
Vendors, 1099/Global Withholding, Global Withholding Reports, Print CIS Payment Statement |
Print CIS payment statement. |
Setting Up Withholding Entities for CIS
Access the Withholding Entity page (Set Up Financials/Supply Chain, Product Related, Procurement Options, Withholding, Withholding Entities, Withholding Entity).
The system creates scheduled payments for amounts that are deducted from payments to sub-contractors defined under the withholding entity. These payments must be made to the HM Revenue & Customs within 14 days after the end of the tax month. You must create a vendor that represents the Accounts Office of the HM Revenue & Customs to which these deducted amounts can be remitted. To ensure that scheduled payments are made to the HM Revenue & Customs vendor, you enter the vendor details on the Withholding Entity page.
To ensure that deductions from payments made toCIS Sub-contractors are kept as a separate payment that can be made at the end of the month to the HM Revenue & Customs , select the Create Withholding Payment check box for the CIS4 withholding class. Then, in the Round Option field, select Natural as the rounding option (you must not leave this field blank). Set the Hold Payment field to Wthd Only (withhold only) or No Hold.
Important. You must define at least one entity named HMRC as there is processing tied to the entity.
See Also
Defining CIS Withholding Requirements for the Entity
Access the Entity Fields - Vendor page (Set Up Financials/Supply Chain, Product Related, Procurement Options, Withholding, Withholding Entities, Entity Fields - Vendor).
Mark the Registration Insurance Number, Business Type, Verification Complete, Verification Date, Verification Number, and Taxpayer Identification Number fields as optional.
See Also
Defining Vendor Information for the Entity
Defining Business Units as Collection Agents for CIS
Access the Procurement Control - Withholding page (Set Up Financials/Supply Chain, Business Unit Related, Procurement, Procurement Control, Withholding).
To ensure that the vendor withholding defaults are passed to the voucher, select the Collection Agent Flag option for the withholding entities that apply to your business unit.
See Also
Defining Withholding Codes for CIS
Access the Withhold Code page.
There are several different classes you can use for CIS withholding:
|
CIS0 |
Sub-Contractor non-deduction. |
|
CISI |
Incentive deduction |
|
CISIM |
Sub-contractor materials |
|
CISS |
Standard deduction |
|
CISSM |
Sub-contractor materials |
See Also
Setting Up Withholding Rules for CIS
Access the Withhold Rule page (Set Up Financials/Supply Chain, Product Related, Procurement Options, Withholding, Rules, Withhold Rule).
There are several different rules you can use for CIS withholding:
|
CIS0 |
No Deduction |
|
CISS |
Verified vendor with a standard deduction of 20 percent. |
|
CISI |
Unverified or Incentive deduction of 30 percent. |
See Also
Setting up Withholding Types for CIS
Access the Withhold Type page. (Set Up Financials/Supply Chain, Product Related, Procurement Options, Withholding, Types and Classes, Withhold Type)
PeopleSoft delivers the CIS07 withholding type that is associated with the CIS0, CISI, CISS, CISSM, and CISIM withholding classes.
Setting Up Withholding Vendors for CIS
Access the Withholding Vendor Information page (click the Global/1099 Withholding link on the Vendor Location page).
Withholding Information
The following fields in this grid have specific requirements for certificate withholding:
|
Default Jurisdiction |
Select to ensure that the withholding defaults are copied to the invoice. |
|
Default Withholding Class |
Select a withholding class that will be used as a default for this vendor location. |
|
Withhold |
Select when setting up certificate information or registration card information for the vendor. |
|
Business Type |
Select Corporation or Individual. |
|
Registration/Insurance Number |
Enter the registration number if this is a corporation or the insurance number if this is an individual. |
|
Verified |
Select this checkbox if the number provided has been verified. |
|
Verification number |
Enter the verification number provided by the HMRC |
|
Verification Dates |
The system automatically populates this field with the current date when the Verified checkbox is selected. |
See Also
Entering Address Information for CIS Vendors
Access the Vendor Information - Address page (Vendors, Vendor Information, Add/Update, Vendor, Address).
Make sure that you include the county. The program that extracts withholding data requires that the county field to be filled in.
Complete the Withholding Alternate name field with the name that appears on the withholding document.
See Also
Setting Up Contractor Details for CIS
Access the Report Control Information - Payor Data page (Set Up Financials/Supply Chain, Product Related, Procurement Options, Withholding, Report Control Information, Payor Data).
Before you generate the monthly and annual returns, you must enter your own company's tax information (contractor details) on the Report Control Information - Payor Data page.
Payer Name 1 and Payer Name 2 are optional fields, but they are used on the EDI file that is submitted to the HM Revenue & Customs. Ideally, you should enter at least Payer Name 1. You should enter your Contractor tax reference in the Tax ID field. If you are using EDI to submit your returns, enter the EDI ID that is issued to you by the HM Revenue & Customs in the Transmitter Cntl Cd field.
It is also important that you enter your business address on the address page. Access this page by clicking the Envelope button.
Note. You must also make sure that you have listed the applicable business units and vendors (or chose the All Vendors option) on the Report Control Information - Vendors and Business Units.
See Also
Entering Transmitter and Payor Data
Setting Up Tax Calendars for CIS
Access the Calendar Builder page (Set Up Financials/Supply Chain, Common Definitions, Calendars/Schedules, Calendar Builder).
U.K. reporting consists of monthly and annual returns. You are obliged to report all payments that are made to subcontractors within 14 days of the end of the tax month.
In the U.K., the tax year runs from April 6 to April 5 of the following year. Each tax month starts on the sixth day of the month. To ensure that payments that are subject to withholding processing are reported in the correct tax month, create a monthly calendar for the U.K. tax year.
To produce the annual return, create an annual calendar.
Monthly Calendar
This is an example of a monthly calendar:
Annual Calendar
This is an example of an annual calendar:
See Also
Generating Reports for CIS
You generate two kinds of reports for CIS: monthly and annual.
Generating Monthly Reports
PeopleSoft provides a flat file conforming to the CIS scheme GFF(generic flat file format) data mapping standards as defined in the EB5/CIS300 message implementation guidelines published by the HMRC.
The U.K. CIS File SQR report (APY8032), which you run from the Withhold Report request page, produces both the flat file and the report output. The PeopleSoft system produces two files:
|
Construction Gross Payment Vouchers |
This file contains details of payments that are made to contractors. The file that is produced is called APY8032.23E (or APCIS23E.DAT on IBM OS390 servers). |
|
Tax Payment Vouchers |
This file contains details of payments that are made to sub-contractors. The file produced is called APY8032.25E (or APCIS25E.DAT on IBM OS390 servers). In addition to producing the flat file, you must also print a copy of the Tax Payment Voucher (form CIS25E). This single-part document is sent to the subcontractor to provide a record of the amounts that have been deducted from the subcontractor's payments during the tax month. |
To create the files, you must first post the withholding details into the transaction table using the Withholding Posting Application Engine process (AP_WTHD), from the Withhold Transaction Post page. You then need to extract the data from the transaction table into the reporting tables, using the Withhold Report Post page to run the Withholding Reporting Application Engine process (AP_WTHDRPT). On the Withhold Report Post page, you enter your report ID and control ID for CIS reports (the delivered Report ID for monthly reports is CIS_NEW, UK Construction Industry Scheme; the delivered Control ID is GBR-REPORT, UK Withholding Report). For the monthly returns, you must select the U.K. monthly tax calendar.
After you extract the data to the report files, you create the output files and the CIS25E report by running the withholding reports using the Withhold Report page.
You must send the files that are produced into the EDI translation software of your choice. This software converts the flat file into EDI messages. A list of third-party EDI translation and submission software providers is available from the HMRC.
All payments that are made tosubcontractors during the tax year must be reported to the HMRC. This can be done using preprinted, multi-part stationery or through EDI. PeopleSoft provides for the EDI solution. The system generates a flat file that conforms to the file that is specified in the HM Revenue & Customs Message Implementation Guide. We produce a single file:
End of Year Payments. The file that is produced is called APY8032.36E (or APCIS36E.DAT on IBM OS390 servers).
To create the files, all the withholding details for the year must have been posted to the transaction table using the Withhold Transaction Post page.
Then, extract the data from the transaction table into the reporting tables using the Withhold Report Post page. For the annual returns, select the U.K. annual tax calendar.
After you extract the data to the report table, you create the output file by running the Withholding Reports.
You must send the files that are produced to the EDI translation software of your choice. This software converts the flat file to EDI messages. A list of third-party EDI translation and submission software providers is available from the HM Revenue & Customs.
See Also
Posting Withholding Transactions
Generating Withholding Reports
Generating Payments to HMRC
There are several ways in which you can set up the system to generate the payment to the HMRC. The method you select depends on the volume of CIS transactions and the way in which you run your pay cycle.
Method 1 - Placing HMRC Payments on Hold
With this method, you set up the system to place the HMRC scheduled payments on hold automatically. Within 14 days after the end of the tax month, you take the scheduled payments off hold. Set up a pay cycle that includes scheduled payment dates within the tax period range (for example, from the sixth of the previous month to the fifth of the current month). Then a single payment to theHMRC can be generated for all withheld amounts.
To place the withheld scheduled payments on hold:
Set the Hold option to Wthd Only (withhold only) on the Withholding Entity page for withholdingClasses CIS0, CISS, CISSM, CISI, and CISIM.
Set the Withholding Date option to Payment on the Payment Selection Criteria - Dates page.
This sets the scheduled due date on the payment so that it is equal to the payment date, making it easier to select only the withheld payments that were made during the tax month.
A variation of this method is to place the HM Revenue & Customs vendor on hold. With this approach, you leave the vendor on hold until just before running a pay cycle that selects HM Revenue & Customs scheduled payments. You take the vendor off hold before running the pay cycle and place the vendor back on hold immediately after the pay cycle completes. To do this, you select the Hold Payments check box on the Additional Payables Options collapsible region on the Vendor Information - Payables Options page.
Method 2 - Using Pay Groups
If the volume of withheld payment is too great to permit resetting the Hold option manually, then you can use Pay Groups. You define one set of pay groups for regular payments and another pay group exclusively for payments that are made to the HM Revenue & Customs . Then you assign the HM Revenue & Customs pay group to your HM Revenue & Customs vendor. When scheduled payments are created for the withheld amount, the system assigns the HM Revenue & Customs pay group to it. When payment to the HM Revenue & Customs is due, you either temporarily include the HM Revenue & Customs pay group in the Payment Selection Criteria component (PYCYCL_DEFN) or create a new pay cycle ID. To prevent the HM Revenue & Customs payments from being selected during the tax month, use different pay groups for all other voucher payments.
Method 3- Using Withholding Class Payment Terms
When defining your withholding entities, you can indicate for every combination of withholding class and withholding categories the payment terms you want to apply to the withheld payment. For example, knowing that you need to pay within 14 days after the end of the tax month, which ends on the 5th of the calendar month, you would create a payment term (Single Payment) that contains two split terms. The first term would say that for any payment falling between the 1st and the 5th of the calendar month, the payment ID would be Same month, on the 15th. The second term would indicate that between the 6th and the end of the calendar month, the scheduled date should be Next month, on the 15th. That way, all withheld amounts that need to be paid to the HM Revenue & Customs will be scheduled to be paid on the 15th, allowing you to run your pay cycle before the due date of the 19th of the calendar month.
See Also
Defining Vendor Information for the Entity
Defining Pay Cycle Date Criteria
Processing Japanese Withholding
This section provides an overview of Japanese withholding, lists prerequisites, and discusses how to generate the Withholding Summary Sheet.
Understanding Japanese Withholding Processing
To meet one of the Japanese income tax reporting requirements, PeopleSoft Payables provides a supporting summary sheet report (WTP2_001) corresponding to the year-end Japan Withholding Report (APY8025), which is printed per vendor. The summary sheet has both detailed and summarized information for the applicable withholding transactions that are processed (paid) in the PeopleSoft Payables module.
Information includes payment and withholding amount summarized by:
Set of withholding classes defined for each reporting line.
Vendor category.
Vendor.
Each summary has a subtotal line indicating the number of payments made, total payment amount, and total withholding amount. The lines for categories, defined classes, and report totals also display the number of payees.
Prerequisites
Because this report is a summary sheet attached to the Japan Withholding Report, every step that must be completed for the Japan Withholding Report also is a prerequisite for the summary sheet. All transaction information used in the summary sheet is based on the detailed information used in the Japan Withholding Report. You can select a portion of the report's information and then output a partial summary sheet, but you cannot include any additional transactions that are not in the report.
To produce the Japan Withholding Report and its summary sheet:
Set up your withholding environment.
Note that the withholding report definitions you make on the Report Definition 1 page are a prerequisite for generating the withholding summary sheet.
Register withholding (create voucher).
Create payments.
Post payments.
Post withholdings.
Run the Withholding Reporting process.
Produce the Japan Withholding Report (not required).
Create the summary sheet.
You must run the Withholding Reporting process before you can produce the Japan Withholding Report. Because the summary sheet is calculated based on the information shown on the Japan Withholding Report, the Withholding Reporting process is also required to create the summary sheet. Consequently, the summary sheet cannot include any transaction that is not processed for the Japan Withholding Report, but it is possible to produce the report for a subset of this information.
Important! When there are more than two lines in one voucher and withholding tax is applied to both lines using the gross amount (that is, when the Withholding Basis Amt Override field is blank), the summary sheet double-counts the gross amount in the Payment Amount field. If you want to automatically calculate withholding tax based on the line amount, make sure you have the correct amount in the Withholding Basis Amt Override field on the voucher.
See Also
Running the Withholding Reporting Application Engine Process (AP_WTHDRPT)
Page Used to Process Japanese Withholding|
Page Name |
Definition Name |
Navigation |
Usage |
|
WTP2_RUN_WTP2_001 |
Vendors, 1099/Global Withholding, Global Withholding Reports, Withholding Report by Class, Withholding Report by Class |
Generate the summary sheet for the withholding report by class. |
Generating the Withholding Summary Sheet
Access the Withholding Report by Class page (Vendors, 1099/Global Withholding, Global Withholding Reports, Withholding Report by Class, Withholding Report by Class).
|
Withholding Report ID |
Select the Withholding Report ID created in the Report Definition component. |
|
Withholding Entity |
Select the entity whose transactions are included in the report output. |
|
From Payment Date |
Select the date for which the report should begin the output of data. Note. This is the date a payment was made to a vendor for whom an amount was withheld, not the date a payment was made to the withholding entity. |
|
To Payment Date |
Select the date for which the report should end the output of data. |
Note. If you are generating this summary sheet with the withholding report (per vendor), the date range must be from the first day of the accounting period you specified on the Withhold Report page to the last day of the same accounting period.
All payment and withholding amounts are converted into the currency defined in the withholding entity, using the exchange rate type defined during the Withholding Posting process.
Important! The currency used in this report is that of the currently effective, single currency code defined for the withholding entity. If there were more than two currencies used to post withholding transactions for the same withholding entity during the selected period of the report, amounts of all transactions that were posted in a currency different from the currently effective currency of the withholding entity do not appear on this report.
Processing ATO Withholding
This section provides an overview of ATO withholding, lists common elements, and discusses how to:
Post withholding data to the withholding report table.
Run the PAYG Voluntary Agreement, Labour Hire, and No ABN Quoted reports.
Run the PAYG Payment Summary Statement and No ABN Quoted Summary Statement reports.
Adjust or enter payment summary data manually.
See Also
Processing Withholding in PeopleSoft Payables
Understanding ATO Withholding
This section discusses:
PAYG overview.
ATO withholding setup.
How information is displayed on ATO forms.
Posting withholding report data.
Running the PAYG Vendor reports.
Printing the reports.
Printing the PAYG payment summary reports.
Adjusting or entering payment summary data manually.
To meet PAYG (Pay As You Go) legislative requirements for Australia withholding, the PeopleSoft system provides several withholding report formats and the functionality to handle PAYG withholding as defined by the ATO.
Specifically, the PeopleSoft system supports these reports using impact printers:
Payment Summary - Voluntary Agreement (PAYG Voluntary Agreement - APY8041).
Payment Summary - Labour Hire and Other Specified Payments (PAYG Labour Hire - APY8042).
Payment Summary - Withholding where ABN not Quoted (PAYG No ABN Quoted - APY8043).
PAYG Payment Summary Statement (PAYG Payment Summary Statement - APY8044).
PAYG Withholding where ABN not quoted - Annual Report (PAYG No ABN Quoted Summary Statement - APY8045).
This table provides the steps you should follow to set up ATO withholding:
How Information is Displayed on ATO Forms
This table shows how information entered in PeopleSoft Financials is displayed on all three ATO forms:
|
Labels on ATO Form |
Fields on Pages |
Page and Navigation |
|
Your ABN |
Tax ID |
Report Control Information - Payor Data page Select Set Up Financials Supply Chain, Product Related, Procurement Options, Withholding, Report Control Information, Payor Data. |
|
Branch Number |
Transmitter Cntl Cd |
Report Control Information - Payor Data page |
|
Payer's Name (line 1 and line 2) |
Transmitter Name 1 and Transmitter Name 2 |
Report Control Information - Payor Data page |
|
Payee's Address (line 1 and line 2) Suburb/Town, Country, State, Postcode |
Address 1 and 2, City, Country, State, Postal |
Address page Select Vendors, Vendor Information, Add/Update, Vendor, Address. |
This table shows how information entered in PeopleSoft Financials is displayed for Voluntary Agreement vendors:
|
Label on ATO Form |
Field on Page |
Page and Navigation |
|
Payee ABN |
VAT Registration ID |
VAT Registration Details Select Vendors, Vendor Information, Add/Update, Vendor, Identifying Information. Click the Registration link on the Identifying Information page to access the VAT Registration Details page. |
This table shows how information entered in PeopleSoft Financials is displayed for Labor Hire vendors:
|
Label on ATO Form |
Field on PeopleSoft Page |
Page and Navigation |
|
Payee Tax File Number |
Tax District Reference Note. Make sure you leave the Taxpayer Identification Number blank. |
Withholding Vendor Information Select Vendors, Vendor Information, Add/Update, Vendor, Location. Click the Global/1099 Withholding link on the Vendor Information - Location page and select the Additional Information tab in the Withholding Information group box. |
This table shows how information entered in PeopleSoft Financials is displayed for No ABN vendors:
|
Labels on ATO Form |
Fields on PeopleSoft Page |
Page and Navigation |
|
Payee Trading Name (line 1 and 2) |
Name 1 and Name 2 |
Address Select Vendors, Vendor Information, Add/Update, Vendor, Address. Expand the Payment/Withholding Alt Names section to access the Withholding Alternate name group box. |
|
Payee Phone Contact |
Prefix and Telephone |
Address Select Vendors, Vendor Information, Add/Update, Vendor, Address. Expand the Payment/Withholding Alt Names section to access the Phone Information group box. |
Posting Withholding Report Data
The reports require aggregated data to be present in the Withholding Report table. Data is aggregated into the Withholding Report table through the Withholding Reporting process, which you can run from the Withhold Report Post page or from the Create PAYG Report Information page.
Whether you launch the Withholding Reporting process from the Withhold Report Post page or from the Create PAYG Report Information page depends on what dates you need to use to summarize withholding.
If your dates fall on the start and end of a period in a calendar, which would be the case when aggregating for year-end reporting, use the Withhold Report Post page. The from and through dates, which are hidden, are based on the start and end dates of the specified calendar period.
If you need to aggregate payments between arbitrary dates, which can be the case if you get a request for a payment summary from one of your vendors during the fiscal year, then you can use the Create PAYG Report Information page to specify arbitrary from and through dates.
Remember that the ATO wants summary reports to exclude payments that have already been reported on previous summaries; therefore, you have to enter appropriate dates. Except for the handling of from and through dates, both methods give the same results as they pass the same parameters to the same process.
Running the PAYG Vendor Reports
PAYG reports for all three classes of PAYG vendors are run by selecting Vendor, Withholdings, PAYG Withholding by Vendor.
At the minimum you need to specify the Report ID, the Vendor SetID and the Vendor ID on this page.
If the information you have provided uniquely identifies the data you want processed in the Withholding Report table, the system defaults the rest of the fields automatically. This would typically happen with vendors for whom you have only set up one location and which you are only paying from one business unit.
In this case, it saves you from having to enter the Vendor Location, Business Unit and Location.
If the Draft Flag check box is deselected, the report is set to print directly into the boxes on the standard ATO form. If you select the Draft Flag, the report prints explanatory labels above each field, so that you can read the results more easily on plain paper. The system displays the from and through dates to remind you what dates the payments were summarized on.
Note. The PAYG No ABN Quoted report, APY8043.SQR, actually prints one page per payment, rather than one report that sums up the amounts paid during the specified time. That means that you may print several pages or forms from APY8043.SQR if you have made several payments to the specified vendor during that time.
Direct printing on ATO forms requires an impact printer as the forms use carbon copies. There are no feeding sprockets to guide the paper, so you will need to position the paper precisely, which depends on the printer model. On test printers, we lined up the printer 1/8 inch above the yellow shaded boxes and immediately below the Payment Summary for year ending 30 June (see the red line in the following illustration):
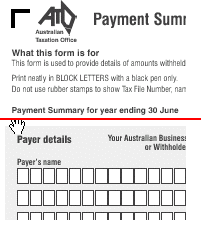
ATO Payment Summary Form
To minimize compatibility issues with older printers, the reports print a pure ASCII file, rather than the usual PCL commands found in our regular SQRs. Some of the test printers had problems printing the report date because it was so close to the end of the forms that the printer thought that it was out of paper.
To avoid requesting a page feed when printing on an ATO form, we have added a hardcoded switch in APY804.SQC to allow you to skip printing of the report date.
Set this variable to 0 if you have problems with printing the report date. In this case, you will have to fill in the report date by hand.
Let #print_report_date = 0
Let #print_report_date = 1
This switch has no effect when in Draft mode because printing starts at the top of the page.
Printing the PAYG Payment Summary Reports
Under the PAYG Withholding System, payers are required to submit the PAYG Payment Summary Statement form by August 14 to the ATO each year together with the ATO originals of all payment summaries listed on the form. The PAYG No ABN Quoted Summary Statement is submitted separately from this form as per the ATO guidelines.
The PAYG Payment Summary Statement form is a reconciliation report. It comprises the total number of payment summaries issued during the financial year, which must equate to the total amount of gross and tax withheld reported on the form.
After generating all Payment Summaries for Voluntary Agreement and Labor Hire through the APY8041 and APY8042 processes respectively, the system writes the payment information required for the PAYG Payment Summary Statement to the Withholding Report Log. This is irrespective of whether the Issued check box on the Withholding by Vendor page is selected or deselected. Selecting the Issued check box flags the payment to be included in the PAYG Payment Summary Statement process. Deselecting the Issued check box represents a duplicate print to be excluded from the above process.
The Withholding Report Log page displays the relevant information for each of the respective types of payment summaries issued during the financial year. Payments summaries which you have issued to your Payees, and which should be included in the Payment Summary Statement, must have the Issued check box selected. For all payment summary printouts that are duplicated, deselect the Issued check box to exclude them from the Payment Summary Statement.
After you choose all the withholding report history on the Withholding Report Log page by selecting or deselecting the Issued check boxes, you can execute the PAYG Payment Summary Statement process from the Withholding Summary page. For form printing using impact printers, deselect the Draft Flag check box. For draft print mode, select the Draft Flag check box. To freeze the fiscal year so that no one can modify the data once you have reported it to the ATO, select the Close Fiscal Year check box.
Adjusting or Entering Payment Summary Data Manually
If you issued payment summaries by filling in the Voluntary Agreement and Labour Hire forms manually, you can enter that information directly in the Withholding Report Log page. This allows you to meet your reporting requirements for the PAYG Payment Summary Statement.
To add a vendor or payee, click the Add a new row button. Enter the information for the vendor in the Vendor Information group box. You can also enter any required payment summary data manually in the Withholding Information group box.
If you enter data manually, do the following:
Make sure that the Issued check box and amounts agree with the payment summaries you have issued to your vendors.
Make sure the withholding type is correct for the vendor type. It should be either VOLAG, LABHR, or NOABN in capital letters. The system expects all vendors to be of the same withholding type. The APY8044 process only selects the VOLAG and LABHR withholding types.
The entry in the Fiscal Year field determines whether it appears on the PAYG Payment Summary Statement for a given year. It is your responsibility to ensure that the fiscal year matches the from and through dates that you indicate and also the contents of your payment summaries. The system does not validate according to the Australian fiscal year calendar.
Alternatively, instead of filling in this page manually, you could run the APY8041, APY8042, or APY8043 (for No ABN Payment Summaries) reports for the same vendors and reporting periods as you had previously filled in manually on the forms.
The system allows manual adjustments where necessary, as mentioned previously. The Payment Summary reporting processes would then update the historical data automatically and you could update the page as required.
PAYG Payment Summary Statement Form:
The horizontal alignment recommended for impact printers is 2 1/16 inches from the top of the form. As a result, it will print the fiscal year at the top of the boxes. The data should fit into its respective boxes. Initially, you may need to make several adjustments before getting all the data to print in the correct boxes.
When you finalize the payment reports for the financial year and ensure that all payment summaries have been reconciled to the payment statement, it is recommended that you close the financial year by selecting the Close Fiscal Year check box and then running the APY8044 process. This process locks the data for that fiscal year and prevents payment transactions from being reported for the fiscal year for which you have already provided summary reports to the ATO.
Furthermore, the payment information for closed periods will not be available on the Withholding Report Log page. You can view all historical payments against closed fiscal years through the withholding inquiries (Vendor, 1099/Global Withholding, Review), however, you cannot make further modifications to historical data.
Common Elements Used in This Section|
Business Unit |
Select the business unit for which you want the reports to be created. |
|
Draft Flag |
Select this check box to print onto a sheet of regular A4 paper. In this case, the report also prints labels for the data. Deselect this check box if you want the reports to print directly into the boxes of the ATO forms. Direct printing on ATO forms requires an impact printer as the forms use carbon copies. |
|
Location |
Select the location of the withholding entity for which you want the reports to be created. |
|
Report Date |
Select the date on which you created your reporting information. |
|
Report ID |
Select the Report ID of the report for which you want to generate data. |
|
Request ID |
Specify a request ID and a description. The system uses these IDs to track each posting request; however, the Request ID can be used repeatedly. The Process Scheduler Request ID is the unique number. |
|
Vendor SetID |
Select a vendor setID for the vendors for which you want to run the reports. |
|
Vendor Location |
Select the vendor location for which you want the reports to be created. |
|
Vendor ID |
Select the ID of the vendor for which you want the reports to be created. |
|
Withholding Entity |
Select the withholding entity or taxing authority for which you want the reports to be created. |
Pages Used to Process ATO Withholding|
Page Name |
Definition Name |
Navigation |
Usage |
|
WTHD_POST_BY_DATE |
Vendors, 1099/Global Withholding, Global Withholding Reports, Create PAYG Report Information |
Post withholding data to the Withholding Report table. |
|
|
WTHD_RPT_RUN2 |
Vendors, 1099/Global Withholding, Global Withholding Reports, PAYG Withholding by Vendor, Withholding by Vendor |
Run the PAYG Voluntary Agreement, PAYG Labour Hire, and PAYG No ABN Quoted reports. |
|
|
WTHD_RPT_RUN3 |
Vendors, 1099/Global Withholding, Global Withholding Reports, PAYG Withholding Summary, Withholding Summary |
Run the PAYG Payment Summary Statement and PAYG No ABN Quoted Summary Statement reports. |
|
|
WTHD_RPT_LOG_LC |
Vendors, 1099/Global Withholding, Global Withholding Reports, Update PAYG Withholding Report, Withholding Report Log |
Adjust or enter payment summary data manually. |
Posting Withholding Data to the Withholding Report Table
Access the Create PAYG Report Information page (Vendors, 1099/Global Withholding, Global Withholding Reports, Create PAYG Report Information).
|
Control ID |
Select a business unit in the first field then select the control ID. These fields determine which business units and vendors to include. |
|
Calendar ID |
Select the setID of the calendar you want to use in the first field. In the second field, select the ID of the calendar you want to use. |
|
From Date |
Select the first date from which you want to generate data. |
|
Through Date |
Select the last date from which you want to generate data. |
|
Fiscal Year |
Select the fiscal year for which you want to generate data. |
Running the PAYG Voluntary Agreement, Labour Hire, and No ABN Quoted
Reports
Access the Withholding by Vendor page (Vendors, 1099/Global Withholding, Global Withholding Reports, PAYG Withholding by Vendor, Withholding by Vendor).
|
Issued |
Select this check box to flag the payment to be included in the Payment Summary Statement process. Deselecting the Issued check box represents a duplicate print to be excluded from the process. |
Running the PAYG Payment Summary Statement and No ABN Quoted Summary
Statement Reports
Access the Withholding Summary page (Vendors, 1099/Global Withholding, Global Withholding Reports, PAYG Withholding Summary, Withholding Summary).
|
Withholding Setid |
Select the setID associated with the withholding entity for which you want to run the summary reports, |
|
Control ID |
Select the control ID. This field determines which business units and vendors to include. |
|
Fiscal Year |
Enter the fiscal year that you want to display on the report. |
|
Close Fiscal Year |
Select this check box to freeze the fiscal year so that no one can modify the data once you have reported it to the ATO. |
Adjusting or Entering Payment Summary Data Manually
Access the Withholding Report Log page (Vendors, 1099/Global Withholding, Global Withholding Reports, Update PAYG Withholding Report, Withholding Report Log).
|
Fiscal Year |
Enter the fiscal year for which you are making entries or adjustments. The entry in this field determines whether it appears on the PAYG Payment Summary Statement for a given year. It is your responsibility to ensure that the fiscal year matches the from and through dates that you indicate and also the contents of your Payment Summaries. The system does not validate according to the Australian fiscal year calendar. |
|
Withholding Type |
Enter the type of withholding for which you are making an entry or an adjustment. Make sure the withholding type is correct for the vendor type. It should be either VOLAG, LABHR, or NOABN in capital letters. The system expects all vendors to be of the same withholding type. The APY8044 process only selects the VOLAG and LABHR withholding types. |
|
Issued |
Select this check box to indicate that you have issued a payment summaries to the vendor. |
|
Basis Amount |
Enter the amount upon which the withholding was calculated. Make sure the amounts you enter on this page agree with the payment summaries you issued. |
|
Liability Amount |
Enter the amount of the withholding liability. |