Setting Up
JD Edwards EnterpriseOne Environmental Accounting and Reporting Setup Overview
The JD Edwards EnterpriseOne Environmental Accounting and Reporting (EAR) setup steps span several applications within JD Edwards EnterpriseOne. To set up EAR, perform the following steps:
-
Activate the JD Edwards EnterpriseOne Environmental Accounting and Reporting System. See: Activating the JD Edwards EnterpriseOne Environmental Accounting and Reporting System
-
Set up the following JD Edwards EnterpriseOne prerequisite modules that are necessary to run the EAR application:
-
JD Edwards EnterpriseOne System Administration
-
JD Edwards EnterpriseOne Address Book
-
JD Edwards EnterpriseOne General Accounting
-
JD Edwards EnterpriseOne Inventory Management
-
JD Edwards EnterpriseOne Accounts Payables
-
JD Edwards EnterpriseOne Fixed Assets
Depending on your individual requirements, there may be additional, EAR related setup steps required within each of the above prerequisite modules. If this is the case, then the details are provided in Setting Up in Other Applications.
-
-
Perform the EAR setup steps described in Setting Up in JD Edwards Environmental Accounting and Reporting..
-
Set up Oracle Data Integrator for data extraction, transformation, and loading from source systems. See: Setting Up in Oracle Data Integrator.
-
Set up Oracle Business Intelligence Enterprise Edition (OBIEE). OBIEE enables the rapid identification of issues and opportunities by providing reports, such as emissions summaries and trends. See: Setting Up in OBIEE.
Activating the JD Edwards EnterpriseOne Environmental Accounting and Reporting System
This topic provides an overview of JD Edwards EnterpriseOne Environmental Accounting and Reporting system activation and describes how to activate the Environmental Accounting and Reporting system.
Understanding JD Edwards EnterpriseOne Environmental Accounting and Reporting System Activation
Before you can enter and process environmental item data, you must activate the JD Edwards EnterpriseOne Environmental Accounting and Reporting system. When you activate Environmental Accounting and Reporting, the system creates links between the JD Edwards EnterpriseOne Environmental Accounting and Reporting system and other JD Edwards EnterpriseOne systems provided by Oracle. The JD Edwards EnterpriseOne Environmental Accounting and Reporting system code is 79A. To activate system 79A, a record containing the following data must exist in the OneWorld System Control File table (F99410):
-
The Data Item field contains SY79A.
-
The Use Module field contains Yes.
You activate system 79A using the EnterpriseOne System Control program (P99410). The JD Edwards EnterpriseOne system stores system constants in the F99410 table.
| Form Name | FormID | Navigation | Usage |
|---|---|---|---|
| WorkWith EnterpriseOne System Control | W99410A | Enter P99410 in the Fast Path field and then press Enter. | Access forms to activate JD Edwards EnterpriseOne systems. |
| EnterpriseOne System Control - Revisions | W99410B | On the Work With EnterpriseOne System Control form, select the row containing the data item SY79A, and click Select. | Activate the JD Edwards EnterpriseOne Environmental Accounting and Reporting system. |
To activate the JD Edwards EnterpriseOne Environmental Accounting and Reporting System
-
Navigate to the EnterpriseOne System Control - Revisions form.
-
Verify that the value SY79A is in the Data Item field. The Data field displays a code that identifies and defines a unit of information. It is an alphanumeric code up to 8 characters long that does not allow blanks or special characters such as %, &, and +. You can create new data items using system codes 55–59. You cannot change the alias.
-
Verify that the system constant description associated with SY79A, Use Environmental Accounting and Reporting Module, appears in the Alpha Description field. The field displays a description of the data items. Enter text in uppercase and lowercase. The system uses this name to search for similar data items. To enter an alpha description you must follow the following conventions:
-
Dates: Begin all date fields with the word Date.
-
Amounts: Begin all amount fields with the word Amount.
-
Units: Begin all unit, quantity, and volume fields with the word Units.
-
Name: Begin all 30-byte description fields with the word Name.
-
Prompt: Begin any Y/N prompting field with the word Prompt.
-
Address Number: Begin all address numbers (employee, customer, owner) with the word Address Number.
-
-
In the Module Existence option, select Yes.
-
Click OK
Setting Up in Other Applications
Before using the JD Edwards EnterpriseOne Environmental Accounting and Reporting (EAR) application, you must ensure that the following prerequisite setup steps have been performed in other applications of JD Edwards EnterpriseOne:
-
JD Edwards EnterpriseOne System Administration. See: Setting Up in JD Edwards EnterpriseOne System Administration.
-
Global User Defined Codes (UDCs)
-
Next Unique Keys
-
-
JD Edwards EnterpriseOne Address Book. See: Setting Up in JD Edwards EnterpriseOne Address Book.
-
Address Book records for all suppliers.
-
-
JD Edwards EnterpriseOne General Accounting. See: Setting Up in JD Edwards EnterpriseOne General Accounting
-
Business Units and Companies
-
General Accounting Constants
-
-
JD Edwards EnterpriseOne Financial Management. See: Setting Up in JD Edwards EnterpriseOne Financial Management.
-
Next Numbers
-
-
JD Edwards EnterpriseOne Inventory Management. See: Setting Up in JD Edwards EnterpriseOne Inventory Management.
-
Inventory Items
-
Branch/Plant Constants
-
Document Types
-
Unit of Measure Conversions
-
-
JD Edwards EnterpriseOne Accounts Payable. Refer to the "Entering Address Book Records" topic of the JD Edwards EnterpriseOne Address Book Implementation Guide for more information.Setting Up in JD Edwards EnterpriseOne Accounts Payable
-
Suppliers
-
-
JD Edwards EnterpriseOne Capital Asset Management Assets. See: Setting Up in JD Edwards EnterpriseOne Capital Asset Management.
-
Assets (Optional)
-
-
JD Edwards EnterpriseOne Tools. See: Setting Up JD Edwards EnterpriseOne Default Location and Printers.
-
Default Location and Printers
-
Setting Up in JD Edwards EnterpriseOne System Administration
Set up the following in JD Edwards EnterpriseOne System Administration:
-
Set up global user-defined codes (UDC). Refer to the “Working with User Defined Codes” of the JD Edwards EnterpriseOne Tools 8.98 System Administration Guide for more information.
-
Set up Next Unique Keys. Unique keys are system generated unique identifiers which help identify a specific record within the table.
Important: Avoid changing unique keys after implementation. To prevent changes, only allow system administrators to access the JD Edwards EnterpriseOne System Administration application.
To set up next unique keys
-
Navigate to the Next Unique Number application (Fast path – P00022).
-
Query for Table Name = F79A*. The Grid displays tables with the following table names:
-
F79A03 - GHG Source
-
F79A09 - GHG Energy Rates
-
F79A10 - GHG Rates
-
F79A11 - GHG Ledger
-
F79A14 - GHG Ledger Energy & Emissions Recalculation Error Workfile
-
F79A41 - GHG KPI
-
F79A43 - GHG KPI List Member
-
F79AU11- GHG Ledger Work Table
-
F79A70 - GHG Hierarchy
-
F79A71 - GHG Organizations
-
F79A72 - GHG Organization Member
-
F79A73 - GHG Organization Control
-
F79A74 - GHG Interest
-
F79A75 - GHG Organization Name
-
F79A76 - GHG Org to JDE BU Mapping
-
F79ADC - GHG Defined Codes
-
-
For any missing tables, click <ADD>
-
Enter the Table Name and Unique ID = 1
-
For existing tables, select and enter a Unique Key ID = 1.
-
Click Save.
Setting Up in JD Edwards EnterpriseOne Address Book
Set up address book records for all suppliers. Refer to the “Entering Address Book Records” topic of the JD Edwards EnterpriseOne Address Book Implementation Guide for more information.
Setting Up in JD Edwards EnterpriseOne General Accounting
Set up the following in JD Edwards EnterpriseOne General Accounting:
-
Set up business units and companies. Refer to the "Setting Up Organizations", "Setting Up Business Units", and "Setting Up Companies” topics of the JD Edwards EnterpriseOne General Accounting Implementation Guide for more information.
-
Set up General Accounting constants. Refer to the "Setting Up Constants for General Accounting", "Setting Up Organizations" and "Setting Up Companies" topics of the JD Edwards EnterpriseOne General Accounting Implementation Guide for more information.
Setting Up in JD Edwards EnterpriseOne Financial Management
Set up Next Numbers in JD Edwards EnterpriseOne Financial Management:
Refer to the “Setting Up Next Numbers” topic of the JD Edwards EnterpriseOne Financial Management Application Fundamentals Implementation Guide for more information.
-
Navigate to the Work with Next Numbers application (Fast path - P0002).
-
Click Add. The Set Up Next Numbers by System form appears.
-
In the System field, enter 79A.
-
Enter the following information:
Use Next Number Document Number Desired Starting No. Batch Number Desired Starting No.
Setting Up in JD Edwards EnterpriseOne Inventory Management
Set up the following in JD Edwards EnterpriseOne Inventory Management:
-
Set up inventory items.
Refer to the “Entering Item Information” topic of the JD Edwards EnterpriseOne Inventory Management Implementation Guide for more information.
-
Set up branch/plant constants.
Refer to the “Defining Branch/Plant Constants” topic of the JD Edwards EnterpriseOne Inventory Management Implementation Guide, for more information.
-
Set up document types.
Refer to the “Setting Up Document Type Information” topic in the JD Edwards EnterpriseOne Inventory Management Implementation Guide, for more information.
-
Verify Standard Units of Measure. The EAR system requires that certain UM Conversions exist.
To verify that the UM Conversions data is available
-
Navigate to the Work with Standard Units of Measure form (P41003).
-
Query to verify that a conversion exists for:
-
KG to TM (Kilograms to Metric Tons)
-
LT to KL (Liters to Kiloliters)
-
-
If they do not exist, click Add. The Standard Units of Measure Revisions form appears.
-
Enter the following values:
From Unit of Measure Conversion Factor To Unit of Measure KL 1000 LT TM 1000 KG -
Click OK to save.
Setting Up in JD Edwards EnterpriseOne Accounts Payable
Refer to the “Entering Supplier Information” topic of the JD Edwards EnterpriseOne Accounts Payable Implementation Guide for more information.
Setting Up in JD Edwards EnterpriseOne Capital Asset Management
Set up assets. This is optional.
Refer to the "Setting Up Capital Asset Management" topic of the JD Edwards EnterpriseOne Capital Asset Management Implementation Guide for more information.
Setting Up JD Edwards EnterpriseOne Default Location and Printers
Set up default location and printers.
Refer to the "Working with Report Printing Administration" topic of the JD Edwards EnterpriseOne Tools 8.98 Development Tools: Report Printing Administration Technologies Guide.
Setting Up in JD Edwards Environmental Accounting and Reporting
You must perform the following setup steps in the JD Edwards EnterpriseOne Environmental Accounting and Reporting application:
-
Setting Up User Defined Codes for Environmental Accounting and Reporting (P0004A)
-
Mapping an Environmental Organization to a Business Unit (P79A76)
-
Setting Up Suppliers (P79A02). This is an optional step, unless you plan to create vouchers.
After completing the setup steps above, perform the following two steps in order to generate EAR reports:
Setting Up Environmental Defined Codes (P79ADC)
The Environmental - Defined Code Values Revisions form enables you to create and maintain defined codes with descriptions that exceed the lengths in standard JDE User Defined Codes and enables you to meet the reporting requirements as prescribed by the GHG Protocol. You must set the defined codes for the following:
-
Activity Type
-
Source
-
Parent Source
-
Organization Category Code 01 to 30
To set environmental defined codes
-
Navigate to the Work With Environmental Defined Codes form.
-
Click Add. The Environmental - Defined Code Values Revisions appears.
-
Enter a Code and a Description for the code.
-
Optionally, enter required comments.
-
Click Ok.
Setting Up User Defined Codes for Environmental Accounting and Reporting (P0004A)
Many programs in the JD Edwards EnterpriseOne Environmental Accounting and Reporting system use User Defined Codes (UDCs) to process information. You can change or delete the predefined data if it is not hard-coded, and can add UDCs to suit your own needs. You must not change the product code, code type, or description name for the UDCs in the JD Edwards EnterpriseOne Environmental Accounting and Reporting system. In addition to standard User Defined Codes, special User Defined Codes must be defined for EAR processing. User Defined Codes and User Defined Values are codes and values defined by users to enable flexibility when configuring the system and for validation purposes. User Defined Codes have a one to many relationship with User Defined Values.
To define user defined codes
-
Navigate to the Work With User Defined Codes.
-
Select the Product Code for the product that you want to set User Defined Codes.
-
Select the User Defined Codes for which you want to set code values.
-
Enter the Description 01 and Description 02 for the codes.
-
Select Y (yes) for Special Handling if the code value requires special handling.
-
Select Y (yes) for Hard Coded if you want to prevent any updates to the code value.
-
Click Ok.
You must set up the following User Defined Codes for running the JD Edwards Environmental Accounting and Reporting (EAR) application:
Actual/Estimate (79A/G2)
A number of EAR transactions can be estimated based on extrapolation of other information from similar sites / facilities. These are normally related to small facilities and are limited to a specified percentage of total emissions. These transactions must be identified when they are entered. All transactions are deemed Actual unless Estimate assigned. For example, greenhouse gas transactions created through Procurement (A/P) and Inventory Issue are recorded into the GHG Ledger as actual transactions. In addition, you can create actual and estimated transactions directly in the GHG Ledger.
Asset Type (79A/AT) and Asset Sub Type (79A/AS)
Optionally set up assets that consume an emissions-producing source as environmental assets. Use asset types and subtypes for reporting purposes.
Calculation Method (79A/GM)
Set up calculation method used in providing the factors for calculating the emissions and energy usage. For example you can set up the following codes:
-
1 - Default Method: National Greenhouse Accounts (NGA) Methods
-
2 - Facility Specific: Industry Sampling
-
3 - Facility Specific: Industry Sampling and Analysis
-
4 - Direct Monitoring: On Periodic Basis
Control Type (79A/CT)
Set up the following control type codes to define the various types of organizational control:
-
EQU: Equity Control: Equity control is based on each party percentage of equity stakes. For example, Joint Venture A has 3 interested parties; Party A has 40% equity, Party B has 50% equity and Party C has 10% equity.
-
FIN: Financial Control: Financial Control is established based on which party has financial responsibility. Only one party can have financial control over a facility or organization.
-
OPM: Operational Control: Operational control is established based on which party influences operations procedures. For example, Occupational Health & Safety, and operational management.
Division Codes (79A/AD)
Set up division codes for various industry sectors. For example, agriculture, mining, manufacturing, forestry, and construction. Each industry division can have zero or more Industry Codes.
Emission Date to Use (79A/ED)
The Emission Date to Use is always the date on the Accounts Payable voucher. This is hard coded and cannot be changed.
Warning: Do not define a blank (null) value for this UDC.
Emission Type (79A/GT)
Set up emission types to define the types of gas emissions that result from consuming or producing a source. For example, carbon dioxide (CO2), perflouroethane (C2F6), and nitrous oxide (N2O). EAR provides seeded emission types.
Energy Type (79A/ET)
The Energy Type code enables users to categorize sources by energy type. The following energy type codes are hardcoded in the system:
-
FUEL - Fuel
-
ELECTRICITY - Electricity
-
HEAT - Heat
-
COOLING - Cooling
-
STEAM - Steam
You can also create new energy type codes based on your needs.
Hierarchy Type (79A/HT)
An organization can have multiple hierarchies for reporting. For example, Financial Hierarchy, Operational Hierarchy, and Legal Structure hierarchy. You can create hierarchy type codes to indicate the type of hierarchy to use for reporting.
Industry Codes (79A/AC)
Set up industry codes as standard codes that reflect the industry that an organization and a facility can be associated with. An industry code can vary in length from 1 to 6 characters. There are standard codes defined specifically for different regions. ANZSIC Codes are defined by the Australian and New Zealand Governments. An Industry Code can belong to only one Industry Division.
Interest Type (79A/GI)
You can set up codes to define interest types for an organization. For example, you can set codes to indicate that an organization has a statutory reporting or financial interest in an organization.
Item Type (79A/IT)
Item Type code indicates how the usage is recorded for an item. The following item type codes are seeded in the system:
-
I - Record Usage via Inventory
-
V – Record Usage via Voucher Entry
For example, set the item Diesel as I or V in the following scenarios:
-
Item Type = I: When Diesel is issued to plant equipment, inventory issue transactions are generated in Inventory and environmental transactions are created in EAR.
-
Item Type = V: When a fleet of vehicles consumes Diesel from a fuel pump, drivers use a fuel card to pay for the fuel. The Diesel is itemized on a fuel card invoice that is processed via Procurement and subsequently Voucher Matched. To capture the environmental transactions at this point, the supplier related to the fuel card statement must be set up with an EAR Item Type of V. This ensures that the EAR process does not prevent the transaction from being generated during Accounts Payable processing.
Warning: Do not define a blank (null) value for this UDC.
KPI Action (79A/KA)
The KPI Action defines the action that is performed by the related KPI calculation in Reporting. The following KPI action codes are seeded in the system:
-
Sum: Adds the related quantity (Qty) defined by the KPI Type for the granular period, normally 1 month.
-
Average: Averages the related Qty defined by the KPI Type for the most granular period, normally 1 month. For example, KPI Electricity Usage per Employee on-site requires average of daily count, for the period of a month to be compared with sum of total electricity used for the month.
-
Minimum
-
Maximum
Warning: Do not define a blank (null) value for this UDC.
KPI List Type (79A/KL)
The following codes for KPI List Type are seeded in the system:
-
DEN: Denominator
-
NUM: Numerator
Warning: Do not define a blank (null) value for this UDC.
KPI Type (79A/KT)
Set up KPI Type codes to define the source of the quantity used in the KPI. You can set the following codes:
-
Usage: Usage quantity from transactions converted to Standardized Usage UM. This is seeded in the system.
-
Energy: Energy quantity in gigajoules (GJ) from environmental transactions.
-
Emissions: CO2-e Emission Quantity in kilograms (Kgs) from environmental transactions.
-
Value: Value in domestic currency from environmental transactions.
Warning: Do not define a blank (null) value for this UDC.
Ledger Type (79A/GL)
Set up the following codes to classify ledger entries:
-
AA- Actuals
-
TG- Targets
Legislation (79A/LG)
You can set up Legislation codes to define government entities that require carbon permits. For example, set up a code for a certain city that requires permits. For more information about carbon permits, refer to Setting Up Carbon Permit Management (P79A80).
Measurement Criterion (79A/GC)
Set up Measurement Type to indicate the reliability of information that is related to the transactions. For example, the Measurement Criteria for a Paper voucher is ‘A’, i.e. very reliable. The following measurement criteria are seeded in the EAR application:
Number Code `Meaning 1 A Supplier Voucher 2 AA Indirect measurement at consumption point 3 AAA Direct measurement at consumption point 4 BBB Simplified consumption measurement Organization Size (79A/FS)
You can set up organization size codes to indicate the size of an organization. For example, you can set up the organization size codes as following:
-
S- Small
-
M- Medium
-
L- Large
Organization Type (79A/OT)
Set up Organization type codes to indicate the organization type. For example, Aggregate Facility, Sub Facility, Group, Organization, Joint Venture, and Partnership.
Important: You can only assign business units to organizations of type Facility. An 'F" in the special handling code of the organization indicates the organization is a Facility.
Plant Business Unit (79A/GB)
Business Units also known as Cost Centers are used in General Ledger Accounting. These represent distribution centers, which could represent a facility, sub-facility, or cost centers for functions operating out of one location. The following plant business unit codes are seeded in the system:
-
L- Asset location
-
R- Responsible Business Unit
Warning: Do not define a blank (null) value for this UDC.
Reason Code (79A/GR)
Set reason codes to be able to select reasons for recalculation of usages and emissions. For example, COR: emission Correction.
Scope (79A/SC)
Set up emission scope codes to classify a source under one of the following scopes specified by the GHG Protocol:
-
Scope 1: Greenhouse gas emissions from sources that are owned or controlled by an organization. For example, vehicles and equipment, stationary sources, onsite landfills, and waste water treatment plants.
-
Scope 2: Greenhouse gas emissions resulting from the generation of electricity, heat or steam purchased by the organization.
-
Scope 3: Greenhouse gas emissions from sources not owned or directly controlled by the organization but are related to the organization activities. For example, employee transportation contracted waste disposal.
Tip: You can set up other scopes not related to emitting greenhouse gases. For example, set up a Scope 0 to track non-pollutants such as water, recycling batteries, or tree planting.
Source Type (79A/GF)
Set the following codes to indicate whether a source in a transaction is consumed or produced:
-
C- Consumed / Purchased: Used for a source that is consumed or purchased by a facility.
-
P- Produced / Generated: Used for a source that when captured, generated, or produced releases energy that can be used for final consumption by operations that are internal or external to the facility.
Supplier Type (79A/GS)
Supplier type codes determine whether Accounts Payable vouchers require Environmental information to be entered at time of data entry. The following supplier type codes are seeded in the system:
-
Mandatory Supplier (M)
-
Optional Supplier (O)
Warning: Do not define a blank (null) value for this UDC.
Transport Type (79A/TT)
Set up transport types to identify the various diesel engine types. You must enter emission factors for diesel engines by the engine type as each type has a different emission value. For example, EURO1, EURO2, EURO3.
-
Setting Up EAR Category Codes (P0004A)
Category codes are a type of UDC that you customize to manage the tracking and reporting requirements of your business. In EAR, use Category Codes to further segment your sources for tracking and reporting purposes. You might want to further categorize your Scope 3 sources into employee transportation and contracted waste disposal. For example, you decide to set up category code 01 to store a Scope 3 source's greenhouse gas emission classification. Use the User Defined Codes form to set up category codes for EMP (employee transportation) and WST (contracted waste disposal). Then, when you assign a category code to an source record, you can assign EMP or WST for category code 01.
Note: When setting up EAR category codes, create a blank record on the User Defined Codes form. This provides a default if you do not need to assign a category code to a source.
You can change the category code description, but you should not change the product code and code type. For example, you can change the description of UDC table 79A/01 from Category Code 01 to Employee Transportation. You can also change the characteristics for your category codes. For example, you can change the Code Length (size, up to 10 characters). If you change the category code description or any of the characteristics for a category code, your system administrator must change the data dictionary edit rule and how the data dictionary is mapped so that the changes appear on your data entry forms.
You use the Sources Revision program (P79A03) to assign category codes to sources. If you assign a category code to your sources and then decide to change the description or a characteristic of the category code, you must manually change the existing sources. See: Defining Sources (P79A03).
To add an EAR Category Code value
-
Navigate to the Category Codes form.
-
In the Product Code field, enter the code for Greenhouse Gas Accounting, 79A.
-
In the User Defined Codes field, enter the code type for a particular Category Code.
EAR provides 10 pre-defined EAR Category Code types, numbered 01 through 10, each with a pre-defined blank record.
-
Click Find.
-
Click Add. Select the blank row below any existing code values.
-
Optional. In the Codes field, enter a category code value for the selected EAR Category Code.
-
Required. In the Description 01 field, enter a description of the category code value.
-
Optional. In the Special Handling field, enter special handling instructions, if needed.
-
Optional. In the Hard Coded field, enter 'Y' for yes if selecting this category code value within other EAR forms triggers custom code (EAR Category Code values are not hard coded in the standard version of the software). Enter 'N' for no.

-
To add another category code value, select the blank row below the new code value and repeat the above steps.
-
When you finish defining category code values, click OK.
Setting Up Organizations (P79A71)
An Environmental Organization can be defined as a single undertaking or an enterprise or any entity that performs activities or a series of activities that emit greenhouse gases and/or produces, or consumes energy at a single site and is attributable to a single industry sector. An organization can have multiple hierarchies for reporting, for example, government reporting hierarchy, operational hierarchy, or legal structure hierarchy. In addition an organization can be a division, company subsidiary, or operation.
The Work With Environmental Organizations form enables you to create organization entities that are required for hierarchical reporting of emission information. These entities can be facilities, sub-facilities, aggregate facilities and so on for reporting aggregation and government agencies that may be interested in data related to an organization. An organization also needs to identify the multiple parties involved in an organization. The involvement of a party could be from a control or reporting perspective. Control can be either operational, financial, or equity. Under the GHG Protocol, reporting organizations are recommended to select one of the following control options:
-
Operational control is established based on which party influences operation procedures. For example, Occupational Health and Safety, and operational management. Only one party can have operational control over a facility or organization.
-
Financial Control is established based on which party has financial responsibility. Only one party can have financial control over a facility or organization.
-
Equity control is based on each party percentage of equity stakes, e.g. Joint Venture A has 3 interested parties; Party A has 40% equity, Party B has 50% equity and Party C has 10% equity.
Organizations who subcontract services and activities may not have operational control over the subcontractor and may not need to report their activities as part of their usage. For example, electricity companies that move electricity poles and pylons for road construction projects manage their own jobs and are not controlled by the organization that manages the road construction project.
The GHG Protocol requires organizations to record the following, with effective dates:
-
Equity percentage of each participant in a facility.
-
Type of control for each facility.
-
Method used for reporting details to various parties.
-
Subcontractor activities that generate emissions exceeding specific, government-specified limits. Report the subcontractor to the governing entity.
Record the above information using effective dates, since the information can change over time.
Prerequisites
- Set up the company’s mailing address in the Address Book Revisions program (P01012). Refer to " Entering Address Book Records" topic of the JD Edwards EnterpriseOne Address Book 9.1 Implementation Guide.
To set up an organization
-
Navigate to the Work With Environmental Organizations form.
-
Click Add. The Environmental - Organization Revisions form appears and defaults to the Organizations tab.
-
In the Organization Code field, enter a required code for the organization.
-
Select the type of the organization from user-defined code table 79A/OT. Valid options are:
-
Aggregate Facility: This is a logical facility that acts as a container for many smaller facilities.
-
Facility: This is a main container for collecting emission transactions.
-
Government Agency
-
Joint Venture
-
Management Unit
-
Organization
-
Partnership
-
Sub-facility
-
-
In the Size field, enter a required value for the size of the company from user-defined code table 79A/FS. Valid values are Large, Medium, and Small. Facility specific reporting requirements apply according to the size of a facility, which is determined by facility-level thresholds.
Note: The amount of pollution created determines the size of the company, not the physical size, market value, or quantity of goods produced.
-
Select the Industry Code and the Company number for the company. Industry Code is the standard industry code for the organization.
Note: The Size, Industry Code, Company Number, CEO Name, Effective Date range, Latitude, Longitude, Location and Category Codes are used in Business Intelligence Analysis and Reporting.
-
Enter the Name of the CEO of the company.
-
Enter the Effective Date From and Date To as the date range in which the company is effective. These dates are automatically populated if you do not enter a value. The Date From field defaults to the current date. The Date To field defaults based on the CENTCHG DD (Century Change Year) item and reflects the last day of the year defined in that field.
-
Click the Address tab.
-
Optionally, select an address in the Address Number field. To select an address:
-
Click Search in the Address Number field. The Address Book Master Search form appears. Search by Name or Type and select the address number. Click Select. When you select an Address Number, the details appear in the Address Details region if the details have been entered previously. or,
-
Enter address details if you do not select an Address Number or if the Address Number selected has no details.
Note: Selecting the Address by Effective Date option in JDE's Address Book Constants enables the Previous and Next buttons in the Address tab. Use the Previous and Next buttons to enter address details for multiple addresses with different effective dates.
-
-
Select the Location tab.
-
Enter the Latitude, Longitude and the Location of the organization. Latitude and Longitude provide the GPS coordinates for the organization. Location is the location of the organization. This information is used for BI reporting.
-
Select the Cat Code tab.
-
Enter the Organization Codes for the organization. You can enter up to 30 organization codes.
-
Click Ok to save.
The system creates an Org Id. Org Id is the unique identifier for the organization.
To import organizations from Real Estate Management
If companies, business units, floors, and units are defined in JD Edwards EnterpriseOne Real Estate Management, then you can import them into JD Edwards EnterpriseOne Environmental Accounting and Reporting (EAR) and use them to create organizations.
The following example shows how EAR uses imported Real Estate Management information to create organizations. Notice that three new organizations are created in EAR from the single record of imported Real Estate Management information.
| Company ID | Company Name | BU ID | BU Name | Floor ID | Floor Name | Unit ID | Unit Name |
|---|---|---|---|---|---|---|---|
| 00001 | Oracle USA | 1441 | Oracle HQ | 1 | Floor 1 | 100 | Unit 100 |
| Organization Code | Organization Name |
|---|---|
| 00001|1441 | Oracle HQ |
| 00001|1441|1 | Oracle HQ – Floor 1 |
| 00001|1441|1|100 | Oracle HQ – Floor 1 – Unit 100 |
Note: Note that if the Floor data does not exist, then that space is left null. In the above example, if Floor 1 is not defined, the Organization Code created is 00001|1441||100.
During the organization creation process, the Import Organizations from Real Estate Management program automatically maps the new organization to the business unit used to create the organization. For more information about the mapping process, refer to Mapping an Environmental Organization to a Business Unit (P79A76).
-
Navigate to the Work With Batch Versions - Available Versions form. Search for and select a version of the Import Organizations from Real Estate Management program.
-
Navigate to the Processing Options form (Row > Processing Options). Set the following processing options, then click OK. Refer to "To set up an organization:" above for detailed information about any fields represented by these processing options.
Tip: The Processing Options form opens automatically later, after you select a program version to run. You can update the processing options at that time, too.
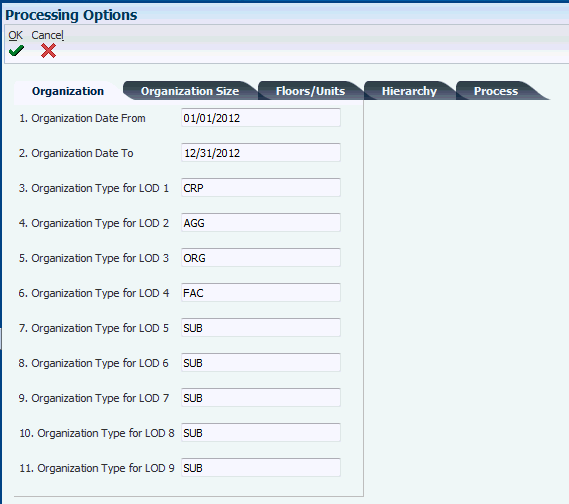
-
Organization tab
-
Organization Date From/To - The date range for which the organizations created from Real Estate Management are valid.
-
Organization Type for LOD 1, 2, etc. - Specify the type of the organization from user-defined code table 79A/OT. When importing from Real Estate Management, LOD 1 represents the company, LOD 2 represents the business unit, LOD 3 represents the floor, and LOD 4 represents the unit. If LOD 3 or 4 is not defined, then the Organization Type defaults from the parent LOD for the floor and unit.
-
-
Organization Size tab - Provide the default size of the organization from user-defined code table 79A/FS. Valid values are Large, Medium, and Small. The size defaults to Medium if no size is defined for a particular LOD. For floors and units, the size defaults from the parent LOD.
-
Floors/Units tab - Specify whether or not to create organizations based on floor and unit information.
-
Hierarchy tab - Select the top level Hierarchy Code to use from the list of existing Hierarchy Codes.
For more information about hierarchies, refer to Defining an Organization Hierarchy (P79A70).
-
Processing tab - Select whether to run the batch in proof or final mode. Proof mode enables you to run the batch and determine if there are any data issues, without committing any data to the database. Final mode commits the data to the database where possible. Any errors encountered during the batch run are displayed.
-
-
Double click a version of the Import Organizations from Real Estate Management program or select a version to run it.
The Version Prompting form displays.
-
In the Version Prompting form, choose whether to receive prompts for data selection and data sequencing. Click Submit.
-
The Data Selection form opens if you chose to receive prompts for data selection. Define the rules for selecting Real Estate Management data. Click OK.
-
The Data Sequencing form opens if you chose to receive prompts for data sequencing. The sequenced columns selected by default display. After updating the data sequencing, if necessary, click OK.
-
To change the sequencing, select a column to change, then click the Up or Down menu buttons to change the sequencing order.
-
To change the sort order, click the Sort Order button for a column to change to Ascending or Descending.
-
To add additional columns, select the Show Available Columns link.
-
-
The Processing Options form opens. Change processing options as needed, then click OK.
-
The Printer Selection form opens. Set the printing options as needed, then click OK.
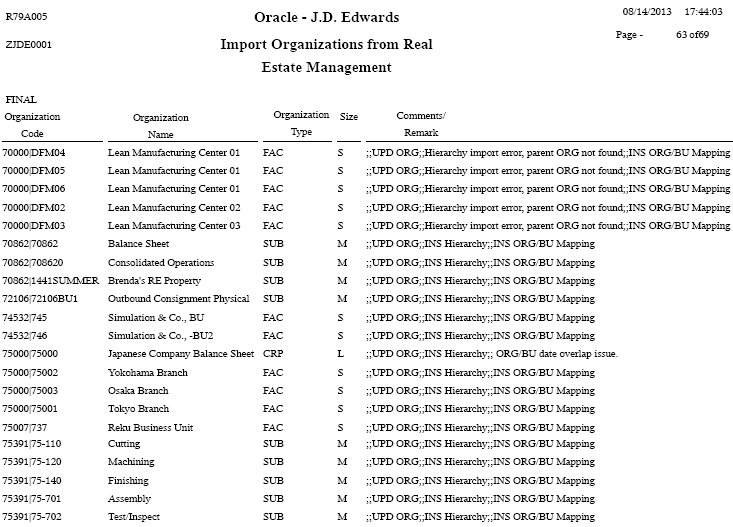
The Import Organizations from Real Estate Management program processes. Once the process completes, open and view the report from the Recent Reports menu.
To enter My Interests
-
Navigate to the Work With Environmental Organizations form.
-
Select the organization for which you want to create interests.
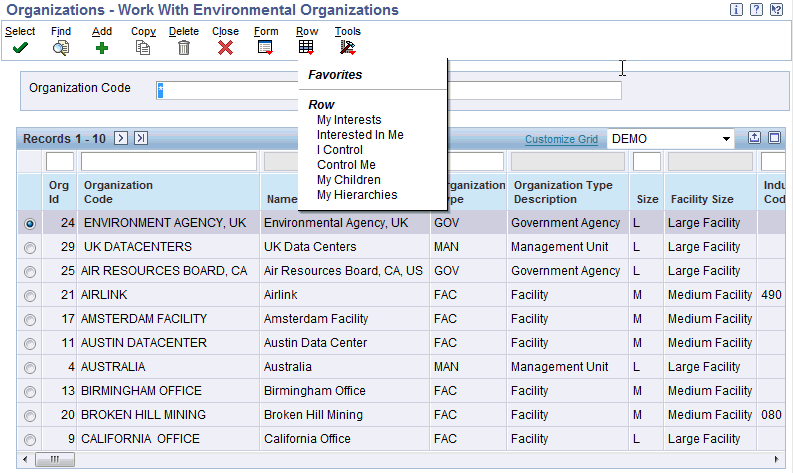
-
Select My Interests from the Row menu. The Environmental - My Interests form appears. The organization you select and its type, display in the Interested Organization/ Type field.
-
Enter the following information for the organization:
-
Organization Code as the code for the organization in which the organization is interested in.
-
Organization Type, Organization Type Description, Org Date From and Org Date To fields default to those defined for the selected organization.
-
-
Enter the Interest Type that the organization has in the selected organization. The Interest Type Description displays.
-
Enter Interest % as the percentage of interest that the organization has in the selected organization.
-
Enter Date From and Date To as the effective date range for the organization’s interest in the selected organization.
-
Org Id is the unique identifier for the selected organization.
-
Interested Org Id is the unique identifier for the interested organization.
-
Click Ok.
To enter organizations Interested In Me
-
Navigate to the Work With Environmental Organizations form.
-
Select the organization for which you want to create interests in the current organization.
-
Select Interested in Me from the Row menu. The Environmental – Interested in Me form appears. The organization you select and its type, displays in the Interested Organization/ Type field.
-
Enter the Organization Code as the code for the organization that is interested in the current organization. The Organization Type, Organization Type Description, Org Date From and Org Date To fields default to those defined for the selected organization.
-
Select the Interest Type that the selected organization has in the current organization. The Interest Type description displays.
-
Enter Interest % as the percentage of interest that the selected organization has in the current organization.
-
Enter Date From and Date To as the effective date range for the selected organization’s interest in the current organization. Multiple date ranges can be entered for the same organization relationship and Control Type, but should not overlap.
-
Interested Org Id is the identification number for the interested organization. This information defaults in automatically based on the Organization Code entered.
-
Interest Id is the identification number for the interest. This information defaults in automatically based on the Interest Type entered.
-
Click Ok.
To add or edit organizations or facilities I Control
-
Navigate to the Work With Environmental Organizations form.
-
Select the controlling organization.
-
Select I Control from the Row menu. The Environmental - Organizations I Control form appears. The Controlling Organization/ Type display.
-
Enter the code for the organization that the current organization controls in the Organization Code field. The Organization Type, Organization Type Description, Org Date From and Org Date To fields default to the values defined for the selected organization.
-
Select the Control Type that the current organization has in the selected organization. Required. The Control Type Description displays.
-
Enter Control % as the percentage of interest that the organization has in the selected organization. You must enter 100%, if you select Operational control.
-
Enter Date From and Date To as the effective date range for the current organization’s control in the selected organization. These dates are automatically populated if you do not enter a value. The Date From field defaults to the current date. The Date To field defaults based on the CENTCHG DD (Century Change Year) item and reflects the last day of the year defined in that field.
-
Org Id displays the identification code of the organization selected.
-
Control Id displays the code for the Control Type selected.
-
Click Ok.
To add or edit organizations or facilities that Control Me
-
Navigate to the Work With Environmental Organizations form.
-
Select the controlled organization.
-
Select Control Me from the Row menu. The Environmental - Organizations Controlling Me form displays. The Controlled Organization / Type display.
-
Enter the code for the organization that controls the current organization in the Organization Code field. The Organization Type, Organization Type Description, Org Date From and Org Date To fields default to the values defined for the selected organization.
-
Select the Control Type that the selected organization has in the current organization. Required. The Control Type Description displays.
-
Enter Control % as the percentage of interest that the selected organization has in the organization.
-
Enter Date From and Date To as the effective date range for the selected organization’s control in the organization.
-
Controlling Org Id is the identification number of the controlling organization.
-
Org Id displays the identification code of the organization selected.
-
Click Ok.
To view or add My Children
-
Navigate to the Work With Environmental Organizations form.
-
Select the organization for which you want to view the child organizations in its hierarchy.
-
Select My Children from the Row menu. The Environmental - My Children form displays and lists all of the selected organization’s children (and relevant Hierarchy) in the hierarchy level. The selected organization and its type display in the Parent Organization / Type field.
-
The following fields display:
-
Hierarchy Code is the code for the organization hierarchy.
-
Hierarchy Name is the name of the organization hierarchy.
-
Child Organization Code is the code for the child organization.
-
Hierarchy Id is the identification number for the organization hierarchy.
-
Child Org Id is the identification number for the child organization.
-
Org Member Hierarchy Id is the number which uniquely identifies an organization hierarchy.
-
-
To add a child organization, select a Hierarchy Code and the Child Organization Code.
-
Click Ok to save.
To view My Hierarchy
-
Navigate to the Work With Environmental Organizations form.
-
Select the organization for which you want to view the hierarchy.
-
Select My Hierarchies from the Row menu. The Environmental - My Hierarchies form displays.
-
The following fields display:
-
Hierarchy Code is the code for the hierarchy.
-
Hierarchy Name is the name for the hierarchy.
-
Immediate Parent Organization Code is the code for the parent organization.
-
Hierarchy Id is the identification number for the hierarchy.
-
Parent Org Id is the identification code for the parent organization.
-
Org Member Hierarchy Id is a unique identifier for the relationship between the parent and child organizations within the hierarchy.
-
To add or edit Organization Targets
Use this page to define energy, emission, usage and cost targets for use in the organization OBIEE dashboard reports.
-
Navigate to the Work With Environmental Organizations form.
-
Click the organization record for which you want to add or edit targets.
-
Select Organization Targets from the Row menu. The Organizations - Environmental - Organization Targets form displays.
-
Required. Select the Target Type from user-defined code table 79A/TG. Choose one of the following hard-coded target types:
-
Energy
-
Emission
-
Cost
-
Usage
-
-
Specify sources for the target type. Either select All Sources or select a Parent Group Source.
The sources specified appear in the Included Sources table below. If the parent group source specified includes no child sources, then no sources are listed in the Included Sources table. The selected parent group source is, in effect, the only included source in this case.
-
Required. Enter a Target Value.
-
Required. For a Usage target type, enter the Target UM (unit of measure) for the target value.
The Target UM defaults as follows for the other target types:
-
For the Energy target type, the default UM is GJ (Gigajoules).
-
For the Emission target type, the default UM is KG (Kilograms).
-
For the Cost target type, the currency defaults from the first company found in the organization.
Caution: The business units within the organization should share a common currency. If the business units within the organization use different currencies, the comparison of cost to target will not be accurate.
-
-
Required. Enter Start Date and End Date for the target type.
-
Click Save.
Related Topics
Understanding the Targets Dashboard
Target Usage Recalculation Report (R79A004)
Setting Up Environmental Company Constants (P79A77)
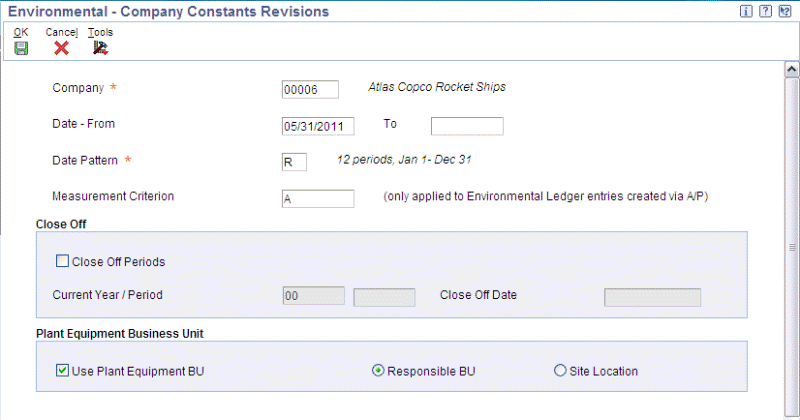
Constants provide a basic framework for how your JD Edwards EnterpriseOne Environmental Accounting and Reporting system works based on your business needs. You must set up company constants for the organizations for which you want to track usage transactions and emissions. The Environmental Company Constants Revisions form enables you to add Company Constants.
Prerequisites
- Set up the company in the Company Names and Numbers application (P0010).
-
"Entering Address Book Records", JD Edwards EnterpriseOne Address Book Implementation Guide
-
"Setting Up Organizations", JD Edwards EnterpriseOne Financial Management Application Fundamentals Implementation Guide
See:
To set up EAR company constants
-
Navigate to the Work with Environmental Company Constants form.
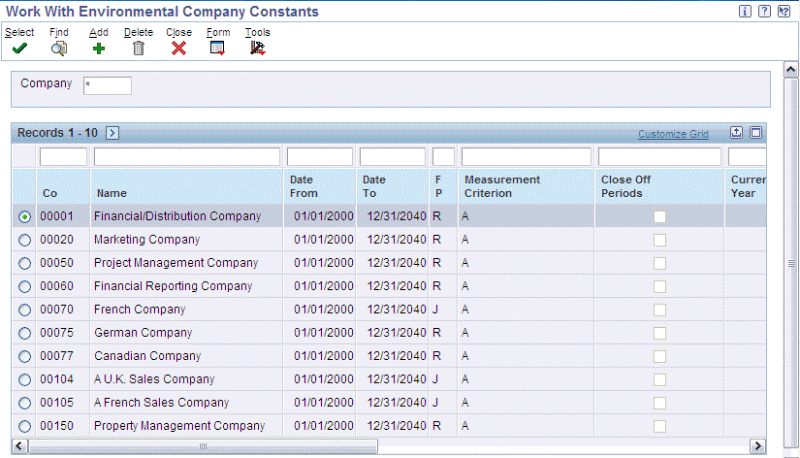
-
Click Add. The Environmental - Company Constants Revisions form displays.
-
In the Company field, search for a company for which you want to define EAR constants. The Company Master Search form appears. Select a company from the list of companies available and click Select.
-
Enter Date From and optionally a Date To as the date range for the Company and related Business Units set up in the Business Unit Master to create environmental Ledger transactions. Set the From Date to the earliest date in which historical environmental data is loaded. If left blank, the Date To field defaults to the last day of the year defined in the CENTCHG DD (Century Change Year) item field.
-
Select the Date Pattern as the period and year that you want the application to allocate to the environmental transactions. Click Search in the Date Pattern field. The Select User Defined Code form appears. Select the required Date pattern. If you set the Date Pattern, then the Environmental Company Constants application allocates the period and year to the environmental transactions regardless of the financial year that applies to the organization’s accounting transactions.
-
Select the Measurement Criterion for the company. Click Search in the Measurement Criterion field. The Select User Defined Code form appears. Select the required measurement criterion. This is required only for Environmental Ledger entries created using the Accounts Payables application. Refer to “Setting Up UDCs” topic for more information.
-
In the Close Off region, select the Close Off checkbox if you want the application to prevent Ledger transactions being generated on or prior a specific date. If you select the checkbox the following fields are enabled:
-
Current Year / Period
-
Close Off Date displays
-
-
In the Plant Equipment Business Unit region, select the Use Plant Equipment BU if you want to specify a business unit as the ‘destination business unit’ during inventory processing. The destination business unit also holds the link to the state and country based on which the GHG calculation are applied. Select:
-
Responsible Business Unit, if you want the application to use the state and country of the business unit of the equipment in environmental calculations.
-
Site Location, if you want the application to use the state and country of the current location of the equipment in environmental calculations.
-
-
Click Ok to save.
To view environmental company constants
-
Navigate to the Work with Environmental Company Constants form.
-
The following fields display for a company for which constants are defined.
-
Co is the code for the company.
-
Name is the name of the company.
-
Date From and Date To is the effective date range for the company.
-
Fiscal Pattern (FP) is the date pattern that you wish to use for this company.
-
Measurement Criterion indicates the reliability of information that is related to the transactions.
-
Close Off Period displays as checked if Ledger transactions for the company are prevented from being generated on or prior a specific date.
-
Current Year displays the current year.
-
Current Period displays the current period.
-
Close Off Date is a date after which ledger transactions are prevented for the company. It is also the last day of the fiscal year and period, as selected in the Current Year and Current Period fields.
-
Use PE BU displays as checked if a destination business unit is specified for all transactions of the company.
-
Plant BU displays as:
-
L- Asset location
-
R- Responsible Business Unit
-
-
Plant Business Unit.
-
Cur Code is the code for the currency used by the company in its transactions.
-
Address Number is the address code of the company.
-
To update company constants
-
Navigate to the Work with Environmental Company Constants form.
-
Select the Company for which you want to update information.
-
Click Select. The Environmental - Company Constants Revisions form appears.
-
You can edit the following fields:
-
Date To
-
Date Pattern
-
Measurement Criterion
-
Close Off Periods (including Current Year / Period and Close Off Date)
-
Use Plant Equipment BU
-
-
Click Ok to save.
Mapping an Environmental Organization to a Business Unit (P79A76)
You must attach an organization that is defined as a facility, sub-facility, aggregate facility and so on, to a business unit involved in business processes of the organization to accurately define the content for Business Intelligence (BI) analysis and reporting. An organization can have a number of business units allocated, but the effective dates of a mapping must not overlap with an existing mapping. A business unit can only be attached to one organization.
Mapping an EAR organization to a business unit
You can map an organization to a business unit using the Work With Business Units by Environmental Organization Facility form. To map an organization to a business unit:
-
Navigate to the Work With Business Units by Environmental Organization Facility form.
-
To add a business unit mapping to an organization, click Add. The Environmental Organization Mapping to Business Unit Revisions form appears.
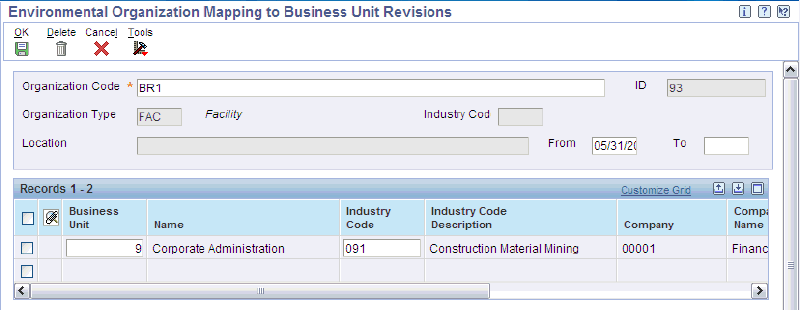
-
Select the Organization Code of the organization to which you want to map business units. The ID, Organization Type, Industry Code, and Location fields display for the organization.
-
Enter the From and To as the effective date range for the organization-business unit mapping.
-
Select the code for the Business Unit to map. The Name of the Business Unit, Industry Code, Industry Code Description, Company and Company Name display. You can edit the Industry Code.
-
Select the Date From and Date To as the effective date range for the business unit-company mapping.
-
Org Id is the identification number for the EAR organization.
-
Click Ok.
-
To delete a business unit mapping, select a record and click Delete.
Viewing Existing Mappings
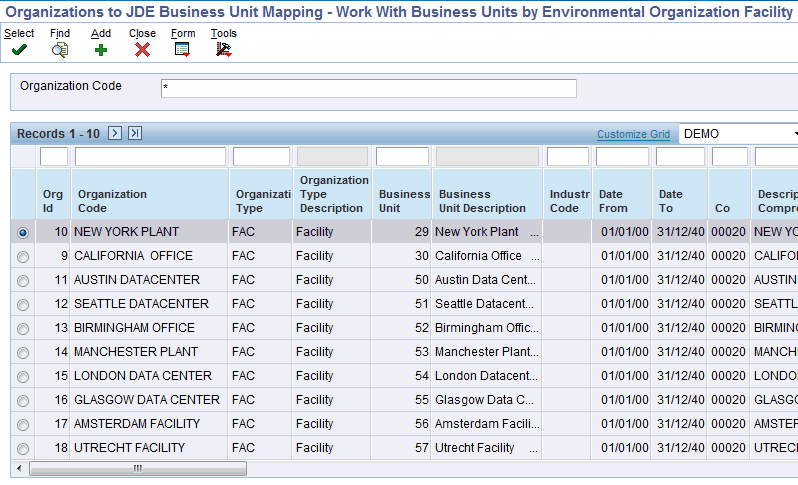
You can view the existing Organization to Business Unit mapping using the Work with Business Units by Environmental Organization Facility form. To view exiting mappings:
-
Navigate to the Work With Business Units by Environmental Organization Facility form.
-
Click Find. The form displays a list of all organizations mapped to business units. You can also enter the Organization Code of the organization for which you want to view the business unit mapping and click Find.
-
Select a record and click Select to view the business units mapped to an organization.
-
The Environmental Organization Mapping to Business Unit Revisions form displays the following information
-
Organization Code, ID, Organization Type, Industry Code, and Location display for the selected organization.
-
From and To fields display the effective dates for the Organization- Business Unit mapping. You can edit these fields.
-
Business Unit is the code for the business unit that is mapped to the company.
-
Business Unit Name is the name of the business unit that is mapped to the company.
-
Industry Code is the industry code for the organization. You can edit this field.
-
Industry Code Description is a brief description of the industry code.
-
Company is the code for the company of the organization that is mapped to the business unit.
-
Company Name is the name of the company of the organization that is mapped to the business unit.
-
From Date is the start date of the effective date range for the business unit-company mapping.
-
To Date is the end date of the effective date range for the business unit-company mapping. You can edit this field.
-
Org Id is the code for the organization of the company.
-
Date From and Date To is the effective date range for the business unit-company mapping.
-
-
To view the details of an organization, select the organization and select Organizations option in the Form menu. The Work With Environmental Organizations form appears. Refer to the “Setting Up Organizations” topic for field descriptions.
-
To import organization to business unit mappings, click Import. The Environmental Organization Mapping to Business Unit Import form appears. Enter the following information and click Ok.
-
Business Unit is the code for the business unit that the organization is mapped.
-
Organization Code is the identification code for the organization.
-
Industry Code is the code for the industry under which the organization is classified.
-
Date From and Date To is the effective date range for the mapping.
-
Org Id is the identification number for the organization.
-
Updating the Organization to Business Unit Mapping
You can also update Business Unit mappings for an organization. To update a mapping:
-
Navigate to the Work With Business Units by Environmental Organization Facility.
-
Select Update Business Unit from the Form menu. The Update Business Unit With Environmental Organization Facility form appears.
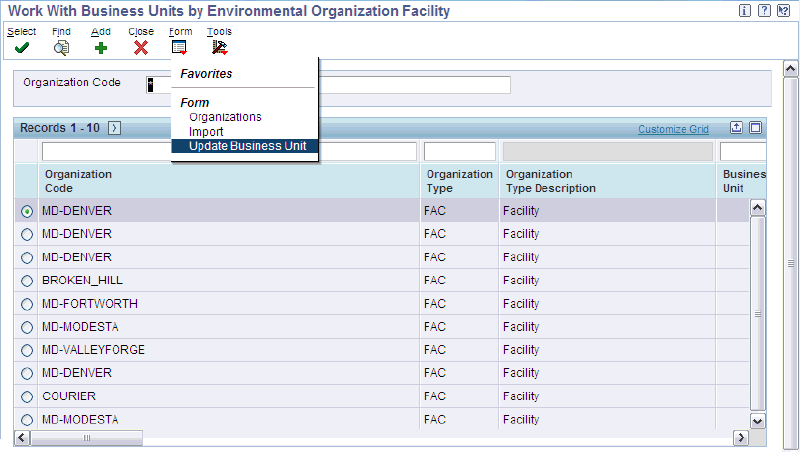
-
In the Header region, enter Organization Code/Ty to view business unit mappings of a specific organization. When you enter the Organization Code/ Ty, then the following fields display:
-
Industry code is the industry code for the organization.
-
Apply Date From and To as the effective range for the organization to business unit mapping.
-
-
Click Find. The Details region displays a list of all business units mapped to the organization and also the unmapped business units. Information displays for each business unit to organization mapping as described in the “Viewing Existing Mappings” topic.
-
Select the unmapped business unit or business units that you want to map to the organization.
-
Click Update BU Facility. The Organization Code field displays the Organization Code of the organization selected in the Header region of the form.
-
Click Save.
Defining UM Classifications (P79A37)
Set up the unit of measure (UM) classifications to maintain a standard unit of measure for measuring the usage quantities for a single source or a group of related sources to facilitate calculations and reporting of the source usages and emissions by the JD Edwards EnterpriseOne Environmental Accounting and Reporting (EAR) application. The Environmental Unit of Measure Classification form enables you to define the broad classifications for sources, with a base unit of measure. The EAR dashboards require all transactions for a source in the same unit of measure for consistent reporting. For example, you can define a classification called Electricity to classify all sources that provide electricity and set up KWh (kilowatt hour) as a standard UM for the classification. If you enter the usage data of any source that falls under the Electricity Classification, then the application converts the UM the usage is recorded in, into the standard UM of KWh to further calculate the usage quantities and emissions. You must set up units of measure user defined codes before defining UM classification.
Defining Unit of Measure Classifications
You can define UM classifications in the Work With Environmental Unit of Measure Classifications form.
-
Navigate to the Work With Environmental Unit of Measure Classifications form.
-
Click Add. Environmental – Unit of Measure Classification Revisions form displays.
-
Enter a unique code to identify the classification name in the Unit of Measure Classification field.
-
Enter a brief description for the classification in the UM Classification Description field.
-
In the Standardized Usage UM field, select a Standard UM for the classification. All sources which use the classification are converted into the selected standard UM. The description of the selected UM displays in the Standardized Usage UM Description field.
-
Click Ok to save.
Viewing and Editing UM classifications
You can also view and edit using the Work With Environmental Unit of Measure Classifications form. To view or edit UM classifications:
-
Navigate to the Work With Environmental Unit of Measure Classifications form and click Find. A list of available UM classifications display. To view the details of a specific UM classification, enter the classification in the Unit of Measure Classification field and click Find.
-
The following information displays:
-
Unit of Measure Classification is the name of the classification.
-
UM Class Description is the description of the UM classification.
-
Standardized Usage UM is the standard UM for the classification.
-
Program Id is the identification number of the program.
-
Work Stn Id is the identification number for the workstation of the user.
-
User Id is the identification number of the user who has edited the UM classification.
-
Date Updated is the date when the UM classification was updated.
-
Time of Day is the time when the UM classification was updated.
-
-
To edit a UM Classification, select the Unit of Measure Classification and click Select. The Environmental - Unit of Measure Classification Revisions form appears. You can edit the following fields:
-
UM Classification Description.
-
Standardized Usage UM.
-
Viewing Environmental - Unit of Measure Classification Audit
To view the Unit of Measure Classification audit report using the Audit Inquiry option:
-
Navigate to the Work With Environmental Unit of Measure Classifications form.
-
Select Audit Inquiry from the Form menu. The Environmental - Unit of Measure Classification Audit form appears.
-
Enter the following criteria to search for specific records and click Find:
-
Unit of Measure Classification to view the changes made to a specific unit of measure classification.
-
Date From and Date To to view the changes made to a unit of measure classification of a specific effective date range.
-
-
The details region of the form displays records of all the changes made to the selected UM classification. The following fields display for each record:
-
Unit of Measure Classification
-
Date Updated is the date on which the unit of measure classification is updated.
-
Time of Day is the time when the unit of measure is updated.
-
A C indicates if the audit record has been created due to an add (A), change (C) or delete (D).
-
UM Classification Description is a brief description of the UM classification.
-
Standardized Usage UM is the standard unit of measure used for the UM classification.
-
Program Id is the identification number of the program.
-
User Id is the identification number of the user who edited the UM classification.
-
Work Stn Id is the identification number for the workstation of the user.
-
Viewing Environmental - Unit of Measure Classification Audit History
To view the Unit of Measure Classification audit report using the Audit History option:
-
Navigate to the Work With Environmental Unit of Measure Classifications form. Select the UM Classification that you want to view the change history.
-
Select Audit History from the Row menu. The Environmental - Unit of Measure Classification Audit form appears.
-
The Details region of the form displays records of all the changes made to the selected UM classification. The following fields display for each record:
-
Unit of Measure Classification
-
Date Updated is the date on which the unit of measure classification was updated.
-
A C indicates if the audit record has been created due to an add (A), change (C) or delete (D).
-
UM Classification Description is a brief description of the UM classification.
-
Standardized Usage UM is the standard unit of measure used for the UM classification.
-
Program Id is the identification number of the program.
-
User Id is the identification number of the user who edited the UM classification.
-
Work Stn Id is the identification number for the workstation of the user.
-
Defining Sources (P79A03)
You must define any source that causes the release of emissions, consumption or production of energy, as an emission Source. Such sources release greenhouse gases and particulates that can be classified as greenhouse gases. You can attribute a source to one of the following scopes based on the GHG Protocol:
-
Scope 1: Greenhouse gas emissions from sources that are owned or controlled by an organization. For example, vehicles and equipment, stationary sources, onsite landfills, and waste water treatment plants.
-
Scope 2: Greenhouse gas emissions resulting from the purchase of electricity.
-
Scope 3: Greenhouse gas emissions from sources not owned or directly controlled by the organization but are related to the organization activities. For example, employee transportation, and contracted waste disposal.
Additionally, you can configure pollutants produced from the facility operations and track environment inventories and KPI Metrics. Sources can be any of the following:
-
Emission Source Activity, for example, Combustion of Diesel Fuel in Post 2004 Vehicle.
-
Tracked Usage. For example, Water, and square feet area.
-
Pollutant. For example, Marsh Salination and Sulphuric Acid contamination.
-
Environmental Event. For example, tree planting by hours, or number of trees.
-
KPI Metric. For example, Occupied Rooms (for Hotel and Motel chain).
A Source cannot be deleted in any of the following scenarios:
-
An Energy Factor exists for the Source.
-
An Emission Factor exists for the Source.
-
An Environmental Ledger Transaction exists in the Environmental Ledger that has not been reversed or voided.
If a Source does not have applicable energy factors, then an entry is not required. If a Source does not have applicable emission factors, then an entry with zero emissions must be entered. This is regardless of whether the Source is a KPI Metric or a Source configured to only track environmental Usage. You can define and manage the sources required by your organization using the Work With Environmental Sources form. You must define UM classifications before defining sources.
Apportion Usage
The Environmental - Source Revisions form provides the Apportion Usage option that you can set to:
-
Checked: If you set to checked, then during Accounts Payable data entry, you can apportion the total usage quantity of a source over each day in a date range.
-
Unchecked: If you set to unchecked, then during Inventory Issue, Accounts Payable Entry, or Environmental Ledger Entry, the environmental date can default to the relevant transaction date, if an environmental date is not entered. The source usage quantity is applied to a single environmental date.
Adding Environmental Sources
You can define environmental sources using the Work With Environmental Sources form. To define sources:
-
Navigate to the Work With Environmental Sources form.
-
Click Add. The Environmental - Source Revisions form appears.
-
In the Source tab, enter a name for the source in the Source field. Required.
-
Optionally, enter a description for the emission source in the Description field.
-
Select the Date to Apply as the date to apply for the environmental transaction. This is always the Invoice Date. Required.
-
Select the Default Emission Scope as the scope that must be used while entering transactions for the source. Required.
-
Select the Apportion Usage as checked or unchecked. If you select checked, then during AP entry the source usage quantity is apportioned to each day in a date range. For example, quarterly electricity bill. Default is unchecked.
-
Select the Unit of Measure Classification for the source. This is used for reporting purposes and is used in rules for which sources can be included in a KPI List. Required.
-
In the Reporting tab, enter Parent Group Source, Parent Source, Protocol Source, Activity Type, and Energy Type for the emission source. This is required for environmental reporting. By providing a parent group source, you can generate reports for a group of related sources. Optional.
-
In the Category Codes tab, optionally, enter Category Codes 1-10 for additional reporting requirements.
-
Click Ok to save.
Viewing and Editing Emission Sources
You can view and edit emission sources using Work With Environmental Sources form:
-
Navigate to the Work With Environmental Sources form.
-
Click Find to view details of all sources or enter a name in the Emission Source field and click Find to search for a specific source. The following fields display for each source:
-
Source is the name of the emission source.
-
Source Description is a brief description of the emission source.
-
Date to Apply is the date applied for the environmental transaction.
-
Date to Use defaults to the invoice date.
-
Default Emission Scope is the default scope for the source.
-
Emission Scope Description is the description for the source.
-
Apportion Usage displays as checked if the source usage quantity of the source can be apportioned for each day in a date range during transaction data entry.
-
Unit of Measure Classification is the UM classification for the source.
-
Unit of Measure Classification Description is a description of the UM classification.
-
Parent Source, Parent Source Description, Protocol Source, Protocol Source Description, Parent Group Source, and Cat 1-10 provide the reporting details for source.
-
Energy Type is the type of energy of the source.
-
Activity Type is the activity type for the source usage.
-
Activity Description is the description for the activity type.
-
Cat Code 01- 10 provide fields for additional reporting data. See: Setting Up EAR Category Codes (P0004A)
-
Source Id is a unique identifier that identifies the Source (system generated)
-
-
To view details of a specific source and edit information, select a source in the Emission Source field.
-
Click Select. The Environmental - Source Revisions form displays. Refer to the “Adding Environmental Sources” topic for field descriptions. You can edit the following fields:
-
Source Description
-
Default Emission Scope
-
Apportion Usage
-
Parent Group Source
-
Parent Source
-
Protocol Source
-
Activity Type
-
Energy Type
-
Category codes
-
-
To view suppliers for a specific source, select a source and select the Suppliers option of the Form menu. The Work With Environmental Suppliers form appears. Refer to the “Setting up Suppliers” topic for detailed field descriptions.
-
To add energy factors for a source, select a source and select Energy Factor from the Row menu. The Environmental - Energy Factor Revisions form appears. Refer to the “Defining Energy Factors” for detailed field descriptions.
-
To add emission factors for a source, select a source and select Emission Factor from the Row menu. The Environmental - Emission Factor Revisions form appears. Refer to the “Defining Emission Factors” for more information.
-
To import Sources, select the Import option from the Form menu. The Environmental - Source Import form displays. Enter the Source information as described in the “Adding Environmental Sources” topic and click Ok.
Viewing Environmental Source Audit History
The Environmental - Source Audit History form enables you to view all updates that are made to Sources. You can view an audit trail for all the updates for a specific source and for a specific effective date range. To view the source audit history:
-
Navigate to the Work With Environmental Sources form.
-
Select Audit from the Form menu or the Row menu. The Environmental - Source Audit History form appears.
-
Select the Source for which you want to view the audit history if you have selected the Audit option from the Form menu. If you have selected the Audit option from the Row menu, then source id defaults to the source that you selected in the Work with Environmental Sources form.
-
Select the Date From and Date To to view audit history for a source for a specific effective date range.
-
Click Find. The Details region of the form displays the records of all the changes made to the selected source. Refer to the “Viewing and Editing Emission Sources” topic for detailed field descriptions.
-
Defining Emission Factors (P79A10)
An Emission Factor is the factor used to calculate the amount of an Emission Type produced (typically a gas) by consuming or producing an Emission Source. For example, according to the National Greenhouse and Energy Reporting (NGER), in the energy industry burning one ton of black coal produces 27.0 gigajoules (GJ) of energy. One gigajoules of energy produced by burning black coal produces 88.2 kilograms (Kgs) (emission factor) of Carbon Dioxide, 0.03 kilograms of Carbon Dioxide equivalent (CO2-e) for Emission Type Methane and 0.2 kilograms of Carbon Dioxide equivalent (CO2-e) for Emission Type Nitrous Oxide. The following information can be derived from the example:
-
The Emission Source is black coal.
-
The Emission Types are Carbon Dioxide, Methane and Nitrous Oxide.
-
The NGER factors are normalized to Kgs/GJ of CO2-e for emissions regardless of the emission type.
-
The emission factors are:
-
CO2: 88.2 kgs/GJ of CO2-e
-
Methane: 0.03 kgs/GJ of CO2-e
-
Nitrous Oxide: 0.2 kgs/GJ of CO2-e
-
The Emission Factors specify the calculation factors applicable to each type of Emission Source and can be applied to either actual usage or energy (GJ). An emission factor is used to define the various factors that are applicable to a Source that can be defined:
-
By Geography. For example, globally, by country, by state within a country, or county within a state or country.
-
By Organization. For example, organization wide, within a manufacturing organization or a facility, depending on its hierarchy.
-
By supplier. For example, if companies A and B are providing the same source, and if B is adding an additive that increases the efficiency of the source, then the energy factor for the source provided by B is different from that of the source by A. This is applicable only for transactions that are captured by invoices or the supplier whose transactions are identifiable and data is by the EAR Ledger.
Emission Factors are by Emission Type so calculation methods may differ between the Emission types associated with a source. There may be multiple entries for one emission type based on organization and geographical area.
When an Organization is defined in an Emission Factor it must be an organization mapped to a JD Edwards Business Unit and represent an Aggregate Facility, Facility or Sub-Facility. When no Organization or Business Unit is specified, then emission Factor applies to all organizations. You must define emission sources before defining emission factors.
Adding Emission Factors
You can define emission factors using the Work With Environmental Emission Factors form. To define emission factors:
-
Navigate to the Work With Environmental Emission Factors form.
-
Click Add. The Environmental - Emission Factor Revisions form displays.
-
Select the Source for which you want to enter an emission factor. Required.
-
In the Emission Scope field, enter a required value for the emission from user-defined code table 79A/SC. The Emission Scope description displays. Values include:
-
0 – KPI Metric
-
1 – Direct Emission, e.g. Plant Equipment diesel usage
-
2 – Indirect Emissions, e.g. Electricity
-
3 – Non-reporting
-
-
Enter the Emission Type as the type of gas emission. Required.
-
Enter the County, State, and Country if the emission source is linked to a specific geographical area.
-
Enter the code for the Organization to which you want to apply the factor to. The organization must be a facility. If you do not enter an organization code, then the factor applies to all organizations. Optional.
-
Enter the Business Unit to which you want to associate the emission factor. If you do not enter the business unit, then the emission factor is applicable to all business units. The Business Unit Name displays. Optional.
-
Optionally, enter the Address number.
If you want to set up an emission factor by location, you must associate it to an Address number.
Warning: This is a required step when the source supplier provides a ratified emission factor that differs from the default factor applied to other suppliers.
-
In the Calc Method field, enter a value for the method used to derive the emission factor from user-defined code table 79A/GM. Options are:
-
1 – Default Method; provided by legislative agencies, where reporting is mandatory.
-
2 – Facility Specific industry sampling.
-
3 – Facility Specific industry sampling and analysis.
-
4 – Direct monitoring on periodic basis.
-
-
When you enter the Calc Method the Calculation Method Description displays.
-
Enter Date From as the start date for the effective date range for the energy factor.
-
Enter Date To as the end date for the effective date range for the energy factor.
-
Enter the Usage Quantity as the proportion of one unit of source to which the calculation factor must be applied.
-
Enter the Usage UM as the UM in which the usage quantity of the source is measured.
-
Enter the Emission Factor as a factor to be applied to each Usage Qty and Unit of Measure to calculate CO2-e emissions.
-
Enter the CO2-e Usage Qty as a proportion of one unit of source to which the CO2-e emission factor is applied.
-
Enter the CO2-e UM as the unit of measure of the related CO2-e Usage Quantity. For example, LT for Liters of Water.
-
Enter the CO2-e Emission Factor to calculate the Emissions data in CO2-e Kgs.
-
Enter Cal Source as a free format text to enter reference of where the emission factor is defined. For example, Department of Climate Change – NGA Factors.
-
The Emission Factor Id identification code for the Emission Factor selected.
-
The Org Id is the identification code for the selected organization.
-
Click Ok to save.
Note: An emission factor cannot exist with a date overlap where the following Energy attributes are the same:
-
Source
-
Emission Scope
-
Emission Type
-
Organization Id
-
Business Unit
-
Address No
-
County, State & Country
-
Viewing and Editing Emission Factors
You can view and edit emission factors using the Work With Environmental Emission Factors form. To view and edit emission factors:
-
Navigate to the Work With Environmental Emission Factors form.
-
Enter any of the following criteria to search for specific records. These fields are described in detail in "Adding Emission Factors" above.
-
Emission Scope.
-
Source.
-
Address No.
-
Date Range.
-
-
Click Find.
-
To edit an emission factor for a source, select a record in the details region and click the Select menu option. The Environmental - Emission Factor Revisions form appears. Refer to “Adding Emission Factors” above for detailed information. You can edit the following fields:
-
County
-
State
-
Country
-
Date To
-
Usage Quantity
-
Usage UM
-
Emission Factor
-
CO2-e Usage Qty
-
CO2-e UM
-
CO2-e Emission Factor
-
Calc Source
-
-
To add suppliers, select the Suppliers option from the Form menu. The Work With Environmental Suppliers form appears. Refer to “Setting Up Suppliers” topic for detailed field descriptions.
-
To import emission factors, select the Import option from the Form menu. The Environmental - Emission Factor lmport form appears. Enter the emission factor information in the grid as described in the “Adding Emission Factors” topic.
Setting Up Carbon Permit Management (P79A80)
Carbon Permit Management enables a company to participate in emissions trading (sometimes referred to as cap-and-trade). Some governments use a market-based approach to control pollution by providing economic incentives for achieving reductions in the emissions of pollutants. These governments set a limit or cap on the amount of a pollutant that may be emitted. This limit or cap is allocated or sold to firms in the form of emissions permits, which represent the right to emit or discharge a specific volume of the specified pollutant.
Companies are required to hold a number of permits (or carbon credits) equivalent to their emissions. Liable entities must have procedures in place to ensure that they purchase or surrender the correct amount of permits for each relevant year. Typically, in carbon tax and emission trading schemes, significant penalties apply for not surrendering the correct amount of permits by the compliance date. Companies must establish processes to actively manage the trading of permits, such as funding purchases when needed and understanding which permits to use to meet their liabilities. Use the Carbon Permit Management windows in JD Edwards EnterpriseOne Environmental Accounting and Reporting to track carbon permits by organization. Create carbon permit reports using the Carbon Permit tab in the Emissions Dashboard (see: Understanding the Emissions Dashboard).
Prerequisites
- Define which value in the Unit of Measure (00/UM) UDC table represents metric tons in the Carbon Permit Management forms. You can specify the seeded value of TM or another unit of measure value. To define this value, navigate to Environmental Accounting and Reporting > Setup > Carbon Permit Management. Right click on the Carbon Permit Management link, then click Values. In the Processing Options form, enter the unit of measure used to represent metric tons.
- Define values for the Legislation (79A/LG) UDC. Refer to Setting Up User Defined Codes for Environmental Accounting and Reporting (P0004A).
To set up Carbon Permit Management
-
Navigate to the Carbon Permit Management - Work with Carbon Permit Management form.
-
Click Add. The Carbon Permit Management - Carbon Permit Management Revisions form displays.
-
Select the Organization Code for which you want to set up carbon permits. Required.
-
In the Date From and To fields, enter the date range for which the carbon permits for this organization are valid. Required.
-
In the Legislation field, select the legislation requiring the carbon permits. Required.
-
In the Reporting Deadline field, enter the date that the report is due to the governing body. Required.
-
In the Permits Owned field, enter the number of permits owned by the organization. Optional.
-
In the Allowances field, enter the number of free allowances granted to the organization. Optional.
The number of free carbon permit allowances depends on the specific regulations of the governing body.
-
In the Estimated Permit Cost field, enter the expected cost per permit. Optional.
-
In the CO2-e Quantity Per Permit field, enter the fixed amount of CO2 emissions that constitutes a carbon permit. Required.
-
In the Included Scopes table, search for and select each scope specified by the GHG Protocol that requires carbon permit management reporting.
You must enter at least one scope.
-
Click OK to save.
Related Topics
Setting Up User Defined Codes for Environmental Accounting and Reporting (P0004A)
Understanding the Emissions Dashboard
Defining Energy Factors (P79A10)
An Energy Factor is a factor used to calculate the amount of energy consumed or produced by an Emission Source. Therefore, using the example above in Emission Factors, consuming 20,000 tons of black coal for a purpose other than for the production of electricity or coke, produces the following amount of energy:
Energy Consumed = 20,000 x 27 =540,000 GJ
An energy factor is used to define the various factors that are applicable to a Source that can be defined:
-
By Geography. For example, globally, by country, by state within a country, or county within a state or country.
-
By Organization. For example, organization wide, within a manufacturing organization or a facility, depending on its hierarchy.
-
By supplier. For example, if companies A and B are providing the same source, and if B is adding an additive that increases the efficiency of the source, then the energy factor for the source provided by B is different from that of the source by A. This is applicable only for transactions that are captured by invoices or by the supplier whose transactions are identifiable and data is by the Environmental Ledger.
A Source can have zero or more energy factors associated with it. For example, Electricity Usage per KWh produces 0.0036 GJ of Energy.
You must define sources and map organization to a business unit to be able to define emission factors.
Adding Energy Factors
To define energy factors:
-
Navigate to the Work with Environmental Energy Factors form.
-
Click Add. The Environmental - Energy Factor Revisions form displays.
-
Select the Source for which you want to enter an energy factor. Required.
-
Select the Emission Scope. Required. Values include:
-
0 – KPI Metric
-
1 – Direct Emission, e.g. Plant Equipment diesel usage
-
2 – Indirect Emissions, e.g. Electricity
-
3 – Non-reporting
-
-
The Emission Scope Description displays.
-
Enter the County, State, and Country for the source if the emission source is linked to a specific geographical area. If you do not enter the county, state, and country, then the energy factor is applicable to all geographical areas. Optional.
-
Enter the code for the Organization to which you want to apply the factor to. Optional. If you do not enter the organization, then the energy factor is applicable to all organizations.
-
Enter the Business Unit to which you want associate the energy factor. If you do not enter the business unit, then the energy factor is applicable to all business units. The Business Unit Name displays. Optional.
-
Optionally, enter the Address number.
If you want to set up an energy factor by location, you must associate it to an Address number.
Warning: This is a required step when the source supplier provides an energy factor that differs from the default factor applied to other suppliers. If you do not enter the business unit, then the energy factor is applicable to all business units.
-
Alpha Name is the associated description of the address number.
-
In the Calc Method field, enter a value for the method used to derive the energy factor from user-defined code table 79A/GM. Options are:
-
1 – Default Method; provided by government agencies, where reporting is mandatory or using published factors in voluntary reporting.
-
2 – Facility Specific industry sampling
-
3 – Facility Specific industry sampling & analysis
-
4 – Direct monitoring on periodic basis
-
-
When you select the Calc Method, the Calculations Method Description displays.
-
Enter Date From as the start date for the effective date range for the energy factor. These dates are automatically populated if you do not enter a value. The Date From field defaults to the current date. The Date To field defaults based on the CENTCHG DD (Century Change Year) item and reflects the last day of the year defined in that field.
-
Enter Date To as the end date for the effective date range for the energy factor.
-
Enter Usage Quantity as the proportion of one unit of source to which the calculation factor must be applied.
-
Enter the Usage UM as the UM in which the usage quantity of the source is measured.
-
Enter the Energy Factor as a factor to be applied to each Usage Qty and Unit of Measure to calculate GJ of Energy. For example, 1 KWh = .0036 GJ.
-
Enter Calc Source as a free format text to enter reference of where the energy factor was defined. For example, Department of Climate Change – NGA Factors. The Energy Factor Id defaults based on the Energy Factor selected.
-
The Org Id is the identification code for the organization selected
-
Click Ok to save.
Viewing and Editing Energy Factors
To view and edit energy factors:
-
Navigate to the Work with Environmental Energy Factors form.
-
Enter any of the following criteria to search for specific records:
-
Emission Scope to search for energy factors of a specific scope.
-
Source to search for energy factors for a specific source.
-
Address No. to search for energy factors using the address number.
-
Date Range to search for energy factors that are effective in a specific date range.
-
-
Click Find. The following fields display:
-
Source is the code for the emission source.
-
Source Description is the description for the source.
-
Emission Scope is the scope of the emission source.
-
Emission Scope Description is a brief description of the scope.
-
County, State, and Country provide the geographical location of the source.
-
Organization Code is the organization where the transactions for the source occur.
-
Business Unit is the code for the business unit mapped to which the energy factor is associated to.
-
Business Unit name is the name of the business unit.
-
Supplier Number is the address book number for the supplier.
-
Supplier Name is the name of the supplier.
-
Calc Method is the method using which the energy factor is defined.
-
Date From and Date To is the effective date range of the energy factor.
-
Usage Quantity defines the proportion of one unit of the source to which the energy factor is applied.
-
Usage UM is the unit of measure in which the usage quantity is measured.
-
Energy Factor is the factor to be applied to each Usage Qty and Unit of Measure to calculate GJ of Energy.
-
Calc Source provides the reference of where the energy factor was defined.
-
Program Id is the identification number for the program.
-
User Id is the unique identifier of the user that updated the record.
-
Work Stn Id is the unique identifier for the workstation of the user that updated the record.
-
Date Updated is the date when the energy factor is updated.
-
Energy Factor Id is the identification code for the energy factor.
-
Source Id is the identification code for the source.
-
Org Id is the identification number for the environmental organization.
-
-
To edit the details of an energy factor, select a source and click the Select menu option. The Environmental - Energy Factor Revisions form appears. Refer to the “Adding Energy Factors” topic for field descriptions. You can edit the following fields:
-
County
-
State
-
Country
-
Calc Method
-
Date To
-
Usage Quantity
-
Usage UM
-
Energy Factor
-
Calc Source
-
-
To add suppliers, select the Suppliers option from the Form menu. The Work With Environmental Suppliers form appears. Refer to “Setting Up Suppliers” topic for more information.
-
To import energy factors, select the Import option from the Form menu. The Environmental - Energy Factor lmport form appears. Enter the energy factor information in the grids as described in the “Adding Energy Factors” topic and click Ok.
Viewing Sources and Factors (P79A09)
The Work with Environmental Sources & Factors form provides consolidated information on emission sources and their related emission and energy factors. You can add or edit sources and factors using this form.
To view emission sources and factors
-
Navigate to the Work With Environmental Sources & Factors form.
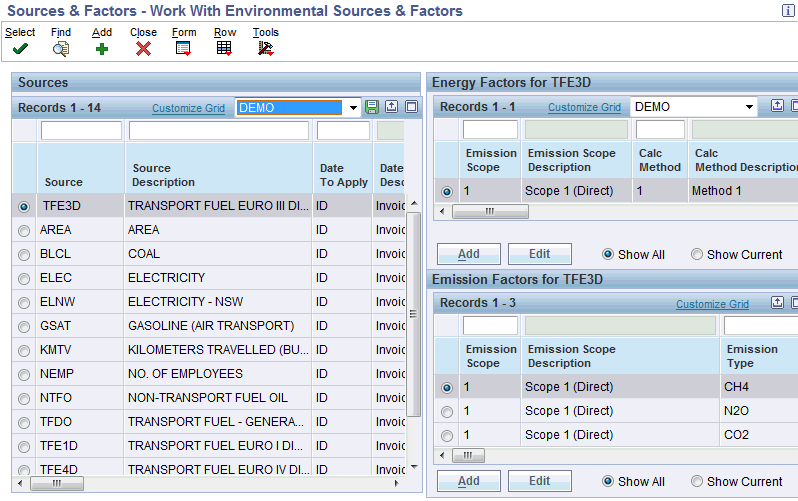
-
Click Find. The left pane of the form displays a list of all emission sources. To add sources, click Add. Refer to the “Defining Sources” topic for field descriptions and information on how to add sources.
-
Select a source for which you want to view the energy and emission factors. The right pane of the form displays a list of energy and emission factors for the selected emission source. To add or edit energy or emission factors, click Add or Edit in the respective sections of the form. Refer to the “Defining Energy Factors” and “Defining Emission Factors” topics for field descriptions and information on how to add and edit factors.
-
To add suppliers for a source, select the source and select the Suppliers option from the Form menu. The “Work With Environmental Suppliers” form appears. Refer to the “Setting up Suppliers” topic for information on how to add suppliers.
-
To import sources, select the Import Sources option from the Form menu. The Environmental - Source Import form appears. Enter the source information in the grids as described in the “Defining Sources” topic.
-
To import energy factors, select Import Energy from the Form menu. The Environmental - Energy Factor Import form appears. Enter the energy factor information in the grids as described in the “Defining Energy Factors” topic.
-
To import emission factors, select Import Emissions from the Form menu. The Environmental - Emission Factor Import form appears. Enter the emission factor information in the grids as described in the “Defining Emission Factors” topic.
-
To view the audit history for the changes made to a source, select Audit from the Form or Row menus. The Environmental - Source Audit History form appears. Refer to the “Defining Sources” topic for more information on source audits.
Defining Source UM Conversions (P79A39)
Set up Source UM Conversion to allow UM conversions for sources that are required to be recorded in the energy and emission calculations. Sources may normally be used, consumed, or generated in a unit of measure (UM) different from that of the base energy unit of measure. Sources may not be linked to an inventory item and even where the conversions exist, the UM conversion would not be a unit of measure that is ideal for warehousing, procurement, or distribution areas. Setting up UM conversions for sources facilitates the conversion of the recorded source usage UM to the base unit of measure of their energy and emission factors and provides for energy and emission calculations. The Source Unit of Measure Conversion is used in the energy calculation and emission calculation after matching the respective energy or emission factor. For example, gases like ethane are purchased in Kg or bottles but related source energy factors are based on cubic meters. Hence, you must set up a conversion for Kg into cubic meters to be able to perform emission and energy calculations in GJ and Kg respectively, based on the usage quantity of ethane.
Inverse UM Conversion
The EAR application also provides for inverse conversion factors for sources to facilitate the energy and emission calculations. For example, consider that you set up a source UM conversion for a Source A, of cubic meters to liters.
Source UM conversion from cubic meters to liters = Conversion 0 .89
Source UM conversion from liters to cubic meters = Not defined
If a transaction is entered for A with a usage of 100 liters and CO2-e emission factor is in cubic meters then the EAR application converts 100 liters to cubic meters based on conversion defined for liters to cubic meters. As a factor for this conversion is not defined, the application uses the factor available for cubic meters to liters conversion and inverts the factor and applies the conversion rate as 1/.89 = 1.123596 and performs the emission calculations.
Setting Up UM Conversion for a Source
You can set the UM conversion for a source using the Work With Environmental Source UM Conversion form. To set the UM conversion for a source:
-
Navigate to the Work With Environmental Source UM Conversion form.
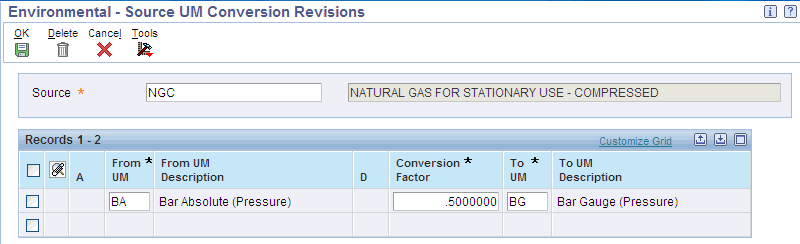
-
Click Add. The Environmental - Source UM Conversion Revisions form appears.
-
In the Source field, select the emission source for which you want to set up the UM conversion. Required.
-
In the From UM field, select the unit of measure that you want to convert. Required. The description of the selected UM displays in the From UM Description field.
-
Enter the Conversion Factor that must be applied to From UM to convert into To UM.
-
In the To UM field, enter the unit of measure that you want the From UM to convert into. Required. The description of the selected UM displays in the To UM Description field.
-
Click Ok to save.
Viewing and Editing Source UM Conversions
You can view and edit source UM conversions using the Work With Environmental Source UM Conversion form. To view and edit source UM conversions:
-
Navigate to the Work With Environmental Source UM Conversion form and click Find. A list of existing source UM conversions displays. To search for a specific UM conversion, enter a UM in the Unit of measure conversion field and search.
-
The following information displays:
-
Emission Source is the name of the source for which the UM conversion is defined.
-
Emission Source Description is a brief description of the emission source.
-
A is the base quantity of the From UM being converted. This defaults to 1. (i.e. 1 LT = .001 KL)
-
From UM is the UM that is converted to another UM.
-
From UM Description is the description of the UM that is converted.
-
D is the qualifier for the conversion. This defaults to ‘=".
-
Conversion Factor is the factor applied on From UM to convert into To UM.
-
To UM is the UM that From UM converts into.
-
To UM Description is a brief description of the UM that From UM converts into.
-
Inverse Conversion is a factor that is applied for the inverse conversion of the unit of measures.
-
-
To edit a UM conversion select the record to edit and click the Select menu option. The Environmental - Source UM Conversion Revisions form appears.
-
Enter a new value in the Conversion Factor field.
-
Click Ok to save.
Defining Environmental Assets and Subcontractors (P79A08)
Plant Equipment Assets that consume fuels that create emissions are set up as environmental assets with an associated Transport Type. Reporting obligations in certain countries stipulate that for certain size facilities, the emissions and energy from major contractors are to be identified. In such cases, you can associate an asset to a subcontractor. The JD Edwards EnterpriseOne Environmental Accounting & Reporting (EAR) system enables you to set up and maintain plant equipment assets that consume fuel, including assets configured to track sub-contractors. A Subcontractor can own zero or more Assets. An Asset can belong to either a Subcontractor or an Organization. Plant equipment assets must already be configured in Plant Equipment Management system as assets.
Prerequisites
- Plant equipment assets must already be configured in Plant Equipment Management system as assets. Refer to the "Setting Up Equipment" topic of the JD Edwards EnterpriseOne Capital Asset Management Implementation Guide for more information.
- Sub-contractors must already exist in the Address Book. Refer to:
-
Entering Supplier Master Information, JD Edwards EnterpriseOne Applications Accounts Payable Implementation Guide.
-
Entering Address Book Records, JD Edwards EnterpriseOne Applications Address Book Implementation Guide.
Adding Assets
To add assets:
-
Navigate to the Work With Environmental Plant Equipment and Subcontractors form.
-
Click Add. The Environmental - Plant Equipment and Subcontractors Revisions form displays.
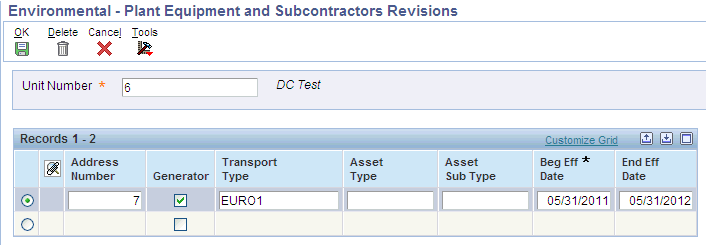
-
Select the Unit Number as the asset that you want to define as an environmental asset. Required.
-
Select the Address Number for the asset. Optional. If you enter the address number, then it must represent a Subcontractor and the Asset is a fictitious asset number in the Plant Equipment Management system setup.
-
Select the Generator checkbox if the asset generates emissions.
-
Select the Transport Type as the engine type for the asset type to identify the correct emission source to determine the correct factor to use in the energy and emissions calculation. Optional.
-
Optionally, select Asset Type and Asset Sub Type as the type of asset for additional reporting requirements. Refer to “Setting up User Defined codes” topic.
-
Enter Beg Eff Date as the start date for the effective date range of the asset. If you do not enter a value, the date defaults to the current date.
-
Enter End Eff Date as the end date for the effective date range of the asset. If you do not enter a value, the date defaults based on the CENTCHG DD (Century Change Year) item and reflects the last day of the year defined in that field.
-
Click Ok to save.
Viewing and Editing Plant Equipment and Subcontractors
To view plant equipment and subcontractors
-
Navigate to the Work With Environmental Plant Equipment and Subcontractors form.
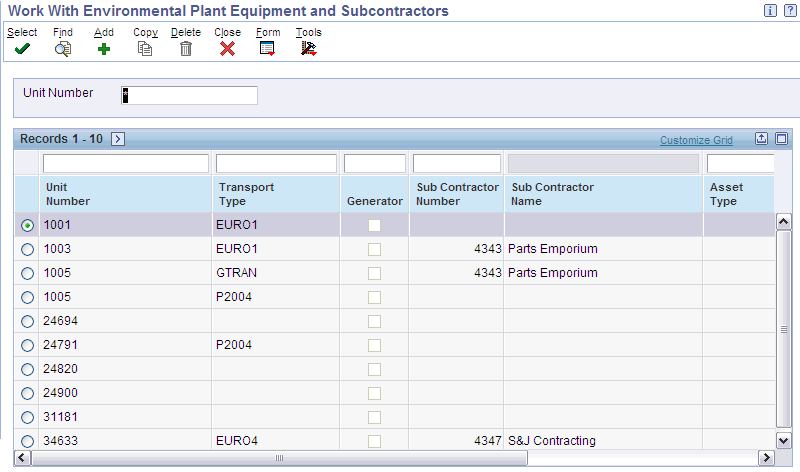
-
Enter an asset number in the Unit Number field to search for a specific asset.
-
Click Find. A list of assets display. The following fields display for an asset:
-
Unit Number is the alpha numeric identification number of the asset.
-
Transport Type is the engine type for the asset.
-
Gen displays as checked if the engine generates emissions.
-
Subcontractor Number is the address number of the subcontractor for the asset.
-
Subcontractor Name.
-
Asset Type and Asset Sub Type are the type and sub type of the asset and used for reporting requirements.
-
Beg Eff Date and End Eff Date is the effective date range for the asset.
-
Asset Number is the unique identification number for an asset.
-
-
To edit an asset, select the asset and click the Select menu option. The Environmental - Plant Equipment and Subcontractors Revisions form appears. Enter the asset information as described in the “Adding Assets” topic. You can edit the following fields:
-
Address Number
-
Transport Type
-
Asset Subtype
-
End Eff Date
-
-
To import assets, select the Import option from the Form menu. The Environmental - Plant Equipment and Subcontractor Import form appears. Enter the asset information in the grids as described in the “Adding Assets” topic.
Defining Items (P79A04)
You must define items as Environmental Items to be able to identify their emission sources and record their usages and emissions in the JD Edwards EnterpriseOne Environmental Accounting and Reporting application. Environmental Items must exist in the Item Master and can be an inventory item, e.g. Diesel fuel or a non-stock item and Electricity.
Prerequisites
- Items must exist in the Item Master (P4101).
Adding Items
To define items
-
Navigate to the Work With Environmental Items form.
-
Click Add. The Environmental Items Revision form appears.
-
Select the item that you want to set up as item in the 2nd Item Number field. The Item Description displays.
-
Optionally, select the organization in the Organization Code field that you want to associate the supplier to. You can only select organizations that are mapped to a business unit. You can allocate an organization in order to define a different business process for the same item. For example, Organization ‘A’ may use the Inventory Issue for the Item whereas; Organization ‘B’ may alternatively process the Item through Procurement. If you leave the field blank, then the item is associated to all organizations.
-
Optionally, select the Business Unit that you want to associate the item to. You can allocate a business unit in order to define a different business process for the same item. For example, business unit ‘B’ may use the Inventory Issue for the Item whereas; business unit ‘C’ may alternatively process the environmental item through Procurement. If you do not associate an item to a business unit, then the item applies to all business units. The Bus Unit Description displays.
Note: You can select Organization, Business unit, or both.
-
Select the Transport Type for the item. The Transport Type Description displays. Optional.
-
Select a Source for the item. The Source description displays. Required.
-
Select a Emission Scope for the item. The Emission Scope Description displays. Required.
-
Required. Select the Item Type from user-defined code table 79A/IT:
-
I – Record Usage via Inventory if you want to record the item usage by inventory issue transactions.
-
V– Record Usage at Voucher Entry if you want to record the item usage using A/P processing.
-
-
3rd Item Number is a 25-digit, free-form, user defined alphanumeric item number for the item.
-
Short Item Number is an 8-digit computer-assigned number for the item.
-
Enter the Beg Eff Date and End Eff Date as the effective date range for the item. If you do not enter the Beg Eff Date, then it defaults to the system date. These dates are automatically populated if you do not enter a value. The Beg Eff Date field defaults to the current date. The End Eff Date field defaults based on the CENTCHG DD (Century Change Year) item and reflects the last day of the year defined in that field
-
Org Id is the identification code for the EAR Organization.
-
Click Ok to save.
Viewing and Editing Items
To view and edit items:
-
Navigate to the Work With Environmental Items form.
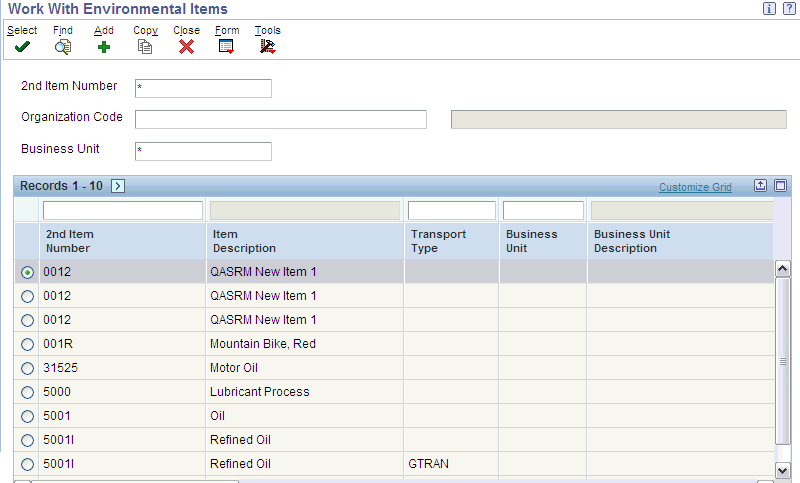
-
Enter any of the following search criteria to search for specific records:
-
2nd Item Number is the identification number for the item.
-
Organization Code to search for all items associated to a specific organization.
-
Business Unit to search for all items associated to a specific business unit.
Note: An item can display multiple times with different transport types and effective date ranges that do not overlap.
-
-
Click Find. The following fields display:
-
2nd Item Number is the identifier for the environmental item.
-
Item Description is a brief description of the item.
-
Transport Type is the transport type for the item.
-
Business Unit is the business unit to which you want to associate the item.
-
Business Unit Description is a brief description of the business unit.
-
Organization Code is the code for the organization to which the item is associated.
-
Source is the source for the environmental item.
-
Source Description is a brief description of the emission source.
-
Emission Scope is the scope for the emission source.
-
Emission Scope Description is the description of the emission scope.
-
Item Type displays as:
-
I – Record Usage via Inventory if the item usage is recorded by inventory issue transactions.
-
V– Record Usage at Voucher Entry if the item usage is recorded using AP processing.
-
-
Beg Eff Date and End Eff Date displays the effective date range for the item.
-
3rd Item Number is the item number.
-
Short Item Number is a short name for the item.
-
Org Id is the identification code for the EAR organization.
-
-
To view details for an item, select the record for the item and click the Select menu option. The Environmental Items Revision form appears. Refer to the “Adding Items” topic for field descriptions. You can edit the following fields:
-
Source
-
Emission Scope
-
Item Type
-
Date To
-
-
To import items, select Import from the Form menu. The Environmental Items Import form appears. Enter the item information in the grid as described in the “Adding Items” topic and click Ok.
Setting Up Suppliers (P79A02)
If you plan to create vouchers, you must set up suppliers as Environmental Suppliers that provide products or services whose usage transactions are used by the EAR application for energy and emission calculations. You can allocate source and emission scope to an Environmental Supplier that are applied to the transactions created in the Environmental Ledger upon the supplier’s use within the AP Voucher Entry application.
Prerequisites
- All suppliers must already exist in the Address Book (P0100041) and Supplier Master (P04012) before setting them up as Environmental suppliers.
Adding Suppliers
To set up suppliers
-
Navigate to the EAR Work With Environmental Suppliers.
-
Click Add. The Environmental - Supplier Revisions form appears.

-
Select the Supplier that you want to set up as an environmental supplier. The following fields display:
-
Supplier Number is the address book number for the supplier.
-
Supplier Name is the name of the supplier.
-
-
Optionally, select the Business Unit to which you want to associate the supplier. You can allocate a business unit in order to define a different business process for the same Supplier. For example, for business unit ‘A’ a supplier may be required to be mandatory as a provider of electricity, but for business Unit ‘B’ the supplier may perform activities, for example, move power lines which is not under the organization’s direct operational control. The Business Unit Description displays.
-
Select the Supplier Type from the user-defined table 79A/GS. The Supplier Type Description displays. Select:
-
Mandatory, if you want the Usage quantity entered for all AP Vouchers related to the supplier.
-
Optional, if you do not want the Usage quantity entered for all AP vouchers related to the supplier. A warning displays during AP voucher processing that no environmental information is entered.
-
-
Optionally, select the Default Source for the supplier. The Source Description displays.
-
Optionally, select the Emission Scope for the emission source. The Emission Scope Description displays.
-
Select the Item Type as:
-
I – Record Usage via Inventory if you want to record the source usage by inventory issue transactions. Default.
-
V– Record Usage at Voucher Entry if you want to record the source usage using A/P processing.
The Item Type Description displays.
Note: The supplier's Item Type enables the supplier to automatically override an environmental item's Item Type of 'I'. Environmental items with an Item Type of 'I' capture emissions using Inventory Issue transactions.
For example, an Inventory Issue transaction occurs when the environmental item Diesel with an Item Type of 'I' is issued to plant equipment. The Inventory Issue generates emission transactions for Diesel that are captured in JDE.
In another scenario within the same company, fleet vehicles consume Diesel from a fuel pump at a supplier and a fuel card is used to pay for the Diesel. The Diesel is itemized on a fuel card invoice. The invoice is processed using Procurement and subsequently Voucher Matched. Voucher Matching triggers the creation of emissions transactions for Diesel in JDE. To enable this, set the Item Type to 'V' for the supplier related to the fuel card statement. The supplier's Item Type 'V' overrides Diesel's Item Type 'I', ensuring that emissions transactions are generated during A/P processing.
Important: If bulk fuel is consumed only through Inventory Issues, then the supplier of that bulk fuel must have an Item Type of 'I'. This supplier cannot process invoices related to bulk fuel purchases.
-
-
Enter the Beg Eff Date and End Eff Date as the effective date range for the supplier.
-
Click Ok to save.
Viewing and Editing Suppliers
To view and edit suppliers:
-
Navigate to the Work With Environmental Suppliers form.
-
Enter a Supplier to search for information for a specific supplier.
-
Click Find. The following information displays:
-
Supplier Number is the address book number of the supplier.
-
Supplier Name is the name of the supplier.
-
Business Unit is the code for the business unit to which the supplier is associated to.
-
Business Unit Description is a brief description of the business unit.
-
Supplier Type is the type of supplier. Displays as Mandatory or Optional.
-
Supplier Type Description is a brief description of the supplier type.
-
Default Source is the source associated to the supplier.
-
Source Description is a brief description of the emission source.
-
Emission Scope is the scope for the emission source.
-
Emission Scope Description is a description of the emission scope.
-
Item Type displays as Mandatory or Optional.
-
Beg Eff Date and End Eff Date is the effective date range for the supplier.
-
-
To edit a supplier, select a supplier and click the Select menu option. The Environmental - Supplier Revisions form appears. Enter the supplier information as described in the “Adding Suppliers” topic. You can edit the following fields:
-
Supplier Type
-
Default Source
-
Emission Scope
-
Item Type
-
End Eff Date
-
-
To import Suppliers, select Import from the Form menu. The Environmental - Suppliers Import form appears. Enter the supplier information in the grid as described in the “Adding Suppliers” topic
Defining KPIs (P79A40)
Key Performance Indicators (KPIs) in reporting dashboards enable you to assess business performance. For programs designed to reduce usage or emissions, you can track a KPI over a time period to evaluate if the program is effective or is producing the expected results. For example, Fuel Emissions per KM travelled, Fuel Usage per KM travelled, Electricity Usage per Employee Onsite, and Electricity Usage per Occupied Room in a hotel.
A KPI is configured using the Environmental KPIs – KPI Revisions form in the JD Edwards EnterpriseOne Environmental Accounting and Reporting application with a numerator and a denominator. The numerator / denominator have an associated KPI Type, KPI Action and UM.
KPI Type defines the source of the quantity used in the KPI. The following KPI Types are available in the EAR application:
-
Usage: Usage quantity from environmental transactions converted to Standardized Usage UM.
-
Energy: Energy quantity in gigajoules (GJ) from environmental transactions.
-
Emissions: CO2-e Emission Quantity in kilograms (KG) from environmental transactions.
-
Value: Value in domestic currency from environmental transactions.
KPI Action defines the action that is performed by the related KPI calculation in Reporting. The following KPI actions are available in the EAR application:
-
Sum: Adds the related Qty defined by the KPI Type for the granular period, normally one month.
-
Average: Averages the related Qty defined by the KPI Type for the most granular period, normally one month. For example, KPI Electricity Usage per Employee on-site requires average of daily count, for the period of a month to be compared with sum of total electricity used for the month.
-
Maximum is the maximum related Qty defined by the KPI Type for the most granular period, normally one month.
-
Minimum is the minimum related Qty defined by the KPI Type for the most granular period, normally one month.
There must be at least one emission source assigned to the Numerator List and Denominator List. If the List’s KPI Type is ‘Usage’, then all of the emission sources in the list must have the same Unit of Measure Classification. The following example explains how the EAR application calculates the metric values using the various KPI actions:
Consider that a company by the name Global Industries has a metric defined as, Quantity of Electricity per Full-time-equivalent (FTE) Employee. This metric is needed for each facility within the company. The company requires the analysis of this metric per month by facility with the ability to aggregate up a time period hierarchy (from month to quarter to year) and also aggregate up an organization hierarchy (from facility to region to division to company).

For the metric the following data is required:
-
Electricity (kWh)
-
FTE employee headcount (employee)
The unit of measure for this metric is kWh per FTE.
Data is collected in the following way:
-
Electricity activity information is sourced from utility bills. The bills arrive quarterly for a 90/91 day billing period.
-
Employee headcount is sourced from Human Resources department.
Also, consider that the company has the following single organization hierarchy and has the levels, Company, Division, Region and Facility.
A time period hierarchy exists as Year, Quarter, and Month.
With all the data captured for the company the following section describes how the various KPI actions (Sum, Average, Minimum, and Maximum) are applied to determine this metric in different scenarios. When the metric is to be shown at a level other than facility and month, the aggregation chosen for the numerator and denominator is applied. The chosen aggregations are applied in the BI Server using the metadata definitions in the BI repository.
For the ABC facility in the Year 2008 and Quarter 1 consider that the following data exists:
| KWh | FTE |
|---|---|
| 152 | 30 |
| 165 | 30 |
| 177 | 31 |
The metric values are calculated as follows:
| Action | Numerator Value | Denominator Value | Metric Value |
|---|---|---|---|
| Sum | 152+165+177 = 494 | 30+30+31 = 91 | 494/91 = 5.43 |
| Average | (152+165+177) / 3= 164.67 | (30+30+31) / 3 = 30.33 | 164.67 / 30.33 = 5.43 |
| Minimum | Min (152, 165, 177) = 152 | Min (30, 30, 31) = 30 | 152/30 = 5.07 |
| Maximum | Max (152, 165, 177) = 177 | Max (30, 30, 31) = 31 | 177/31 = 5.71 |
For the Transport division in the Year 2008 and Month 1 consider that the following data exists:
| KWh | FTE |
|---|---|
| 152 | 30 |
| 45 | 9 |
| 456 | 33 |
| 234 | 17 |
The metric values are calculated as follows:
| Action | Numerator Value | Denominator Value | Metric Value |
|---|---|---|---|
| Sum | 887 | 89 | 887 / 89 = 9.97 |
| Average | 221.75 | 22.25 | 221.75 / 22.25 = 9.97 |
| Minimum | 45 | 9 | 45 / 9 = 5.00 |
| Maximum | 456 | 33 | 456 / 33 = 13.82 |
For the South America region, in the Year 2009 and quarter 3 consider that the following data exists:
| KWh | FTE |
|---|---|
| 425 | 56 |
| 469 | 56 |
| 436 | 56 |
| 82 | 23 |
| 91 | 23 |
| 93 | 23 |
The metric values are calculated as follows:
| Action | Numerator Value | Denominator Value | Metric Value |
|---|---|---|---|
| Sum | 1,596 | 237 | 6.73 |
| Average | 266 | 39.5 | 6.73 |
| Minimum | 82 | 23 | 3.56 |
| Maximum | 469 | 56 | 4.04 |
Prerequisites
- Define KPI Types
- Define Action Types
To add KPIs
-
Navigate to the Work With Environmental KPIs form.
-
Click Add. The Environmental KPI Revisions form appears.

-
Enter a Code and a Name for the KPI. Required.
-
Select a Numerator Type from the user-defined table 79A/KT as the type of formula value to be used as the numerator in the formula. Required. Valid options are:
-
Emissions: CO2-e Emissions in kilograms (Kgs)
-
Energy: Energy in gigajoules (GJ)
-
Usage: Transaction Usage
-
Value: Transaction Value
-
-
Select a Numerator Action Type from the user-defined table 79A/KA as the type of algebraic function for which the numerator is used in the formula. Required. Valid options are:
-
AVERAGE: Average
-
MAX: Maximum
-
MIN: Minimum
-
SUM: Sum
-
-
Select the Denominator Type and Denominator Action for the KPI. Required. See Steps 4 and 5 for valid options available.
-
Select the KPI List Type from the user-defined table 79A/KL as Numerator or Denominator. Required. The KPI List Type Description displays.
-
Select one or more Sources that need to be included in the KPI for the selected Numerator or Denominator. Required. Note: All sources selected in the numerator or denominator must have the same UM classification, if the related numerator or denominator type is usage. The Source Description displays. When you select the emission source, the following fields display the default values defined for the source:
-
Unit of Measure Classification
-
Unit of Measure Classification Description
-
Source Id
-
-
Click Ok to save.
To view and edit KPIs
-
Navigate to the Work With Environmental KPIs.
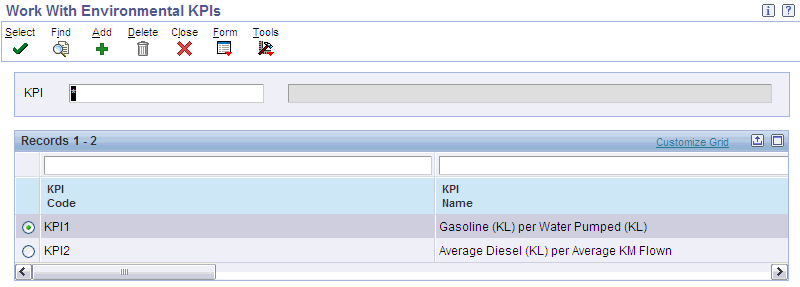
-
Enter the KPI Code to search for a specific KPI.
-
Click Find. The following fields display:
-
KPI Code is the identification code for the KPI.
-
KPI Description is a brief description of the KPI.
-
-
To edit a KPI, select the KPI Code and click the Select menu option. The Environmental - KPI Revisions form displays. Refer to the “Adding KPIs” for detailed field descriptions. You can edit the following fields:
-
KPI List Type
-
Source
-
To view the KPI Audit History
The Work With Environmental KPI Audit History form enables you to view all updates that are made to KPIs. You can view an audit trail for all the updates for a specific KPI and for a specific date range. To view the KPI Audit History:
-
Navigate to the Work With Environmental KPIs form.
-
Select KPI audit. The Work With Environmental KPI Audit History form appears.
-
Enter the following search criteria to view audit history for a specific KPI:
-
KPI code to view audit history for a specific KPI.
-
Date Updated and To fields to view change records in a specific date range. Optional.
-
-
Click Find. The following fields display in addition to the KPI information fields that display in the Work With Environmental KPIs form:
-
Date Updated is the date when the emission factor is updated.
-
Time Updated is the time when the emission factor is updated.
-
A C indicates if the audit record has been created due to an add (A), change (C) or delete (D).
-
Program Id is the program used to update the KPI.
-
User Id is the identification for the user who updated the KPI.
-
Work Stn Id is the identification number for the workstation of the user.
-
KPI Id is the identification number for the KPI.
-
To view the KPI List Audit History
The Work With Environmental KPI List Member Audit History form enables you to view all updates that are made to KPI List members. You can view an audit trail for all the updates to KPI Lists based on a specific KPI and for a specific date range. To view the KPI List Audit History:
-
Navigate to the Work With Environmental KPIs form.
-
Select KPI Audit List. The Work With Environmental KPI Audit List History form appears.
-
Enter the following search criteria to view audit history for a specific KPI.
-
KPI code to view audit history for a specific KPI. When you select a KPI Code, the KPI id displays.
-
Date Range From and To fields to view change records in a specific date range. Optional.
-
-
Click Find. The following fields display:
-
KPI List Id is the identification number for the KPI list.
-
KPI Id is the identification number for the KPI.
-
KPI Code is the code for the KPI.
-
Date Updated is the date when the KPI is updated.
-
Time Updated is the time when the KPI is updated.
-
A C indicates if the audit record has been created due to an add (A), change (C) or delete (D).
-
Source Id is the identification code for the source.
-
Source is the name of the source.
-
KPI List Type is the type of the KPI list.
-
KPI List Type Description is a description of the KPI List Type.
-
Program Id is the identification number of the program.
-
User Id is the identification number of the user who edited the KPI list member.
-
Work Stn Id is the identification number for the workstation of the user.
-
To add KPI targets
Use this page to define energy, emission, usage and cost targets for use in the KPI OBIEE dashboard reports.
-
Navigate to the Work With Environmental KPIs form.
-
Click the KPI record for which you want to add or edit targets.
-
Select KPI Targets from the Row menu. The KPIs - Environmental - KPI Targets form displays.
-
Select an organization in which to apply the KPI target.
-
Select the Target Type from user-defined code table 79A/TG. Choose one of the following hard-coded target types:
-
Energy
-
Emission
-
Cost
Warning: The Usage target type is not allowed for KPI targets.
-
-
Enter a Target Value.
-
The Target UM (unit of measure) defaults as follows for the target types:
-
For the Energy target type, the default UM is GJ (Gigajoules).
-
For the Emission target type, the default UM is KG (Kilograms).
-
For the Cost target type, the currency defaults from the company of the first business unit encountered for the oganization.
-
-
Required. Enter the Start Date and End Date for the target type.
-
Click Save.
Defining an Organization Hierarchy (P79A70)
JD Edwards EnterpriseOne Environmental Accounting and Reporting application enables you to build multiple hierarchies for various business requirements, such as legal, reporting, and operations. A hierarchy must be defined with meaningful levels and branches to correctly represent the various levels of your organization. The levels define parent-child relationships and a child can only have one parent within a hierarchy. You must create a balanced organization hierarchy to be able to view reports in the Oracle Business Intelligence Enterprise Edition (OBIEE) dashboards. A balanced hierarchy implies that each level within the hierarchy includes logical relationships between each level. Although you can add any number of levels to a hierarchy, OBIEE supports a maximum of 12 levels for reporting. The EAR Organization Hierarchy - GHG Organization Hierarchy form enables you to view, add, edit and delete hierarchies.
Following is an example of a hierarchy:
A company called Global Industries has an organizational hierarchy that has the levels, Company, Division, Region, and Facility. The following diagram represents the organization hierarchy:

Note: Business Units cannot be included in the Organization Hierarchy in Environmental Accounting and Reporting but during extraction to Business Intelligence (BI) reporting the Organization to Business Unit mappings is used to add these as the bottom layer in the reporting hierarchy in BI reporting.
Prerequisites
- Set up organizations. Refer to Setting Up Organizations (P79A71).
Creating an Organization Hierarchy
To create an organization hierarchy:
-
Navigate to the Environmental Organization Hierarchy form.
-
To create a hierarchy, click Add from the menu. The Environmental - Organization Hierarchy Revisions form displays.
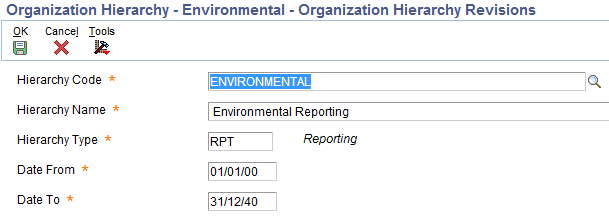
-
Enter a value in each of the following required fields:
-
Hierarchy Code - enter a unique value.
-
Hierarchy Name - enter a descriptive name for the organization hierarchy.
-
Hierarchy Type - select one of the following Hierarchy Types from the user-defined table 79A/HT:
-
FIN - Financial
-
OPR - Operational
-
RPT - Reporting
-
-
Date From and Date To - enter the effective date range for the hierarchy.
-
-
Click Ok to save.
Viewing Existing Hierarchies
To view existing hierarchies:
-
Navigate to the Environmental Organization Hierarchy form.
-
Click Find. The left pane of the form displays a list of existing hierarchies.
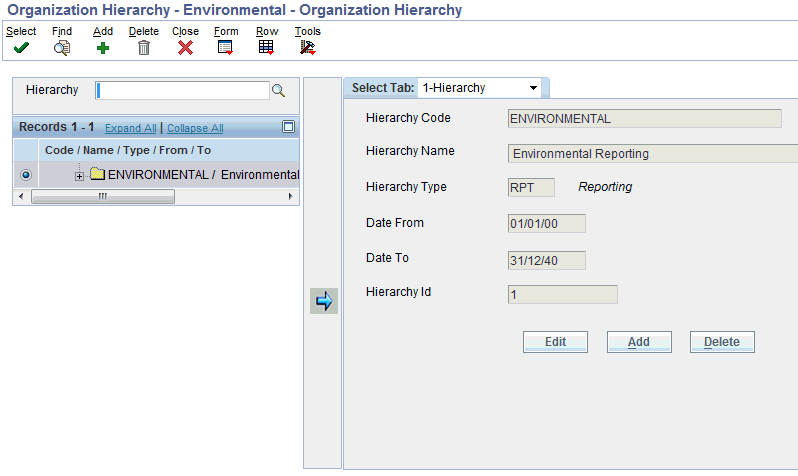
-
To view the details of a hierarchy, select the hierarchy record from the list of existing hierarchies or enter the name of the hierarchy in the Hierarchy field and search. The information for the selected hierarchy displays in the right pane of the form and is categorized under the following tabs:
-
Hierarchy: The following fields display:
-
Hierarchy Code is the specific code for the hierarchy that you define.
-
Hierarchy Name is the name of the hierarchy.
-
Hierarchy Type is the type of the hierarchy.
-
Date From and Date To is the effective date range for the hierarchy.
-
Hierarchy Id is the identification code number for the hierarchy.
To edit information for the hierarchy or add a new hierarchy, click Edit or Add. The Environmental – Organization Hierarchy Revisions form appears. Refer to the “Adding Organizations to a Hierarchy” topic for detailed information. To delete the hierarchy, click Delete. Refer to the “Deleting a Hierarchy”topic for detailed information.
-
-
Selection: When you select the Selection tab, a list of available organizations displays. You can select an organization and click the left arrow that adds the organization below the selected hierarchy or organization in the tree. You can also search for specific organizations to add using search criteria. Refer to the “Adding Organizations to a Hierarchy” topic.

-
Organization: The Organization tab displays the details of the EAR organization, when you select an EAR organization on the left pane of the form. The following fields display:
-
Code is the code for the organization.
-
Type is the type of the organization
-
Size is the size of the organization.
-
Industry Code is the standard industry code for the organization.
-
Business No. is the contact number of the organization.
-
CEO Name is the name of the CEO of the organization.
-
From and To is the effective date range for the organization.
-
Line 1, Line 2, Line 3, Line 4, City, County, State and Country provide the address of the EAR organization.
To edit information for the organization or add a new organization, click Edit or Add. The Environmental Organization Revisions form appears. Refer to the “Setting Up Environmental Organizations” topic for detailed information.
-
-
My Interests: When you select an EAR organization on the left pane of the form, the My Interests tab displays the details of the organizations that the selected organization is interested in. You can click Edit to access the Environmental - My Interests form and add organizations of interest. Refer to the “Setting Up EAR Organizations” topic for detailed information.
-
Interested in Me: When you select an EAR organization on the left pane of the form, the Interested in Me tab displays the details of the organizations interested in the selected. You can click Edit to access the Environmental- Interested in Me form and add interested organizations. Refer to the “Setting Up EAR Organizations” topic for detailed information.
-
I control: When you select an EAR organization on the left pane of the form, the I Control tab displays the details of the organizations controlled by the selected organization. You can click Edit, to access the Environmental- Organizations I Control form to add organizations to control for the selected organization. Refer to the “Setting Up EAR Organizations” topic for detailed information.
-
Controlling Me: When you select an EAR organization on the left pane of the form, the Controlling Me tab displays the details of the organizations that control the selected organization. You can click Edit, to access the Environmental - Organizations Controlling Me form to add organizations controlling the selected organization. Refer to the “Setting Up EAR Organizations” topic for detailed information.
-
My Children tab displays a list of child organizations for an organization hierarchy. You can click Edit to access the Environmental- My Children form to add or edit child organizations to the organization hierarchy.
-
My Hierarchies tab displays a list of hierarchies that the selected EAR organization belongs to.
-
-
To import new hierarchies, select Import Hierarchies from the Form menu. The Environmental - Organization Hierarchy Import form displays. Enter the following required and optional grid data and click Ok:
-
Hierarchy Code is the identification code for the hierarchy. Required. Enter a unique value.
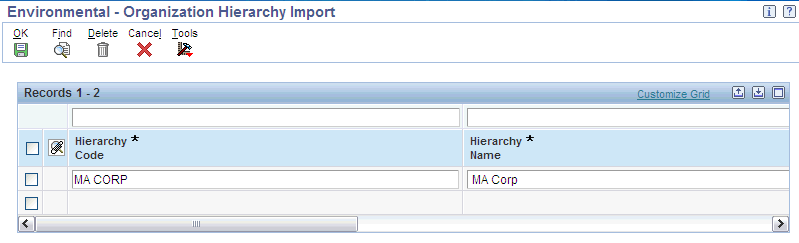
-
Hierarchy Name is the name of the hierarchy. Required.
-
Hierarchy Type is the type of the hierarchy. Required.
-
Date From and Date To is the effective date range for the hierarchy. Required. These dates are automatically populated if you do not enter a value. The Date From field defaults to the current date. The Date To field defaults based on the CENTCHG DD (Century Change Year) item and reflects the last day of the year defined in that field.
-
Hierarchy Id is the identification code for the hierarchy. Optional.
-
User Id is the identification number of the user who imports the grid data. Optional.
-
Program Id is the identification number of the program. Optional.
-
Work Stn Id is the identification number for the workstation of the user. Optional.
-
Date Updated is the date when the grid data is imported. Optional.
-
Time of Day is the time when the grid data is imported. Optional.
The information is imported and displays in the Environmental Organization Hierarchy form.
-
-
To import organization relationships into a hierarchy, click Import Relationships. The Environmental – Hierarchy Relationship Import form appears. Enter the following grid data and click Ok:
-
Select the Hierarchy Code for the hierarchy to which you want to import the organization relationship information.
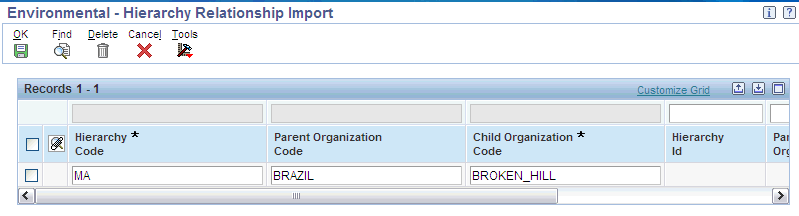
-
Select the Parent Organization Code.
-
Select the Child Organization Code.
-
Click Ok. The following fields display:
-
Parent Org Id is the parent organization identification code.
-
Child Org Id us the child organization identification code.
-
Org Member Hierarchy Id is the unique identifier which identifies the relationship between the Parent and Child Org Ids.
The organization relationship is imported and displays in the Environmental Organization Hierarchy form.
-
-
Adding Organizations to a Hierarchy
To add organizations to a hierarchy:
-
Navigate to the Environmental - Organization Hierarchy form. The left pane displays a list of existing hierarchies display.
-
Select the hierarchy to which you want to add organizations. The hierarchy details display on the right pane of the form.
-
Select the Selection tab. A list of available organizations display.
-
Select the organization that you want to add to the hierarchy and click the left arrow. This adds the organization below the selected hierarchy or organization in the tree.
-
Search for specific organizations to add to the hierarchy by entering the following criteria:
-
Organization Type.
-
Effective Date .
-
Organization Code.
-
Deleting a Hierarchy
To delete a hierarchy:
-
Navigate to the Environmental - Organization Hierarchy form. The left pane displays a list of existing hierarchies display.
-
Select the hierarchy you want to delete and click Delete.
Editing a Hierarchy
To edit a hierarchy:
-
Navigate to the Environmental - Organization Hierarchy form.
-
Select the hierarchy record from the list of existing hierarchies or enter the name of the hierarchy in the Hierarchy field and search.
-
Click Select menu option. The Environmental - Organization Hierarchy Revisions form displays. Edit the effective date range for the hierarchy by entering new dates in the Date From and Date To fields.
-
Click Ok to save.
Setting Up in Oracle Data Integrator
Oracle JD Edwards EnterpriseOne Environmental Accounting and Reporting uses Oracle Data Integrator to transfer data from the JDE to the Business Intelligence Data Warehouse tables. This transfer occurs by running ETL (Extract, Transform, and Load) programs in Oracle Data Integrator.
For detailed information on the installation steps, refer to the Oracle JD Edwards EnterpriseOne Environmental Accounting and Reporting Installation Notes for Business Intelligence and Data warehouse.
To install ODI
-
Install Oracle Data Integrator 11g (11.1.1.5.0).
-
Create ODI repository and users. The Repository Creation Utility (RCU) is used to create the ODI repository and user.
-
Create database objects in data warehouse schema.
-
Set up the ODI topology and import ODI run time scenarios. Refer to Oracle JD Edwards EnterpriseOne Environmental Accounting and Reporting Installation Notes for Business Intelligence and Data Warehouse for more information.
-
Populate Calendar. Populate the calendar for BI reports. SQL scripts are provided to populate Gregorian or Australian calendar.
-
Populate the UOM and UOM Conversion Factor for reporting and viewing emissions in the BI dashboards and reports. A provided SQL Script populates the reporting UOM.
-
Once you have completed the setup steps listed above, you can run the ghgjdeincr.bat ETL on forms or ghgjdeincr.sh ETL on UNIX environment to populate data from JD Edwards tables to data warehouse tables. The ETL populates the data in incremental mode so that only the new or updated transactions are loaded into the data warehouse tables. You must define the Organization Hierarchy for a specific user, user group or application, to view the dashboard reports.
Setting Up in OBIEE
You must define the Calendar and the Organization Hierarchy for a specific user, user group or application, to view the dashboard reports. Refer to the Oracle JD Edwards EnterpriseOne Environmental Accounting and Reporting Installation Notes for Business Intelligence and Data warehouse for more information.