Service Desk User Procedures
This chapter, which is relevant to Service Desk only, provides examples of user procedures.
This chapter covers the following topics:
- About the Sample Service Desk User Procedures
- Creating a Service Request
- Resolving the Service Request
- Searching Service Requests
About the Sample Service Desk User Procedures
Because user procedures vary greatly from implementation to implementation, Oracle cannot provide step by step end-user help for the Service Desk module.
Instead, this chapter uses examples to provide application implementers and administrators with an introduction to typical user procedures for creating and resolving a service request and for searching in the Service Desk module of Oracle TeleService.
The example details how the support organization for the fictitious Vision Enterprises handles a problem on a field office e-mail server.
Vision Enterprises resolves employee problems in two steps:
-
A support representative logs the problems first and verifies the employee information.
-
The application then assigns the service request to the appropriate support group for resolution.
The support organization assigns work to the different support groups based on service territories and leaves it up to the agents to determine what they want to work on next. Agents can choose to work on any item in either their personal work queue or in the unassigned work queue.
In this section you can learn about:
Creating a Service Request
This example illustrates the creation of a service request for an existing installed based item.
-
Tracy Peters, a database administrator for a field office, calls to report that users cannot receive e-mail apparently because of a faulty e-mail server.
-
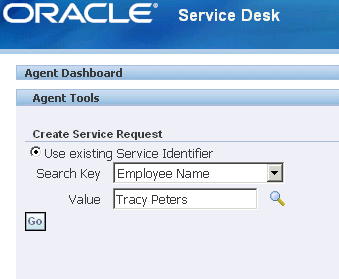
Support agent Ted Crilly chooses Employee Name as the search key in the Create Service Request region of the Agent Dashboard, enters the employee's name, and clicks Go.
-
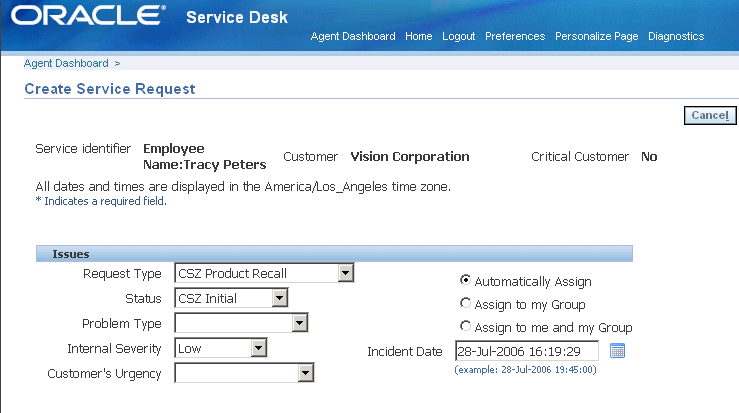
The Create Service request page opens.
-
Ms. Peters gives support agent Crilly the unit's serial number.
-
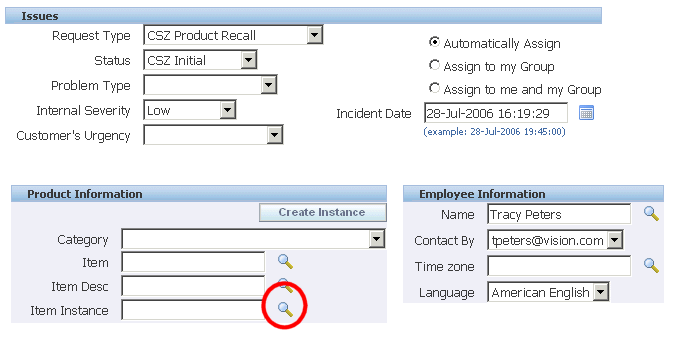
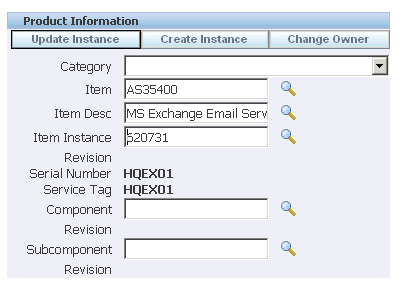
To enter the item instance using the serial number, Mr. Crilly clicks Search next to the Item Instance field (highlighted in the image below).
-
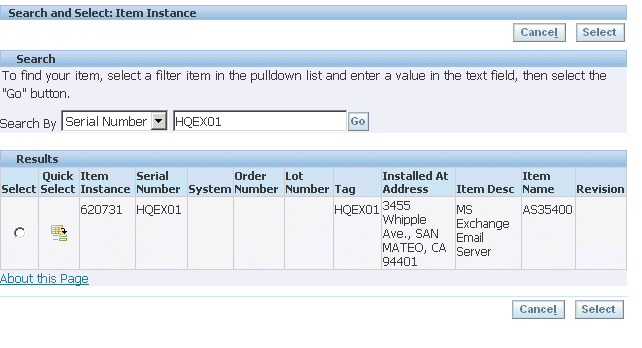
In the list of value window, he chooses Serial Number as the search key and enters the unit's serial number “HQEX01” for the search.
-
Clicking Quick Select populates the Product Information on the Create Service Request page.
Note: Your application may display different information depending on your implementation. For example, the application displays different information if the item is an Oracle Installed Base instance, an Oracle Enterprise Asset Maintenance asset, or an inventory item that is not tracked by either application.
-
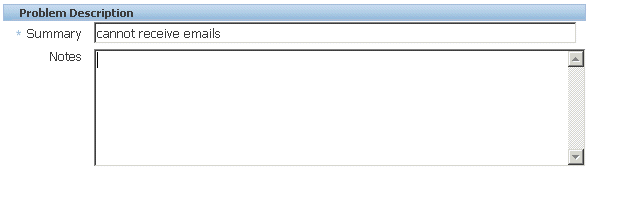
The agent returns to the Create Service Request page and enters the problem summary “Cannot receive e-mails” into the Summary field and classifies the employee problem as a “Technical Problem” using the Request Type drop-down list in the Issues Region.
-
The agent is now ready to save the new service request.
-
The selection of the radio button in the Issues Region determines how the application will assign the service request after it is saved.
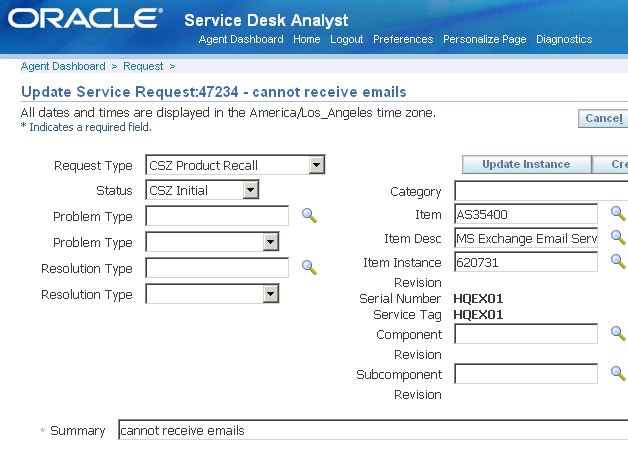
Selecting the Automatically Assign radio button causes the application to assign the service request to the appropriate support group or to a specific agent, depending on how you set up your work assignment and distribution.
Alternately, the agent can keep possession of the service request by choosing “Assign to me and my Group” radio button or keep ownership in her support group by choosing Assign to My Group.
-
Clicking Apply creates the new service request and triggers the assignment process.
-
The application automatically opens the new service request in the Update Service Request page.
-
Because the service request will be resolved by a different agent, Mr. Crilly clicks Cancel to return to the Agent Dashboard.
Note: You can have the employee automatically notified by e-mail that the service request has been created. See Setting Up Notifications. If you have implemented Oracle iSupport, employees can view the service request on their support portal.
Resolving the Service Request
This topic details how Mary Swanson, a support engineer for the corporate e-mail system, resolves the service request.
-
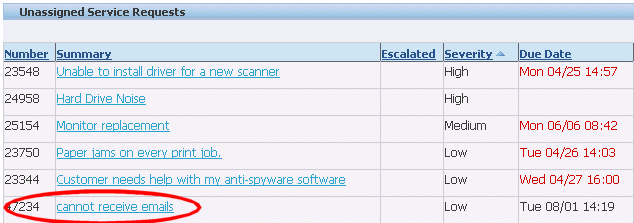
Checking the Unassigned Work queue, Ms. Swanson sees that a new service request has been created.
-
Her first action is to assign the service request to herself by selecting the Accept icon to the right of the service request (highlighted in the image below). Assigning the request to herself assures that nobody else in her support organization tries to update the service request at the same time.

-
The service request opens in the Service Request Update page.
-
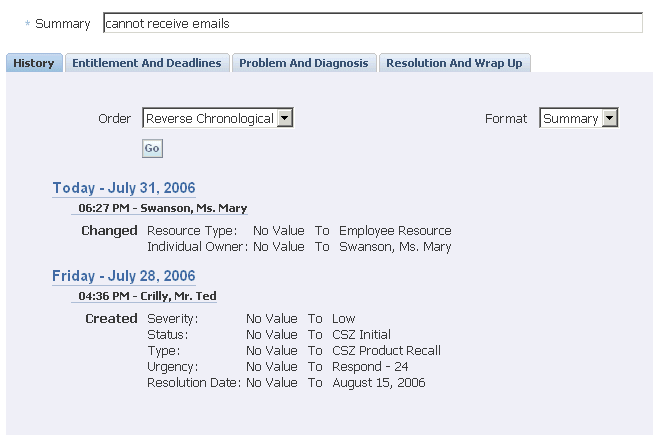
On the History tab Ms. Swanson can see that the service request was created by agent Ted Crilly.
-
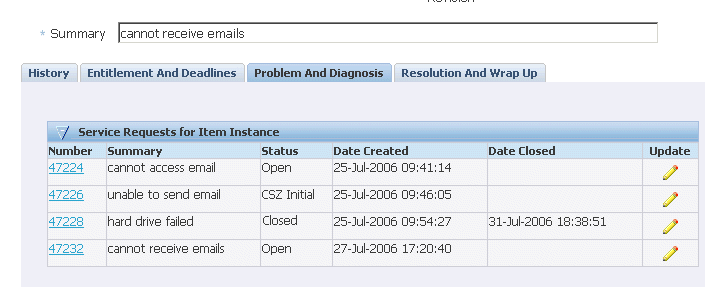
On the Problem And Diagnosis tab, she notices that this server has recently had its hard drive replaced.
-
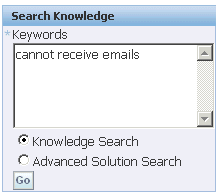
Ms. Swanson decides to search the knowledge base for possible solutions by clicking Go in the Search Knowledge region.
-
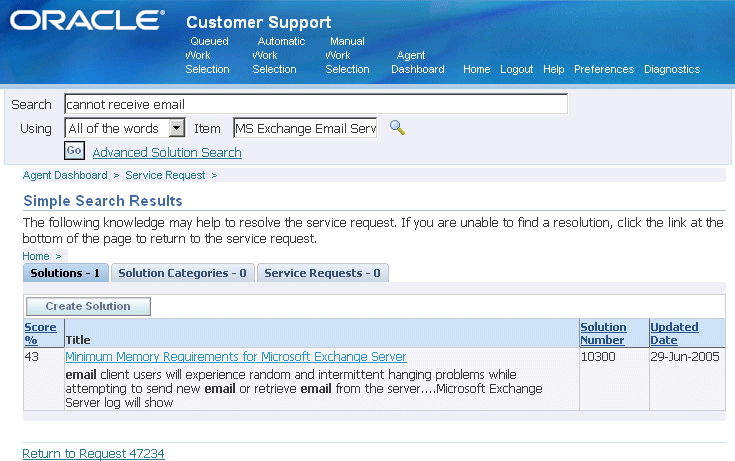
The Simple Search Results page displays possible solutions in the database.
-
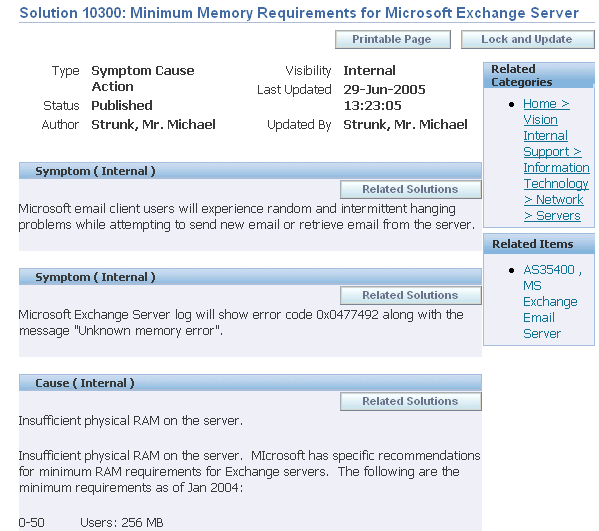
The displayed knowledge base solution summary suggests this may be a virtual memory problem. Ms. Swanson decides to view the solution in detail and assess its usefulness.
She clicks the solution link and the text of the solution displays.
The solution stipulates at least 500 megabytes of memory for an organization with 50 to 100 employees. Ms. Peter's office has almost 100 users.
-
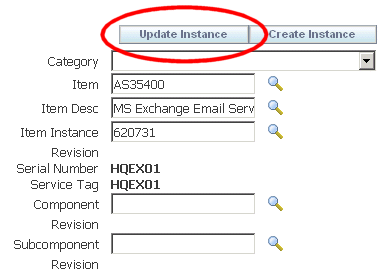
Ms. Swanson decides to check the server's configuration to see if the available memory meets this requirement. To do so, she returns to the Service Request Update page and clicks Update Instance (the button highlighted in the image below).
-
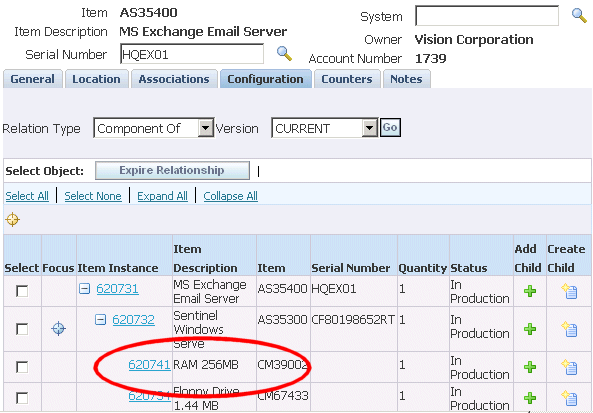
The Oracle Installed Base record shows that the server has only 256 megabytes of memory.
-
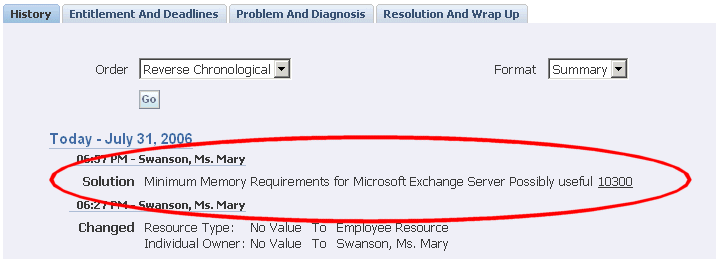
Ms. Swanson decides that this solution may prove useful to resolve this problem, so she scrolls down to the bottom of the page and clicks Maybe in the Usefulness of Solution region.

This action attaches the solution to the service request. A link to the suggested solution appears in the History tab of the service request.
-
Because the field office does not have its own technicians on site to fix this type of problem, Ms. Swanson decides to dispatch one by creating a dispatch task.
Note: If you require management approval, before equipment upgrades are made, for example, you can automatically trigger an approvals process when an agent sets the service request to a specific status. The service request become read only until the approval request is accepted or rejected. See the Electronic Approvals and Records.
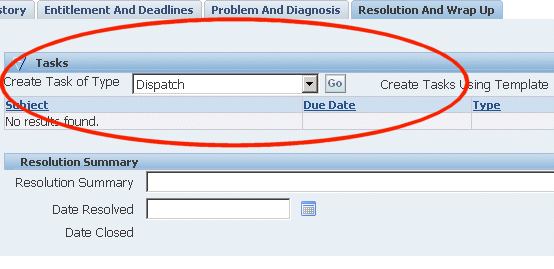
Ms. Swanson chooses Dispatch from the Create Task of Type drop-down list and clicks Go.
Note: Your organization can set up task templates your agents can use to create tasks to solve common problems and you can have these tasks created automatically based on the service request type, problem code and other attributes. See the Generating Tasks Automatically.
-
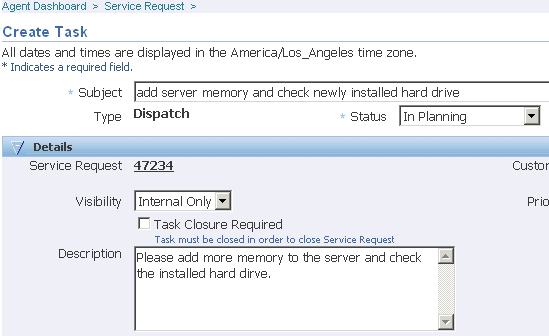
Ms. Swanson enters the task and description in the Create Task page and checks the Task Closure Required check box to ensure the service request is not closed before this task is completed.
-
Ms. Swanson clicks Apply to create the task and return to the service request.
-
Ms. Swanson wants to send a brief e-mail to the customer about the action she has taken. To do so, she selects the e-mail address in the Primary Contact region.
-
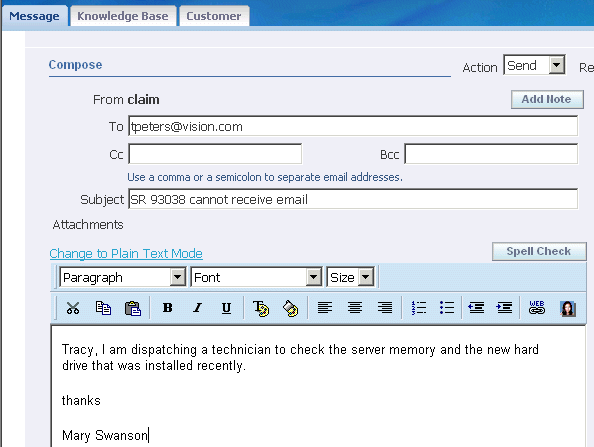
The application opens up the Oracle Email Center Compose page.
The application automatically fills in the subject line of the e-mail with the service request number and the text in the summary field of the service request.
You can create templates that provide the text of the e-mail body with merge fields which automatically populate customer, contact, and service request information.
-
Swanson types the body of the e-mail and clicks Go at the top of the window to send it.
Searching Service Requests
Service Desk offers agents multiple ways of searching for service requests from the Agent Dashboard.
This topic discusses:
Quick Find
When an employee calls to inquire about the status of a service request and does not remember the service request number, agents can use Quick Find to locate it.
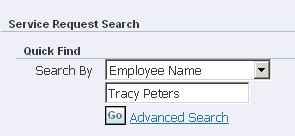
You can search by:
-
Employee Email
-
Employee Name
-
Employee Number
-
Serial Number
-
Service Tag
-
System
-
Service Request Number
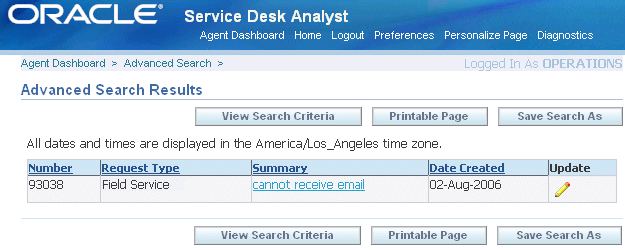
The application displays the results on the Advanced Search Results page.
Advanced Searches
Advanced searches permit complex searches with additional search criteria. For example, an agent can find all of the service requests for a customer created within the last week, all that have been escalated, or all that are in jeopardy (in danger of violating the applicable contract).
Agents can also use an advanced search to track all service requests owned by a colleague who is away on vacation, for instance.
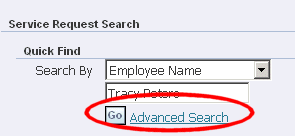
To start an advanced search, select the Advanced Search link below Quick Find.
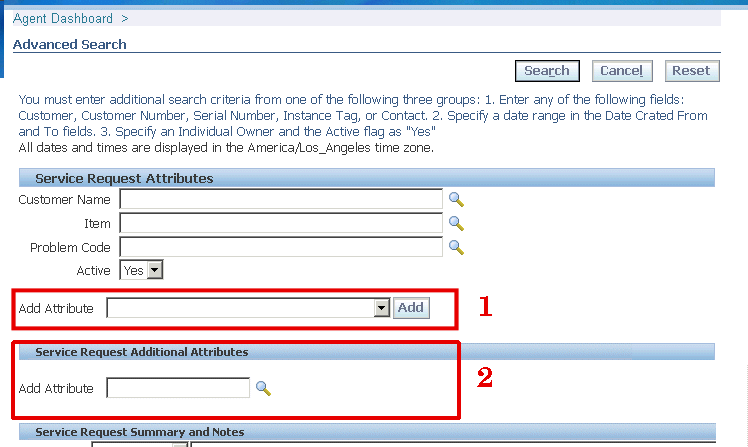
On the Advanced Search page, some search criteria in the Service Request Attribute region appear as fields. Agents can add others using the Add Attribute drop-down list (highlighted as region 1 in the image below).
Using personalization, you can specify which criteria are available as fields and which agents must select using the Add Attribute list. See Personalizing the Advanced Search Page.
The Add Attribute list automatically includes a subset of the extensible attributes created for the service request. These indexed extensible attributes display with their attribute group display names hyphenated in front, for example: “Vehicles for Towing- Make”. See Setting Up Attributes and Attribute Groups. Administrators cannot expose or remove these through personalization.
Agents can search using other non-indexed extensible attributes using the Service Request Additional Attributes region (highlighted as region 2 above).
When an agent adds an attribute using the Add Attribute drop-down list, it appears as a field below the default search criteria (highlighted in the image below):
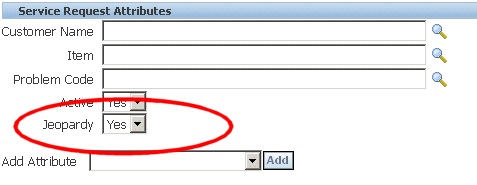
(For a complete list of search criteria please see Available Search Criteria for Service Desk.)
For performance reasons, the application requires you to use criteria from at least one of the following three groups:
-
Enter any of the following fields: Customer, Customer Number, Serial Number, Instance Tag, or Contact.
-
Specify a date range in the Date Crated From and To fields.
-
Specify an Individual Owner and the Active flag as "Yes".
Saved Searches
You can save your advanced search criteria for reuse. Agents can use saved searches to track service requests of a colleague who left on vacation, for example, or to track escalated service requests of their support group.
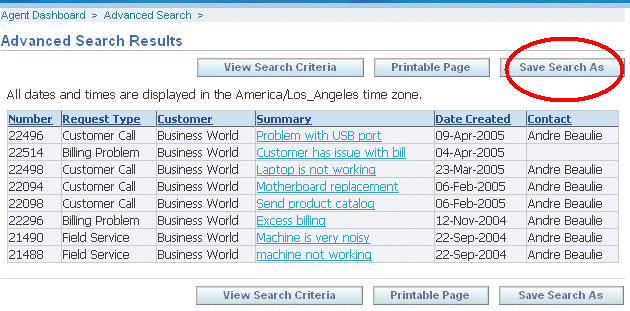
To save a service request, perform an advanced search and click Save Search As on the results page.
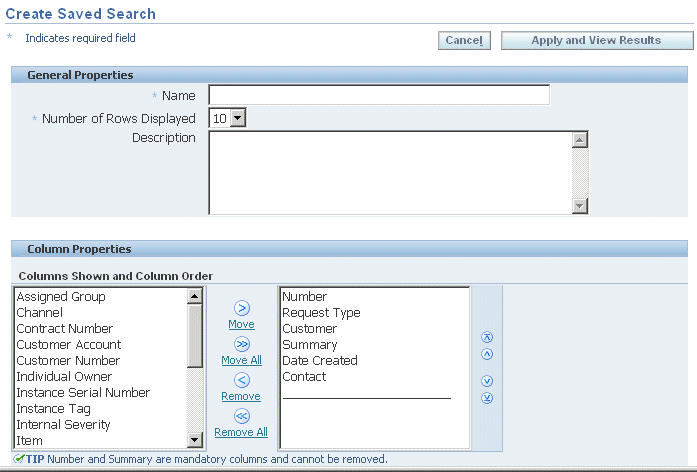
The Create Saved Search page make it possible for you to not only name the search, but to modify the display of results and the search criteria themselves. The image below shows part of the page only.
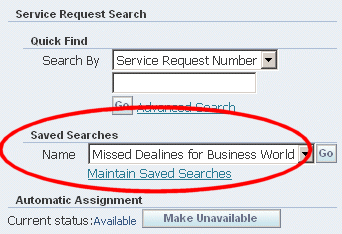
Saved searches appear on the Agent Dashboard right underneath Quick Find.
Application Search
An agent can search for a service request from the Application Search region in the Agent Dashboard. The agent must select Service Request from the Enterprise Search LOV, enter a keyword, and click Go. The application displays the results on the Apps Search Results page. The agent can further narrow down the search by using the filter criteria provided. The agent can then click on the Service Request number, to view or update the service request details in the Update Service Request page.