| C H A P T E R 5 |
|
Installing Windows Server 2003 |
This chapter describes how to install the Windows Server 2003 operating system directly onto a Sun Blade X6240 server module using the Windows Server 2003 media.
The following sections are included in this chapter:
Before beginning the operating system installation, ensure that the following requirements are met.
For requirements specific to the mass storage driver and Windows media delivery methods that you have chosen, see TABLE 5-1.
|
Connect the USB diskette drive directly to the system USB dongle port, and insert the mass-storage drivers diskette into the diskette drive.[1] |
|
|
Connect the diskette drive to the JavaRConsole system (if necessary) and insert the mass-storage drivers diskette into the diskette drive. |
|
|
Ensure that the floppy.img file is accessible from the JavaRConsole system. |
|
|
Ensure that the Microsoft Windows Server installation media and a DVD drive are available. |
|
|
Insert the Microsoft Windows Server installation media into the JavaRConsole system’s CD or DVD drive. |
|
|
Ensure that the Windows Server installation media is accessible from the JavaRConsole system. |
Follow these steps to install the Microsoft Windows Server 2003 software onto your Sun Blade X6240 server module.
|
1. Ensure that you have completed all of the requirements listed in Installation Requirements.
2. Power cycle the Sun Blade X6240 server module.
3. When the Press F8 for BBS POPUP or Boot menu prompt appears on the BIOS POST screen, press F8.

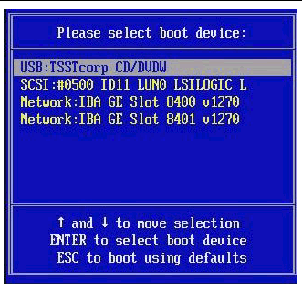
When the BIOS POST process is complete, the Boot Device menu appears.

4. If you have selected the Windows Local installation method, insert the CD now.
5. Select CD-DVD from the Boot Device menu.

|
Caution - After you press Enter in Step 6, the next actions must be performed quickly. Read Step 7and Step 8before proceeding, so that you will know what to look for. The prompts are displayed for five seconds and are easy to miss. If you do not press F6 while the prompts are being displayed, the screen allowing you to specify additional drivers is not displayed and the installation will fail. You will need to restart the system and go back to Step 3 |
7. When prompted with Press any key to boot from CD, quickly press any key.
The Windows Setup begins. During the early part of Windows Setup, the following message appears at the bottom of the screen:
Press F6 if you need to install a third party SCSI or RAID driver.
8. Press F6 to install mass-storage drivers.
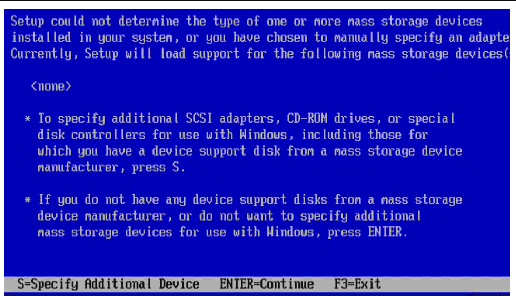
A screen appears, prompting you to press S to specify additional devices.
FIGURE 5-3 Specify Additional Device Screen

9. Ensure that the mass storage drivers are accessible according to the mass storage driver installation method that you have selected.
10. Press S to specify additional devices.
A screen appears listing the available drivers.
FIGURE 5-4 Select SCSI Adapter Screen
11. Select the appropriate version of the LSI Logic Fusion-MPT SAS Driver, depending on the version of Windows you are installing (Server 2003 32-bit or Server 2003 AMD64), and press Enter.
A screen appears, confirming your selections and allowing you to select additional drivers.
FIGURE 5-5 Specify Additional Device Screen
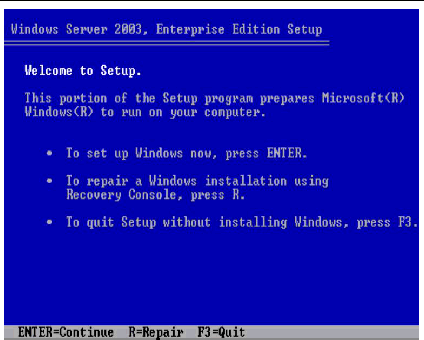
The Welcome to Windows Setup screen appears.
FIGURE 5-6 Welcome to Windows Setup Screen

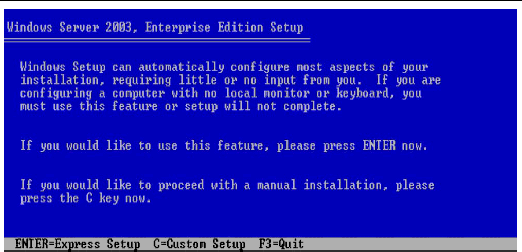
Windows Setup continues and displays the following screen, allowing you to select Express Setup or Custom Setup.
FIGURE 5-7 Select Setup Screen

14. Press Enter for Express Setup.
15. Follow the onscreen instructions to complete the Windows Server Installation.
During installation, the system will reboot.
16. Proceed to Updating Critical System-Specific Drivers.
Copyright © 2008, Sun Microsystems, Inc. All Rights Reserved.