 To Replace the Storage Backplane
-
Power off the workstation using the procedure described in the section, To Power Off the Workstation
-
Remove the left-side access panel using the procedure described in the section, To Remove the Left-Side Access Panel.
-
Remove any installed hard drives from the HD assembly using the procedure in the section, To Remove a Hard Drive.
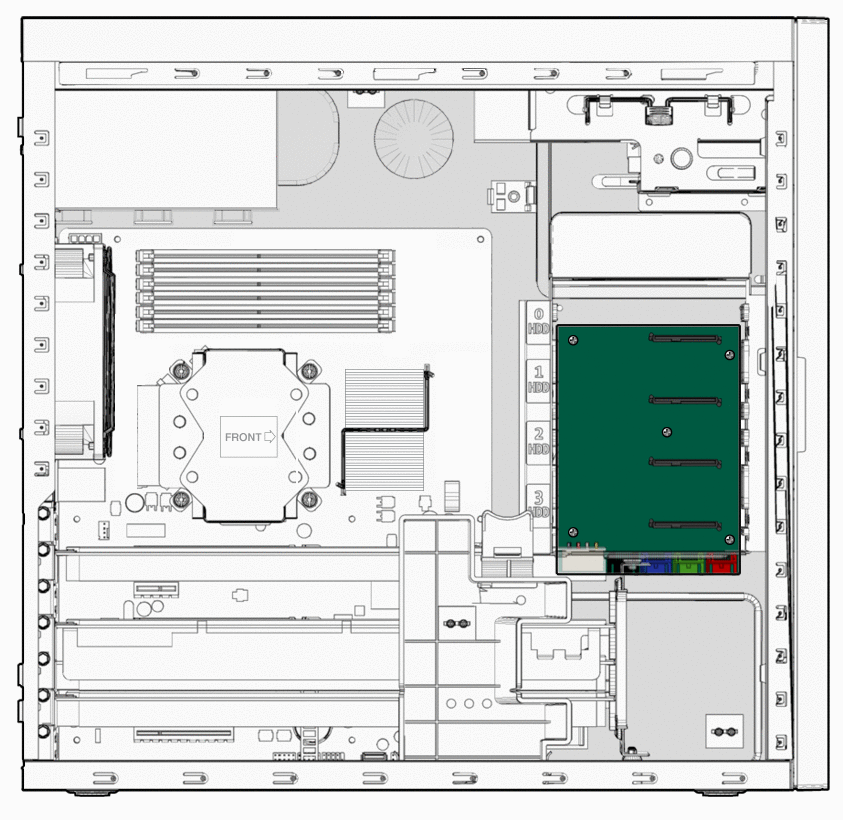
Set the hard drives aside in a safe location. After removal of the hard drives, the storage backplane is accessible (see Figure 3–8).
Figure 3–8 Location of the Storage Backplane
-
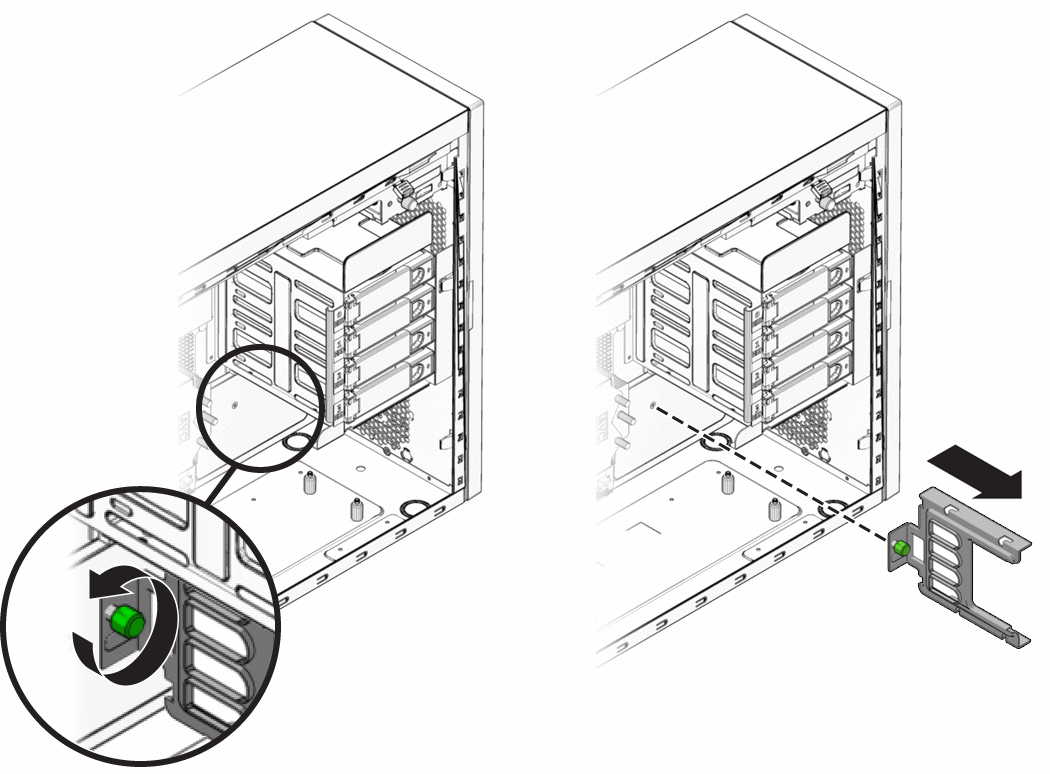
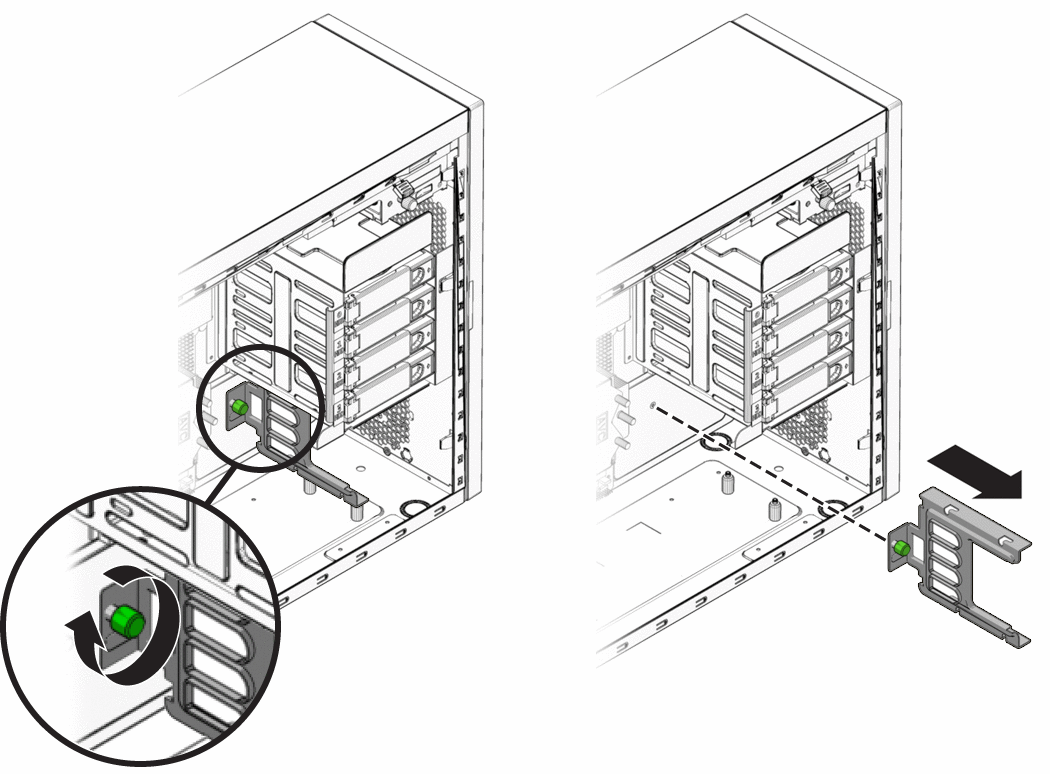
To remove the hard drive cage support bracket, completely loosen the captive retaining screw (see Figure 3–9).
Figure 3–9 Removing the Hard Drive Cage Support Bracket
-
Pull the hard drive cage support bracket away from the back wall of the interior of the workstation until it stops against the support standoffs.
-
Push the top and bottom of the bracket toward the front of the workstation until it is free from the support standoffs.
-
Remove the bracket from the interior of the workstation.
-
Gently lay the system on its right side on a stable, nonslip surface.
-
Disconnect the power connector and the black, blue, green, and red storage interface connectors.
-
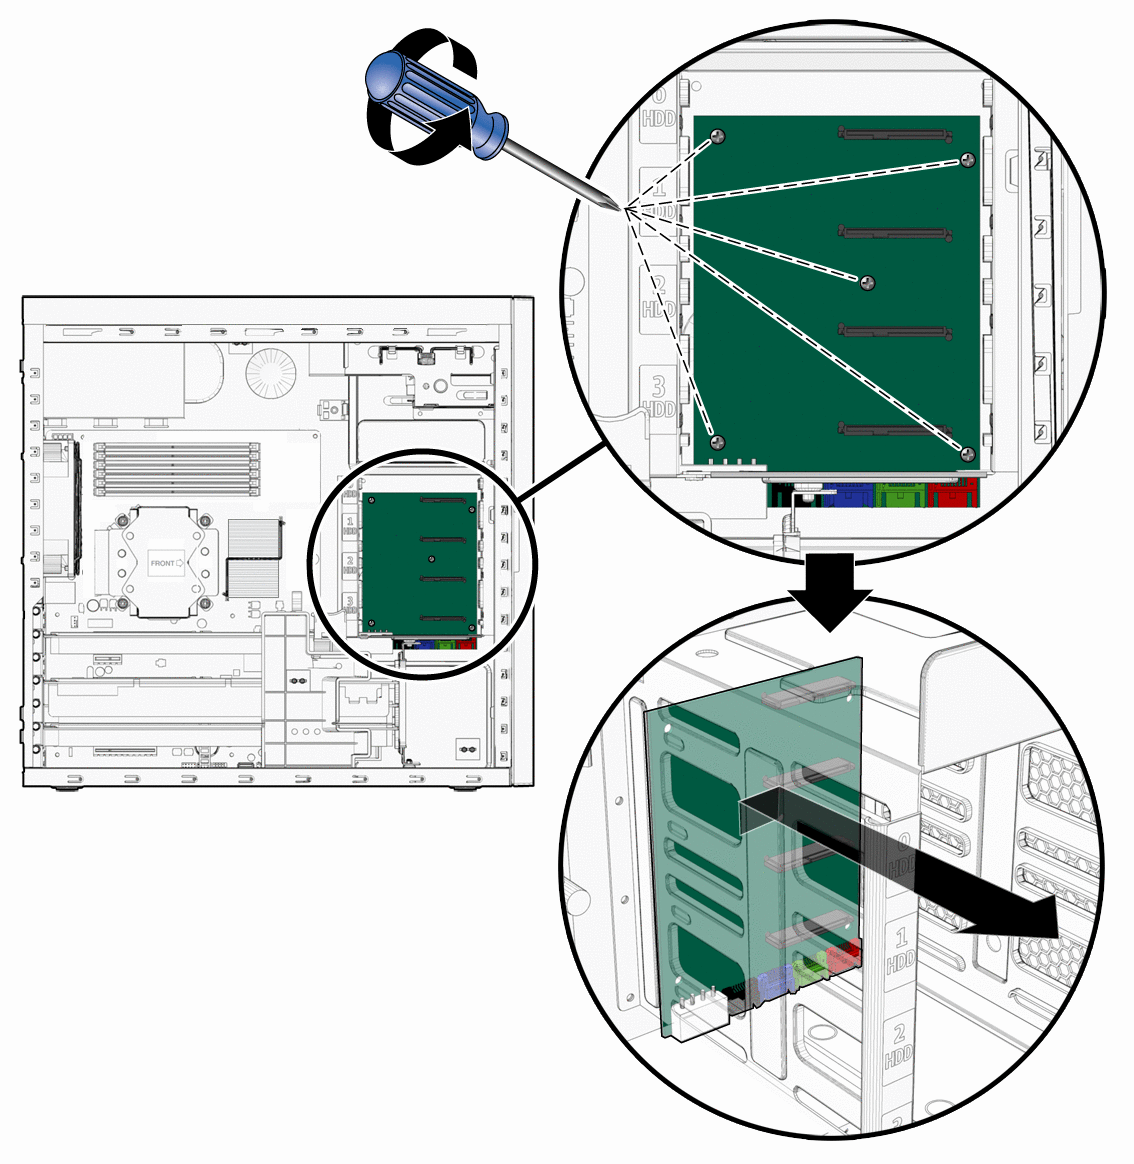
Using a long (more than 6 inches) No. 2 Phillips screwdriver, remove the five screws securing the storage backplane to the threaded standoffs on the chassis (see Figure 3–10).
Retain the screws.
Figure 3–10 Removing the Storage Backplane
Note –Do not attempt to remove the HD cage.
-
Remove the storage backplane by lifting the top edge slightly upward (to allow the connectors to clear the bottom of the hard drive cage) and pulling board up through the storage cage.
-
Lower the new storage backplane into the hard drive cage connector end first and ensure that the connectors on the bottom edge of the board slip under the lower edge of the hard drive cage.
-
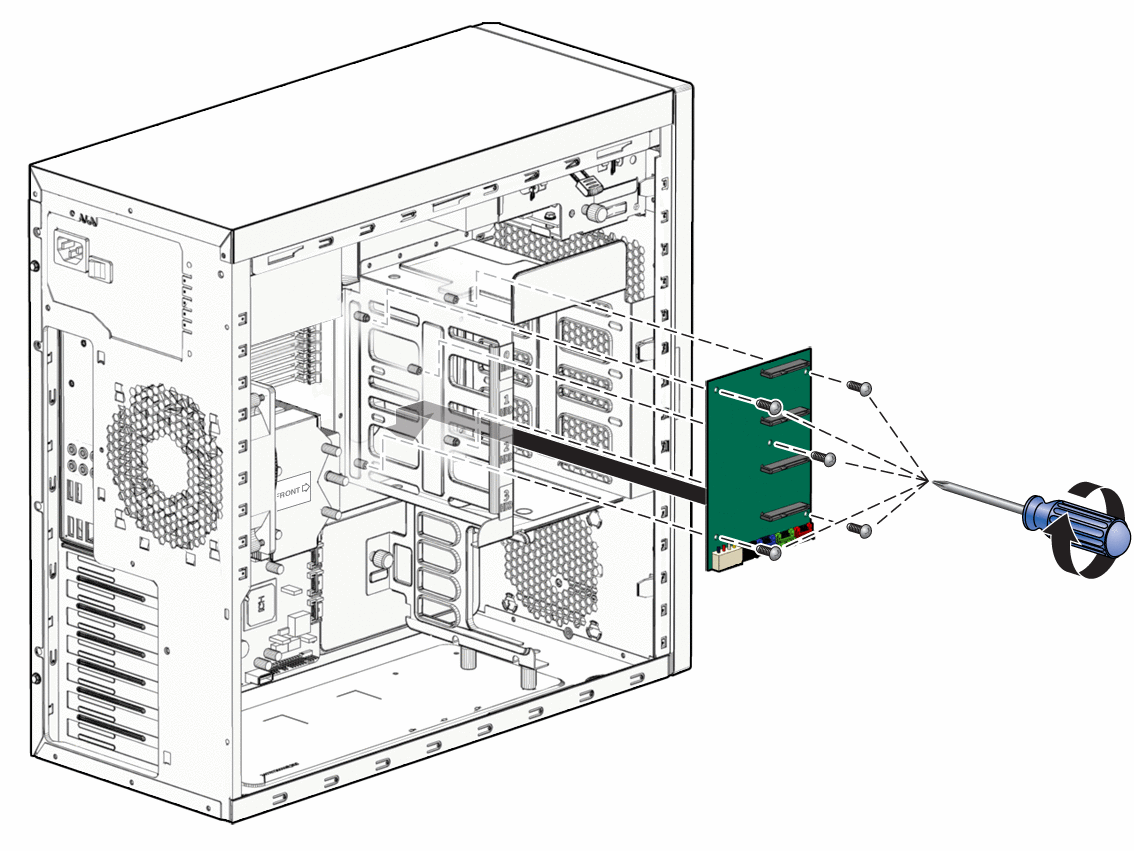
Lay the storage backplane board onto the threaded standoffs.
Figure 3–11 Installing the Storage Backplane
-
Align the screw holes in the board with the screw holes in the threaded standoffs.
-
Fasten the storage backplane to the threaded standoffs using the five mounting screws.
-
Connect the power connector and the black, blue, green, and red storage interface connectors to the connectors on the bottom edge of the storage backplane board.
-
Position the hard drive cage support bracket so that the edge of the bracket with the green captive screw is facing down.
Figure 3–12 Installing the Hard Drive Cage Support Bracket
-
Lower the bracket into the workstation chassis to the right of the four support bracket standoffs (two on the bottom of the hard drive cage and two on the bottom of the workstation chassis.
In this position the green captive screw does not line up with the screw hole in the back wall of the chassis.
-
To slip the slotted openings in the support bracket over the four support bracket standoffs, move the bracket to the left.
You might need to apply slight upward pressure against the bottom of the hard drive cage. When the bracket is in the correct position the green captive screw lines up with the screw hole in the back wall of the chassis.
-
To secure the bracket to the interior of the workstation, tighten the green captive screw.
-
Install all hard drives into the hard drive cage using the procedure in section, To Install a Hard Drive.
-
Stand the workstation upright and close the workstation using the procedure in the section, Closing the Workstation and Preparing for Operation.
- © 2010, Oracle Corporation and/or its affiliates
