Installing the GlassFish ESB Platinum Pack
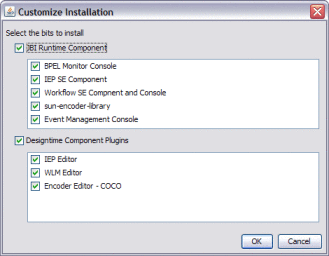
Before installing the Platinum Pack, be sure GlassFish ESB 2.2 is successfully installed. With the Platinum Pack installer, you can install any combination of the following components:
-
BPEL Monitor
-
IEP Service Engine (Intelligent Event Processor)
-
WLM Service Engine (Worklist Manager)
-
COBOL Copybook Encoder
-
Event Management Console
 To Install the Platinum Pack
Before You Begin
When installing the Platinum Pack on UNIX systems, such as Solaris machines, you need to set the DISPLAY variable to install in GUI mode. For more information, see To Install GlassFish ESB Components Using the GlassFish ESB Installer.
If you are installing the Platinum Pack into a clustered environment, perform the following steps in the order given before you begin:
-
Shut down all components in the cluster that use the encoder shared library, such as the File BC and FTP BC.
-
Uninstall the encoder library from the cluster.
-
Stop the cluster and the application server.
-
Exit from all programs prior to beginning the installation.
You can cancel the installation at any time during the process.
-
Locate the Platinum Pack Installer file on your installation media.
You can use either of two files for the installation, platinumpack–v2.2-installer.jar or platinumpack-v2.2-installer.jnlp.
-
To start the installation, double–click the platinumpack–v2.2-installer.jar or platinumpack-v2.2-installer.jnlp file, or run the following command from a command line:
java -jar platinumpack-v2.2-installer.jar
The Platinum Pack Installer wizard appears.
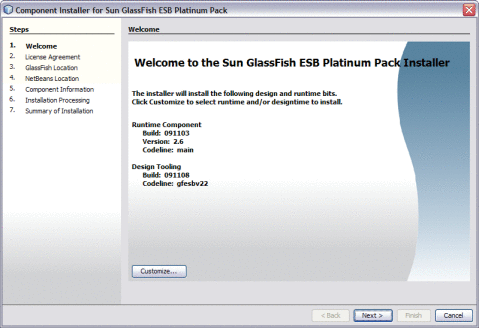
Tip –Use the Next and Previous buttons to navigate forward and backward in the installation.
-
If you do not want to install all Enterprise Pack components, do the following:
-
Click Next on the Introduction page to begin the installation.
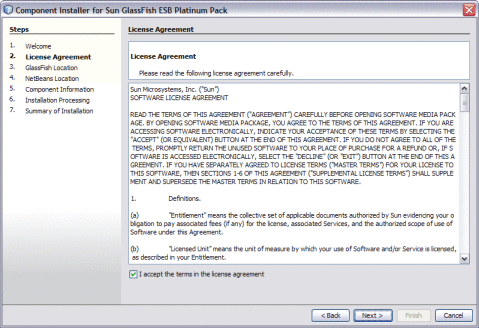
The License Agreement page appears.
-
On the License Agreement page, read the license agreement, Select I Accept the Terms of the License Agreement, and then click Next.
The GlassFish Location window appears.
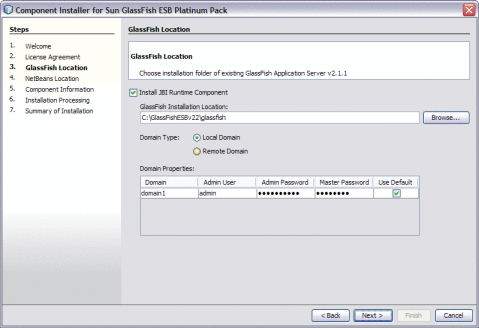
Note –The default admin password is adminadmin and the default master password is changeit. If you need to change the master password, run the following command:
asadmin change-master-password new-password
Substitute the actual password for new-password.
-
Do the following:
-
To skip the runtime installation, deselect Install JBI Runtime Component and click Next; otherwise perform the following steps.
-
Verify or modify the location for the GlassFish server home directory in your GlassFish ESB installation.
-
Select Local Domain or Remote Domain.
-
Verify or update the connection and login information for the GlassFish ESB domain.
-
Click Next.
The NetBeans Location window appears.
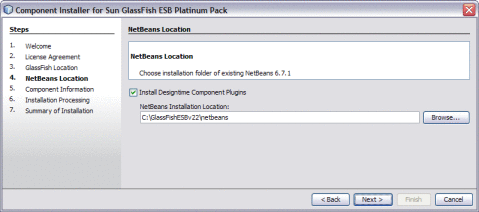
Note –When installing on Mac OS, the path to select is GlassFishESB_Home/netbeans.app/Contents/Resources/netbeans.
-
-
Do the following:
-
To skip the runtime installation, deselect Install Designtime Component Plugins and click Next; otherwise perform the following steps.
-
Verify or modify the location for the NetBeans home directory in your GlassFish ESB installation.
-
Click Next.
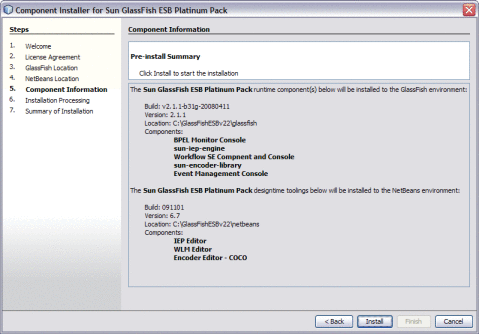
The Component Information window appears.
-
-
Verify each component of the installation and then click Install. If you need to make changes, click Previous to return to a previous screen.
Note –If a firewall blocks any of the components from installing, remove the block and continue installing the component. The installation process can take several minutes, depending on the speed of your system.
-
When the installation is complete, review the installation summary and then click Finish.
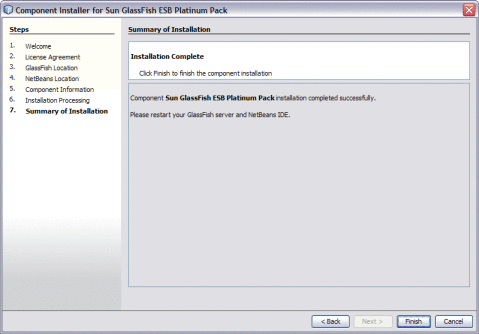
For additional details about the installation, see the installation log, located in user-home-dir/.componentinstaller.
- © 2010, Oracle Corporation and/or its affiliates

