| Skip Navigation Links | |
| Exit Print View | |

|
Sun Blade Storage Module M2 Installation Guide |
About This Documentation (PDF and HTML)
Overview of the Sun Blade Storage Module M2
Terminology Used In This Document
Storage Module Operation Within the Blade Chassis
Storage Module Hardware Compatibility
Storage Module Software Compatibility
Installing the Storage Module Into the Chassis
Storage Module Front Panel LEDs
Assigning and Managing Storage
Overview of Assigning Storage to Hosts
Before You Begin
If you have optional components to install, do so before installing the storage module. For information on installing optional components, refer to the Sun Blade Storage Module M2 Service Manual.
The storage module can be installed in any free slot.
 | Caution - If the chassis is powered on, insert the storage module within 60 seconds of removing the filler panel. Otherwise, chassis cooling might be compromised. |
Note - Filler panels should remain in any unused slots because they ensure that the chassis maintains the proper cooling and complies with FCC limits on electromagnetic interference (EMI).
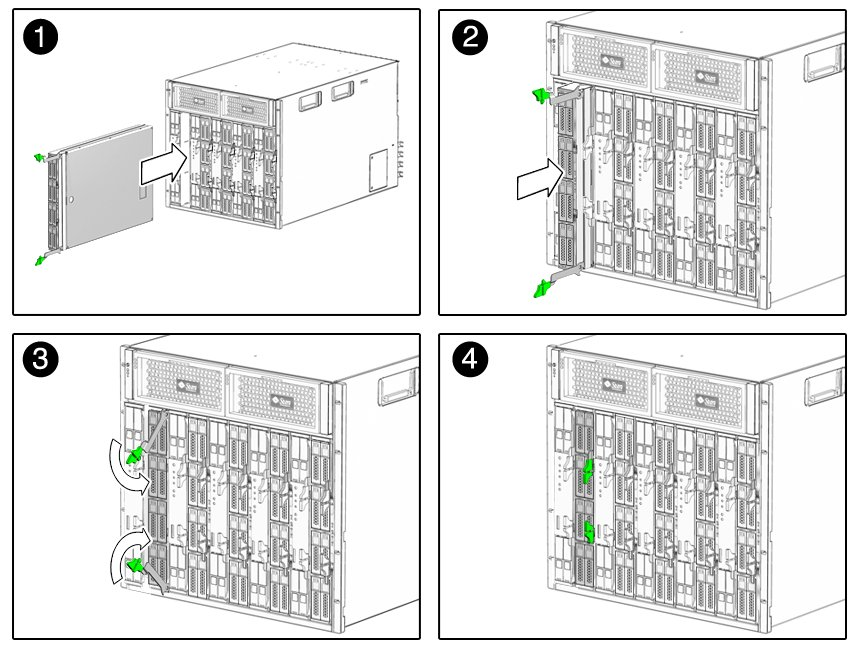
The storage module should now be flush with the chassis (although the disk drives stick out about 1.5 mm) and the ejectors locked in place [3, 4].

Chassis power will immediately be applied to the storage module. The storage module green activity LED will blink and then remain steady on as the module is initially discovered by the Chassis Monitoring Module (CMM). This process can take up to a minute. Once storage module resources are fully discovered by the CMM, an “added to SAS-2 fabric” event will be logged in the CMM event log. This can take an additional 2 to 4 minutes.
Note - Before the storage module drives can be seen by server modules in the chassis, they must be assigned on a per-host basis using the Sun Blade Zone Manager feature of the CMM ILOM.
Next Steps
For information about storage module LEDs, see Storage Module Indicators.
For information about assigning storage module resources on a per-host basis, see Assigning and Managing Storage.