Managing File Systems, Mount Points, and Directories With File System Manager
Table A-1 Task Map: Managing Files With File System Manager|
Task |
Description |
For Instructions, Go To |
|||||
|---|---|---|---|---|---|---|---|
|
Create a UFS File System |
Create a new file system on a specified device. | ||||||
|
Create a Mount Point |
Create a local (UFS) or remote (NFS) mount point. | ||||||
|
Modify the Properties of a Mount Point or Directory |
Mount or unmount a file system, share or unshare a directory, or modify an automounter map. |
"How to Modify the Properties of a Mount Point or Directory" | |||||
|
Mount or Unmount a File System |
Mount or unmount a file system. | ||||||
|
Share or Unshare a Directory |
Share or unshare a directory. | ||||||
|
View Static Client File Systems |
View the file systems that are mounted and directories that are shared at boot time on the server's diskless clients and AutoClient systems. | ||||||
|
View Active Server File Systems |
View the file systems that are currently mounted and the directories that are shared on the server. | ||||||
|
View Static Server File Systems |
View the server's file systems that are mounted and directories that are shared at boot time on the server. | ||||||
|
Remove a Mount Point From /etc/vfstab |
Remove a mount point from the /etc/vfstab file. | ||||||
How to Create a UFS File System
-
Choose Create File System from the Object Menu.
The New File System property book is displayed.
-
Open the Device chapter.
-
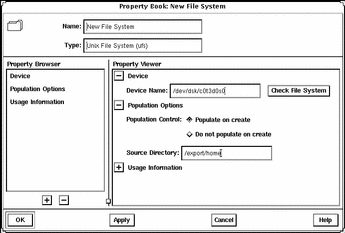
Enter the device name of an unused slice or metadevice on which to create the UFS file system.
You can either type the name of a device, or drag and drop a slice from Disk Manager or a metadevice from DiskSuite Tool.
-
If you want to verify that the specified device is currently available, click the Check File System button.
-
If you want to copy the contents of an existing directory into the new file system, open the Population Options chapter and select Populate on Create. Enter the Source Directory from which to copy the contents into the new file system.
-
Click OK.
Example -- Creating a UFS File System
How to Create a Mount Point
-
Click the appropriate icon in the tool bar to create a UFS or NFS mount point, or choose the appropriate option from the Object menu.
The Mount Point Name window appears.
-
Type a name and click OK.
The property book for the mount point is displayed.
-
If you are creating a UFS mount point, skip to Step 6. If you are creating an NFS mount point, open the Server Path chapter.
-
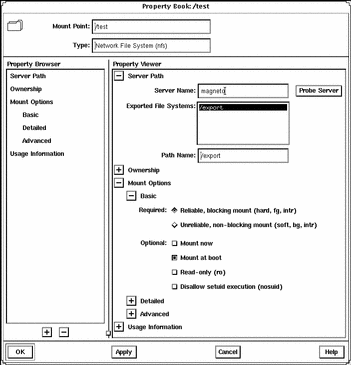
Type the name of a server and click Probe Server.
A list of exported file systems is displayed in the Exported File Systems list.
-
Click the desired file system name or type a name in the Path Name field. Skip to Step 9.
-
Open the Device chapter.
-
Enter the device name of an unused slice or metadevice on which to create the UFS mount point.
You can either type the name of a device or drag and drop a slice from Disk Manager.
-
If you want to verify that the specified device is currently available, click the Check File System button.
-
Make modifications to the other chapters, if needed.
For example, in the Mount Options chapter you can choose to mount now and/or mount at boot time.
-
Click OK.
The mount point appears in the Mount Point list.
Example -- Creating a Mount Point
How to Modify the Properties of a Mount Point or Directory
-
Select a directory or mount point from the main window.
You can select a directory or mount point from the main browser, the Mount Point list, or the Shared Resource list.
Note -Once you select a mount point or directory, the Object menu may allow you to automatically mount a file system, unmount a file system, share a directory, or unshare a directory. If you want to complete one of these tasks, it is faster to use the Object menu rather than make the change using the Property Book.
-
Choose Properties from the Object menu.
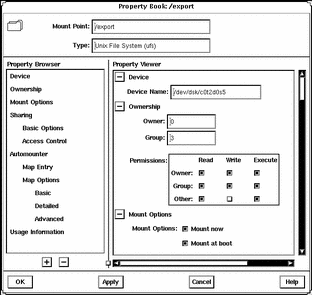
The property book for the file system or directory is displayed.
-
Open the available chapters to modify the properties for the mount point or directory.
Click Help in the property book to see detailed information about each chapter.
-
Click OK.
Example -- File System Manager Property Book
How to Mount or Unmount a File System
-
Select a mount point from the main browser, Mount Point list, or Shared Resource list.
Note -Once you select a mount point, the Object menu may allow you to automatically mount or unmount a file system. This method is faster than making the change using the Property Book.
-
Choose Properties from the Object menu.
The property book for the file system is displayed.
-
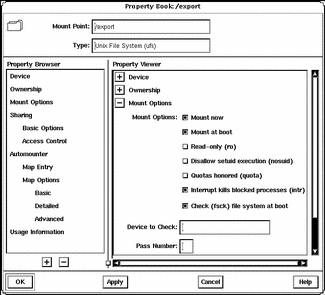
Open the Mount Options chapter to modify the mount options (for example, mount or unmount the file system).
-
Click OK.
Example -- Mounting a File System
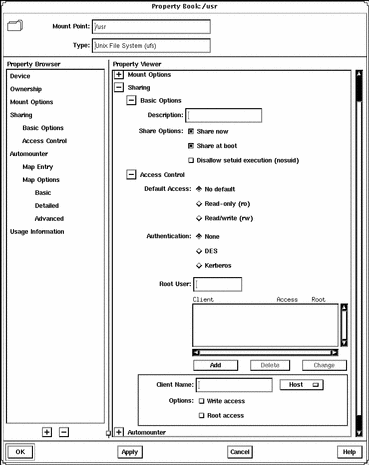
How to Share or Unshare a Directory
-
Select a directory or UFS mount point from the main browser, Mount Point list, or Shared Resource list.
Note -Once you select a directory or mount point, the Object menu may allow you to automatically share or unshare it. This method is faster than making the change using the Property Book.
-
Choose Properties from the Object menu.
The property book for the file system is displayed.
-
Open the Sharing chapter to modify the share options (for example, share or unshare the file system).
-
Click OK.
Example -- Sharing a Directory
How to View Static Client File Systems
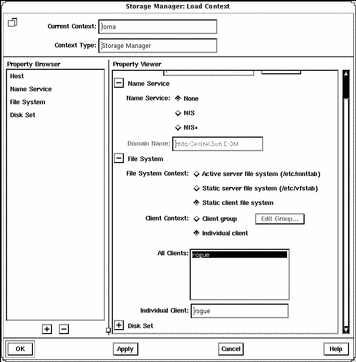
Static client file systems are those file systems that will be mounted on a server's AutoClient or diskless clients when they boot.
-
Click the Load Context icon or choose Load from the File menu.
The Load Context property book is displayed.
-
Open the File System chapter, if not done already.
-
Click the Static Client File System button.
Note -This button is only active if there are AutoClient systems or diskless clients configured on the system.
The Client Context field is activated.
-
Select either Client Group or Individual Client.
-
Select a system from the Client Group or All Clients list.
-
Click OK.
The file systems that will be mounted at boot time for the clients are displayed in the Mount Point list on the main window.
The directories that will be shared at boot time for the clients are displayed in the Shared Resources list on the main window.
Example -- Viewing Static Client File Systems
How to View Active Server File Systems
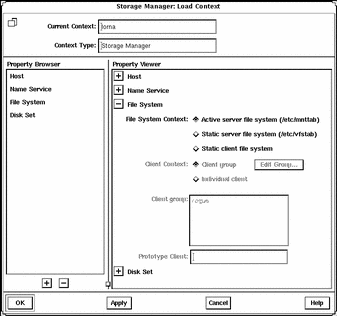
Active server file systems are the file systems on a server that are currently mounted or shared. This is the same information as contained in the /etc/mnttab file.
-
Click the Load Context icon or choose Load from the File menu.
The Load Context property book is displayed.
-
Open the File System chapter, if not done already.
-
Click the Active Server File System button.
-
Click OK.
The file systems that are currently mounted on the server are displayed in the Mount Point list on the main window.
The directories that are currently shared on the server are displayed in the Shared Resources list on the main window.
Example -- Viewing Active Server File Systems
How to View Static Server File Systems
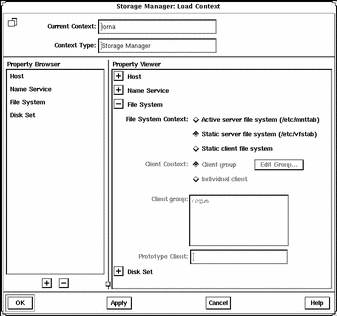
Static server file systems are the file systems on a server that will be mounted or shared at boot time. This is the same information as contained in the /etc/vfstab file.
-
Click the Load Context icon or choose Load from the File menu.
The Load Context property book is displayed.
-
Open the File System chapter, if not done already.
-
Click the Static Server File System Button.
-
Click OK.
The file systems that will be mounted at boot time on the server are displayed in the Mount Point list on the main window.
The directories that will be shared at boot time on the server are displayed in the Shared Resources list on the main window.
Example -- Viewing Static Server File Systems
How to Remove a Mount Point From the /etc/vfstab File
-
Perform the procedures in "How to View Static Server File Systems".
-
Select a mount point from the main browser, Mount Point list, or Shared Resource list.
-
Choose Properties from the Object menu.
The property book for the file system is displayed.
-
Open the Mount Options chapter.
-
Open the Basic subchapter.
-
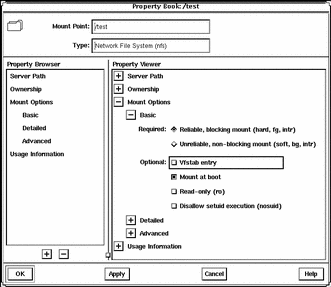
Click Vfstab Entry.
You are toggling (deselecting) this property.
-
Click OK.
The mount point no longer appears in the Mount Point list.
Example -- Removing a Mount Point Entry From the /etc/vfstab File
- © 2010, Oracle Corporation and/or its affiliates
