Chapter 1 Configuring Siebel EAI Workflows
This document provides conceptual information that provides instructions on how to configure Siebel EAI workflows. Specifically, it provides an overview of how to install Siebel Web Server extensions, and how to view, import, modify, and configure Workflow templates. Additionally, it describes how to create a subsystem for a deployed workflow. It includes the following topics:
Installing the Siebel Web Server Extension
Use the following procedure to install the Siebel Web Server Extension.
 To Install Siebel Web Server Extension (SWSE)
-
From the Siebel installation media, run \eappweb\setup.exe, which invokes the installation wizard.
-
Follow the instructions presented by the wizard. Use the naming conventions for your Siebel EAI Application Server.
-
For Connection Protocol, specify the default port for an HTTP server, which is 80.
-
Do not use any encryption or compression methods.
-
For Anonymous Employee and Anonymous Contact login and password, use SADMIN.
-
For Error Level for Logging, enter All Errors and Warnings. You can change this once correct system operation has been verified.
-
In the \bin directory where you have installed the Siebel Web Server Extension, open the eapps.cfg file and note the following (typical values are shown):
[defaults]
AnonUserName = SADMIN
AnonPassword = SADMIN
AnonUserPool = 10
StatsPage = _stats.swe

[/eai]
ConnetString = siebel.TCPIP.none.none://MyGatewayServer:2320/
MyEnterpriseServer/eaiObjMgr/MyAppServerEnableExtServiceOnly = TRUE
-
After modifying these files, stop and then restart the following services:
-
Siebel Server
-
World Wide Web Publishing Service
-
-
Log in to Siebel 7 and follow the Screens menu path:
Ctrl+Shift+A ⇒ Server Administration ⇒ Enterprise Configuration ⇒ Enterprise Component Groups

-
Select the following items, and click Enable:
-
Enterprise Application Integration
-
Workflow Management
-
Communication Management
-
-
Open the browser and type:
yourservername/module (for example,10.1.3.135/eai)
and then click Enter.
Make sure that your Siebel Server ODBC data source is configured. You can verify which one you are using by examining the Siebel Server log directory—it contains a file listing all the parameters.
 To Verify SWSE Operation for Siebel 7
-
Verify that the Server Request Processor is running correctly. You may need to synchronize the Server Request Components with the Gateway Server—follow the menu/command path:
Enterprise Configuration ⇒ Batch Components Admin ⇒ Synchronize
-
Verify that the EAI Object Manager is running correctly.
-
Follow the path:
Server Admin ⇒ Servers ⇒ Server Components
-
Under Assignment Components, select EAI Object Manager.
-
-
For Windows installations only, verify that the .swe file is associated with sweiis.dll in the web site. Use the following procedure to set the association:
-
Run the IIS 4.0 Management Console application.
-
Right-click on your Web site entry in the tree display, and select Properties.
-
Select the Home Directory tab.
-
In the Application Settings box, select Configuration.
-
On the App Mappings tab, select Add.
-
Type swe, select sweiis.dll, and click OK to save the association.
-
-
Verify that the configuration files are set up properly. If LDAP is not used, comment out all LDAP-related parameters in the configuration files (for example, eai.cfg and siebel.cfg):
;[SecurityAdapters]
;LDAP = LDAP

;[LDAP]
;DllName = sscfldap.dll
;ServerName =
;Port = 389
;BaseDN =
;UsernameAttributeType = uid
;PasswordAttributeType = userPassword
;CredentialsAttributeType = credentials
;RolesAttributeType = roles
;SslDatabase =
Note –The LDAP configuration may differ in your Siebel system depending on your version of Siebel and your installed options. For more information on disabling LDAP in your Siebel system, consult your Siebel user documentation.
-
After modifying these files, stop and then restart the following services:
-
Siebel Server
-
World Wide Web Publishing Service
-
Viewing Siebel EAI Workflow Templates
Use the following procedure to view Siebel EAI workflow templates.
Following the Screens menu path shown below displays the installed Workflow templates, as shown in Figure 1–1.
Siebel Workflow Administration ⇒ Workflow Processes ⇒ All Processes
Figure 1–1 SeeBeyond Workflow Processes

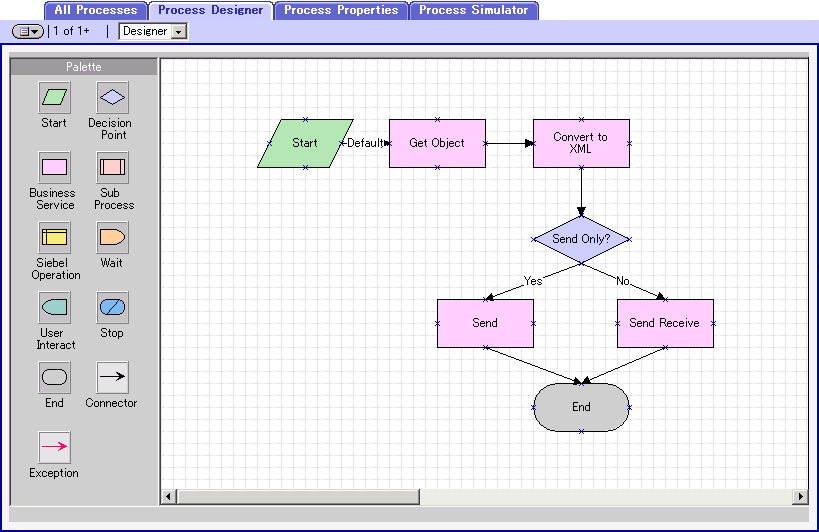
Clicking the process name to invoke a Workflow Process Designer display for that process, such as shown in the figures below.
Figure 1–2 DELETE Workflow Template
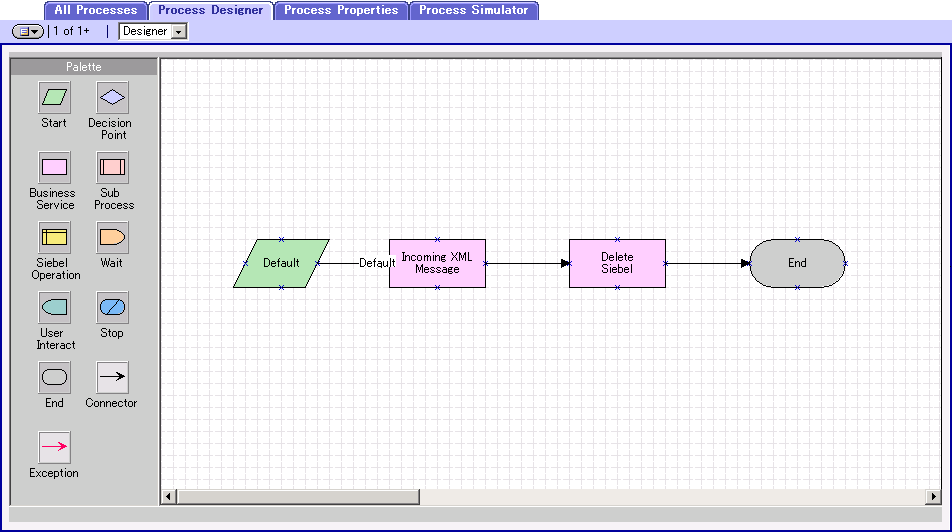
Figure 1–3 QUERY Workflow Template
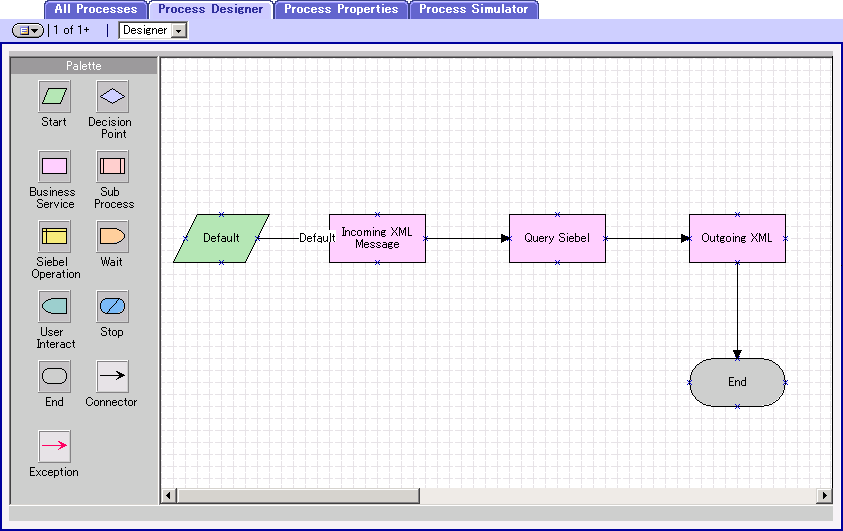
Figure 1–4 INSERT/UPDATE Workflow Template
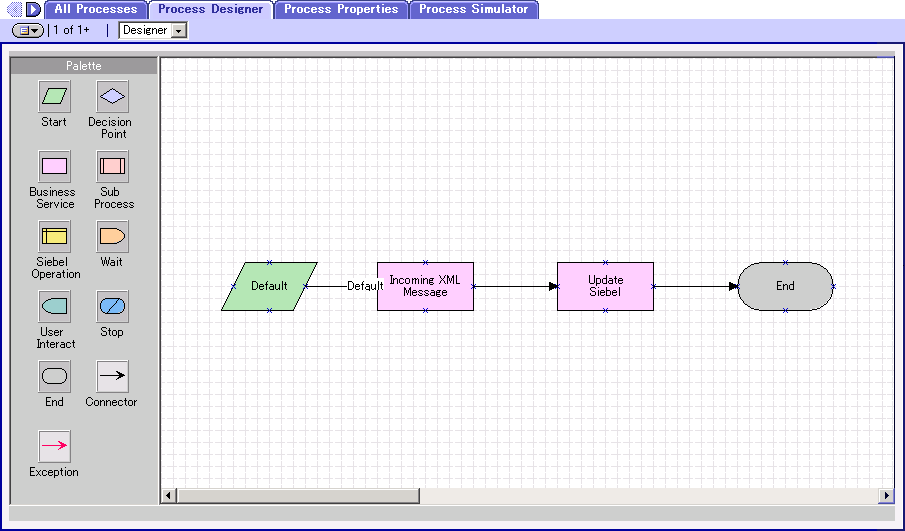
Figure 1–5 EXECUTE Workflow Template
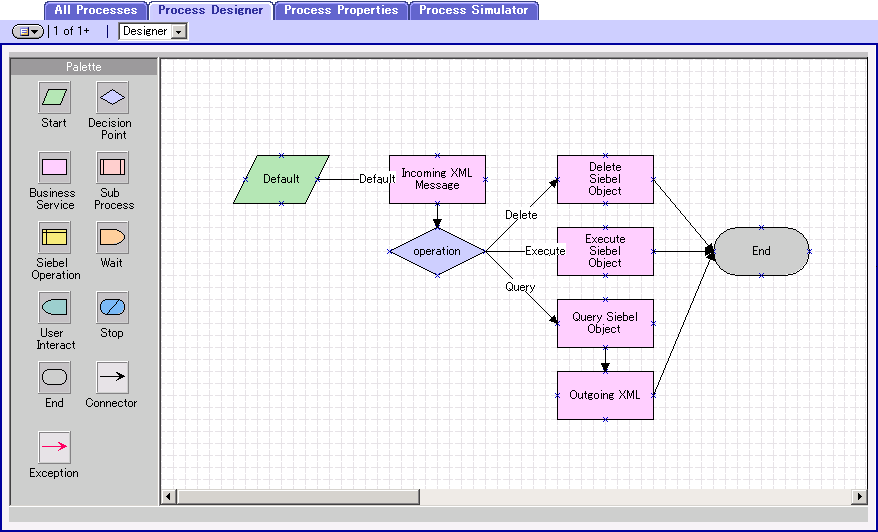
Figure 1–6 SEND Workflow Template
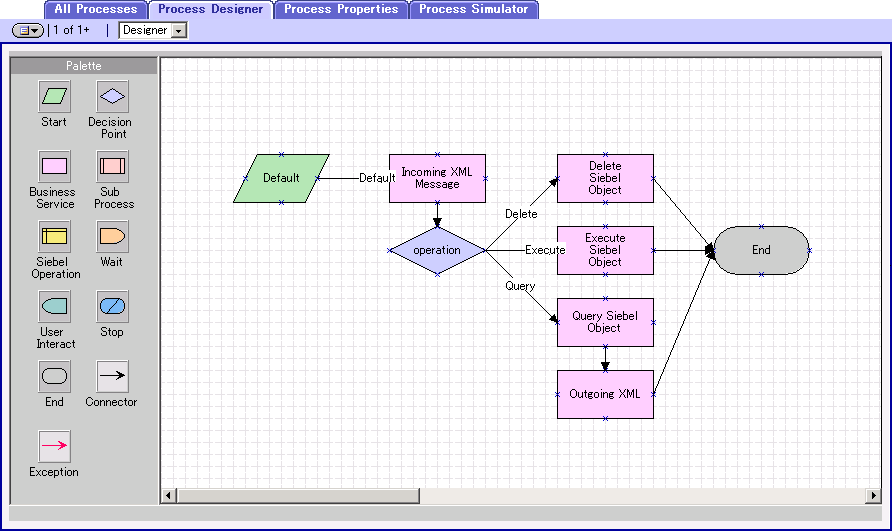
Figure 1–7 SEND/RECEIVE Workflow Template
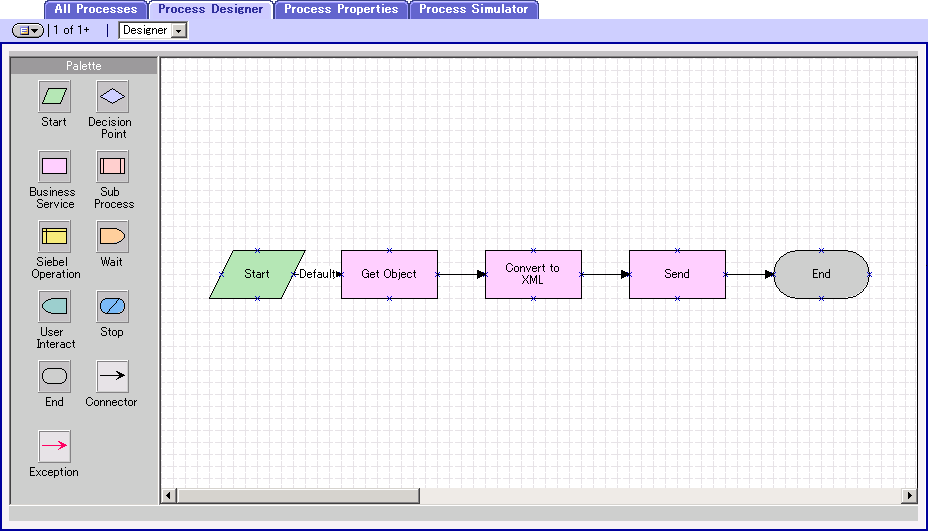
Figure 1–8 POST Workflow Template
Importing Siebel Workflow Templates
Use the following procedure to import Siebel EAI workflow templates.
 To Import the SeeBeyond Workflow Templates
with Siebel 7.5
-
Start Siebel EAI Client and select Siebel Sales.
-
Follow the menu path:
Ctrl+Shift+A ⇒ Siebel Workflow Administration ⇒ Workflow Processes
-
Click Import and browse to the directory that contains SeeBeyondHTTPWorkflow.xml.
This file is installed with the Enterprise Designer. If you installed the Enterprise Designer in the <c:\JavaCAPS>\edesigner directory, then the file is located in
<C:\JavaCAPS>\edesigner\usrdir\modules\ext\siebeleaieway
-
Click Open to begin importing the Workflow template.
-
Check or set up the following configuration files:
-
In the file SWEApp\eapps.cfg, verify that the following section is specified correctly:
[/eai_enu]
onnectString = siebel.TCPIP.none.none://<Your Gateway Server>:2320/
<Your_Enterprise_Server>/EAIObjMgr_enu/<Your_App Server>
EnableExtServiceOnly = TRUE
WebPublicRootDir=c:<Your_Siebel_Dir>\SWEApp\public\enu
WebUpdatePassword=<Your_Password>
-
For the SiebelEAI_jcdUpsert sample, add the following sections in the file siebsrvr\bin\ENU\eai.cfg:
[HTTP Services]
...
SEEBEYOND_HTTP_DELETE = SB_HTTP_DELETE
SEEBEYOND_HTTP_QUERY = SB_HTTP_QUERY
SEEBEYOND_HTTP_UPDATE = SB_HTTP_UPDATE
SEEBEYOND_HTTP_EXECUTE = SB_HTTP_EXECUTE

[SB_HTTP_DELETE]
Mode = Document
Service = SeeBeyond HTTP Delete
Method = RunProcess

[SB_HTTP_QUERY]
Mode = Document
Service = SeeBeyond HTTP Query
Method = RunProcess

[SB_HTTP_UPDATE]
Mode = Document
Service = SeeBeyond HTTP Update
Method = RunProcess
[SB_HTTP_EXECUTE]
Mode = Document
Service = SeeBeyond HTTP Execute
Method = RunProcess
-
-
-
The imported Workflow must be in active mode before it can be used; this is accomplished by clicking the active button.
Modifying Siebel Workflow Templates
Use the following procedure to modify Siebel EAI workflow templates.
 To Modify a SeeBeyond Workflow Template
-
Log in to Siebel Client 7.0, designating the appropriate Siebel server.
-
Follow the menu path:
Ctrl+Shift+A ⇒ Siebel Workflow Administration ⇒ Workflow Processes
-
Highlight the SeeBeyond Workflow Process template you want to modify.
-
Right-click and select Copy Record.
-
Rename the copied Process.
-
Specify the Business Object to which you want to apply the template, and any other fields that may be necessary (for example, Description).
-
After modifying a Workflow template you must create the Business Service to execute it, using the supplied Workflow processes as templates. This procedure is described in the following section.
-
A new Services section should be added to your siebsrvr\bin\ENU\eai.cfg file, as shown in the preceding section.
For example, if you have a Business Service named Employee Execute, you should add the following lines to the eai.cfg file:
[HTTP Services]
...
EMPLOYEE_EXECUTE = EE

[EE]
Mode = Document
Service = Employee Execute
Method = RunProcess
Setting Up SeeBeyond Workflow Processes
The Workflow processes invoked by the SeeBeyond Workflow Templates must be set up in Siebel Business Services.
Note –
The names entered in the last step above are used to set up the Business Service for the sample program supplied with the eWay. You should use them as templates to create new processes corresponding to the Workflows you create for your own system.
 To set Up the Business Service To Execute
the Workflow
-
Make sure the following services are running:
-
Siebel Gateway Server
-
Siebel Server
-
World Wide Web Publishing Service
-
-
Log in to Siebel Sales 7.0.
-
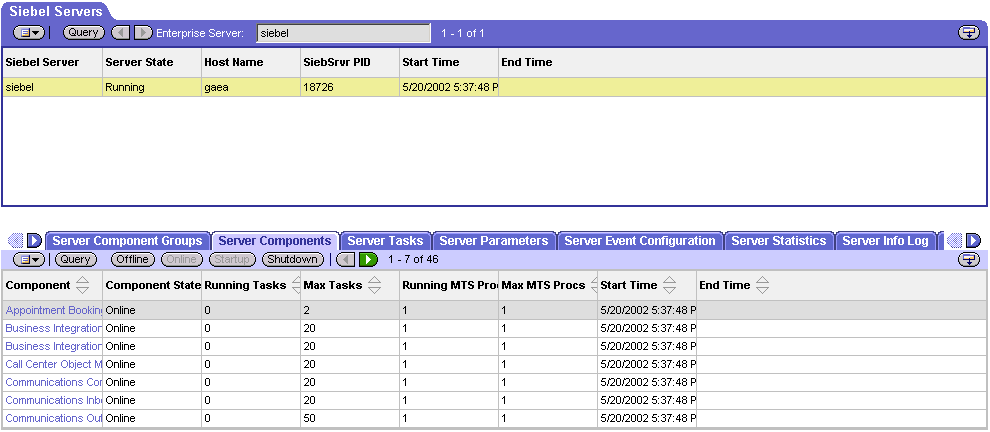
Follow the Screens menu path:
Server Administration ⇒ Servers
-
Make sure that Workflow Management is Online and Enabled.
-
Log in to Siebel Tools 7.0 and designate the server as the database by entering sadmin, sadmin, server.
-
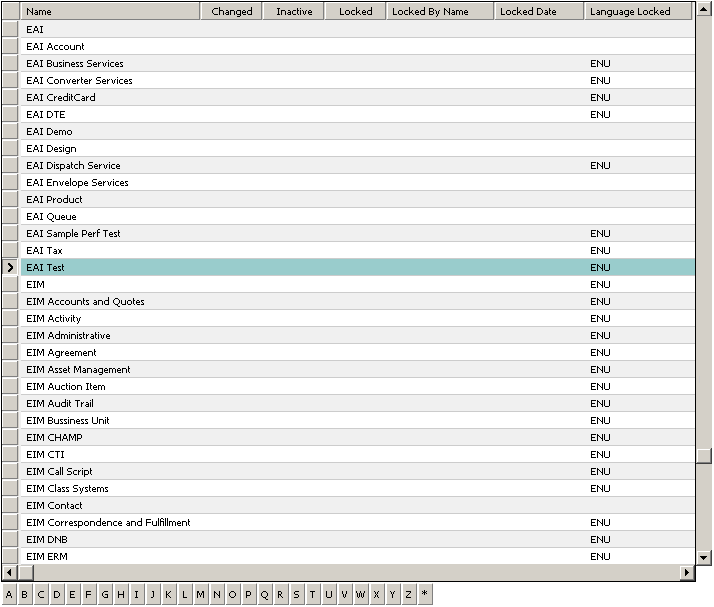
In Object Explorer, go to Siebel Objects ⇒ Project and lock the Project (see the figure below).
-
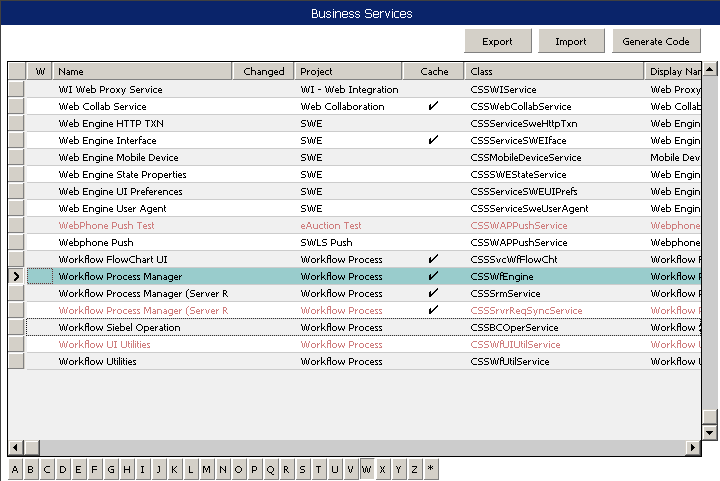
In Object Explorer, go to Business Service, make a copy of Workflow Process Manager (menu path Edit ⇒ Copy Record).
-
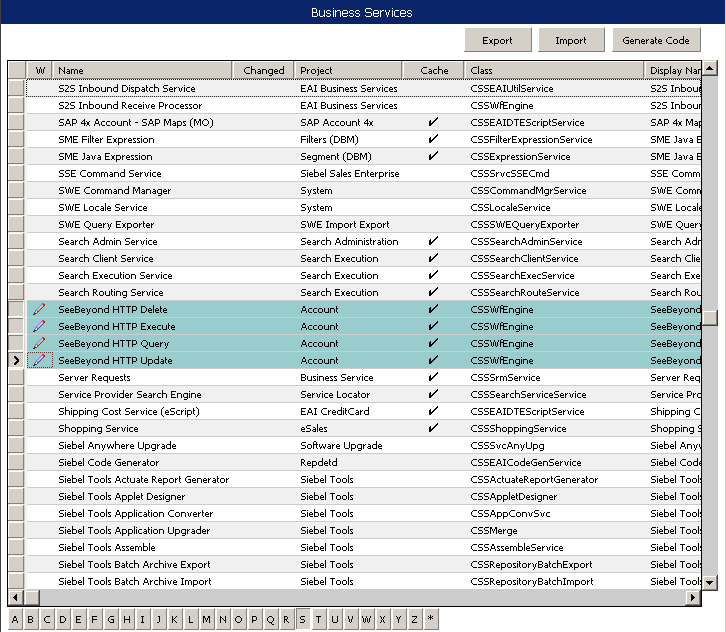
Type the Process Name into the Name and Display Names fields, as shown below (this name is specified in the eai.cfg file).
For the SiebelEAI_jcdUpsert project, perform this step for the following:
-
SeeBeyond HTTP Delete
-
SeeBeyond HTTP Execute
-
SeeBeyond HTTP Query
-
SeeBeyond HTTP Update
-
-
In Object Explorer, go to Business Service > Business Service Method:
-
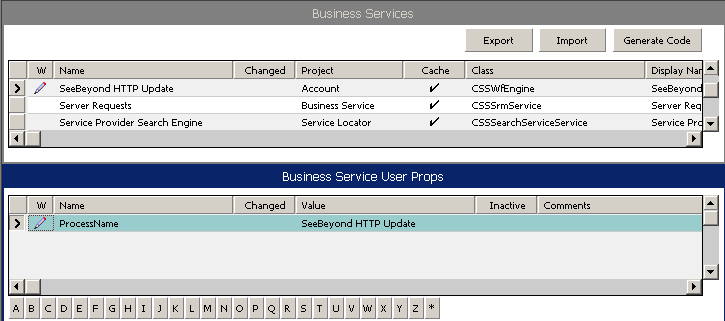
Type ProcessName into the Name field.
-
Type the actual Process Name into the Value field (see the figure below).
For SiebelEAI_jcdUpsert project, perform this step for:
-
SeeBeyond HTTP Delete
-
SeeBeyond HTTP Execute
-
SeeBeyond HTTP Query
-
SeeBeyond HTTP Update
-
Creating a Subsystem for a Deployed Workflow
Use the following procedure to create a subsystem for a deployed workflow.
 To Create a Subsystem For a Deployed Workflow
-
Log in to Siebel Client 7.7, designating the appropriate Siebel server.
-
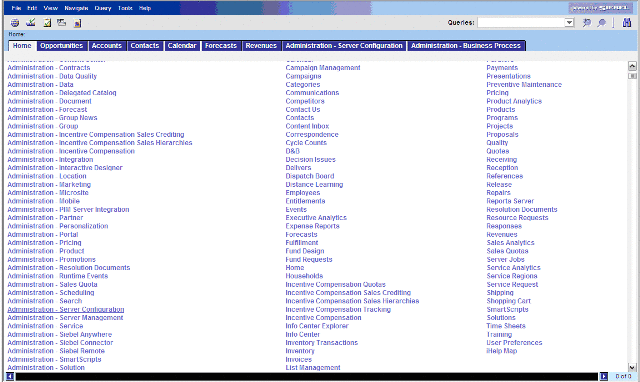
Click the Site Map in the Siebel Client home page.
Figure 1–9 Administration - Server Configuration
-
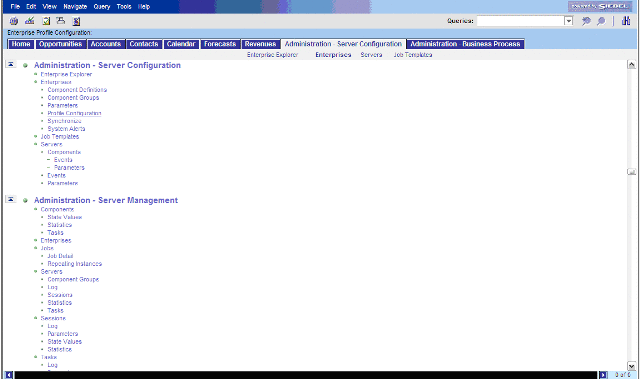
Click the Administration - Server Configuration link. The Administration - Server Configuration page appears.
Figure 1–10 Administration - Profile Configuration
-
Click the Profile Configuration link.
-
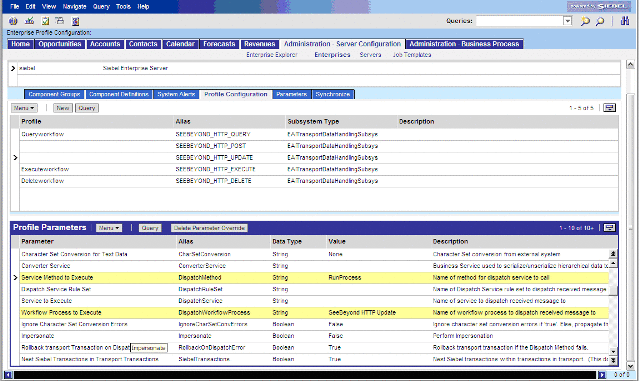
In the Profile Configuration page, create the Named Subsystem (SEEBEYOND_HTTP_UPDATE).
-
Set the Workflow Process to Execute parameter for SEEBEYOND_HTTP_UPDATE to SeeBeyond HTTP Update.
-
Set the Service Method to Execute parameter for SEEBEYOND_HTTP_UPDATE to RunProcess.
For this example, SEEBEYOND_HTTP_UPDATE is the name of the Named Subsystem. SeeBeyond HTTP Update is the Business Service that invokes the SeeBeyond HTTP Update Workflow. .
Figure 1–11 SEEBEYOND_HTTP_UPDATE Named Subsystem
- © 2010, Oracle Corporation and/or its affiliates
