| Sun ONE Meta-Directory 5.1.1 Administration Guide |
Chapter 9
Configuring the Microsoft Exchange ConnectorThis chapter discusses configuration factors specific to the Microsoft Exchange Connector, which provides bi-directional synchronization of Microsoft Exchange user and group data into its Connector View. This connector supports Microsoft Exchange 2000 Server. Note that Microsoft Exchange 2000 uses Active Directory as to store user information. Hence, the Microsoft Exchange connector works similarly to the Active Directory connector. The main difference is in the list of attributes that are flown.
The topics in this chapter are:
The following components must be installed before you configure the connector:
- Sun ONE Directory Server 5.2, as described in the Deployment and Installation Guides. Restart the server after enabling the retro-changelog plug-in.
- Sun ONE Meta-Directory 5.1.1, as described in the Deployment and Installation Guides. Make sure to select Microsoft Exchange Connector in the Components screen when you install Meta-Directory.
- Windows 2000 and Microsoft Exchange Server 2000.
Creating the Exchange Connector View InstanceYou can set configuration parameters during connector instance creation or from the configuration file. The configuration file contains extra parameters for setting the schema and modes.
To set configuration parameters during instance creation
- From the Sun ONE Console window, right-click on Server Group.
- Choose Create Instance Of > Microsoft Exchange Connector. The ‘New Instance Creation’ dialog box displays.
- Provide input for the data fields. See table below provides a description of these fields.
To set configuration parameters from the configuration file
- Locate the adc.ini configuration file in the following directory:
NetsiteRoot/exc-ViewName/config/adc.ini
Netsite_Root is the installed path for Meta-Directory. The default is c:\SunOne\Servers. The ViewName is the name you provided in the New Instance Creation dialog box.
- Provide values for the file parameters. The following table provides definitions for the configuration file parameters:
Table 9-2 List of options and the description of the action to perform
Configuration File Parameter
Definition
NTLMdomain\user
Specifies the pre-Windows 2000 abbreviated name of the domain to be synchronized. Example:
restaurants
instead of
restaurants.central.madisonparc.com
username
Specifies the Windows 2000 account name that the directory connector uses to authenticate Active Directory.
password1
It is associated with the domain controller’s user name.
Do not modify this parameter.adtopleveldn
Specifies the top level DN where Microsoft Exchange Connector synchronization occurs.
utctopleveldn
Specifies the View Base DN as entered in the ‘New Instance Creation’ dialog box.
domain
This parameter is not currently used.
dc
Specifies the host address of the domain controller where the Active Directory exists.
schema
This has to be ExchangeSpecific for the Exchange Connector
logginglevel
Specifies the log level for the task script and accessor utility. Values are as follows:
0 - None
1 - Minimum
2 - Verbose
3 - Very verboseAfter you set the log level from the dialog box, you cannot change it from there. You must use the configuration file to change the log level.
finddeletedfreq2
Specifies that every nth scheduled synchronization, the connector should run in the ’Find Delete’ mode. This is done to process the deleted entries (since incremental mode does not handle deletes).
For instance, when finddeletedfreq = 2, the connector will run in the ’Find Delete’ mode, at every 2nd scheduled sync.
This parameter is used in conjunction with the Schedule window, described in "To configure the schedule from and to Connector Views".
loggingsize
Specifies the maximum size of the accessor log file in kilobytes (KB). The default value is 4096 KB.
perllogfilesize
Specifies the maximum size of the Perl log file in kilobytes (KB). The default value is 4096 KB.
searchattrs
Specifies a list of comma-separated Active Directory attributes. The list determines which attributes Exchange Connector retrieves during a search operation. If you do not provide a list (blank), all attributes are selected.
disallowattribs
This is a comma-separated list of attributes that you do not wish to be flown to or from the Active Directory. This is effective only when the schema is set to ADSpecific mode at instance-creation time, or edited in adc.ini. You can add to this list any other attributes that need to be eliminated while writing into the active directory. For example:
dissalwattribs=mdscvlinktype,mdsentityowner, mdslintomv,mdsvmembership
usermultitonovalattr
Specifies the comma separated list of user entry attributes for which value can go from some value (multiple or single) to no value.
This parameter doesn't come pre-configured in the adc.ini file. User has to configure this parameter. The attribute names listed against this parameter should be the attribute names used in the external data source and one should not specify the attribute names used at the Connector View end. For example:
usermultitonovalattr=mail,telephoneNumber
groupmultitonovalattr
Specifies the comma separated list of group entry attributes for which value can go from some value (multiple or single) to no value.
This parameter does not come pre-configured in the ini file. User has to configure this parameter.The attribute names listed against this parameter should be the attribute names used in the external data source and one should not specify the attribute names used at the Connector View end. For example:
groupmultitonovalattr=member,description
fulldumpfreq2
Specifies that at every nth scheduled synchronization, the connector should run in the ’Full Dump’ mode. This is done to ensure data is in a consistent state and performs the ’add-back’ operations in the Incremental mode.
For instance, when fulldumpfreq = 5, the connector will run in the ’Full Dump’ mode, at every 5th scheduled sync.
To disable fulldump mode, set fulldumpfreq to -1.
1If the domain controller’s password is changed, you must create a new instance of the associated connector.
2The connector can run in three modes: Incremental, Find Delete and Full Dump. In Incremental mode, the connector detects only new and modified entries in Active Directory and flows it to the Connector View. This mode does not detect deletes. In the Find Delete mode, the connector only finds deleted entries in Active Directory and deletes the corresponding entries in the Connector View. In Full Dump mode, all entries in Active Directory are flowed to the Connector View. This ensures all entries are correctly in sync. The ’fulldumpfreq’ and ’finddeletedfreq’ parameters in the ADC.INI file are used to control when Full Dump and Find Delete modes are used. If the Full-Dump and Find-Delete mode clash, Full-Dump takes priority and gets executed. The default mode is Incremental.
To add the instance as a Participating View
- Right-click the Participating Views object under Meta View.
- Click Add Participating View. The ‘Select View’ dialog box displays.
- Select the Connector View you want to add or participate in a join/synchronization with the Meta View.
- Click OK. The view is added to the Meta-Directory configuration tree.
To provide authorization
Provide authorization of created users for data server access. See "Setting Access Permissions" for the procedure.
Configuring a Participating Connector ViewTo configure the Participating View refer to the procedures in Chapter 2, "Working with Views."
Creating UsersThe following procedures apply only to the Meta View. If you have installed the Join Engine and want to create new entries, it is recommended that you create them under the Meta View instead of Connector View. The Connector View is intended only to reflect the contents of the external data source or Meta View.
To create a Microsoft Exchange User in the Meta View
You can also create Microsoft Exchange users in the Meta View by using an LDIF file format within any LDAP client. The LDIF format should be similar to the structures of user entries and group entries, discussed in "User Entries" and "Group Entries".
To modify a Microsoft Exchange user in the Meta View
Configuring Connector RulesApart from the Connector Rules for the synchronization between Connector View and Meta View, for Microsoft Exchange Connector. You can configure the following types of rules for the data synchronization between external data source and Connector View.
To configure connector rules, see "Configuring Attribute Flow Rules", "Configuring Default Attribute Value Rules", and "Creating Filter Rules".
Configuring a Connector InstanceConsider the following procedure an extension of the comprehensive configuration procedures in "Configuring Universal Connector Instance". You need to perform the following product-specific procedure for every Microsoft Exchange Connector.
To configure a connector instance
- Optional: Manually configure the attribute flow by doing the following:
- Select the Microsoft Exchange Connector, then select the Attribute Flow tab1..
- Click New and enter a new configuration name, then click OK.
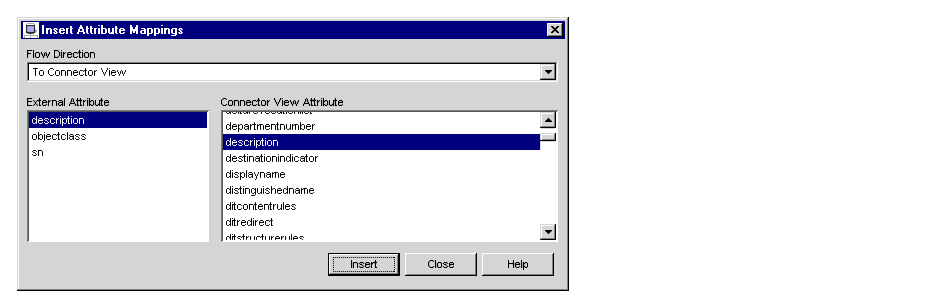
- Click Insert. The Insert Attribute Mappings dialog box appears. For both mapping types (locally owned objects and Connector View-owned objects), map each attribute to itself for both flow directions (to Connector View and from Connector View).
- Click Save. Choose View > Refresh.
- Select the Microsoft Exchange Connector instance. The General window displays.
- From the Attribute Flow Configuration list box, select the attribute flow configuration name you created (Step b). The name becomes available in the list after refreshing (Step d).
- Select the desired filters and default values from the drop-down lists.
- Select the operation you want to perform and click Save.
- Configure the remaining windows for the connector instance. Begin with "To configure the schedule from and to Connector Views".
Restarting the Connector InstanceYou must restart the connector instance to activate your configuration. Both instance-specific and shared configurations will not become effective for a given instance until you have restarted the instance. If the entries you are saving preexist in a Microsoft Exchange Connector View, see for advisory information.
- Stop the connector by right-clicking on the connector instance. A context menu appears.
- Click Yes to the prompt. A message appears stating that the stop command has been issued to the component.
- Start the connector by right-clicking on the connector instance. A context menu appears.
- Select Start Server. A message appears stating that the start command has been issued to the component.
Implementing the ConfigurationAfter you start the Join Engine and enable the Connector View, your data can flow to the Meta View. The following sections provide procedures for doing these tasks.
Starting the Join Engine
Before you start the Join Engine, ensure that you have enabled the retro-changelog plug-in in the Directory Server configuration.
To start the Join Engine
Enabling the Connector View
- From the Meta-Directory window, click on the Status tab.
- Click on the Join Engine object. The Operations tab window appears.
- Select the Participating View you want to enable.
- Select Enable from the Operation list menu, then click Start.
This option disables the Traverse drop-down menu. You can only enable the Participating View if the configuration for setting up the view is valid. Any error in the configuration automatically changes the view to a disable status.
Refreshing the View
You can optionally refresh the view if you want to observe updates immediately and bypass the regularly scheduled refresh synchronization.
- From the Meta-Directory window, click on the Status tab.
- Select the Participating View you want to refresh. Note that it should already be enabled.
- Select Refresh from the Operation List Window, then select either Meta View or Connector View from the Traverse menu list.
- Click Start.
You must select a filter for the second and third options. Only filters configured for the “NoSubtreesExcept” option are displayed when you click Select Filter, not filters configured for the “AllSubtreesExcept” option.
Monitoring the ConnectorThe Microsoft Exchange Connector provides logs at the following locations that enable you to monitor connector status.
For example, a Perl log file entry might appear as follows:
adcpl-20010605-01.log
Common errors you may encounter in the Accessor Utility Log are as follows:
For other errors, refer to the following Microsoft Product Support Services site:
http://support.microsoft.com/support/kb/articles/Q242/0/76.asp
Data Flow for User and Group EntriesEntries in the Microsoft Exchange Connector View must adhere to certain conditions to flow from the Connector View into the Active Directory. Note the following restrictions and advisory information:
- To prevent duplicate user IDs from occurring in the same Connector View, the Meta View and Connector Views must be separate entities. A Connector View should not be nested as a subtree of another Connector View. That is, the Connector View should be a flat tree that does not contain any subentries.
- Entries that preexist in an Active Directory Connector View will not flow to the Meta View after the connector starts. To flow these entries, the Active Directory Connector View must be an enabled participating Connector View in the Join Engine. Refreshing the Meta View operation from the Join Engine will trigger the preexisting entries from the Active Directory Connector View to flow to the Meta View.
When setting up the Join Engine, you need to ensure that user and group entries meet the required criteria for Microsoft Exchange Connector views. The following sections discuss the requirements and list the available external attributes read from Active Directory for both user and group entries.
User Entries
You can create Active Directory users in the Connector View with any LDAP client by adhering to the attribute conventions shown in the following structure for the default schema:
dn: uid=userid, cvroot_dn
uid: userid
cn: user_full_name
objectclass: top
objectclass: person
objectclass: organizationalPerson
objectclass: mdsexcmailrecipient
sn: user_second_name
mdsexcMailnickname: mail_nicknameMake sure that the objectclass attribute contains the following values:
mdsexcmailrecipient
inetorgperson
organizationalperson
person
top
Note that the userid, mdsexcMailnickname and one of mdsexcHomeMdb/mdsexcHomeMTA/mdsexcMsExchHomeServerName should be populated for the exchange Mailbox to be created properly. The rest of the mdsexcXXXX attributes will be populated automatically by Exchange if they are left empty. Ensure that the user ID attribute does not contain any of the following special characters:
The table below shows the available attributes for the user entries in ‘complete attribute set mapping’ for default schema mode. Refer to your Active Directory and Microsoft Exchange documentation for more information about these attributes.
Table 9-3 Attributes for User Entries
departmentnumber
homephone
mdsexcHomeMdb
description1
telephonenumber
mdsexcHomeMTA
facsimiletelephonenumber
l
mdsexcMsExchHomeServerName
homepostaladdress
destinationindicator
mdsexcMailnickname
o
mobile
mdsexcShowInAddressBook
ou
usercertificate
mdsexcProxyAddresses
objectclass
physicaldeliveryofficename
mdsexcLegacyExchangeDN
pager
cn
mdsexcUserPrincipalName
postalcode
mail1
mdsexcMemberOf
postofficebox
street
mdsexcMsExchUserAccountControl
displayname
postaladdress
mdsexcMsExchPoliciesIncluded
sn
employeeid
mdsexcMsExchPoliciesExcluded
st
givenname
employeetype
usermimecertificate
title
initials2
internationalisdnnumber
preferreddeliverymethod
registeredaddress
teletexterminalidentifier
telexnumber
uid
x121address
mdsexcmsexchmailboxsecuritydescriptor
mdsexcmsexchmailboxguid
mdsexcmsexchalobjectversion
mdsexcmdbusedefaults
mdsexcuserAccountControl
mdsexccompany
1‘Description’ and ’mail’ attributes are declared as multi-valued attributes in Sun ONE Directory Server, however, these attributes are considered as single-value attributes in Microsoft Active Directory.
2‘Initials’ attribute in Microsoft Active Directory can have maximum of 6 characters only.
Enabling or Disabling a User Account
Enabling or disabling of the User Account can be controlled by providing a valid value for ‘mdsexcuserAccountControl’ attribute of the User entry. (For valid values of this attribute, see Microsoft’s Active Directory documentation.) There is no validation for the attribute values on the Connector View side and all values would follow the Active Directory standards while flowing to and from Active Directory.
Group Entries
The group entries in the Connector View contain the list of member DNs. The Connector View applies static group membership. See
http://docs.sun.com/source/816-5609-10/dit.htm#1005527The following restriction applies to group entries:
Table 9-4 shows the available attributes for the group entries in “complete attribute set mapping” for default schema mode. Refer to your Microsoft Exchange documentation for more information about these attributes.
Configuration ExampleThe following example is intended as a quick reference you can use as a checklist. For complete configuration information, refer back to the earlier portions of this chapter.
Install the Connector
- Ensure that Sun ONE Directory Server 5.2 and Meta-Directory 5.1.1 is installed.
- Install the ADSI package.
- Create a Microsoft Exchange connector instance.
During instance creation:
- From the Sun ONE Console window, right-click on Server Group. A context menu appears.
- Select Create Instance Of, then select Meta-Directory Microsoft Exchange Connector. The New Instance Creation dialog box appears.
- Provide input for the data fields. For View Name, use Exchange. For View ID, use CV1. For View Base DN, use o=CV1. For the remaining fields, see Table 9-1.
Modify the configuration file:
- Locate the adc.ini configuration file in the following directory:
NetsiteRoot/exc-ViewName/config/adc.ini
- Provide values for the file parameters. Use default parameters and values.
- Add the instance as a Participating View.
- Provide authorization. See "Setting Access Permissions".
Configure Connector Rules
- Configure default attribute rules.
- Click on the Default Values tab. The Default Values window appears.
- Click New.
- In the Name field, type in ExchangeDefault. The name is echoed in the Configurations list box.
- In the Attribute Destination drop-down list, select External Directory.
- Click Add. Blank fields appear below the Attribute and Default Value fields.
- Click within the blank Attribute field. A drop-down list appears. Select givenname from the list.
- Double-click within the blank Default Value field and type in surname.
- Click Save.
- Configure filters.
- Click on the Filters tab. The Filters window appears.
- Click New. The Filter Name dialog box appears.
- Type in ExchangeExclude and click OK. The new name appears in the Filter Name list box.
- Select From Connector View.
- Filter excluded data:
- Provide a list of subtrees to exclude by selecting All Subtrees Except, then clicking Add. The Sub-tree DN dialog box appears.
- Specify a subtree to exclude, such as o=madisonparc,c=us, then click OK. The subtree appears in the list box.
With this filter, entries in all subtrees that are not specifically excluded are included, no matter how you set the associated entry-level filters.
- Filter back entries from the excluded subtrees using entry-level filters. Select the subtree you just created, select ‘Exceptions to Above Rule’, then click Add. The Entry RDN dialog box appears.
- Specify an entry you want to include, such as cn=Fred Scofflaw, then click OK. The included entry appears in the list box.
The entry-level filters you apply affect only the entries found in the list of subtrees to include. The entries you specify here will filter through; all others are excluded.
- Click Save.
- From the menubar, select View > Refresh.
Configure a Connector Instance
Restart the Connector Instance
- Stop the connector by right-clicking on exc-Exchange. A context menu appears.
- Click Yes to the prompt. A message appears stating that the stop command has been issued to the component.
- Start the connector by right-clicking on exc-Exchange. A context menu appears.
- Select Start Server. A message appears stating that the start command has been issued to the component.
Start the Join Engine
Enable the Connector View
- .Select Status > Join Engine > Operations.
- .For View, select the Microsoft Exchange Connector View, for Operation, select Enable, and then click Start.
- For traverse direction, keep the default value as “Connector View” and repeat the step above except select Refresh instead of Enable.
- Wait for a few seconds. From the Configuration tab Refresh the Contents of Meta View. Verify that the Data is properly propagated to the Meta View subtree.