| C H A P T E R 3 |
|
Administration Tool |
The Sun Ray Administration Tool (Admin GUI) enables administration of Sun Ray users and DTUs; however, the Command-Line Interface (CLI), documented in Chapter 2, is the recommended interface for enabling assistive technologies.
This chapter is divided into the following sections:
|
Note - This chapter describes a standalone server. Servers in failover groups are discussed in Chapter 10. |
Sun Ray administration data comes from two sources:
The internal database keeps persistent administration data and grants read access to all internal database clients; however, it allows changes only by those internal database clients that connect as the privileged utadmin user.
The authentication manager is queried as needed for dynamic data.
|
Tip - Although Sun Ray administration data is accessible through standard database interfaces and applications, to avoid operational errors, do not modify data except with the Administration Tool. |
The Administration Tool allows you to administer Sun Ray users and DTUs from a web browser.
|
1. Log in to your Sun Ray server's console or any DTU attached to it.
|
Tip - If you chose a different port number when you configured the Sun Ray supporting software, substitute that number for "1660" in the URL above. |
If you get a message denying access, make sure that:
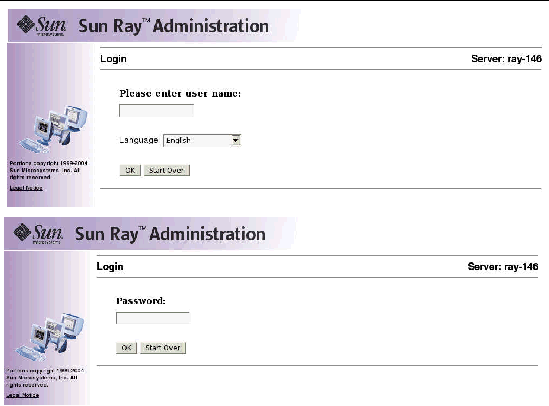
4. Enter the administrator user name admin on the first login screen and click the OK button.
5. Enter the administration password you specified when you configured the Sun Ray Server Software on the second login screen and click the OK button.
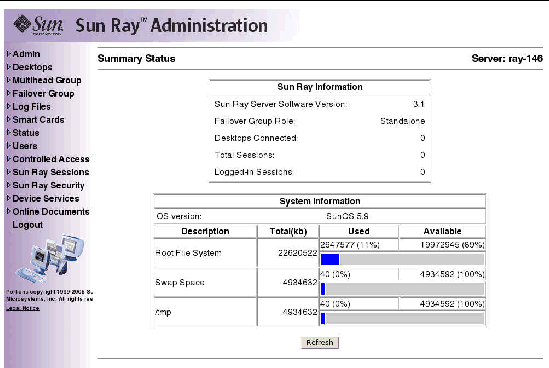
The Summary Status window is displayed.
Use the navigation bar on the left to navigate through the Administration Tool.
|
Note - If the session is inactive for 30 minutes, you must log in again. |
|
The administrator's password allows you to use the Administration Tool to access and change Sun Ray administration data.
1. In the navigation menu, click the arrow to the left of Admin to view the options.
The Change Admin Password window is displayed. This window allows you to change the password for the admin account that was entered during configuration with the utconfig script; it does not allow you to change UNIX user passwords.
|
Note - In failover groups, all servers must use the same password for the admin account. |
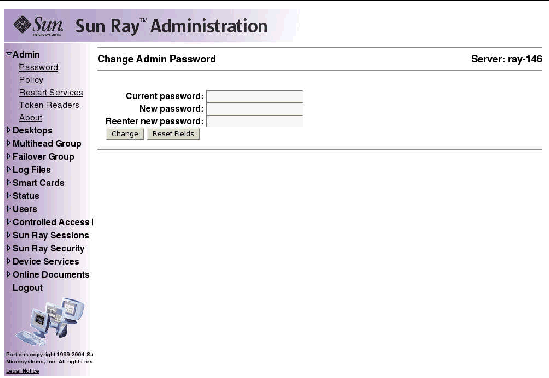
3. Enter your current password.
|
Tip - If you make a mistake, click the Reset Fields button to clear the fields and start again. |
The new password takes effect and the internal database hierarchy is updated.
Set the same policies on all the Sun Ray servers in a given failover group. If all the servers are configured to use the same policies and a failover occurs, all policies remain consistent.
Changes to local policies affect only the current Sun Ray server; changes to group policies affect all Sun Ray servers in the same group.
|
1. Select the arrow to the left of Admin in the navigation bar to expand the menu.
The Change Policy window is displayed.
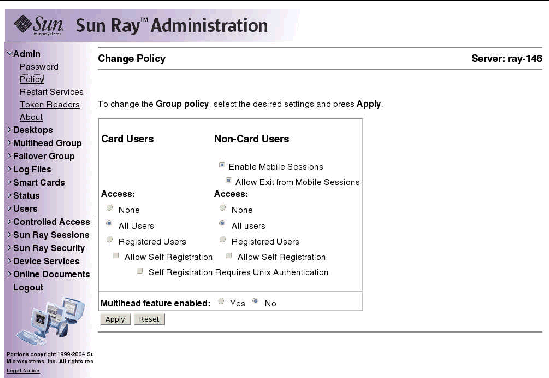
3. To enable multihead, click the Yes radio button next to Multihead feature enabled.
4. Notify users to log off to avoid losing their sessions.
When changing the Multihead feature, you have the option of resetting Sun Ray services. All other changes require you to restart Sun Ray services.
|
1. From the expanded navigation menu under Admin, click the Restart Services link.
The Sun Ray Services window is displayed.
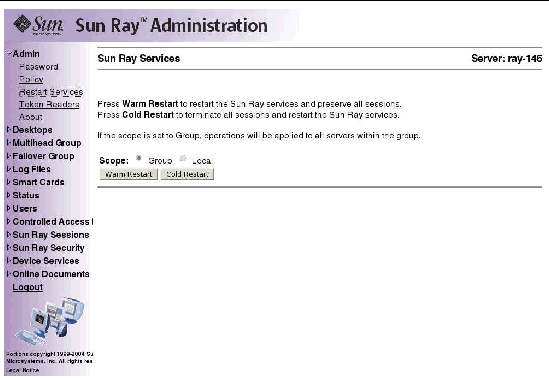
Sun Ray services are reset, and the sessions are preserved.
|
Note - Warm Restart provides the same functionality as the Reset button in earlier versions of Sun Ray Server Software. |
|
All sessions are immediately terminated, and Sun Ray services are restarted.
|
Note - In a failover group, you must initiate these functions from the primary server in the group. |
You can use the Administration Tool to create token readers and locate Sun Ray DTUs designated as token readers. Sun Ray DTUs configured as token readers do not support hotdesking. They display the token reader icon instead of a login dialog box.
A token reader is a Sun Ray DTU that reads a smart card and returns the card's ID. A valid ID allows you to add a user.
1. Click the arrow in front of Desktops to expand the navigation menu.
2. Click the View Current link.
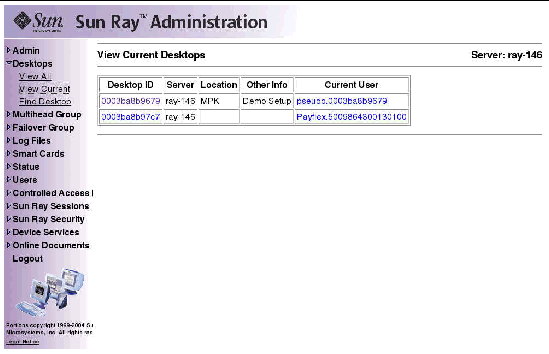
3. Select the desktop of the DTU you want to use as a token reader.
The Current Properties window is displayed.
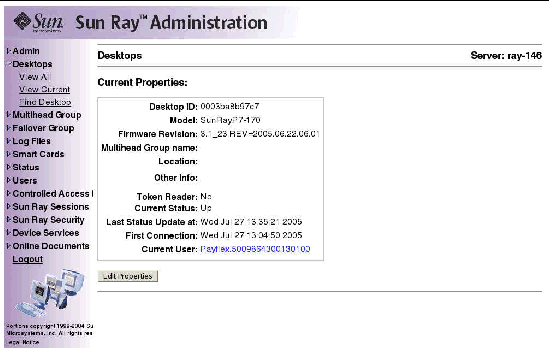
4. Click the Edit Properties button.
The Edit Desktop Properties window is displayed.
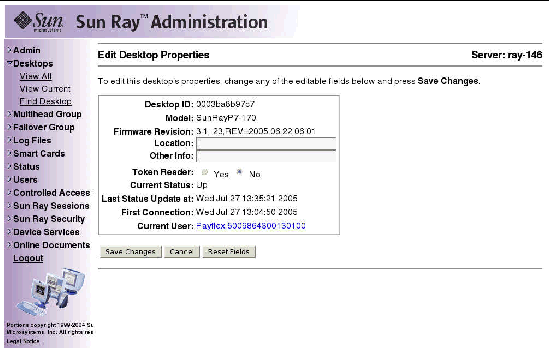
5. Next to Token Reader, select the Yes radio button.
6. Click the Save Changes button.
The DTU you have selected is now set up to read smart cards.
The DTU is now a token reader.
|
 From the expanded navigation menu under Admin, click the the View Current link to display a list of current token readers.
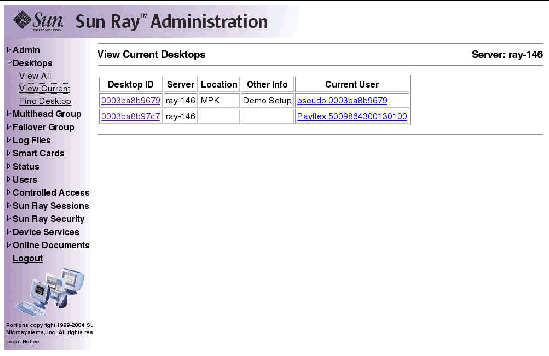
|
 Click the Desktop ID link in the Token Readers window.
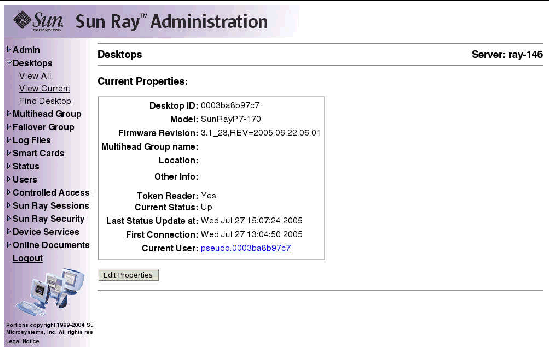
|
1. In the navigation menu, click the directional arrow to the left of Desktops to view the options.
2. To view all desktops, click View All.
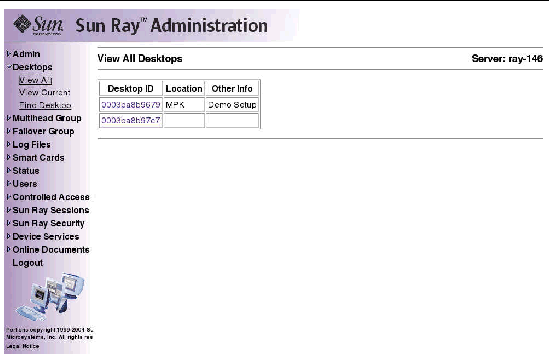
|
The Desktops Current Properties window is displayed (see FIGURE 3-7).
|
1. In the navigation menu, click the directional arrow to the left of Desktops to view the options.
The View Current Desktops window is displayed (see FIGURE 3-6). This window lists the desktops that are currently connected to this Sun Ray server and communicating with the Authentication Manager or with any other Sun Ray server in the same failover group.
|
 From either the View Current User window or the Desktops Current Properties window, click the link for Current User.
The Properties window for the Current User is displayed
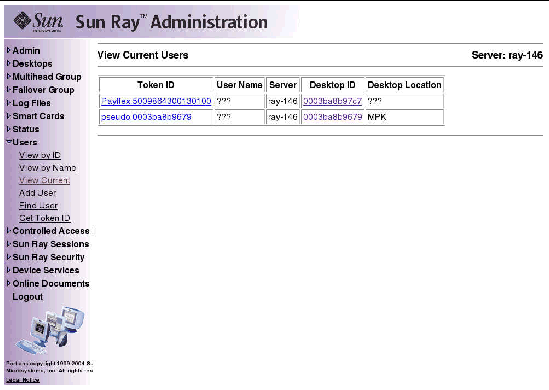
|
1. In the navigation menu, click the directional arrow to the left of Desktops to view the options.
The Find Desktop window is displayed.
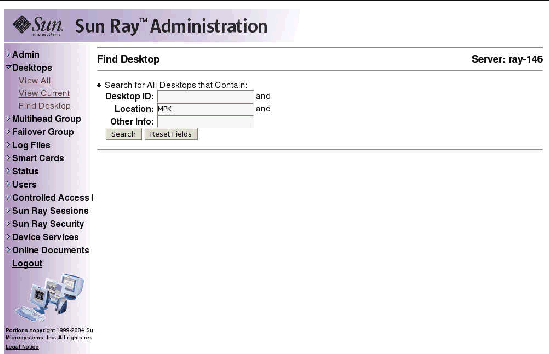
3. From the Find Desktop page, enter data into the Desktop ID, Location, and Other Info fields.
The Find Desktop window is redisplayed with all matches in the administration database.
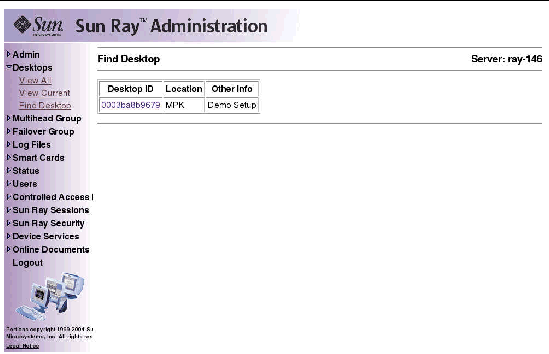
|
1. To display the Desktop Properties page for the desktop you want to edit, click the Desktop ID.
The Desktops Current Properties window is displayed (see FIGURE 3-7).
2. Click the Edit Properties button.
The Edit Desktop Properties window is displayed (see FIGURE 3-8).
3. Change the data in the text boxes as appropriate.
4. Click the Save Changes button to save the changes to the administration database.
The multihead feature allows users to control separate applications on multiple Sun Ray screens. Only a single keyboard and pointer device, attached to the primary DTU, are needed. The multihead feature also allows users to display and control a single application, such as a spreadsheet, on multiple screens.
System administrators create multihead groups so that users can access them. A multihead group, consisting of two or more DTUs controlled by one keyboard and mouse, can consist of Sun Ray 1, Sun Ray 100, Sun Ray 150, and Sun Ray 170 DTUs.
For further information on multihead implementations, see Chapter 9.
|
1. From the navigation menu, select the arrow to the left of Multihead Group to expand the menu.
The Multihead Groups window is displayed.
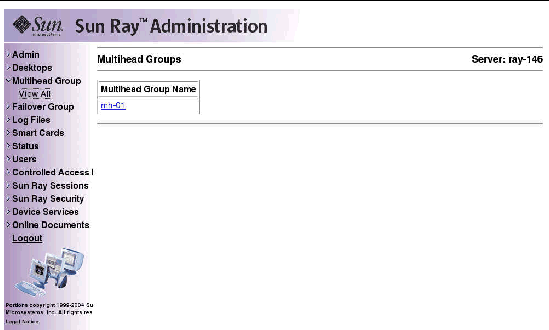
3. To view the properties for this group, click the Multihead Group Name link.
The Multihead Group Properties window is displayed.
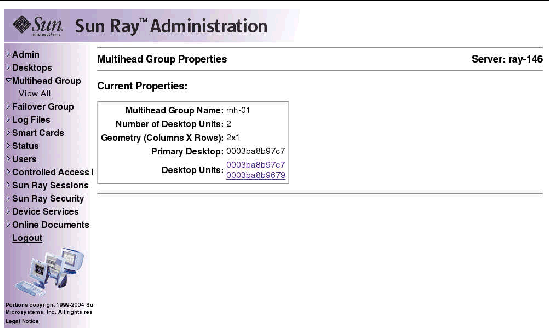
4. To display the Desktops Current Properties for the DTUs that are part of this group, click the Desktop Units links.
The Desktops Current Properties window for the link selected is displayed.
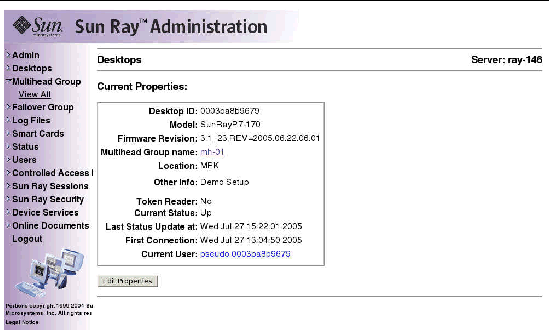
The Multihead Group name is displayed as a property of this desktop.
All Sun Ray device services are enabled by default. Sun Ray device services include USB devices connected through USB ports, internal serial ports, and internal smart card readers on the Sun Ray DTU.
To enable or disable these services, use the utdevadm command line tool (see ) or the Admin GUI as shown in this section.
|
1. From the navigation menu, select the arrow to the left of the Device Services in the navigation bar to expand the menu.
2. Click on Enable/Disable Services in the menu to display the USB Service window.
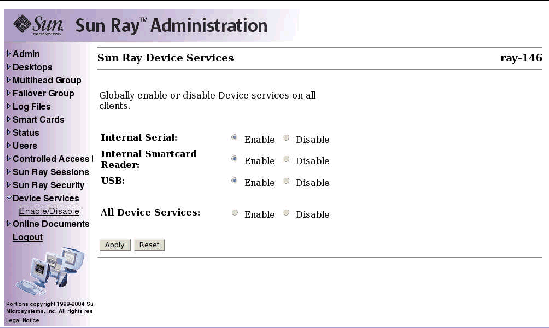
3. Toggle the Disable or Enable radio button.
4. Click Apply to make the relevant change.
|
Note - Sun Ray services must be restarted before these changes can take effect. |
Significant activity concerning files retrieved from the Sun Ray server is logged and saved. The server stores this information in text files. TABLE 3-1 describes the log files that are maintained.
|
Lists operations performed during server administration. This log is updated daily. Archived files are stored on the system for up to one week and are annotated using numeric extensions (for example, from filename admin_log.0 to admin_log.5). |
||
|
Lists events logged from the Authentication Manager. The auth_log file is updated (up to a limit of 10) every time the server's authentication policy is changed or started. The archived authentication files are annotated using numeric extensions (for example, from auth_log.0 to auth_log.9). |
||
|
Lists mount messages for mass storage devices. The archived mountd files are annotated using numeric extensions (for example, from utmountd.log.0 to utmountd.log.9). |
||
|
Lists mass storage device events. The archived storage files are annotated using numeric extensions (for example, from utstoraged.log.0 to utstoraged.log.9). |
||
|
Lists events from the server's DTUs, including details of registering, inserting, or removing smart cards. This file is updated daily. Archived files are stored on the server for one week annotated with numeric extensions (for example, from messages.0 to messages.5). |
|
1. From the navigation menu, select the arrow to the left of Log Files to expand the menu.
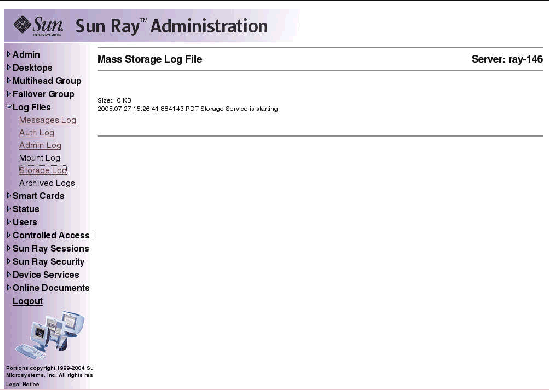
2. Choose the Log link you want to inspect: Messages, Auth Log, Admin Log, or Archived Logs, utmountd.log, or utstoraged.log.
The appropriate Log File window is displayed. Use the scroll bar to access data to the right and bottom of the window.
The information provided about smart cards is extracted from vendor-supplied configuration files. These configuration files are located in the directory: /etc/opt/SUNWut/smartcard. Configuration files must be formatted correctly, and file names must end with a .cfg suffix; for example, acme_card.cfg.
For certain vendors, the smart card may require additional software to enable the Sun Ray Server Software to probe for it. If required, this optional software must be supplied as Java classes in a Jar file. This file must end with a .jar suffix and must have the same pre-suffix filename as the .cfg file that contains its configuration information.
|
1. From the navigation menu, select the arrow to the left of Smart Cards to extend the menu.
The View Configured Smart Cards window is displayed. Smart cards are listed in probe order, i.e., the order in which they are inspected.
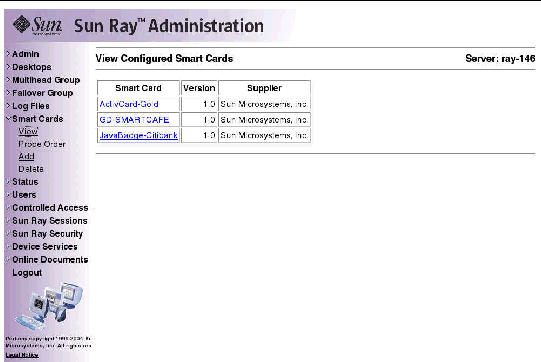
From this window an administrator can see the current list of smart cards as well as the supplier and version number for each card.
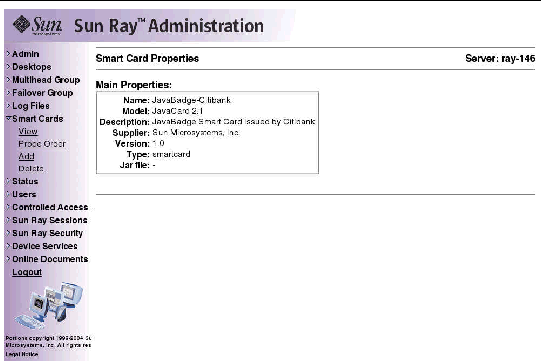
3. From the View Configured Smart Cards window, select the link for the smart card.
The main properties for the selected smart card are displayed in FIGURE 3-21.
|
 From the navigation menu under Smart Cards, click the Probe Order link.
The Smart Card Probe Order window is displayed.
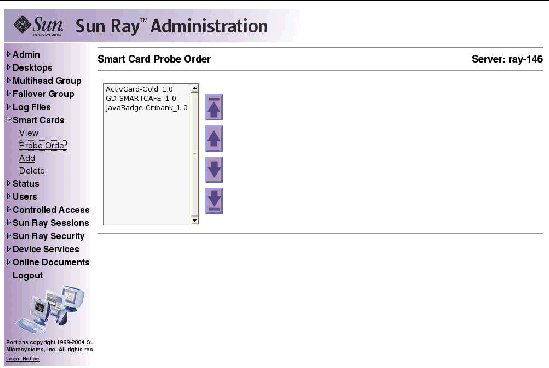
Smart cards are probed in the order in which they appear in this list.
|
Tip - As you add more cards, you can change the order of the cards to move those used most often to the top of the list. |
|
1. Select a smart card and press the appropriate up and down button.
Clicking on the first and last buttons (from top to bottom) moves the selected card to either the top or bottom of the list.
|
1. From the expanded navigation menu under Smart Cards click the Add link.
The Add Smart Cards to Probe List window is displayed.
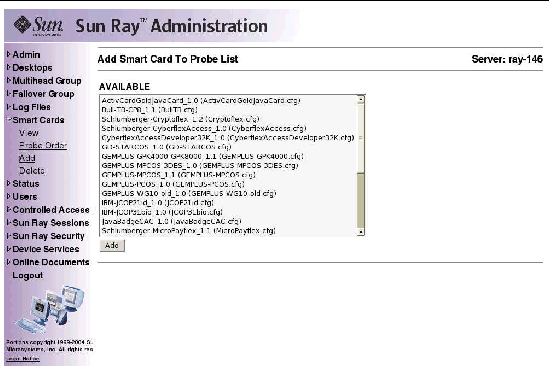
2. Select a smart card and click the Add button.
|
1. From the expanded navigation menu under Smart Cards, click the Delete link.
The Delete Smart Card From Probe List window is displayed.
|
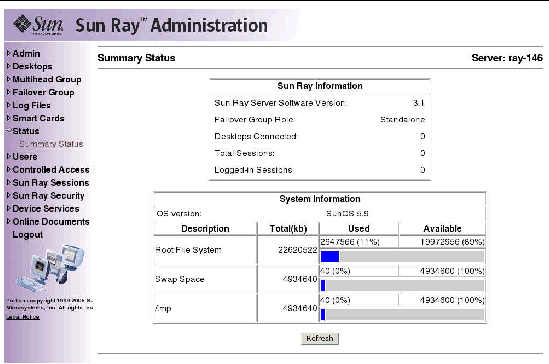
1. Click the directional arrow to the left of Status to expand the navigation menu.
2. Click the Summary Status link.
The Summary Status window is displayed.
You can specify the following user fields in the Sun Ray administration database:
|
Note - Sun Ray Server Software now supports multiple administration accounts. This feature is described in . |
|
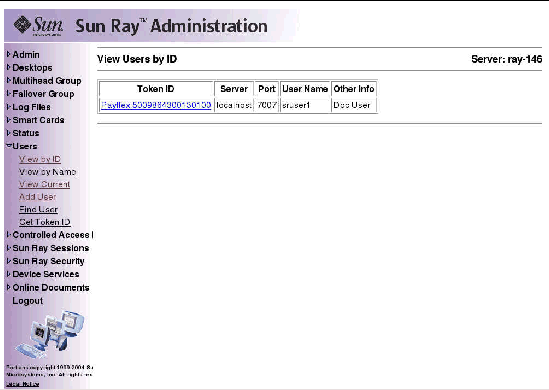
 From the expanded Users navigation menu, click the View by ID link.
The View Users by ID window is displayed. The list of all the users in the administration database is sorted by the Token ID field. If a user has multiple tokens, they are listed separately.
|
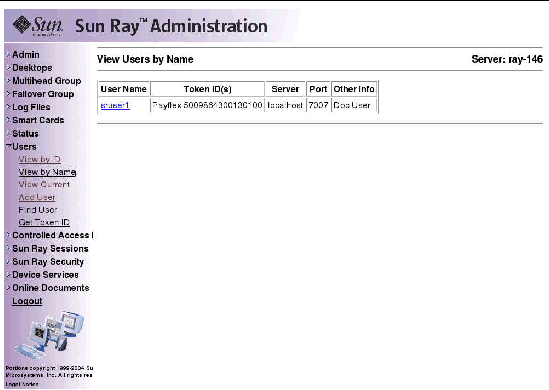
 From the expanded Users navigation menu, click the View by Name link.
The View Users by Name window is displayed, listing all the users in the administration database sorted by the User Name field. If a user has multiple tokens, they are grouped together with the name.
|
|
Caution - This operation deletes the user and all associated tokens. |
1. From the View by Name window, click the User Name of the user you want to delete.
The Current Properties window displays information about the user, host, token, and allows the administrator to edit the user's properties, delete the user, and view the user's session.
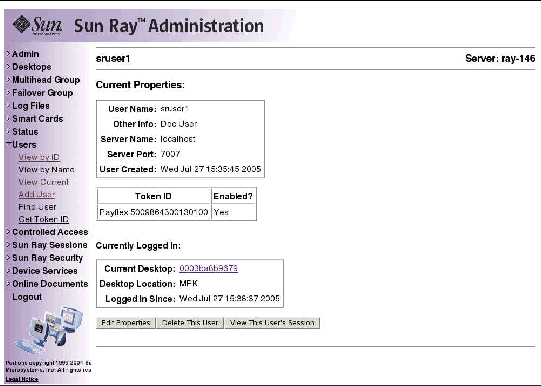
2. Press the Delete This User button.
The Delete User page is displayed.
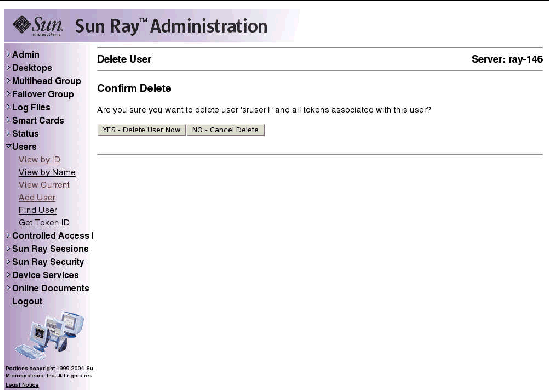
3. To delete the user, press the YES -- Delete User Now button.
To cancel this delete operation, press the NO -- Cancel Delete button. If you press YES, the user and all associated tokens are deleted from the administration database and a confirmation of your delete operation is displayed. If you press NO, you are returned to the Current Properties page.
|
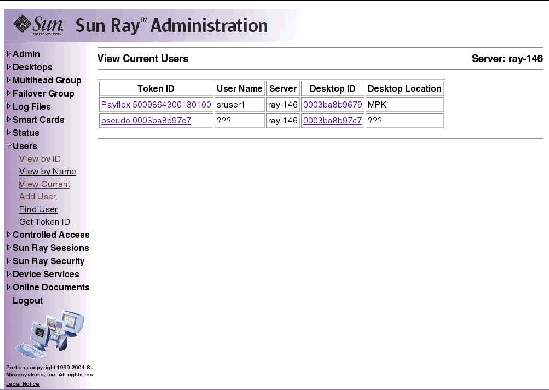
 From the expanded navigation menu under Users, click the View Current link.
The View Current Users window is displayed, listing users who currently have active sessions.
|
Note - The list of users conforms to policies established with utpolicy, with which you can enable display of registered users, unregistered users, or both. |
|
 Click the Token ID or User Name hyperlink for the user.
The Current Properties page for the user is displayed (see FIGURE 3-27). It displays the information about the user contained in the administration database, including the user's current login status.
For the last two states, the following fields are also displayed:
|
1. From the expanded menu under Users, click the Add User link.
The Add User window is displayed.
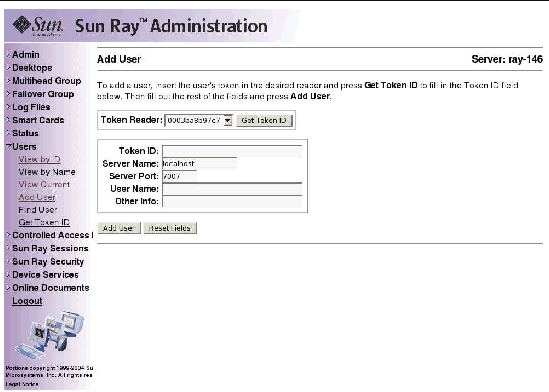
2. If you do not know the user's Token ID and have configured a token reader:
a. Insert the user's new card into the selected token reader.
b. Choose the selected token reader from the pull-down menu of available readers.
c. Press the Get Token ID button.
The application queries the token reader and, if successful, redisplays the form with the Token ID field filled out.
3. Enter data in the required fields.
The user and associated token are created in the administration database.
|
 If the user is currently logged in, view the user's session by clicking the View This User's Session button.
|
1. From the user's Current Properties page, press the Edit Properties button.
The Edit User Properties page is displayed.
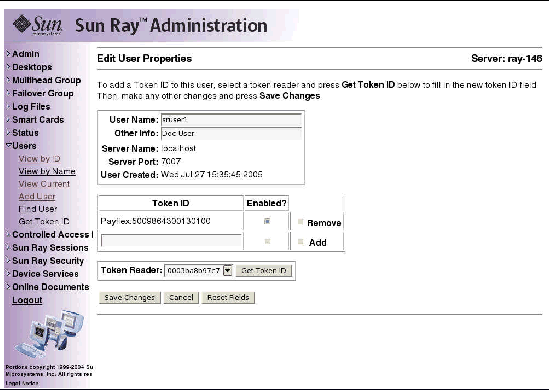
2. Make changes to any of the text boxes.
You can also add or remove tokens from a user at the same time.
3. When finished, press the Save Changes button.
The changes are saved to the administration database.
|
1. From the Edit User Properties page, type the new Token ID into the empty Token ID text field.
2. If you do not know the new Token ID and have configured a token reader:
a. Insert the user's new card into the selected token reader.
b. Choose the selected token reader from the pull-down menu of available readers.
c. Press the Get Token ID button.
The application queries the token reader and, if successful, redisplays the form with the Token ID text field filled out.
3. Check the Enabled checkbox next to the new Token ID.
4. Check the Add checkbox next to the new Token ID.
You can also make any other edits to the user at the same time.
5. Press the Save Changes button.
The changes are then added to the administration database.
|
1. From the Edit User Properties page, check the Remove checkbox for any token IDs you want to remove.
2. Press the Save Changes button.
The changes are then added to the administration database.
|
1. From the Edit User Properties page, check the Enabled checkbox for any token IDs you want to enable.
2. Uncheck the Enabled checkbox for any token IDs you want to disable.
3. Press the Save Changes button.
The changes are saved to the administration database.
|
1. From the expanded menu under Users, click the Find link.
The Find User window is displayed.
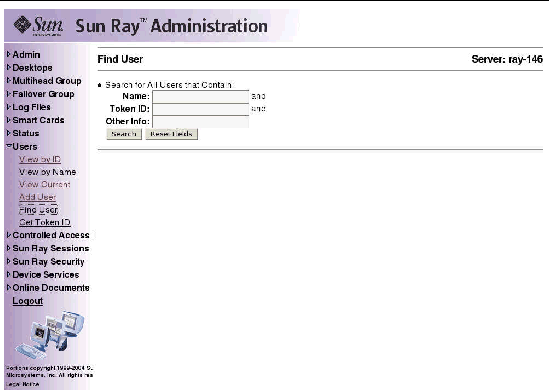
2. Enter data in the required fields.
|
1. From the expanded Users menu, click the Get Token ID link.
The Get Token ID window is displayed.
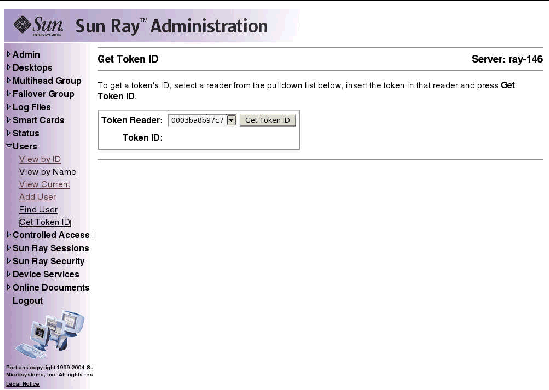
2. Insert the new card into the selected token reader.
3. Choose the selected token reader from the pull-down menu of available readers.
4. Press the Get Token ID button.
The application queries the token reader and redisplays the page with the Token ID field filled out.
A Sun Ray session is created when the user logs in to a Sun Ray DTU. The possible states for a Sun Ray session are shown in TABLE 3-4.
|
1. From the navigation menu, click the expansion arrow for Sun Ray Sessions.
2. From the expanded navigation menu, click the Find Sun Ray Sessions link.
3. In the text fields, enter the User Name, Token ID, or Unix Login Name.
If you enter data in error, press the Clear button to clear entered data. The Sun Ray Sessions window is displayed with the Sun Ray search results.
|
1. From the navigation menu, click the expansion arrow for Sun Ray Sessions.
2. From the expanded navigation menu, click the View by Server link.
Running sessions on the current server are displayed.
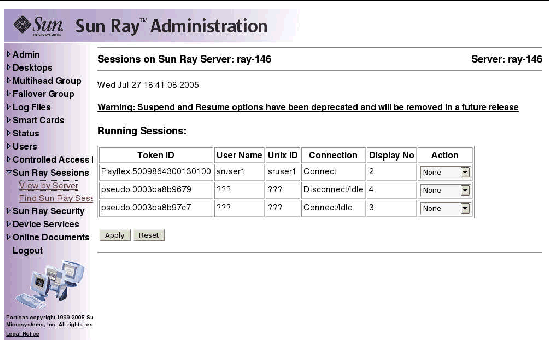
3. To change the state of any of the displayed sessions, use the Action pull-down menu button to display your choices.
The possible actions are: None and Terminate.
4. To apply your changes, click the Apply button.
Copyright © 2006, Sun Microsystems, Inc. All Rights Reserved.