Install Configuration
Pointing your browser at the administrative host, you perform this procedure after you have completed the procedures described in the preceding sections.
To Install Your Software Configuration
At this point, your proxy cache, array, and array member configuration is recorded in a configuration database. You need to install the configuration on all of the hosts in the array (including the administrative host) for your choices to take effect.
-
In the Proxy Cache Administration page, click Install Configuration.
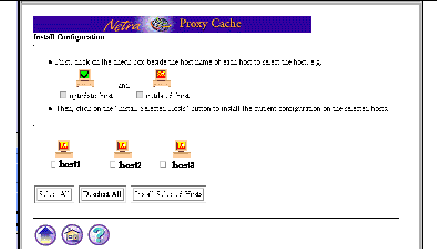
The Install Configuration page is displayed, as shown in Figure 3-16.
Figure 3-16 Install Configuration Page

The page shown in Figure 3-16 is an example. The Install Configuration page displays the hosts you have configured using the array member configuration procedure described in the preceding section. For first-time configuration, the icon for each host is displayed in orange, without a check mark, indicating the host needs updating with configuration information you have just specified.
The Install Configuration is redisplayed, with the check boxes next to each host name filled in, indicating selection.
-
Click Install Selected Hosts.
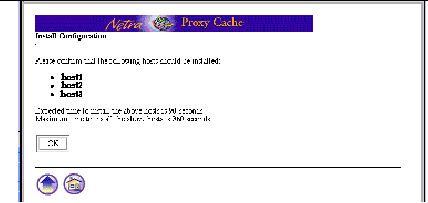
A page such as that shown in Figure 3-17 is displayed.
Figure 3-17 Install Configuration Confirmation

-
Click OK to start installation.
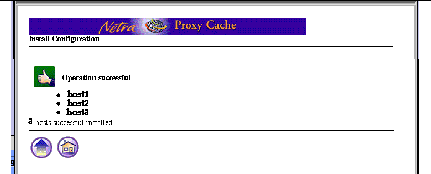
When installation completes, a page such as the following is displayed.
Figure 3-18 Installation Success

If installation fails for one or more hosts, note the reason in the page that reports the failure. The following conditions must be in effect for successful installation:
-
Each array member must be running and must be configured, as described in Chapter 2, Initial Host Configuration."
-
All host and service addresses must be unique and must have the same subnet number.
-
One host in the array must be configured as a DNS server for the array and must have a unique service address with the same subnet number as the host and proxy cache service addresses.
-
All control addresses must be unique and must have the same subnet number.
-
If you configured a local name service (not recommended), you might have made a mistake so that, for example, on one or more hosts, the loopback interface is configured with the host address.
There are other, relatively remote possibilities, such as the update process being dead on a given array member. You could probably correct such an obscure problem by rebooting the affected host.
In the event of installation failure, consult the error logs.
To view installation error logs:
-
Click the home icon to load the Main Administration page.
-
Click Proxy Cache Service to load the Proxy Cache Administration page.
-
Under the Monitoring heading, click Log Files.
-
In the Proxy Cache Log Administration page, click View for the Administration Client Error log or the Configuration Installation Error log.
-
Following a successful installation, click the up-arrow icon, to return to the Install Configuration page.
The appearance of the host icons in the Install Configuration page changes to show a check mark. This check mark indicates that a host has received an updated configuration.
-
Click the up-arrow icon.
You return to the Proxy Cache Administration page.
-
Following a successful installation, click on the home icon to return to the Main Administration page.
-
At this point, the only task remaining to make your Netra Proxy Cache Array fully operational is to configure the DNS to delegate the domain of the Netra Proxy Cache Array to the array DNS server (by that server's DNS service address). This task is described in "Updating the DNS".
Before performing DNS configuration, use a link in the Netra Main Administration page to backup your Netra Proxy Cache Server configuration. This configuration includes Solaris, proxy cache, and array data.
- © 2010, Oracle Corporation and/or its affiliates
