| Skip Navigation Links | |
| Exit Print View | |

|
Sun Blade X3-2B Product Documentation |
Sun Blade X3-2B Model Name Change
Getting the Latest Firmware and Software
Hardware Installation and Product Notes
About the User Administration Guide
Planning the System Management Environment
Choosing Tools for Single System Management
Choosing Tools for Multiple System Management
System Management Tools Overview
Oracle Integrated Lights Out Manager (ILOM)
Oracle Hardware Management Pack
Common System Management Tasks
Common System Administrative Tasks
Evaluating the Server Environment
Planning for Operating System Installation
Planning for System Component Updating and Monitoring
Planning for Modular System Management
Installing System Management Tools
Server Management Documentation
Accessing System Management Tools
Access Oracle System Assistant
Access Oracle System Assistant Locally
Access Oracle System Assistant Remotely
Access Oracle System Assistant Using Oracle ILOM CLI
About Oracle ILOM Password Security
Access Oracle ILOM Using a Web Browser
Change Default Oracle ILOM Password
Access Oracle Hardware Management Pack
Access Oracle Hardware Management Pack From Oracle System Assistant
Access Oracle Hardware Management Pack From My Oracle Support
Setting Up Oracle System Assistant and Updating the Server
Setting Up Oracle System Assistant
Organization of Oracle System Assistant
Provisioning the Server for Operation
View the Server Product Notes and Documentation
View System Overview Information
View System Inventory Information
Get Updates of Platform Software Release
Configure MOS to Enable Oracle System Assistant Updates
Update Oracle System Assistant When Online Access to MOS is Not Available
View Oracle System Assistant Release Notes
Oracle System Assistant Administrative Tasks
Troubleshooting and Verifying Oracle System Assistant
Troubleshoot and Verify Oracle System Assistant
Performing Advanced Maintenance, Security, and Configuration Tasks
Recover Oracle System Assistant Software
Disable Oracle System Assistant Using the UI
Enable (or Disable) Oracle System Assistant Using the BIOS Setup Utility
Access the Firmware and Software on the Oracle System Assistant USB Flash Drive
Mounting the Oracle System Assistant USB Flash Drive
Access Oracle System Assistant Shell
Configure Hardware for Oracle ILOM SP
Backup, Restore, and Revert BIOS Settings
View Oracle System Assistant Product Documentation From the OS
Setting Up Software and Firmware
Set Up Software and Firmware Using Oracle System Assistant
Set Up Software and Firmware Using Oracle ILOM
Set Up Software and Firmware Using Oracle Hardware Management Pack
Managing Server Policies Using Oracle ILOM
Oracle ILOM Features for x86 Sun Servers
Service Processor Power-On Policies
Power Management Policies Supported
Diagnostics Using Pc-Check and NMI
Switch Serial Port Output to Host Management Console
Back Up and Restore BIOS Configuration
Configure Management Policies Using Oracle ILOM Web Interface
Configure Management Policies Using Oracle ILOM CLI
Oracle Recommendations for Drive Slot Population and Virtual Drive Creation
Creating a RAID Volume Before Installing an Operating System
Creating a RAID Volume After Installing an Operating System
Setting Up the Server With BIOS Setup Utility
Access BIOS Setup Utility Menus
Navigate BIOS Setup Utility Menus
BIOS Setup Utility Menu Overview
Selecting Legacy and UEFI BIOS
Configuring the UEFI BIOS Boot Mode
Selecting Legacy BIOS or UEFI Boot Mode
Configuration Utilities for Add-In Cards
Select UEFI or Legacy BIOS Boot Mode
Common BIOS Setup Utility Tasks
Verify BIOS Factory Default Settings
Legacy BIOS Option ROM Allocation Considerations
Configuring Option ROM Settings
Enable or Disable I/O Resource Allocation
BIOS Setup Utility Screen Reference
BIOS UEFI Driver Control Menu Selections
BIOS Save & Exit Menu Selections
BIOS LSI MegaRAID Configuration Utility Screen Reference
Accessing BIOS LSI MegaRAID Configuration Utility Controller Management Menus
BIOS LSI MegaRAID Configuration Utility Controller Management Selections
BIOS LSI MegaRAID Configuration Utility Drive Management Menu Selections
BIOS LSI MegaRAID Configuration Utility Virtual Drive Management Menu Selections
BIOS LSI MegaRAID Configuration Utility Enclosure Management Menu Selections
Identifying Hardware Components and SNMP Messages
Identifying System Hardware Components
System Board Components (Sensors)
Field Replaceable Units (FRUs)
Getting Server Firmware and Software
Firmware and Software Access Options
Available Software Release Packages
Accessing Firmware and Software
Download Firmware and Software Using My Oracle Support
iSCSI virtual drives are used primarily to run supported operating systems that reside on an external server that function as the Sun Blade X3-2B host operating system.
iSCSI virtual drives must be configured in the iSCSI BIOS Setup Utility screens. You must set the iSCSI parameters on the selected port.
Before You Begin
You should be familiar with iSCSI theory of operation for the selected OS.
Refer to the OS documentation to verify that iSCSI targets can be mounted on a client.
You will need access to an external iSCSI server running on any supported OS.
The Sun Blade X3-2B must be in UEFI boot mode, not legacy boot mode. See Select UEFI or Legacy BIOS Boot Mode.
You must provide the following information from the iSCSI target server. The following items are entered in to the Sun Blade X3-2B ISCSI BIOS Setup Utility screens:
| ||||||||||||||||||
Use this procedure to configure iSCSI virtual drives in the ISCSI BIOS Setup Utility.
Note - Ensure Legacy boot mode is not enabled.
A list of all controllable devices appears.
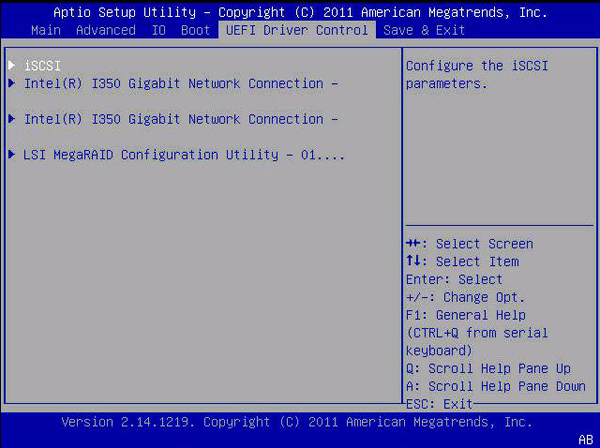
The iSCSI Initiator Name dialog appears.
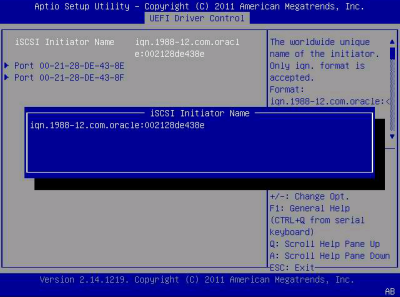
iqn.1988-12.com.oracle:000000000000
Port 00-11-22-DD-2E-AB.
The port configuration screen appears.
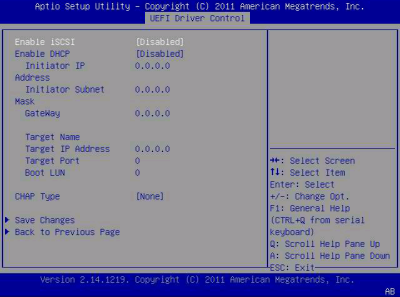
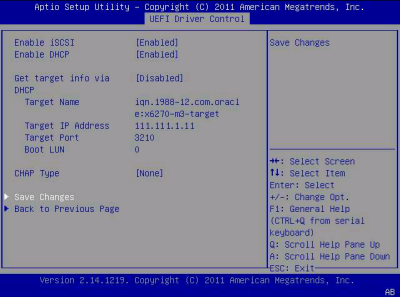
Select Enable iSCSI, and then select Enabled or Disabled.
The Initiator IP address, Initiator Subnet Mask, and GateWay settings are removed.
If you set DHCP to disabled:
Note - Use the same subnet.
The Target Name dialog appears.
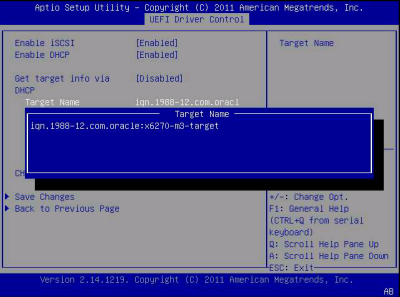
iqn.1988-12.com.oracle:x6270-m3-target
The Target IP address dialog appears.
111.111.1.11.
3210.
Note - When iSCSI is enabled on a network port, PXE is disabled for that port.
The Boot LUN dialog appears.
0.
The Please Select Boot Device dialog box appears.