14 Create a J2EE Server Container
This chapter discusses:
-
Section 14.1, "Create a J2EE Server Container for the Oracle Application Server (OAS)"
-
Section 14.2, "Create a J2EE Server Container for the WebSphere Application Server (WAS)"
-
Section 14.3, "Create a J2EE Server for an Oracle WebLogic Server Domain"
-
Section 14.4, "Install or Uninstall JDBC Drivers to the J2EE Server (WLS or WAS)"
14.1 Create a J2EE Server Container for the Oracle Application Server (OAS)
Note:
There is a one-to-one relationship between a web-based server and a J2EE Server Container. You cannot install more than one web-based server in each J2EE Server Container.To create a J2EE Server Container:

-
Select the existing Managed Instance for a running Oracle Application Server Managed Instance with which you wish to create a new J2EE Server Container.
-
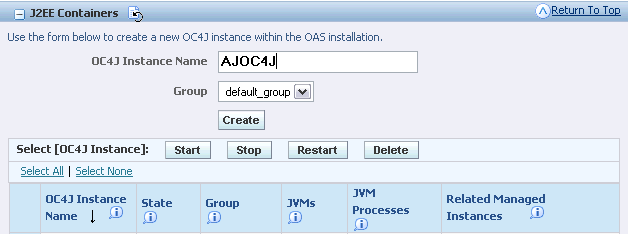
In the J2EE Containers section of the page, use the form below to create a new OC4J instance within the OAS installation by completing these fields:
-
OC4J Instance Name
Enter a unique name for this OC4J instance.
-
Group
Select the Oracle Application Server defined group in which to create the new OC4J instance.
-
-
Click the Create button.
-
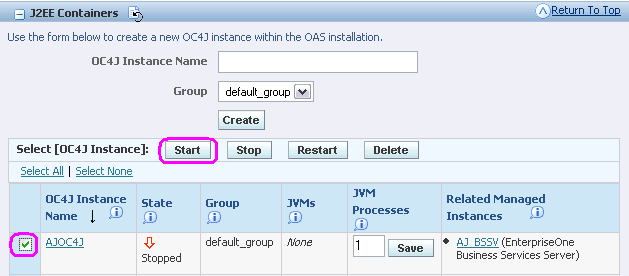
On J2EE Server Containers, select the J2EE Server Container that you just created and click the Start button.
Note:
While technically you are not required to start the J2EE Server Container, it is good practice to ensure that it is properly created and able to start. Otherwise, it might not start as expected during the installation process for a JD Edwards EnterpriseOne web-based server.Tip:
The Server Manager displays a progress monitor indicating that the Start operation is in progress and will continue even if you close the browser. After the progress monitor is no longer displayed, you can refresh the Management Console page to verify that the newly-created J2EE Server Container starts as expected.
Note:
If you do not install the JDBC drivers before installing the Web-Based Server Instance, the Web-Based Server Instance will not be able to start as expected at the end of the installation. Refer to Section 14.4, "Install or Uninstall JDBC Drivers to the J2EE Server (WLS or WAS)"14.2 Create a J2EE Server Container for the WebSphere Application Server (WAS)
Note:
There is a one-to-one relationship between a web-based server and a J2EE Server Container. You cannot install more than one web-based server in each J2EE Server.To create a J2EE Server Container:

-
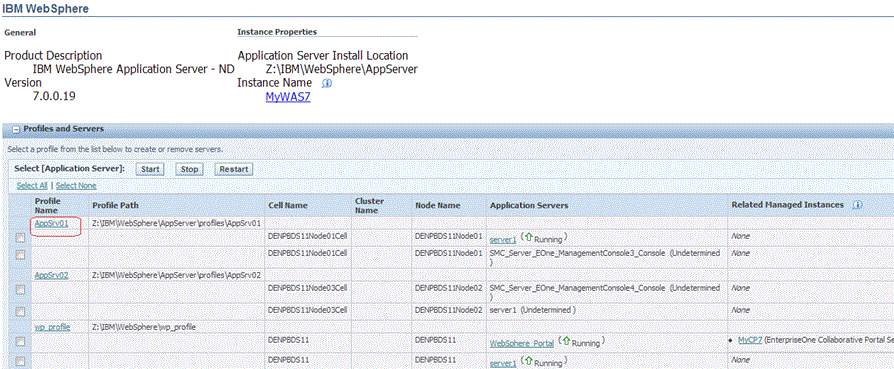
Select the existing Managed Instance for a running WebSphere Application Server with which you wish to create a new J2EE Server Container.
-
In the Profiles and Servers section of the page, click the on an existing Profile Name.
Tip:
If you plan to use this J2EE Server Container to run a JD Edwards EnterpriseOne Business Services Server, you should select a secure profile. This profile must be created and configured within the WebSphere Application Server itself.
-
On the J2EE Servers section of the page, use the form to create a new J2EE Server Container, complete these fields:
-
Node Name
Use the dropdown to select an existing node name.
-
Server Name
Enter a unique name for this J2EE Server Container.
-
-
Click the Create Server button.

-
On the J2EE Servers section of the page, select the J2EE Server Container that you just created and click the Start button.
Note:
While you are not required to start the J2EE Server, it is good practice to ensure that it is properly created and able to start. Otherwise, it might not start as expected during the installation process for a JD Edwards EnterpriseOne web-based server.Tip:
The Server Manager displays a progress monitor indicating that the Start operation is in progress and will continue even if you close the browser. After the progress monitor is no longer displayed, you can refresh the Management Console page to verify that the newly-created J2EE Server starts as expected.
Note:
If you do not install the JDBC drivers before installing the Web-Based Server Instance, the Web-Based Server Instance will not be able to start as expected at the end of the installation. Refer to Section 14.4, "Install or Uninstall JDBC Drivers to the J2EE Server (WLS or WAS)".14.3 Create a J2EE Server for an Oracle WebLogic Server Domain
Note:
There is a one-to-one relationship between a web-based server and a J2EE Server. You cannot install more than one web-based server in each J2EE Server.To create a J2EE Server for an Oracle WebLogic Server domain:
-
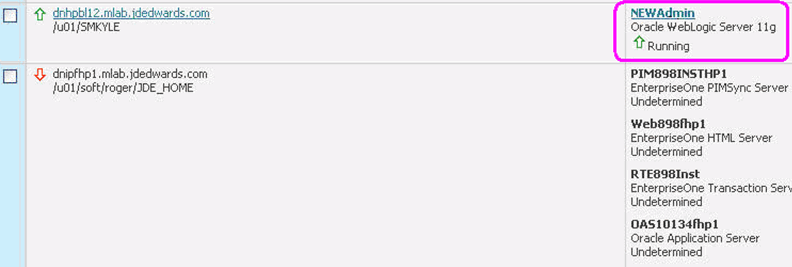
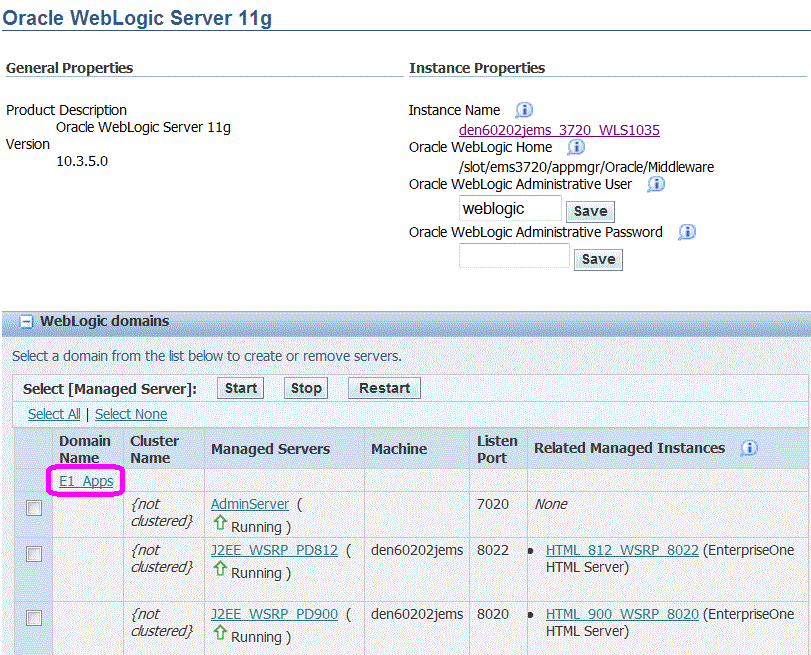
Select the existing Managed Instance for a running Oracle WebLogic Server Managed Instance with which you wish to create a new Server.
-
In the Oracle WebLogic domains section, click on the link for the domain into which you want to create a new Oracle WebLogic Server.
For example, in the above screen shot, the Oracle WebLogic Server Domain is E1_Apps.
-
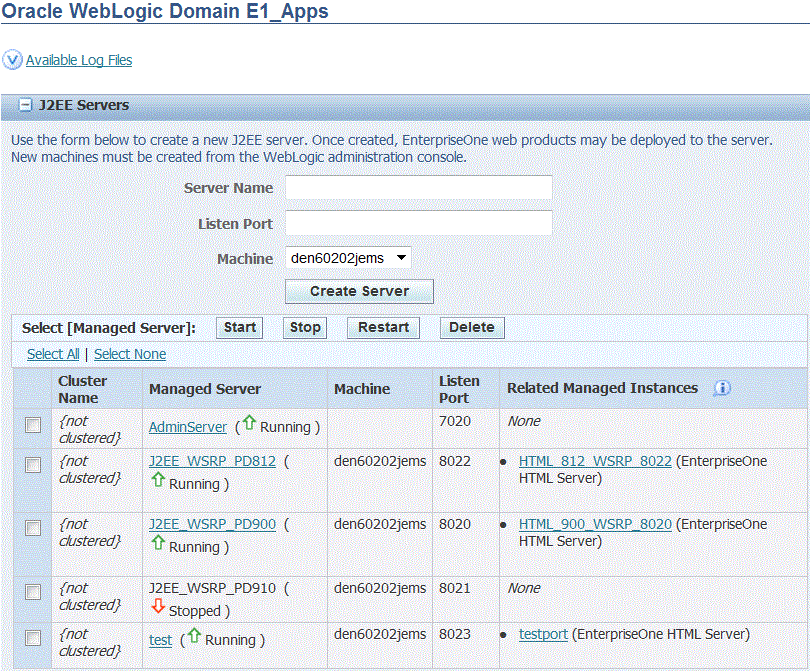
In the J2EE Server section of the page, use the form to create a new J2EE Server instance within the Oracle WebLogic Server domain by completing these fields:
-
Server Name
Enter a unique name for this Oracle WebLogic Server instance.
-
Listen Port
Enter a unique port number. This Oracle WebLogic Server must listen on a port that is different from all of the others servers in the domain.
-
Machine
Use the pull-down to select an existing machine to which this Server is associated. The machine must have already been created in the Oracle WebLogic Server Admin Console.
Note:
All Servers created within Server Manager must be associated with a machine so that they can be started and stopped through Server Manager.
-
-
After the above three (3) fields are complete, click the Create Server button.
-
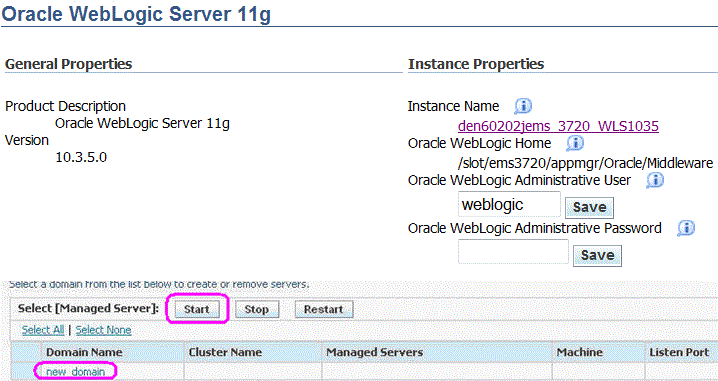
On the J2EE Servers section of the page, select the J2EE Server that you just created and click the Start button.
Note:
While technically you are not required to start the Oracle WebLogic domain, it is good practice to ensure that it is properly created and able to start. Otherwise, it might not start as expected during the installation process for a JD Edwards EnterpriseOne web-based server.Tip:
Server Manager displays a progress monitor indicating that the Start operation is in progress and will continue even if you close the browser. After the progress monitor is no longer displayed, you can refresh the Management Console page to verify that the newly-created Oracle WebLogic Domain starts as expected.
Note:
If you do not install the JDBC drivers before installing the Web-Based Server Instance, the Web-Based Server Instance will not be able to start as expected at the end of the installation. Refer to Install or Uninstall JDBC Drivers to the J2EE Server (WLS or WAS).
14.4 Install or Uninstall JDBC Drivers to the J2EE Server (WLS or WAS)
After you have created a J2EE Server (WLS or WAS), you must ensure that requisite JDBC drivers are installed in the J2EE Server, as applicable. Select the database drivers that are required for the connection with your JD Edwards EnterpriseOne database server. If you have not already uploaded JDBC drivers to your Management Console, refer to Manage JDBC Drivers. Some versions of WebLogic Server automatically have a bundled Oracle Database JDBC driver already installed and configured. The JDBC driver install step is not needed if connecting to an Oracle database that is supported with the WebLogic bundled JDBC driver.
In addition to and in conjunction with the procedure previously described in Manage JDBC Drivers this section describes:
14.4.1 Install JDBC Drivers to the J2EE Server (WLS or WAS)
To install JDBC drivers to the J2EE Server (WLS or WAS):
-
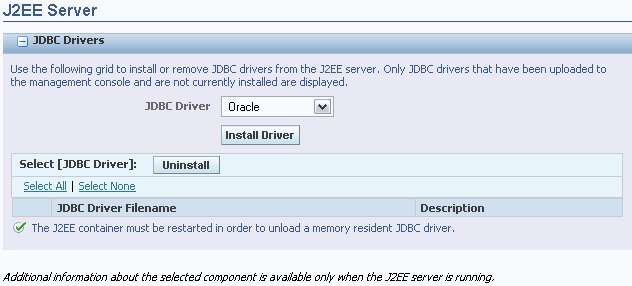
Click the link for a J2EE Server (WLS or WAS).
-
Use the JDBC Driver dropdown to select the JDBC driver to install.
Note:
Only JDBC drivers that have been uploaded to the management console but are not currently installed are displayed. -
Click the Install Driver button.
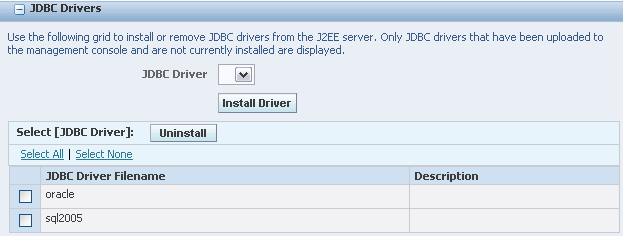
Server Manager installs the driver and adds it to the list of JDBC drivers that can be uninstalled.
14.4.2 Uninstall JDBC Drivers from the J2EE Server (WLS or WAS)
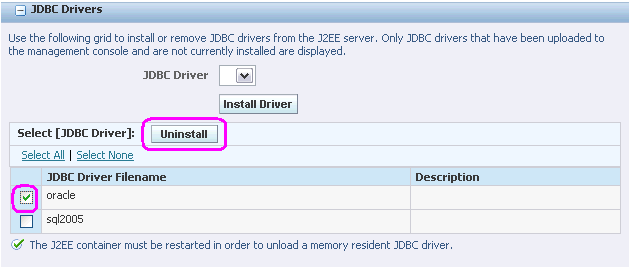
To uninstall a JDBC driver from a J2EE Server (WLS or WAS):
-
From the JDBC Drivers section of the page, select the JDBC Driver Filename to be deleted.
-
Click the Uninstall button.
Note:
If you Uninstall a JDBC driver, the J2EE Server (WLS or WAS) must be restarted in order to unload a memory resident JDBC driver.