4 Installing the Standalone Client
This chapter contains the following topics:
4.1 Overview
Before You Begin
-
Verify that your system meets the Minimum Technical Requirements.
You can install the Standalone Client from a copy of the installation DVDs or a download from Oracle Software Delivery Cloud. Refer to Chapter 3, "Installation Methods"for additional details.
Notes:
Assumptions. Because you are installing from either a copy of the installation DVDs or a download from Oracle Software Delivery Cloud, the installation program will be in the directory into which you expanded the DVDs or downloaded files. If you followed the recommendation, this directory is:C:\Standalone_9.10
As is the case with all installations on Microsoft Windows machines (including Microsoft Windows 7), in order to run the installer for the Standalone Client, you must be logged onto Microsoft Windows as a user with Administrator rights.
Installing the Standalone Client involves first installing a local database and then installing the actual EnterpriseOne Standalone Client. Follow the instructions in the next two sections to install the database and client.
4.2 Understanding Destination Paths
As of Tools Release 9.1, the Standalone Client is installed using the Oracle Universal Installer (OUI) version 11.2. In addition, the Web Client component is installed as a package feature using OUI.
Each Oracle product that is installed on a machine is installed into an Oracle Home directory or path. This is a directory that contains most of the files associated with the product. This path has a name as well. You can specify a name that is intuitive so you do not have to remember the path.
When you install the Oracle Enterprise Edition (OEE) database engine on the Standalone Client's workstation, by default the Oracle Home path will be:
c:\Oracle\E1Local
The value E1Local cannot be changed, but you may specify another drive and/or directory instead of the default value, which is c:\Oracle. The Oracle Home name for the OEE database is E1Local.
When you install the Standalone Client, you specify an Oracle Home path and name for that installation as well. For example, you may enter C:\JDEdwards\E910 as the Oracle Home path and JDE_Standalone_Home as the Oracle Home name.
Caution:
Do not specify a path with a space in its name.Following the above examples, you would now have two Oracle Homes:
-
The first Oracle Home is the Oracle Home of the database; it has these properties:
-
Oracle Home Path
C:\Oracle\E1Local -
Oracle Home Name
E1Local
-
-
The second Oracle Home is the Oracle Home of the Standalone Client; it has these properties:
-
Oracle Home Path
C:\JDEdwards\E910 -
Oracle Home Name
JDE_Standalone_Home
-
During the installation of a Standalone Client installation package, OUI will copy the files from the package to subdirectories under the Oracle Home path and then perform the necessary configurations. In addition, it places a copy of OUI into the Oracle Home Path.
OUI also creates a submenu of items in the Start > All Programs menu. This submenu is named "Oracle - <Oracle_Home_Name>" where <Oracle_Home_Name> is the name that the user specified during the installation. This submenu will include a link to the EnterpriseOne Solution Explorer and another submenu for Oracle Installation Products. Oracle Installation Products includes a link to the copy of OUI that is in the Oracle Home Path. Although you can run other copies of OUI to deinstall (remove) the EnterpriseOne Standalone Client, it is safest to deinstall using the link in Start > All Programs > Oracle - Oracle_Home_Name > Oracle Installation Products > Universal Installer.
4.3 Installing the Local Database
This release of the Standalone Client contains a 64-bit version of Oracle Enterprise Edition (OEE) 11gR2. Thirty-two bit OEE 11gR2 is not supported on 64-bit versions of Windows. If you previously had installed 64-bit OEE 11gR2 as the local database and you are reinstalling the Standalone Client, you do not have to reinstall the database first. However, if you previously had installed OEE 10g or you need to reinstall the 11gR2 database for some reason, follow the instructions in the section of this guide entitled: Section 9.2, "Deinstalling the OEE Database (optional)".
Caution:
It is very important that no files exist in the "E1Local" subdirectory when you next attempt to install the OEE database. If any files do exist, the OEE installation will probably fail.When OEE is installed, it will be installed into a subdirectory called E1Local under a database target directory. By default, this database target directory is C:\Oracle. This means that the database will be installed into C:\Oracle\E1Local by default.
If you cannot delete the E1Local subdirectory because a file in that directory is locked, follow these steps:
-
Determine which file is locked and which process has the lock on the file. A freeware program called Process Explorer can be helpful in determining this information. You can obtain a free copy of Process Explorer from this web site:
-
Either kill the locking process with Process Explorer or Microsoft Windows Task Manager or, if the process was started as a Microsoft Windows service, change the Startup Type to Manual and reboot the computer again.
-
Try again to delete the
E1Localsubdirectory.
To run the local database installer:
-
Launch
InstallManager.exefrom the temporary installation directory. For example:\Standalone_910Note:
When running the installation program and UAC is turned on, you must right click on the executable or shortcut and select Run as Administrator.
-
On JD Edwards Install Manager, click this link:
EnterpriseOne Database Engine
If the database is already installed, the program will display a message indicating that condition. If the database is not installed, you may be prompted for the target directory for the database. The default location is
C:\Oracle. The database will be installed into a folder calledE1Localunder the target directory. For example:C:\Oracle\E1LocalThe
InstallManager.exedecompresses the.cabfiles using theOEESetup.exeprogram. The status of the decompression is displayed in a Command window. If the decompression appears to hang, it may be because you did not run as an administrator, or you did not extract all the expected.cabfiles from the.zipfiles.After the
.cabfiles are decompressed,OEESetup.execontinues through various phases of the installation. This process can take quite awhile, perhaps up to 30 minutes. During these phases, multiple Command windows will open and close as the installation continues. Lastly the installation copies the database files and then performs Oracle database instance functions, while indicating progress. After the installation completes successfully, all Command windows are closed and this dialog is displayed:
-
When the installation of the database finishes, the Reboot dialog is displayed. You must reboot before you can continue with the installation of additional EnterpriseOne Standalone components.
Caution:
Examine the Installer Logs. Even though the screen says that the installation was successful, you should perform a quick determination that all the database installation steps were successful before clicking Exit. Follow these steps:-
From Control Panel, run Administrative Tools / Services.
-
In the list of Services, look for the services named OracleE1LocalTNSListener and OracleServiceE1LOCAL.
-
If either one of these is missing, there was a problem in completing all the installation and configuration steps. Examine these logs:
c:\OEEInstall.logc:\Oracle\cfgtoollogsc:\Oracle\E1Local\cfgtoollogsYou will probably need to deinstall the database engine using the steps in Section 9.2, "Deinstalling the OEE Database (optional)", reboot, and then reinstall the OEE database.
-
-
Reboot your machine.
-
Install 32-bit database drivers.
Note:
64- vs. 32-bit Oracle database drivers. Because JD Edwards EnterpriseOne is a 32-bit program, it needs to load 32-bit Oracle database driver DLLs; however, you should have installed a 64-bit Oracle database in the steps above. Therefore, you also need to install 32-bit Oracle database driver DLLs. These 32-bit DLLs are provided by a 32-bit Oracle database client. You can download the 32-bit Oracle database client from the Oracle Software Delivery Cloud:From that site, search for:
Oracle Database 11g Release 2 Client (11.2.0.1.0) for Microsoft Windows (32-bit), Oracle part number V20606-01
When installing the database client, be sure to select "Runtime" on the Select Installation Type screen.
Caution:
PATH environment variable. When you installed the 64-bit Oracle database, the installer placed the path to the database (for example,c:\Oracle\E1local\bin) at the start of the Windows PATH environment variable. Then when you installed the 32-bit Oracle database client, the installer placed the path to the database client (for example, c:\Oracle\product\11.2.0\client_1\bin) at the start of the Windows system PATH.
When EnterpriseOne runs, it looks for database drivers in each directory from start to finish in the PATH. The first occurrence of a driver DLL that EnterpriseOne finds will be loaded. This means that the path to the 32-bit Oracle database client must come before the path to the 64-bit Oracle database.
If you installed the 64-bit database and 32-bit database client in that order, the order in the PATH should be correct. However, if you installed them in the opposite order, you need to correct the order in the PATH.
To reverse the order of the 64-bit database and 32-bit database client paths in the Windows PATH, follow these steps:
-
From the Start button, select Control Panel and then System.
-
On the left side of the window that comes up, click Advanced system settings.
-
Click the Advanced tab.
-
Click the Environment Variables… button.
-
In the "System variables" box, highlight the variable Path and click the Edit… button.
-
In the Variable value field, cut the 32-bit database client path and the following semicolon. For example:
c:\Oracle\product\11.2.0\client_1\bin; -
Paste the client path and semicolon at the start of the Path value.
-
Click OK.
-
Click OK to exit from the Environment Variables window.
-
Click OK to exit from the System Properties window.
-
Close the System window of the Control Panel.
Note:
Multiple copies of the tnsnames.ora. Various components of EnterpriseOne and the Oracle database look for copies oftnsnames.ora in different paths. For EnterpriseOne and the Oracle database to work correctly all of these copies of tnsnames.ora must contain identical information.
The Standalone Client installer will copy the tnsnames.ora to the places that EnterpriseOne uses; however, it cannot copy them to the locations required by the 64-bit Oracle database and the 32-bit Oracle database client. You must manually copy the tnsnames.ora to locations under the Oracle database and the database client installation directories using these steps:
-
Copy the
tnsnames.ora:from:
\Standalone_9.10\client\tnsnames.orato:
<64-bit Oracle Database Install Dir>\network\adminFor example:
c:\Oracle\E1Local\network\admin -
Copy the
tnsnames.ora:from:
\Standalone_9.10\client\tnsnames.orato:
<32-bit Oracle Client Install Dir>\network\adminFor example:
c:\Oracle\product\11.2.0\client_1\network\admin
4.4 Installing the EnterpriseOne Client
To run the EnterpriseOne Client installer
-
Launch
InstallManager.exefrom the temporary installation directory (for example,\Standalone_910).Note:
When running the installation program and UAC is turned on, you must right click on the executable or shortcut and select Run as Administrator. -
On JD Edwards Install Manager, click this link:
EnterpriseOne E910 Standalone Client
-
On Welcome, click the Next button.
-
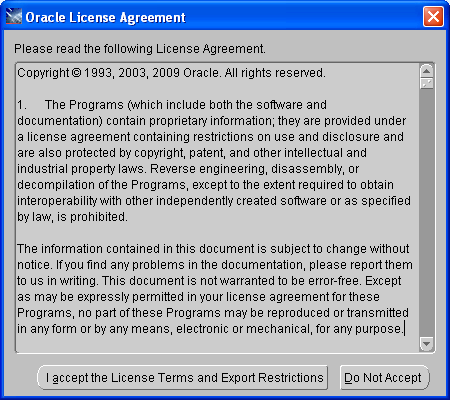
On Oracle License Agreement, if you accept the license click the appropriate button. You cannot continue with the installation unless you accept the license agreement.
Note:
The following screen is displayed only the first time you run the Oracle Universal Installer (OUI) on this machine. Otherwise the next screen displayed will be entitled: Specify Home Details.
-
On Specify Inventory directory, you can accept the default path or specify a different path if you wish.
-
Click the Next button.
-
On Specify Home Details, you must specify an Oracle Home path and a name for that path. The default values are:
-
Name
JDE_Standalone_Home
-
Path
C:\JDEdwards\E910
Each Oracle product that is installed on a machine has what is termed an Oracle Home path. This path contains all the files for each Oracle product. This path has a user-specified name as well.
The path you enter here is for the Oracle Home path where the Standalone Client will be installed.
Caution:
Do not specify the same Oracle Home name or path into which you installed the local database. However, you can specify a path that is at the same level as the Oracle Home of the database; that is, the Standalone Client and the database Oracle Homes can share the same parent directory.Do not specify a path with a space in its name.
Note:
OUI appends a number to the end of the default Oracle Home name and path. This number is initially "1." If an Oracle Home already exists with the given default name and path, OUI will increment this number in both the name and path. You do not have to accept the default values; you can enter your own name and path values. -
-
Click the Next button.
-
On Package Selection, only one package is shown for the Standalone Client. That package is called DEMO and is highlighted by default.
-
Click the Next button.
-
On Install Mode, select the type of EnterpriseOne objects to install:
-
-
Development
These are needed if you plan to modify EnterpriseOne objects such as business functions, applications, forms, and so on.
-
Production
Select this type if you do not plan to modify EnterpriseOne objects.
-
-
Click the Next button.
-
On Summary, verify that what will be installed is what you expect, keeping in mind that the summary is segmented into two parts, where:
-
Space Requirements in the upper half of the window show the space that OUI requires for its support files. This space does not include the size of the package that you selected. You may need to use the vertical scroll bar for this segment to view the contents in its entirety.
-
Package Disk Space Requirements shown in the lower half of the window are for the package being installed. You may need to use the vertical scroll bar for this segment to view the contents in its entirety.
Note:
The following checks determine if enough disk space is available and the required database is installed:-
Available Disk Space
After you click Install, the installer compares the selected package size with the amount of free disk space of the destination path. If not enough free disk space exists, the installer displays a warning. The size of the selected package applies to a new installation of all components of the package. If you are sure that enough disk space really exists (perhaps a file deletion is in progress and has not finished), you can ignore the warning and continue with the installation; otherwise, free up the necessary disk space or use the Back button to back up to the Specify Home Details screen to select a different drive onto which the Standalone Client will be installed. You can then continue with the installation.
-
Available Database
If you have not installed the OEE database engine prior to attempting to install the Standalone Client, you will receive an error message at this time. If that occurs, use the Cancel button to exit OUI. This will take you to the InstallManager screen where you can select the option to install the Database Engine. When that installation completes, you will need to reboot your machine, rerun InstallManager, and select the option to install the Standalone Client.
-
-
Click the Install button.
The progress screen shows the progress of the installation.
The bottom portion of the progress screen shows the name of the log file. For example:

Note:
The elapsed time to complete the Standalone installation can be considerable, perhaps upwards of 30 minutes.After the main part of the installation completes, OUI will spawn a second OUI window to run Configuration Assistants with a Status of In progress... For example:
After the Configuration Assistants process is complete, that OUI window closes and the original OUI displays the End of Installation screen.
-
Caution:
Examine the Installer Logs. Regardless of whether you get the above message indicating the Standalone Client installer succeeded, you should always check the logs before you attempt to run the Standalone Client. Examine the logs specified in Section 4.5, "Troubleshooting the Installation". -
Click the Exit button.
-
Perform the tasks in the section of this guide entitled: Section 5.2, "Post Installation - Set Up Media Object Queues".
4.5 Troubleshooting the Installation
Whether the installation appears to finish successfully or not, you should always examine the log files. The reason is because not all errors are propagated up to OUI where the main Graphical User Interface can display an error message box.
These are the keywords on which you should search for within the log files:
-
SEVERE
This indicates that an error occurred that should not be ignored.
-
Exception
Some of these may be ignored. You have to determine if they are serious enough to warrant concern. For example, an exception that occurs when copying a file may not be of concern to you because you will not use the Standalone Client functionality associated with that file. If you are in doubt whether or not you can ignore an error, contact Oracle Global Customer Support.
This section discusses these troubleshooting topics:
4.5.1 Standalone Client
Because the Standalone Client installer runs as a 32-bit program, its installation logs on 64-bit versions of Microsoft Windows are located at:
C:\Program Files (x86)\Oracle\inventory\logs
When the installation completes, the logs relevant to the current installation are copied to this directory:
<Oracle_Home_dir>\cfgtoollogs
4.5.2 OEE Local Database
The log for OEESetup.exe which spawns the OEE database installer (OUI) is:
c:\OEEInstall.log
Because the 11.2 OEE database installer runs as a 64-bit program, its installation logs on 64-bit versions of Microsoft Windows are located in this directory:
C:\Program Files\Oracle\inventory\logs
Because the 32-bit OEE database client installer runs as a 32-bit program, its installation logs are located in this directory:
C:\Program Files (x86)\Oracle\inventory\logs
When the installation completes, the logs relevant to the current installation are copied to this directory:
<Oracle_Home_dir>\cfgtoollogs