61 Purge Data
This chapter contains these topics:
When data becomes obsolete or you need more disk space, you can use purge programs to remove data from files.
61.1 Purging Data
Purging data consists of:
-
Specifying the information to delete
-
Running the purge program
-
Running the file reorganization program to rebuild the file structure
Caution:
You must know the proper procedures and consequences of purging data to avoid serious damage to your system and data.You can run two types of purges within distribution systems:
-
Running General Purges
-
Running Special Purges
General purges are versions of the JD Edwards World general purge program (P00PURGE) that removes data from a specified file. You run them when you want to remove a large amount of data.
JD Edwards World provides special purges for removing data from files where the selection criteria needs to be more specific. Special purges are programs that have predefined criteria that the system checks before removing any data so you avoid removing associated data located in other files.
61.1.1 What You Should Know About
61.2 Running General Purges
From Sales Order Management (G42), choose hidden selection 27
From Sales Order Advanced & Technical Operations (G4231), choose Data File Purges
From Data File Purges (G42312), choose an option
General purges for the Sales Order Management system include:
-
Sales Order Detail purge
-
Sales Order Detail History purge
-
Sales Order Ledger purge
General purges are versions of the JD Edwards World general purge program that removes data from a specified file. You run general purges when you want to remove a large amount of data.
You can create versions of the general purge program to purge data from any JD Edwards World file. However, JD Edwards World recommends that you do not use general purges for files that have their own special purge programs. General purges are not designed for files that have associated data in other files. Running a general purge for such files could cause you to lose data.
The general purges remove records with a next status of 999, or closed, from the specified file.
61.2.1 Creating a new DREAM Writer version for a purge
Before creating a new DREAM Writer version to purge a file, verify that a special purge program doesn't exist for that file. The ledger and balances files require special processing to select records. Those that can be purged have their own specific purge programs.
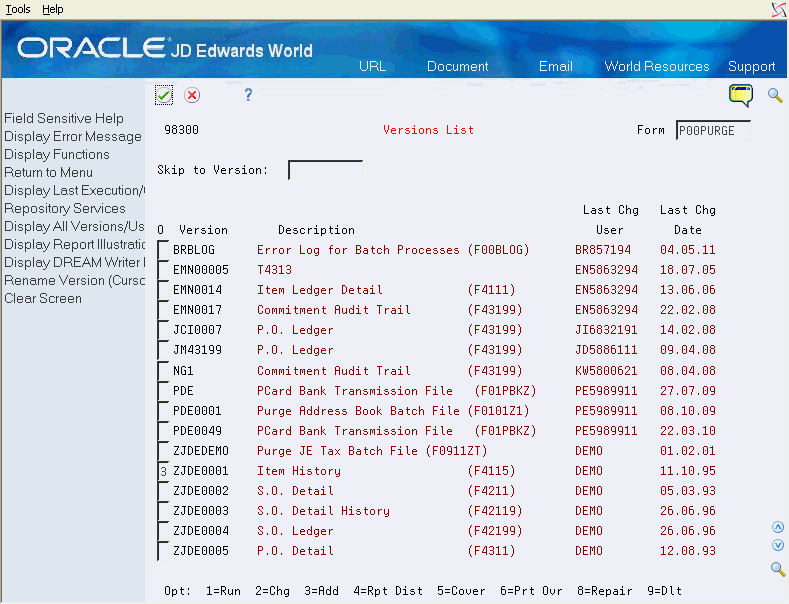
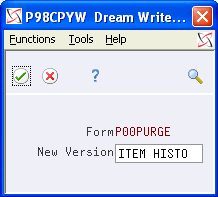
To create a new DREAM Writer version to purge a file, access the Versions List for P00PURGE. In this example, a P00PURGE version is being created for the Item Location file (F41021) from an existing version that purges the Item History file (F4115).
On Versions List
-
Enter a 3 next to the DEMO version of Item History.
Figure 61-2 DREAM Writer Version Copy screen
Description of "Figure 61-2 DREAM Writer Version Copy screen"
-
Enter a version title that will identify the new purge being created.
-
Enter the following fields to reflect the new file:
-
Based on File
-
Format Name
-
-
Set Processing Options as desired.
-
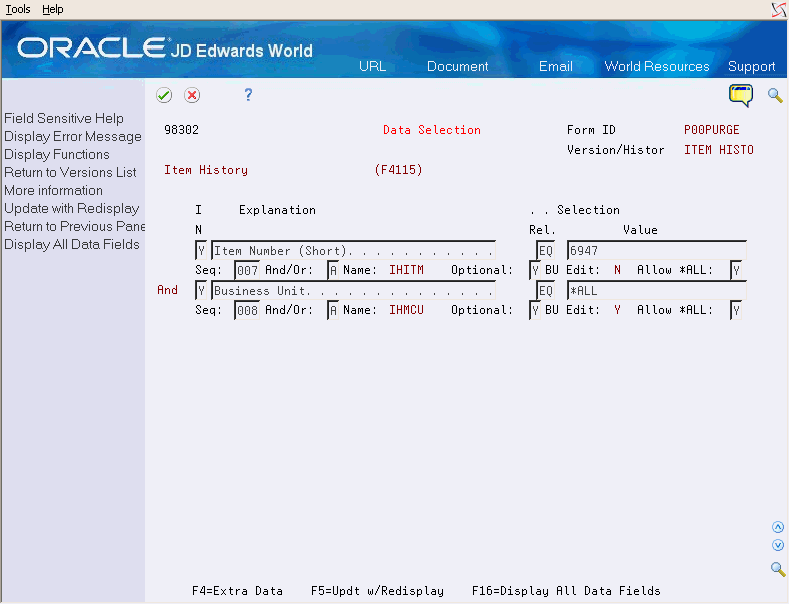
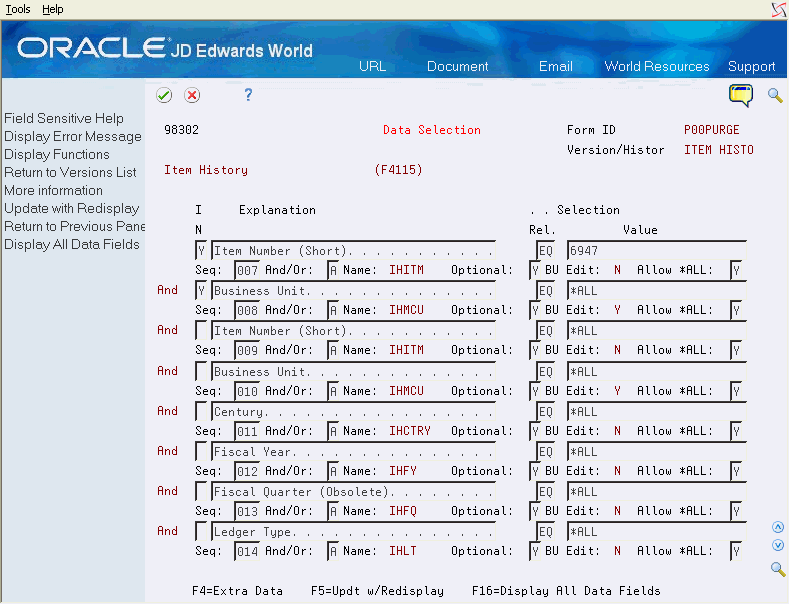
Review the Data Selection.
-
Note that the existing selection criteria from the Item History has been retained. These fields can be removed by entering N in the Include in Selection field and then pressing F5 to update.
-
Press F16 to display all the fields from the based on file that you can select from to create your data selection. Enter a Y against the specific fields you want to include.
Figure 61-5 Data Selection (All Fields) screen
Description of "Figure 61-5 Data Selection (All Fields) screen"
-
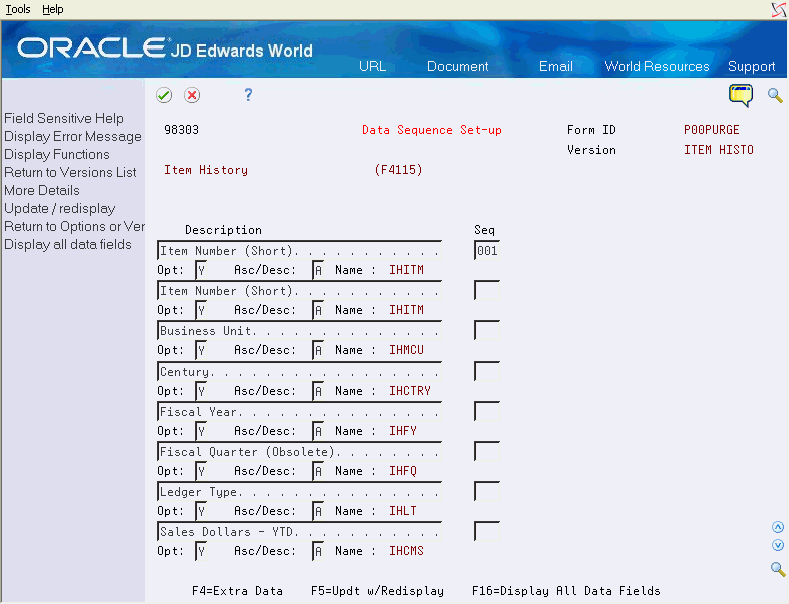
As with data selection, the sequence fields from the Item History version will be retained. Remove these in a similar manner and then press F16 to display all the fields from the based on file you can select from to create your data sequencing criteria.
-
Enter numerical sequence numbers against the fields your version to be sequenced by. After pressing enter your version will have been created and you will be returned to the versions list display.
61.2.2 What You Should Know About
| Topic | Description |
|---|---|
| Sales Order Detail purge | When you set up order line types, you specify whether the system writes closed order lines to the Sales Order Detail History and leaves only cancelled order lines in the Sales Order Detail file when you run the Update Customer Sales program.
You use the Sales Order Detail purge to remove records from the Sales Order Detail file. Optionally, you can move the records from the Sales Order Detail file to the Sales Order Detail History file. See Section 61.3.8, "Running Move Sales Order Detail to History." |
| Sales Order Detail Ledger | Within each step of the order activity rules there is a flag that determines whether a record from the Sales Order Detail file (F4211) is written to the Sales Order Detail Ledger file (F42199). As well as providing valuable historical information as orders progress through the system, the Sales Ledger file is also used for creating credit orders from history. It is also the basis of the Sales Ledger Inquiry program and Sales Ledger Detail reports. |
61.3 Running Special Purges
From Sales Order Management (G42), choose hidden selection 27
From Sales Order Advanced & Technical Ops (G4231), choose Data File Purges
From Data File Purges (G42312), choose an option
JD Edwards World provides special purges for removing data from files where the selection criteria needs to be more specific. Special purges are programs that have predefined criteria that the system checks before removing any data so that you avoid removing associated data that is located in other files.
Running special purges involves:
-
Running the Sales Order Header purge
-
Running the Extended Text purge
-
Running the Batch Order Files purge
-
Running Move Sales Order Detail to History
61.3.1 Running the Sales Order Header Purge
Use the Sales Order Header purge to purge sales order header records from the Sales Order Header file. Records are purged from the Sales Order Header file only if no open detail lines with a matching order type and order number combination exist in the Sales Order Detail file. In addition to purging records, you can optionally move information to the Sales Order Header History file (F42019) by setting the appropriate processing option. Since this program only selects header records without matching detail records it is advisable to run it immediately after the corresponding detail purge program.
| Topic | Description |
|---|---|
| Purging header information during sales update | You can purge sales order header information from the Sales Order Header file and move it to the Sales Order Header History file during Sales Update (P42800). |
61.3.3 Running the Sales Order Text Line Purge
This Sales Order Text Line program (P42960) is not exactly a purge program in that is does not delete any records. Specifically, the program reads through the Sales Order Detail file (F4211) looking for Text lines (Line type is equal to 'T') that do not have any associated non-text lines. Each record found that matches this criteria is set to closed by having its next status set to 999. These detail records can then be purged by either the general or special Sales Order Detail purges.
61.3.4 Running the Extended Text Purge
You use the Extended Text purge to delete specific information from the Text Line file (F4314).
This purge checks the Sales Order Detail and the Purchase Order Detail files for open detail lines with matching order type and order number combinations. One of the following occurs:
-
If the system does not find matching records, it deletes the extended text from the Text Line file.
-
If the system finds matching records, it deletes the Extended Text from the Text Line file only if the matching detail files have a status of 999.
61.3.6 Running the Batch Order Files Purge
Delete processed sales orders from the batch receiver files by using the Batch Order Files purge. The system selects only records with Y in the Processed (Y/N) field of the batch receiver files.
The following files are purged by this program:
-
Batch Receiver File - Order Headings (F4001Z)
-
Batch Receiver File - Order Details (F4011Z)
-
Sales Order Detail File - Tag File from Transportation (F49211Z)
This purge does not remove records from the Destination Quantity file (F4012Z). Use the general purge program to remove data from this file.
61.3.8 Running Move Sales Order Detail to History
Run the Move Sales Order Detail to History program to purge detail lines with a status of 999 from the Sales Order Detail file (F4211) and move them to the Sales Order History file (F42119).
This process can also be achieved as part of the Sales Update program.
| Topic | Description |
|---|---|
| Price Adjustment History (F4074) | If the processing option is set to purge the Price Adjustment History file, the data will be lost since there is no archive file to receive its data. |
See Also:
