2 Installation
This chapter provides information about how you can install the WebCenter Content Storage Connector for Microsoft SharePoint 2010 on the WebCenter Content environment and the SharePoint environment.
This chapter covers the following topics:
2.1 Software Requirements
This section lists the software requirements for the connector on the SharePoint environment and the WebCenter Content environment.
2.1.1 Software Requirements on the SharePoint Environment
This section lists the SharePoint version and database that the connector supports on the SharePoint environment.
-
Microsoft SharePoint 2010 Enterprise Edition with Service Pack 1
-
SQL Server 2008 R2 Enterprise Edition
2.1.2 Software Requirements on the WebCenter Content Environment
This section lists the WebCenter Content version, JDK version, and browsers that the connector supports on the WebCenter Content environment.
-
Oracle WebCenter Content 11.1.1.8.0 and later
-
JDK 1.6
-
The connector supports the following browsers:
-
Internet Explorer version 8 or later
-
Mozilla Firefox version 17.0.0 or later
-
Chrome version 23.0.1271.95 or later
-
Safari version 3.1.2. or later
-
2.2 Prerequisites
Before installing the connector, you must ensure that:
-
You install and enable Remote Blob Storage (RBS) on at least one SharePoint content database.
-
You have the appropriate SQL database user and Active Directory account.
-
The WebLogic Server authenticator is configured to use the default Java authenticator (-DUseSunHttpHandler).
-
The SharePoint Central Administration web application must be using the Network LAN Manager (NTLM) authentication mode.
-
The WebCenter Content Server system user does not have permissions to the SharePoint Server.
Note:
The System User through whom the WebCenter Content server is running should not have permission to the SharePoint Server. Otherwise, when the NTLM authentication happens between the two systems, it would be done using the System User credentials instead of the SharePoint service account credentials provided for connection configuration, and this will eventually result in an error.
2.2.1 Remote Blob Storage
Before installing the connector, you must install and enable RBS on each SharePoint content database for which you want to use the connector. For information about how to install RBS, see: http://technet.microsoft.com/en-us/library/ff629463(v=office.14).aspx#Section3
For information about how to enable RBS, see:
http://technet.microsoft.com/en-us/library/ff629463(v=office.14).aspx#enableRBS
2.2.2 SQL User and Active Directory Accounts
Before installing the connector, you must ensure that you have the appropriate SQL database user and Active Directory account.
2.2.2.1 Database User on the SQL Server
You must have a database user on the SharePoint instance of the SQL server. You must also ensure that:
-
This database user has the dbCreator, sysadmin, and serveradmin permissions.
-
This database user does not have password policies enforced.
-
On the Server Properties page of the SQL server SharePoint instance, SQL Server and Windows Authentication mode is enabled.
2.2.2.2 Active Directory Account with Farm Administrative Privileges
You must have an Active Directory account that the connector can use while interacting with SharePoint and WebCenter Content. This Active Directory account must be a part of the SharePoint Farm Administrators group on the SharePoint Central Administration site.
Note:
Ensure the separate Active Directory account is used for configuring the connection to SharePoint. Using SharePoint farm account i.e., System account, for the connection to SharePoint may result in an authentication or invalid user error.
2.3 Installing the Connector on SharePoint
This section covers the following topic:
-
Section 2.3.1, "Extracting the Contents of the Connector Package for SharePoint"
-
Section 2.3.3, "Registering the WebCenter Content RBS Provider"
2.3.1 Extracting the Contents of the Connector Package for SharePoint
You must extract the contents of the connector package for SharePoint on the SharePoint server. If you have a multi-server SharePoint farm environment, you must extract the contents of the package on each server in the SharePoint farm.After you extract the contents of the connector package for SharePoint, you must have the following files:
-
DeploySolution.ps1
-
RetractSolution.ps1
-
WCCConnector.wsp
-
WCCConnectorInstaller.exe
-
WCCRBSProvider.config
2.3.2 Deploying and Installing the Connector
You must deploy and install connector on only one server in the SharePoint farm. It is recommended to deploy and install the connector on the SharePoint server that hosts the Central Administration web application.
To deploy and install the connector in the SharePoint farm:
Note:
Before performing this procedure, you must ensure that the user who is logged in to the SharePoint Server has farm administrative and system administrative rights.
-
On the SharePoint server where you want to deploy and install the connector, open SharePoint 2010 Management Shell as an administrator.
-
Change the directory to the location where you extracted the WCCConnector.zip package. For more information, see Section 2.3.1.
-
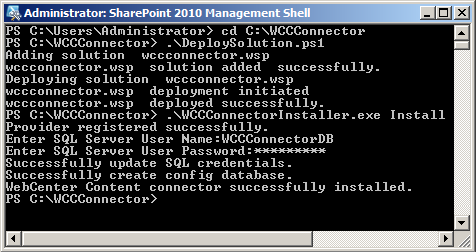
To deploy the WCCConnector Web Solution Package (WSP) on the SharePoint farm, use the following command:
.\DeploySolution.ps1
Figure 2-1 Deploy Solution Command and Output
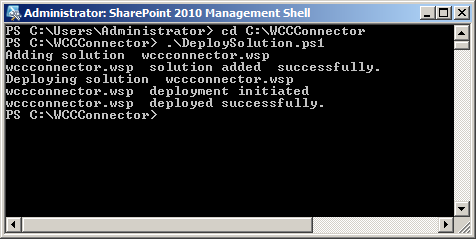
Description of "Figure 2-1 Deploy Solution Command and Output"
-
To install the connector in the SharePoint farm, use the following command:
.\WCCConnectorInstaller.exe Install
-
When the system prompts you for credentials, enter the credentials of the database user on the SharePoint instance of the SQL server. For more information, see Section 2.2.2.1.
-
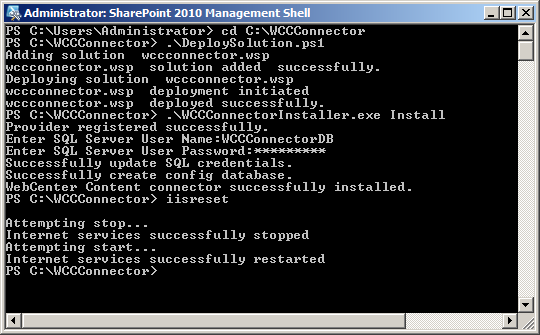
Restart the IIS server using the following command:
iisreset
-
To restart the SharePoint Timer Services, use the following commands:
net stop sptimerv4
Figure 2-4 Stop SharePoint Timer Services Command and Output
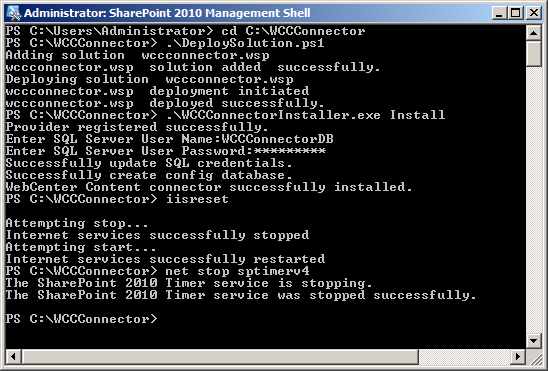
Description of "Figure 2-4 Stop SharePoint Timer Services Command and Output"
net start sptimerv4
Figure 2-5 Start SharePoint Timer Services Command and Output
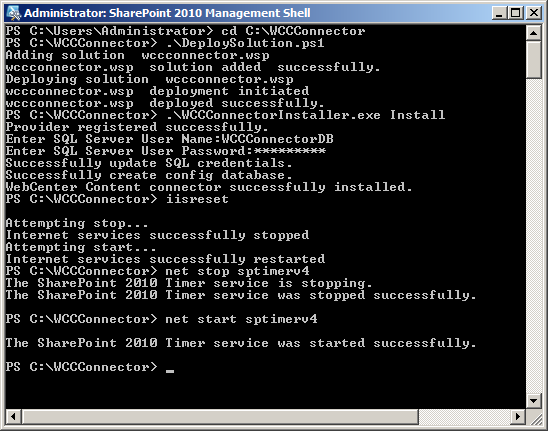
Description of "Figure 2-5 Start SharePoint Timer Services Command and Output"
2.3.3 Registering the WebCenter Content RBS Provider
Apart from the server where you deployed and installed the connector, you must register the WebCenter Content RBS provider for each server in the SharePoint farm. If you have a single-server SharePoint farm environment, you do not need to perform this step.
To register the WebCenter Content RBS provider in the SharePoint farm:
-
On the SharePoint server where you want register the WebCenter Content RBS provider, open SharePoint 2010 Management Shell as an administrator.
-
Change the directory to the location where you extracted the WCCConnector.zip package. For more information, see Section 2.3.1.
-
To register the WebCenter Content RBS provider, use the following command:
.\WCCConnectorInstaller.exe RegisterProvider
Figure 2-6 Register Provider Command and Output

Description of "Figure 2-6 Register Provider Command and Output"
-
To restart the IIS server, use the following command:
iisreset
-
To restart the SharePoint Timer Services, use the following commands:
net stop sptimerv4
Figure 2-8 Stop SharePoint Timer Services Command and Output
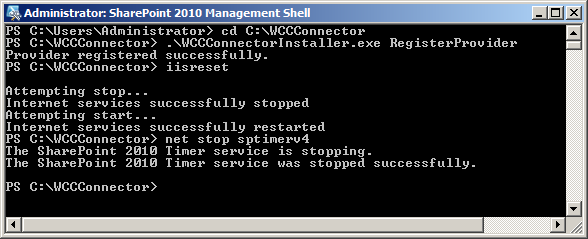
Description of "Figure 2-8 Stop SharePoint Timer Services Command and Output"
net start sptimerv4
Figure 2-9 Start SharePoint Timer Services Command and Output
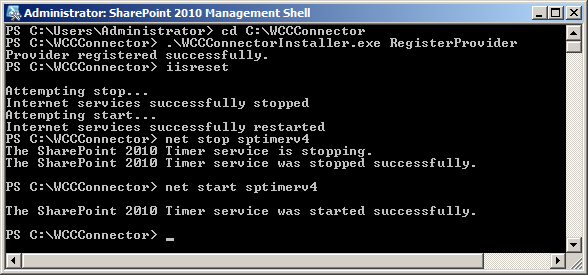
Description of "Figure 2-9 Start SharePoint Timer Services Command and Output"
2.4 Installing the Connector on the WebCenter Content Server
This section covers the following topics:
-
Section 2.4.1, "Installing the SharePointConnector Component"
-
Section 2.4.5, "WebCenter Content cluster environment settings"
2.4.1 Installing the SharePointConnector Component
Note:
If you already installed the SharePointConnector you can skip this procedure and proceed to enable these components. For more information, see Section 2.4.2.
To install the SharePointConnector component:
-
Log on to WebCenter Content as an administrator.
-
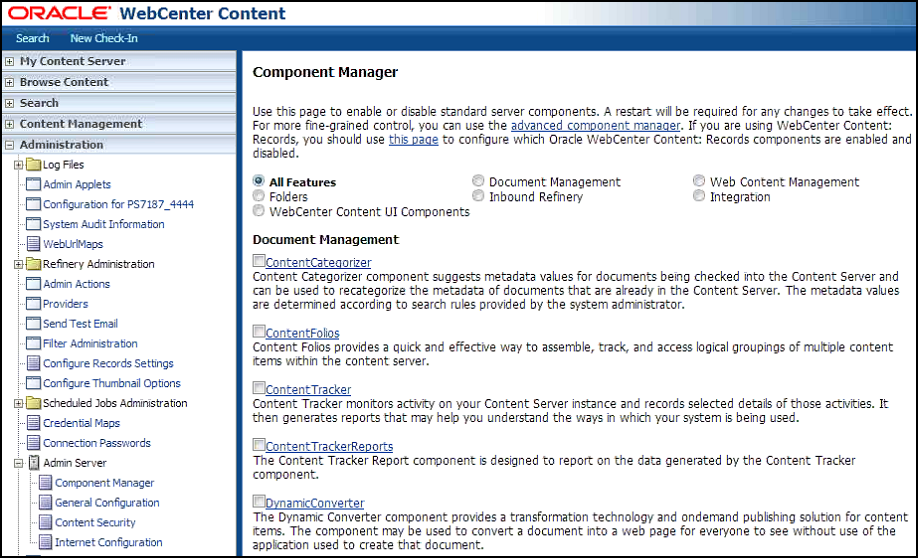
In the Content Server portal, choose Administration, then Admin Server, then Component Manager. The Component Manager page opens with a list of component categories and a list of component names.
-
Click the Advanced Component Manager link. The Advanced Component Manager page appears.
Note:
For more information on using the Component Manager, refer to the chapter "Managing Components" in the Oracle Fusion Middleware Administering Oracle WebCenter Content guide.
Figure 2-11 Advanced Component Manager Page
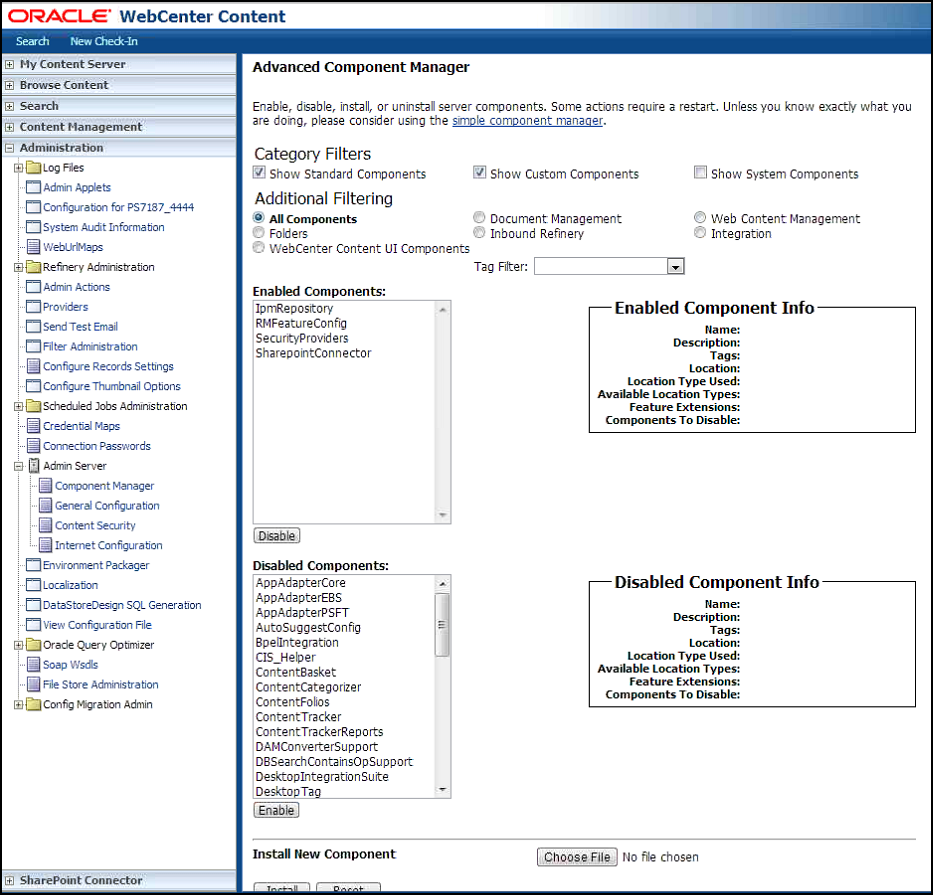
Description of "Figure 2-11 Advanced Component Manager Page"
-
In the Install New Component region, click Choose File. The Choose File to Upload dialog box appears.
Figure 2-12 Choose File to Upload Dialog Box
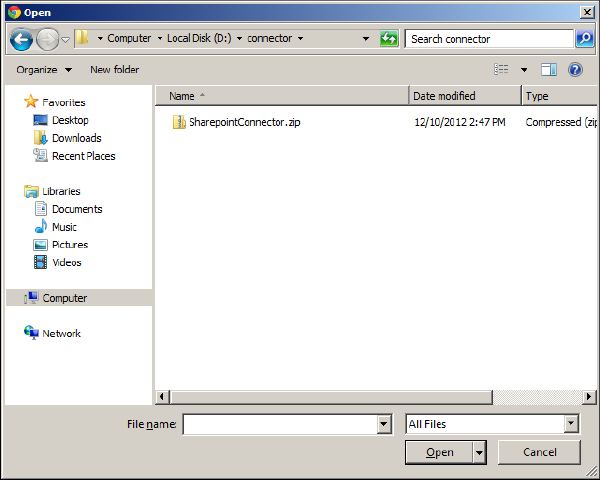
Description of "Figure 2-12 Choose File to Upload Dialog Box"
-
Select the SharePointConnector.zip file, and then click Open.
-
In the Advanced Component Manager page, click Install.
-
In the next page, which displays the items that will be installed, click Continue. The Content Server Message page appears, which displays a message that WebCenter Content successfully uploaded and installed the component.
2.4.2 Enabling the SharePointConnector
To enable the SharePointConnector components:
-
Log on to WebCenter Content as an administrator.
-
In the Content Server portal, choose Administration, then Admin Server, then Component Manager. The Component Manager page opens.
-
Click the Advanced Component Manager link. The Advanced Component Manager page appears.
Figure 2-13 Advanced Component Manager Page
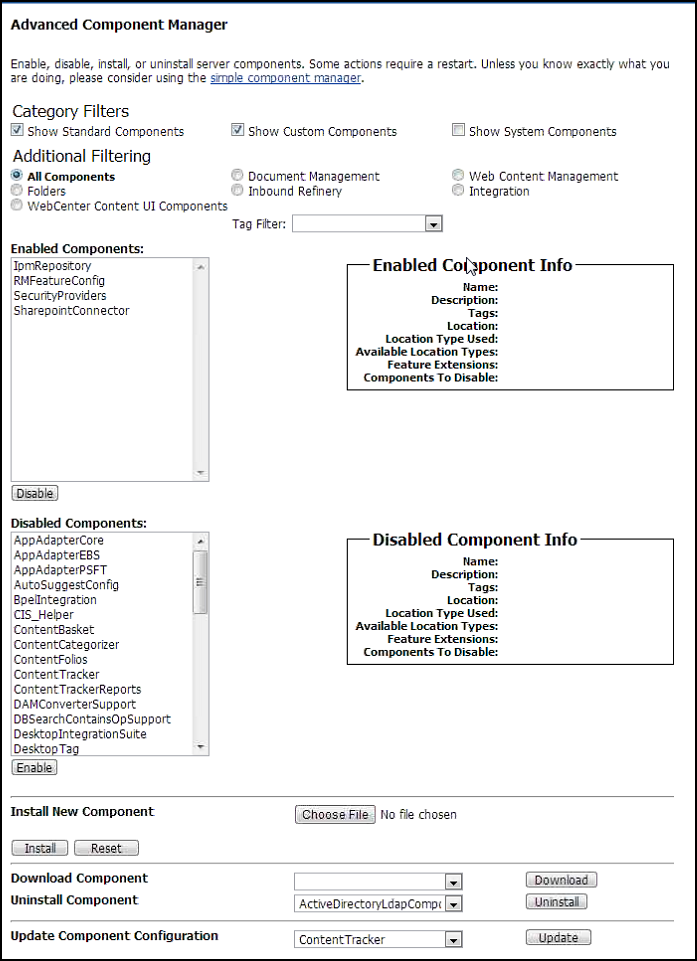
Description of "Figure 2-13 Advanced Component Manager Page"
-
In the Disabled Components list, select SharepointConnector, and then click Enable. If the SharepointConnector component does not appear in the Disabled Components list, you must install the SharePointConnector component. For more information, see Section 2.4.1.
You must restart the Content Server instance for any configuration changes to take effect.
For more information, see "Using Fusion Middleware Control to Restart Content Server" in Oracle Fusion Middleware Administering Oracle WebCenter Content guide.
2.4.3 Creating a WebCenter Content User
You must create a WebCenter Content user that the connector can use while interacting with SharePoint. This user must have administrative privileges, having permissions to all WebCenter Content security groups and accounts to which SharePoint content will be mapped. This user must also have permissions over core WebCenter Content Server services that SharePoint uses to connect to WebCenter Content.
2.4.4 Creating the SPConnectorServices Wsdl
To create the SPConnectorServices Wsdl:
-
Log on to WebCenter Content as an administrator.
-
In the Content Server portal, choose Administration, then click Soap Wsdls. The Wsdl Information page appears.
-
Create a Wsdl named SPConnectorServices.
-
Add the following services for the SPConnectorServices Wsdl, and then update the response and request parameters for each service.
-
Generate Wsdls.
Table 2-1 Services for the SPConnectorServices Wsdl
| Service Name | IdcService | Response Parameter Name | Response Parameter Type | Request Parameter Name | Request Parameter Type |
|---|---|---|---|---|---|
|
CheckInArchive |
CHECKIN_ARCHIVE |
diD |
Int |
dID dDocName dDocTitle IsNative dDocAuthor dSecurityGroup Action primaryFile |
Int String String Boolean String String String File |
|
CheckInNewDocument |
CHECKIN_NEW |
dID |
String |
dDocType dDocTitle dDocAuthor dSecurityGroup primaryFile dDocName |
String String String String File String |
|
CheckInSelectedDocument |
CHECKIN_SEL |
diD |
String |
dID dDocName dDocTitle dDocType dDocAuthor dSecurityGroup dDocAccount dRevLabel primaryFile |
Int String String String String String String String File |
|
CheckOutDocument |
CHECKOUT |
None |
None |
dID |
Int |
|
DeleteDocument |
DELETE_DOC |
None |
None |
dID dDocName |
String String |
|
DeleteDocumentByRev |
DELETE_REV |
None |
None |
dID |
Int |
|
DiscardCheckOut |
UNDO_CHECKOUT |
None |
None |
dID |
Int |
|
GetDocFileByID |
GET_FILE |
downloadFile |
File |
diD |
Int |
|
PingServer |
PING_SERVER |
dUser StatusMessage |
String String |
None |
None |
|
UpdateDocumentInfo |
UPDATE_DOCINFO |
diD |
String |
dDocName dID dSecurityGroup dDocAuthor |
String String String String |
2.4.5 WebCenter Content cluster environment settings
To install the SharePoint connector on WebCenter Content cluster environment, the settings mentioned in Section 2.4.5.1 and Section 2.4.5.2 need to be done.
2.4.5.1 Accessing SharePoint services from WebCenter Content with Connector Component
To access the SharePoint services, you will need to set the managed server starting parameters through the weblogic server admin console. To do this, follow the steps below:
-
Login to the WLS admin console.
-
Click Lock & Edit to enable the edit mode.
-
Click Environment then select Servers.
-
Click a managed server name (UCM Sever 1).
-
Click the Configuration tab, and in second row of tabs, select the Server Start tab.
-
In the Arguments box, type the starting parameter:
DUseSunHttpHandler=true
-
Click Save to save the configuration changes.
-
In case of cluster set up repeat step 4 to 8 for each node in the cluster.
-
Click Activate Changes.
-
Stop and start both UCM manage server using the Admin console.
2.4.5.2 Accessing WebCenter Content services from SharePoint with Connector Component
Accessing WebCenter Content services require configuring the web root in OHS. To do this, follow the steps below:
-
Open the mod_wl_ohs.conf file from the following location:
OHS_HOME/instances/ohs_instance1/config/OHS/ohs1/mod_wl_ohs.conf
-
Add a location for the context URL /_dav by adding the following line to file mod_wl_ohs.conf:
#DAV
<Location /_dav>
WebLogicCluster ecmhost1:16200, ecmhost2:16200
SetHandler weblogic-handler
WLCookieName JSESSIONID
</Location>
-
Restart OHS services.
2.4.6 Stubs Deployment
If the SharePoint connector feature is installed in an Oracle WebCenter Content product, stubs.jar library needs to be added manually from the Oracle WebLogic administration console after a domain is created. A reference to the library must be added to the weblogic-application.xml file of the Oracle WebCenter Content EAR file before the managed server is started for the first time.
To add stubs.jar to the WebLogic WebCenter Content domain, follow these steps:
-
After a domain is created, start the Admin Server. If a managed WebCenter Content server has already been started, then the administrator will have to perform additional steps to add reference to the deployed WebCenter Content server instance later.
-
Open the WebLogic console in a browser. Click Deployments in the left pane. Browse the pages to check if there is already a stubs.jar file in the WebLogic administration console. If it is already present, then no more steps need to be performed.
-
If no stubs.jar file is present, click Install on the Deployments display. A file selection dialog opens. Browse the available file system and select stubs.jar in the following path:
FMW_HOME/Oracle_ECM1/ucm/idc/components/SharePointConnector/lib/stubs.jar -
Click Next. The option page to select the file as library opens. Select "Install this deployment as a library" and click Next.
-
The Target Selection Screen opens. Select all targets and click Next.
-
The Deployment Name screen opens. In the Security section, select "DD Only: Use only roles and policies that are defined in the deployment descriptors." In the Source accessibility section, select "Copy this application onto every target for me" and click Next.
-
In the Additional Configuration section, select "Yes, Take me to the deployment's configuration screen" and click Finish. The library is now deployed in the environment.
If the managed server has been started at least once after the domain has been created, complete the following:
-
Locate the
weblogic-application.xmlof the Oracle WebCenter Content enterprise application in the deployed WebCenter Content domain at a path similar to the following example:FMW_HOME/domain_path/servers/managed_server_name/tmp/_WL_user/Oracle Universal Content Management - Content Server/k6ggd/META-INF/weblogic-application.xml -
Modify the META-INF/weblogic-application.xml and add the following line for library reference:
<library-ref>

  <library-name>stubs</library-name>

</library-ref>
-
If the
UCM_server1Managed Server is not available in/FMW_HOME/domain path/servers/, then this step is not needed, as the managed server has not been started, which would have deployed theUCM_server1at this location.
