C ADF Mobile Application Usage
This appendix provides an introductory information on the ADF Mobile user experience.
This appendix includes the following sections:
-
Section C.2, "Installing the ADF Mobile Application on a Mobile Device"
-
Section C.3, "End User Navigation Between Application Features"
C.1 Introduction to ADF Mobile Application Usage
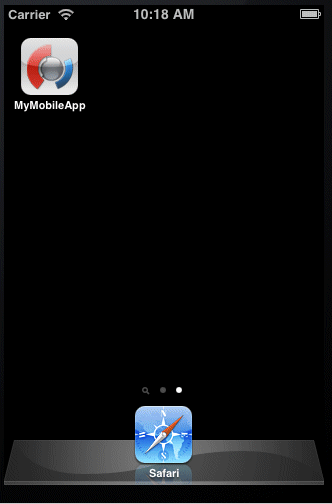
After installing an ADF Mobile application (see Section C.2, "Installing the ADF Mobile Application on a Mobile Device"), the end user can start using it by selecting the application icon on their mobile device's home screen (see Figure C-1), which displays the splash screen while the application launches. After the completion of the launch, the end user can navigate between application features (see Section C.3, "End User Navigation Between Application Features"), set preferences (see Section C.4, "Setting Preferences"), and perform all other tasks.
C.2 Installing the ADF Mobile Application on a Mobile Device
The end user can download and install an ADF Mobile application through their regular application provisioning mechanism.
During installation, the application's Preferences are populated with default settings. For information on how to modify the defaults, see Section C.4, "Setting Preferences" and Section C.2.2, "How End Users Install ADF Mobile Applications on Android-Powered Devices".
Removing the ADF Mobile application from a mobile device is not different from uninstalling any other application (see Section C.2.3, "How End Users Uninstall an ADF Mobile Application").
C.2.1 How End Users Install ADF Mobile Applications on iOS-Powered Devices
Users of iOS-powered devices download and install ADF Mobile applications as follows:
-
From an enterprise-specific distribution mechanism:
-
using iTunes;
-
deploying through iPhone Configuration Utility;
-
wirelessly, hosted on a web server.
-
-
From Apple's App Store.
C.2.2 How End Users Install ADF Mobile Applications on Android-Powered Devices
In addition to installing ADF Mobile applications available through the application marketplace, the end user can download applications available outside of the application marketplace. It is recommended to search the web for information on how to do this.
C.2.3 How End Users Uninstall an ADF Mobile Application
An ADF Mobile application is removed from the mobile device just like any other application. During the uninstall process, all application data and all external preferences are removed along with the application.
C.3 End User Navigation Between Application Features
To provide access to each application feature, ADF Mobile applications allow for navigation between enabled application features using either a navigation bar or a springboard.
For information on configuring navigation during the application development, see Section 5.4, "Configuring the Springboard and Navigation Bar Behavior."
C.3.1 How End Users Navigate Between Application Features on iOS-Powered Devices
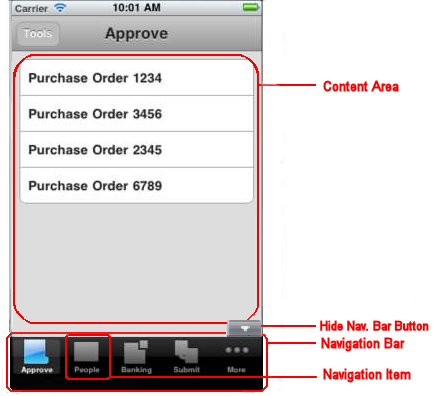
Figure C-2 shows elements of the ADF Mobile UI displayed on an iPhone.
The UI consists of a navigation bar populated with navigation items (icons). The first navigation item is highlighted to indicate that it is selected.
Note:
If the springboard is defined for the application, a Home navigation button represented by an overlay is rendered above the navigation bar, but is not a part of it. This button allows the end user to return to the springboard from the application content:
If the springboard is not specified for the application, the Home icon is not displayed.
For more information, see Section 5.4, "Configuring the Springboard and Navigation Bar Behavior."
The navigation bar in the example that Figure C-2 shows contains six navigation items, and since not all of them can be displayed at the same time due to the space limitations on an iPhone, the fifth icon is represented by the More feature. When activated the More feature expands the navigation bar into the mode that lists the remaining navigation items. On an iPad, all navigation items are displayed. The content area above the navigation bar provides the content specific to this particular solution, which is an approval tool for purchase orders and is bundled with the application.
Note:
If at least one icon for an application feature is shown on the navigation bar, the end user is presented with Hide and Show buttons that allow to display the navigation bar when it is hidden, and hide when it is shown:
If the application XML file (adfmf-application.xml) only defines a single application feature, or if the constraints (or conditions) allow for only a single application feature to be displayed, then the navigation bar is hidden.
The Hide and Show buttons may not be presented to the end user and the navigation bar could be initially hidden if the adfmf-application.xml file does not reference any application features to be displayed on the navigation bar. In this case, if the springboard is defined, it will be the only navigation tool for the application.
For more information, see Section C.3.1.2, "What You May Need to Know About Single-Featured Applications."
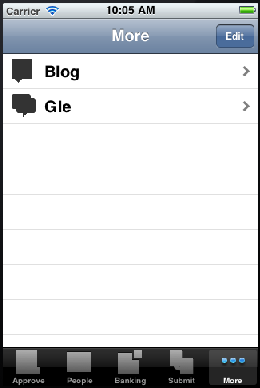
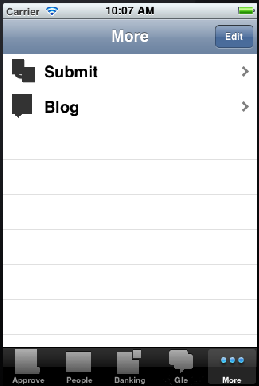
Figure C-3 shows the iPhone UI after the activation of the More icon and display of the remaining navigation items as a list.
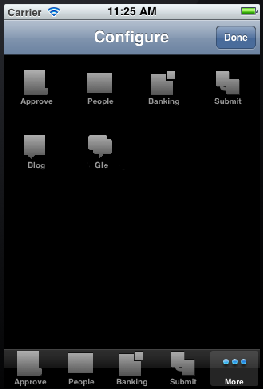
To change which navigation items appear on the navigation bar at the application startup, the end user can select Edit to enter the Configure mode, as Figure C-4 shows.
The Configure mode allows for dragging icons from the content area and dropping them onto the navigation bar. In this example, Submit navigation item was replaced with Gle navigation item on the navigation bar, and Submit is listed under More items, as Figure C-5 shows. To exit the configuration mode, the user selects Done to return to the More screen.
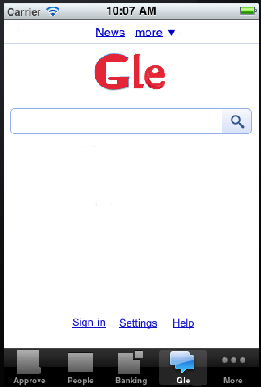
If the end user selects the newly repositioned Gle navigation item in the navigation bar, Gle page is displayed in the content area, as Figure C-6 shows.
C.3.1.1 What You May Need to Know About Navigation Using the Springboard
By default, the springboard navigation is disabled in ADF Mobile. It is enabled during development by configuring the adfmf-application.xml file (see Section 5.4, "Configuring the Springboard and Navigation Bar Behavior").
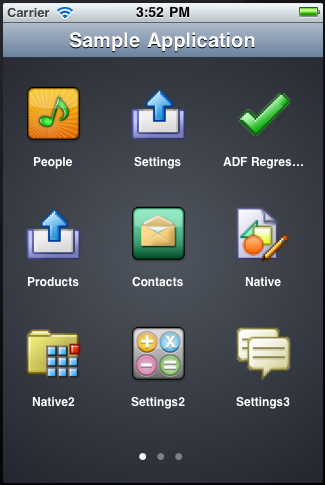
If an ADF Mobile application is enabled for navigation using the springboard, the end user is presented a display similar to the one shown in Figure C-7 when the application starts.
In the preceding illustration, the default springboard supplied by ADF Mobile is displayed on an iPhone in the default portrait layout (for information on how to create a custom springboard during development, see Section 5.4, "Configuring the Springboard and Navigation Bar Behavior"). There are three pages of the application content features that are available to the end user, which is indicated by the three dots at the bottom of the screen. The end user is on page one of the three pages, which is denoted by the bright dot in the first position.
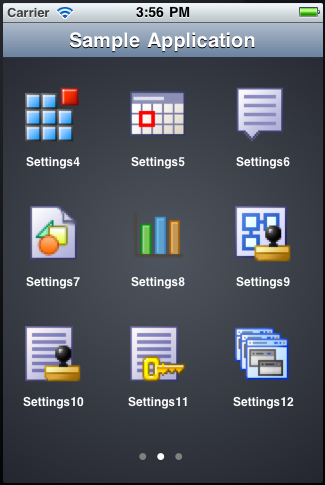
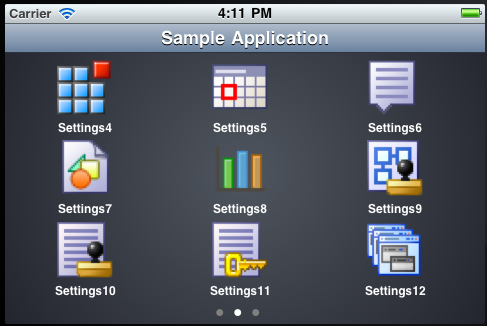
To open the second page of features (see Figure C-8), the end user swipes the iPhone screen from right to left, pushing the first page to the left and bringing the second page from the right. As the first page moves left, it fades out, and as the second page moves in, it fades in.
In the preceding illustration, the end user is on page two of the three pages, which is denoted by the bright dot in the second position.
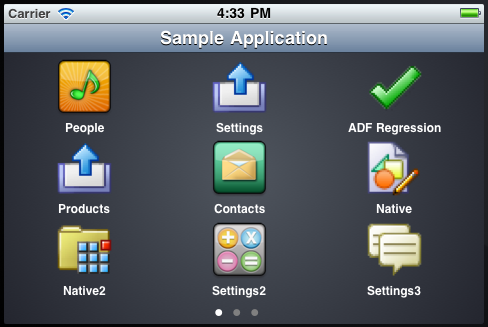
When the end user rotates the mobile device to landscape orientation, the springboard icons animate into positions that will better accommodate such change (see Figure C-9).
Note that the page did not change when the display orientation changed, and the end user is still on page two.
To return to the first page of features while the display is in landscape orientation (see Figure C-10), the end user swipes the iPhone screen from left to right, pushing the second page to the right and bringing the first page from the left.
To view a particular feature (such as Contacts) from page one, the end user touches the Contacts icon or its corresponding text.
On iOS-powered devices, the end user can return to the springboard from any application feature by performing a device shake gesture.
On Android-powered devices, the end user can use a menu item that lets them return to the springboard at any time.
C.3.1.2 What You May Need to Know About Single-Featured Applications
Some applications may have only a single feature, and this feature is not configured to be displayed on a Springboard or navigation bar. In this case, only this single feature is presented to the end user; the special buttons that control the display of the navigation bar or return to the Springboard are not visible.
C.3.2 How to Navigate on Android-Powered Devices
Feature navigation on Android-powered devices is almost identical to the navigation on iOS-powered devices (see Section C.3.1, "How End Users Navigate Between Application Features on iOS-Powered Devices"), with the exception of the More feature: on Android-powered devices, the More feature, when activated, triggers the display of a list of the remaining navigation items. The navigation bar does not change its appearance.
C.4 Setting Preferences
The end user can configure the application preferences in the manner already prescribed by the mobile platform.
For information on configuring preferences during the application development, see Chapter 13, "Enabling User Preferences."
C.4.1 How to Set Preferences on iOS-Powered Devices
The end user can open the Settings application on their iOS-powered device and select ADF Mobile application's Settings icon to access all the settings available for that application. The modified settings take effect upon exiting the Settings application. This is a typical behavior of all applications on iOS-powered devices.
Preferences are populated with default values at startup. These values are defined in the adf-feature.xml file. In addition to the standard ways of setting Preferences values, they can be defined as follows:
-
By making selection from a list of values.
-
As non-readable values (for entering passwords and such).
-
As binary values.
Preferences are displayed on cascading pages. Modifiable preferences can be easily distinguished from the ones that cannot be modified.
Preferences can be used to globally set the user credentials (see Chapter 17, "ADF Mobile Application Security").
C.4.2 How to Set Preferences on Android-Powered Devices
Setting Preferences on Android-powered devices does not differ from the same operation on iOS-powered devices (see Section C.4.1, "How to Set Preferences on iOS-Powered Devices"): the Preferences are accessed through the Preferences menu item.
Note:
The Preferences menu item does not appear in the menu if there are no preferences defined for the application.
C.5 Limitations to the Application Usage
There is a number of limitations to the usage of various modules of typical ADF Mobile applications.
C.5.1 List View Component Limitations
The following are limitations of which the end user should be aware when using an ADF Mobile AMX List View component (see Section 8.2.7, "How to Use List View and List Item Components"):
-
If a List View component is in edit mode, the end user is only allowed to reorder rows (represented by List Item components) and cannot select or highlight a row.
-
If a List View component is in edit mode and dividers are enabled for the component, the end user should not use them, as this may cause unexpected results.
C.5.2 Data Visualization Components Limitations
With the exception of the geographic map (see Section 8.5.14, "How to Create a Geographic Map Component"), ADF Mobile AMX data visualization components do not support interactivity on Android 2.n platform.
