| Oracle® Enterprise Data Quality for Product Data Knowledge Studio Reference Guide Release 11g R1 (11.1.1.6) Part Number E29134-02 |
|
|
PDF · Mobi · ePub |
| Oracle® Enterprise Data Quality for Product Data Knowledge Studio Reference Guide Release 11g R1 (11.1.1.6) Part Number E29134-02 |
|
|
PDF · Mobi · ePub |
This chapter explains how to import and export data lenses, phrase and terminology rules, Item Definitions, and importing enriched data.
A data lens can be exported, which may be useful for archival and back up purposes.
To export a data lens, on the File menu, click Export Data Lens. Enter a descriptive filename for the data lens, and then click OK.
All exported data lenses are stored in the export directory, …\Application%Data\export.
An exported data lens can be imported for use.
To import a data lens, on the File menu, click Import Data Lens. Locate and double-click on the data lens to start the import process.
The Knowledge Studio checks to see if this data lens exists locally and if it does exist, you are prompted to rename the data lens to avoid overwriting files.
Note:
You must still check in the data lens to the Oracle DataLens Server in order to use it in applications.Lens rules can be exported to a text file; this output is useful for reviewing the rules and comparing the existing rule set to prior rule sets.
You can check out a version of the data lens, create a text file, and then check out a prior version of the same data lens. Next, using any tool that allows a comparison to be generated, you can compare the differences between the files. This functionality is used if maintenance has been performed to a data lens and the results were not as expected.
Rules can be exported for an entire data lens or by Domain.
The rules are exported to the default export directory, …\data lens name\Application Data\DataLens\export, or you can specify the path and file name.
Note:
Exporting data lens rules is not the opposite of import rules; exported rules are not in a format that can then be imported.Knowledge that may exist within your organization can be used as part of the knowledge building of terms, phrases and standardizations for creating and enriching data lenses. This information can be imported into a data lens from an Excel spreadsheet with the use of the Import Phrases and Terms feature.
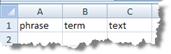
The format of the Excel spreadsheet or tab-delimited file (CSV or text) can be of your choosing. For example, you could include columns that indicate a phrase, a term for the phrase, and the initial data.
The following examples illustrate how you might create the columns and populate your spreadsheet files:
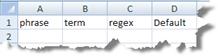
There are two columns you can use to create term variants as follows:
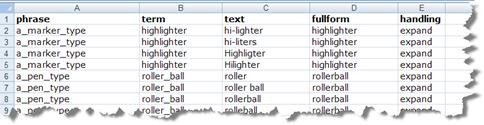
Allows for the import of the full-form variant of the term rule.
Allows for the option of creating term variants.
Note:
The fullform and handling columns must be located in your spreadsheet after any text or regex columns and before any standardization columns.The values that can be used in the fullform and handling columns are as follows:
Automatically creates term variants of the text node.
Automatically creates term variants and plural forms.
Does not create any term variants; term remains unchanged.
In addition, standardization rules can be imported within the same spreadsheet. the standardization types are Full Description and Short Description.
Note:
Prior to importing rules within certain standardization, the standardization type must present in the data lens.To import your new knowledge into your data lens:
From File menu, click Import Phrases and Terms.
Browse to the import spreadsheet and click Open.
The rules are imported into the data lens. The percentage of recognition increases with the addition of these newly imported rules.
You can create aliases when you import rules and phrases using Excel. There is no 'Alias' column in the Excel spreadsheet so aliases are created automatically based upon the name of the attribute or Item Definition. The Knowledge Studio assumes that the labels you provide in the spreadsheet are aliases, modifying them as needed to create attribute names that abide by the required conventions (for example, changing spaces to underscores in the attribute name).
These alias names can be edited or viewed. See "Aliases".
Importing and exporting Item Definitions from one data lens to another allows you to reuse Item Definition information in new ways.
You can easily export Item Definitions from one data lens and import them into another data lens. You can use this feature to import single Item Definitions or entire branches of an Item Definition hierarchy into a new or existing data lens.
When you import an Item Definition, all rules that participate in the Item Definition are also imported.
Open the source data lens.
This is the data lens that contains the Item Definition (or hierarchy of Item Definitions) you want to export out of the source data lens and import in your target data lens.
To maximize reuse of knowledge contained in the source data lens, verify that all Smart Glossaries relevant to the Item Definition and all unit conversion knowledge you want to import are contained in the target data lens.
If you need to import a Smart Glossaries, see "Importing a Smart Glossary".
Select the Phrases tab and the Define Items sub-tab.
Right-click the Item Definition branch that you want to export, and click Export Item Definition.
Enter a name for the export file or accept the default filename, and then click Save to save the exported Item Definition(s).
Open the destination data lens.
Select the Phrases tab and the Define Items sub-tab,
Right-click the parent branch into which you would like to import the Item Definition and click Import Item Definition.
Select the export file you saved, and then click Open to import the Item Definition.
The Item Definitions and all rules associated with the Item Definitions are imported into your destination data lens.
This section describes some possible issues you may encounter and how to resolve them.
You cannot import an Item Definition that already exists in the target data lens and attempts to do so result in an informational message advising you that it is not possible.
This is best resolved by renaming the Item Definition.
If you have exported an Item Definition that relies upon a Smart Glossary (for example, for unit conversion of units of measure), be sure you import the Smart Glossary into the target data lens before you import the Item Definition. If not, you may need to re-create some knowledge in the target lens.
Be sure to create all standardization types needed for the target Item Definition when you import the Item Definition into the target data lens. Standardization information is not preserved when you import an Item Definition.
Be sure to create all unit conversion knowledge in the target data lens when you import any Item Definitions that require unit conversion. Unit conversion information is not preserved when you import an Item Definition.
Attribute value logic is preserved after the import, provided the target data lens has the requisite unit conversion information. In most cases, unit conversion information is contained in Smart Glossaries, such as DLS_Units_of_Measure or DLS_Units_of_Measure_Retail, so importing the appropriate Smart Glossaries into the target data lens avoids this issue.
Search logic used by attributes of the imported Item Definition is preserved in the import.
You can refine your data using data remediation and enrichment features in EDQP. The process is simply to
Create or modify a DSA in Application Studio containing Item Definition enrichment and remediation steps.
Create or modify a corresponding Governance Studio project and use AutoSuggest to augment your data with AutoSuggest and your suggestions. You create a data enrichment task to enable the importation of the enriched data knowledge into your data lens.
Create or modify a corresponding Knowledge Studio data lens and import the enriched data knowledge into your data lens, and then verify the changes.
Enriched data knowledge can be imported in one of two ways, directly from your Oracle DataLens Server or from a file that you downloaded from an enrichment task. The following sections describe both import methods.
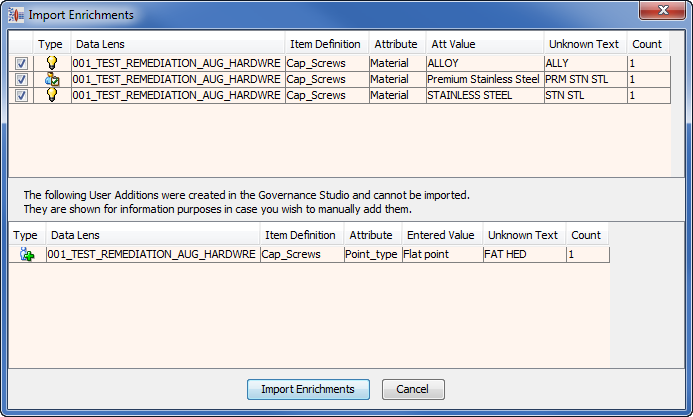
This import method is automatically available when you create the data enrichment task in Governance Studio because it is stored in a file on the server. You can select the enrichments that you want to import and view user enrichment suggestions before you import.
From the File menu, select Import Enrichments from server.
This dialog remains open so that you can continueto reference the information while refining your data lens.�.
Using the check boxes, select the data enrichments suggestions that you want to import from the list in the upper pane. All enrichments that have been created for the data lens, regardless of who created them, are presented.
Any user enrichment suggestions appear in the lower pane so that you can consider adding them to your data lens.
Click Import Enrichments.
A confirmation message is displayed indicating the number of enrichments that were imported or any errors if the enrichments were not created.
Click OK.
Review and modify the new productions added to your data lens. See "Modifying Phrase Productions".
These productions are indicated with a light bulb for valid AutoSuggest enrichments and a person with check mark icon for user suggestions for enrichment as follows:
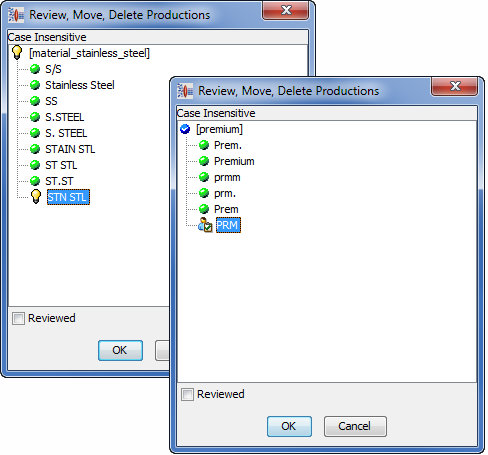
(Optional) Select Reviewed when you are done with these productions to indicate that you have complete your review.
Click OK.
This import method relies on you downloading any data enrichment files stored on your Oracle DataLens server to a known location on the user's system by viewing the given task in Task Manager, Application Studio, Governance Studio, or Knowledge Studio. See "Viewing Tasks". The default download directory is in the user's C:\Users\user_name\AppData\Roaming\DataLens\tmp directory.
All enrichments applicable to the open data lens are automatically applied unlike the ability to review and select them as in "Importing from Your Oracle DataLens Server". To review all of the enrichments contained in a data enrichment task before you import them, see "Viewing Data Enrichment Tasks".
From the File menu, select Import Enrichments File.
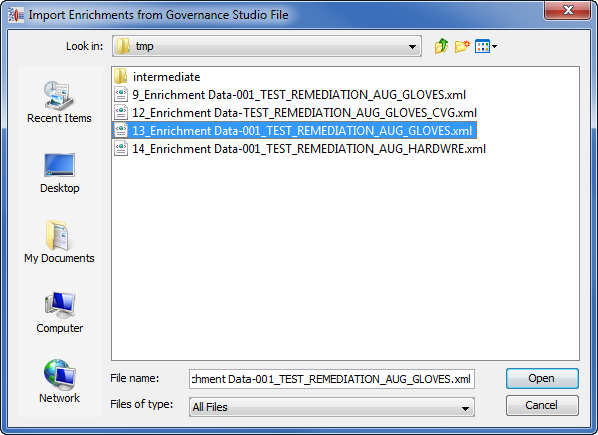
Select the file you want to import from the list of downloaded files or locate the file on your system if it is not in the default download directory.
A confirmation message is displayed indicating the number of enrichments that were imported or any errors if the enrichments were not created.
Click OK.
Review and modify the new productions added to your data lens. See "Modifying Phrase Productions".
These productions are indicated with a light bulb for valid AutoSuggest enrichments and a person with check mark icon for user suggestions for enrichment as follows:
(Optional) Select Reviewed when you are done with these productions to indicate that you have complete your review.
Click OK.
|
Copyright © 2001, 2013, Oracle and/or its affiliates. All rights reserved. Legal Notices |
|