5 Administrative Tasks
After an Oracle Visual Builder service instance is created, an identity domain administrator assigns one or more users the Visual Builder Administrator role for the service instance. A Visual Builder Administrator can manage and set general options for applications in the service instance.
Manage Applications in the Service Instance
An Visual Builder administrator can manage any application in the service instance and does not need to be a team member to see an application on the Home page. Administrators can perform all the tasks of a developer, including adding and removing team members, and opening, staging and publishing applications.
The Home page displays a list of the applications in the service instance. Developers can only see and manage an application when they are a member of the application’s team. Administrators can select the Administered by me checkbox next to the Status dropdown list if they want the list of applications to include all the applications in the instance, even the applications where they are not a team member. The checkbox is not visible to developers who do not have the role of administrator.
Note:
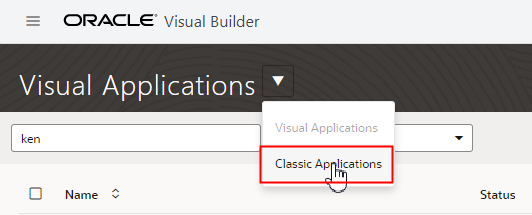
If you have any classic applications (apps that have the older Visual Builder project structure), open the Visual Applications dropdown list in the header and select Classic Applications.
On the Home page for classic applications, administrators can select the Applications I administer checkbox in the Filter by pane to display the applications where they are not a team member.
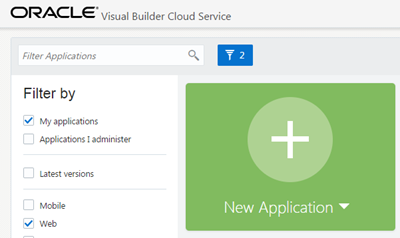
Description of the illustration admin-homepage1.png
Access Instance Settings
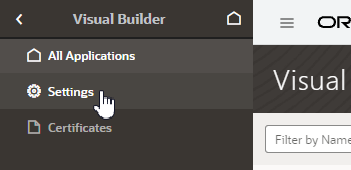
An instance administrator can access the Tenant Settings page for managing the instance’s global settings from any Visual Builder page.
The Tenant Settings page contains three tabs: General, Tenant Database and Services. The General tab has panels for configuring security settings, specifying Access Denied messages, and configuring the Component Exchange details. You use the Tenant Database tab to switch to an Oracle database and to see how much database space your applications are using. You use the Services tab to add and edit the backend services that are accessible to apps in the tenant.
To open an instance’s Tenant Settings page:
The settings available for the instance are grouped in the General, Tenant Database and Services tabs on the page.
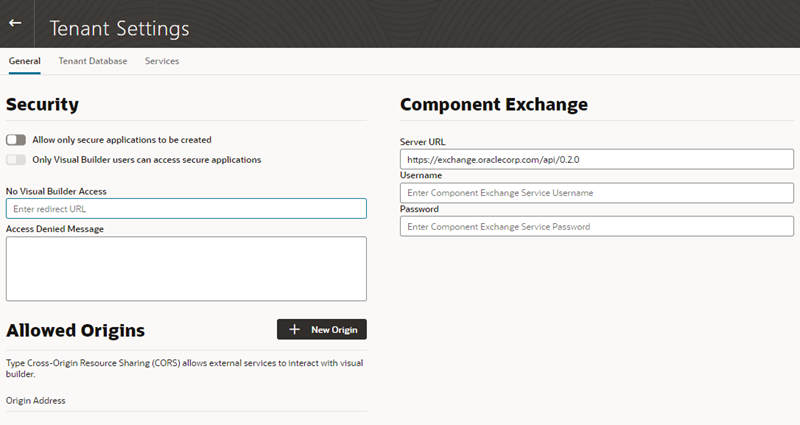
Description of the illustration admin-instance-tenant-settings-oic.png
Choose Your Instance's Update Window
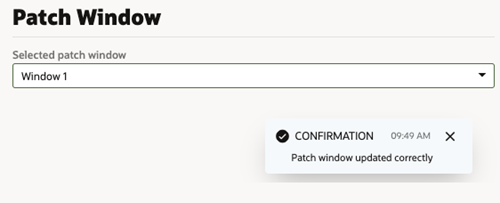
Functional updates for Visual Builder are provided in two windows, which are typically two weeks apart. You can select when you want an instance updated by selecting either Window 1 or Window 2. We recommend that non-production instances be updated in the first window (Window 1) and production instances in the second window (Window 2). This allows you to test your applications in your test and development environments before the update is applied to your production environment.
Note:
Oracle automatically sends notifications to the instance's account administrator each time it will be updated, confirming the instance's next update window. Once we send out the notification, it's too late to change your window for that update. If you do make a change, it won't be applied until the following update.
To set the update window option:
If your Visual Builder instance was provisioned as part of Oracle Integration Generation 2, you specify the instance's update window in the Oracle Cloud Infrastructure Console, not the instance's Tenant Settings. See Choose Your Update Window in Provisioning and Administering Oracle Integration 3.
Configure Security Options for Applications
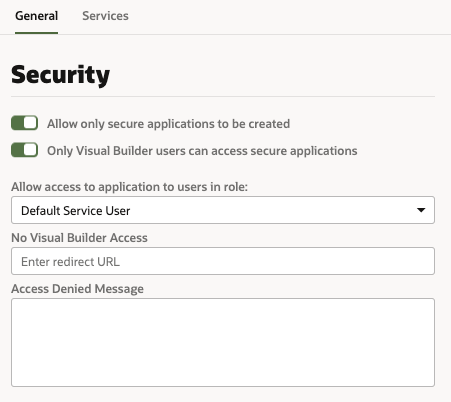
Administrators can use the Security panel in the Tenant Settings page to require authentication for all applications in the instance.
When an administrator enables the Allow only secure applications to be created option, all published and staged applications in the instance will require user authentication. When the option is enabled, users must be assigned a role by the identity domain administrator and log in to access the applications in the instance. When the option is not enabled, applications can be created that allow access to anonymous users.
When an application has the default security settings, any user with a valid login can access the pages in an application. A developer can modify the default security settings to define the roles that can access applications, pages and components.
When the secure application option is enabled, an administrator can enable the Only Visual Builder Users can access secure applications option so that only Visual Builder users (those assigned the default Service User role) can access the staged and published applications in the instance. For example, this allows you to configure security so that users assigned the Visual Builder Developer role can access the designer, but can’t access the published application and data because they are not assigned the Visual Builder Service User role.
An administrator can also use IDCS roles when configuring the instance's security so that a user's access is limited to just the secure applications. Users assigned the selected IDCS role would be able to access the applications, but would be prevented from accessing Visual Builder or Oracle Integration resources external to the application, such as other Oracle Integration integrations.
To configure the security options for all applications in the instance:
Assign Roles for Users to Access an Application
Administrators must assign roles to users, so they have the permissions required to access Visual Builder applications.
Privileges associated with a user role determine what tasks users assigned those roles can perform. See Privileges Available to Roles in Oracle Visual Builder.
| To assign roles to users: | See this: |
|---|---|
| For Visual Builder | Assign Roles to Users |
If your Visual Builder instance is part of Oracle Integration:
| To assign roles to users: | See this: |
|---|---|
| For Oracle Integration Classic | Add Users, Groups, and Roles for an Existing Instance in Administering Oracle Integration Classic |
| For Oracle Integration Generation 2 | About Setting Up Users and Groups in Provisioning and Administering Oracle Integration 3 |
Set Page Messages for Access Denied Errors
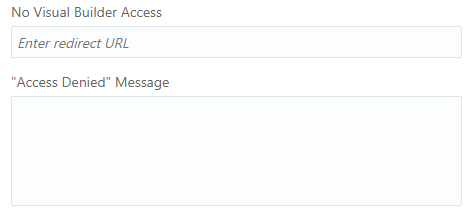
Administrators can use the instance’s settings page to specify a URL that users are navigated to when they are denied access to an application or page.
Authenticated users might see an Access Denied page or message when they attempt to access an application or page in an application that their user role is not permitted to access. Administrators can set the default page or message that users see when they are denied access to an application or page. Access Denied messages that are set at the application level in the General Settings of an application will override messages set in the instance’s settings page. The default Access Denied page and message is used if the message options in this panel are not set.
To specify an Access Denied page or message for applications in the instance:
Allow Other Domains Access to Services
Use the Global Settings page to specify the domains that are permitted to interact with services in your instance.
Cross-Origin Resource Sharing (CORS) is a mechanism that enables you to specify the domains that are allowed to exchange data with applications in your instance. By default, incoming requests from domains not on your instance’s list of allowed origins are blocked from accessing application resources.
To add a domain to the list of allowed origins:
Inspect Database Usage
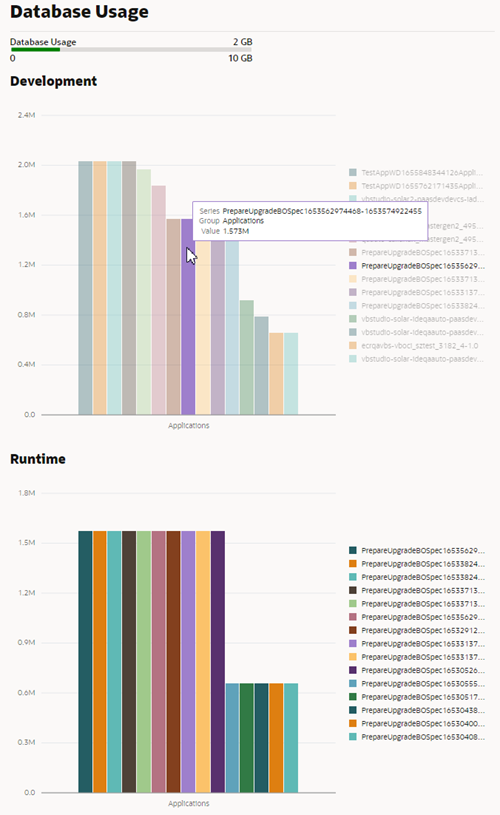
An administrator can view how much space in the tenant's database is being consumed by each of the tenant's applications.
The capacity of the tenant's database is 5GB, so by viewing the database usage you can see how much of the database's capacity remains. If you require more than 5GB of storage, you can Switch to Your Own Oracle DB Instance.
To inspect your instance's database usage:
The Database Usage meter in the panel shows how much of the database's capacity is currently used. The data usage is rendered in two charts:
- The Development chart shows the space used for storing the business objects in each application in the design-time.
- The Runtime chart shows the space used for each of the staged and published apps.
Switch to Your Own Oracle DB Instance
The database provisioned with your Visual Builder instance is used to store data for your business objects and your app's metadata, but this database has a 5GB limit and you can't access the data in the objects using regular SQL.
If the 5GB limit is insufficient for your tenant schema, you can configure your instance to use an Oracle DB instance that has more space instead of the default database. If you choose to switch to an Oracle DB instance, the database must be publicly accessible. You can connect to an Oracle DBaaS or Autonomous Transaction Processing (ATP) database instance. Using an ATP database will give you more space and direct SQL access to the objects VB creates. You can also use a Free Forever Oracle ATP, which provides 20GB of storage for free.
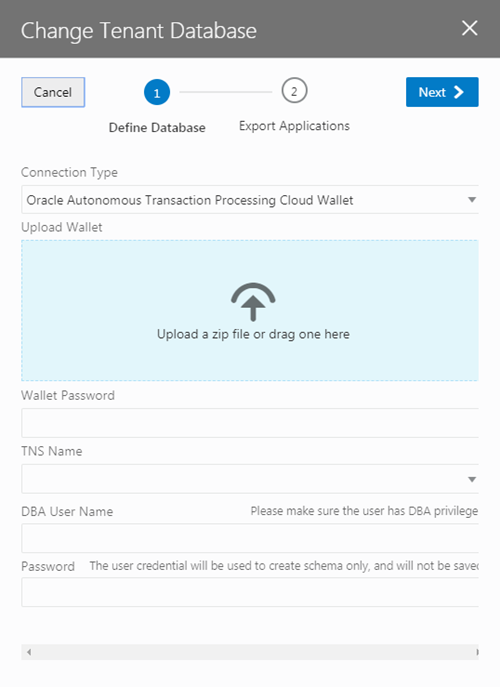
To use a different Oracle DB instance, you use a wizard in the Tenant Settings to create a connection to the database instance and export the applications stored in the tenant's current database.
If you decide to use JDBC to connect to your DBaaS instance, you must include the privileges required to enable the ADMIN user to create a tenant schema. The following SQL shows the grants that are needed:
CREATE USER [adminuser] IDENTIFIED BY [password];
GRANT CONNECT, RESOURCE, DBA TO [adminuser];

GRANT SELECT ON SYS.DBA_PROFILES TO [adminuser] WITH GRANT OPTION;
GRANT SELECT ON SYS.DBA_USERS TO [adminuser] WITH GRANT OPTION;
GRANT SELECT ON SYS.DBA_DATA_FILES TO [adminuser] WITH GRANT OPTION;
GRANT SELECT ON SYS.DBA_SEGMENTS TO [adminuser] WITH GRANT OPTION;
If you decide to use ATP, you'll need to include the wallet.zip file in the wizard in addition to the connection info. You might want to create a new ATP ADMIN user with the correct admin privileges. The following SQL statement shows how to create a second ATP ADMIN user in SQL*Plus or SQL Developer.
DROP USER [adminuser] CASCADE;
CREATE USER [adminuser] IDENTIFIED BY [password];
GRANT CREATE USER, ALTER USER, DROP USER, CREATE PROFILE TO [adminuser] WITH ADMIN OPTION;
GRANT CONNECT TO [adminuser] WITH ADMIN OPTION;
GRANT RESOURCE TO [adminuser] WITH ADMIN OPTION;
GRANT CREATE SEQUENCE, CREATE OPERATOR, CREATE SESSION,ALTER SESSION, CREATE PROCEDURE, CREATE VIEW, CREATE JOB,CREATE DIMENSION,CREATE INDEXTYPE,CREATE TYPE,CREATE TRIGGER,CREATE TABLE,CREATE PROFILE TO [adminuser] WITH ADMIN OPTION;
GRANT UNLIMITED TABLESPACE TO [adminuser] WITH ADMIN OPTION;
GRANT SELECT ON SYS.DBA_PROFILES TO [adminuser] WITH GRANT OPTION;
GRANT SELECT ON SYS.DBA_USERS TO [adminuser] WITH GRANT OPTION;
GRANT SELECT ON SYS.DBA_DATA_FILES TO [adminuser] WITH GRANT OPTION;
GRANT SELECT ON SYS.DBA_SEGMENTS TO [adminuser] WITH GRANT OPTION;
Note:
If you get an error Failed to verify the target database in the Change Tenant Database dialog when switching the database, it might be because the database is not reachable (Visual Builder cannot reach databases in private subnets), or because you don't have the required privileges.
If you see the error, confirm that the ADMIN user (adminuser) has the required privileges. You might also need to assign the SYSOPER and SYSDBA roles to the ADMIN user:
GRANT SYSOPER, SYSDBA TO [adminuser];You can run the following query to confirm the ADMIN user has the necessary privileges:
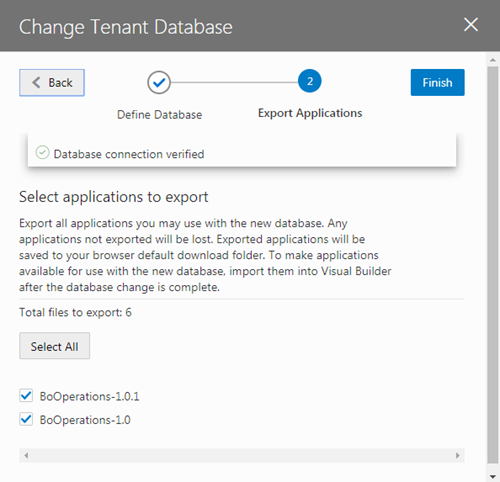
select * from v$pwfile_users;In the wizard you need to select and export all the applications in your instance that you want to keep. After confirming that your instance is using the new database instance, you must import the exported applications into Visual Builder to save them in the new database instance.
Note:
If you have live applications already on the instance before migration, make sure to backup the data in their business objects using the export options in the Visual Builder data manager. You'll then be able to import that data back into the new apps you'll create from the application archives you export in the wizard.To switch to a different Oracle DB instance:
After switching the database, the Tenant Database pane displays the connection information for your tenant's database. In the following image you can see that the instance is now using an Autonomous Transaction Processing (ATP) database instance.
Note:
If you decide to revert back to using the embedded database, you can click ![]() in the Tenant Database pane. You'll be prompted to confirm that you want to switch to using the instance's embedded database instead of the current one.
in the Tenant Database pane. You'll be prompted to confirm that you want to switch to using the instance's embedded database instead of the current one.
When you revert to using the embedded database, the visual applications in your current database are not transferred automatically. You'll need to export the apps you want to keep before switching the database, and then import them into the embedded database.
Visual Builder automatically manages the schemas and tables it uses for apps and business objects in your new DB, so you don't need to do anything further.
If you would like to access the business objects using SQL, you'll find that VB creates users/schemas with names that start with VB_ followed by randomly generated strings. By examining the data dictionary you'll be able to find the users that represent specific apps. Note that you'll see separate schemas for dev, stage, and published instances of an app. The schemas for the dev and test instances will be re-created with different names with every new version of the app that you create. If you want to prevent the schema name for a published app from changing, when you publish new versions of the app you should choose the option to not replace the data.
Note:
Instead of having Visual Builder create and manage schemas, you can make a schema that already exists in your database available to applications, so developers can create business objects based on existing DB tables and views. In this case, only one schema is used for the app's dev, staged, and published instances. See Make Schemas in an Oracle DB Instance Available to Applications.Make Schemas in an Oracle DB Instance Available to Applications
When you connect an Oracle database instance with your Visual Builder instance, application developers can use schemas predefined in the tenant database to create business objects based on existing tables and views for an application. But for developers to access these schemas, you'll first need to make them available to applications.
To make a tenant database's existing schema available to applications:
Reset an Expired Password or ATP Wallet for Your Oracle DB Instance
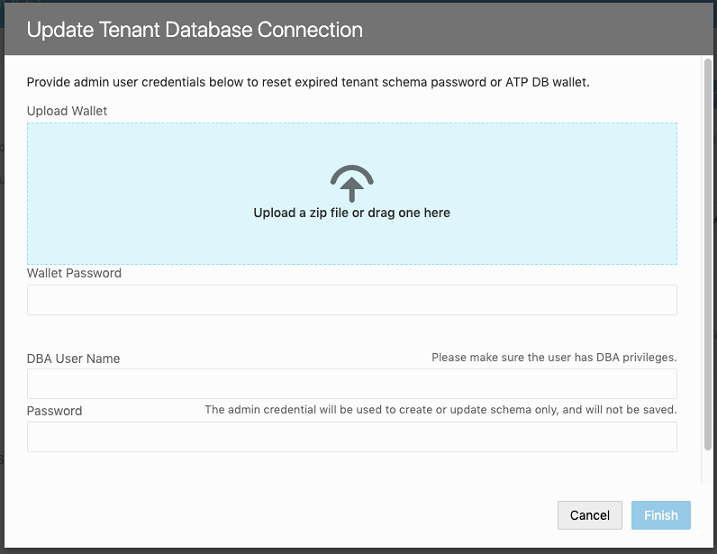
If you switch to use your own Oracle DB instance and the credentials you use to access the instance expire, you can renew the expired credentials using the Update Tenant Database Connection dialog.
To regenerate the expired values, you need to provide the ADMIN user credentials that you provided when you first switched to your own Oracle DB instance. Visual Builder uses the ADMIN user credentials to generate new Visual Builder tenant credentials to replace the expired credentials. Visual Builder does not store the ADMIN user credentials that you supply.
To reset expired credentials:
Add a Connection to Integration Applications
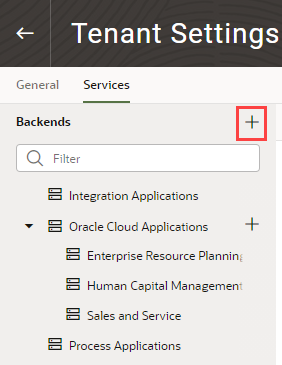
Administrators can use the Services tab in the Tenant Settings page to add a connection to an instance of Oracle Integration as a backend service.
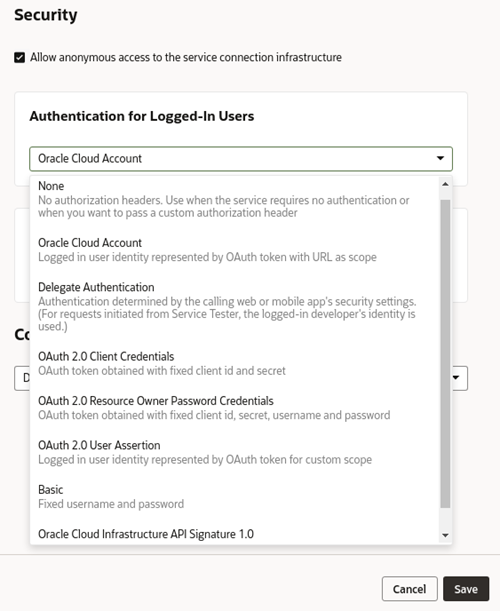
When adding a connection to an instance of Oracle Integration as a backend service, you can use any of the available authentication options in the Create Backend dialog. If using Oracle Cloud Account or Delegate Authentication as the authentication type, the Oracle Integration instance should be co-hosted with Visual Builder. In most cases, this backend service (Oracle Integration) will be preconfigured for your Visual Builder instance.
If you are using multiple Visual Builder instances, for example, development and production instances, you might need to add connections to Oracle Integration in more than one instance.
To add a connection to an Oracle Integration instance:
See About Authentication and Connection Type in Developing Applications with Oracle Visual Builder.
Add a Connection to Oracle Cloud Applications
The list of REST services in the service catalog of a visual application is retrieved from an Oracle Cloud Applications backend service. Specify the instance URL of the Oracle Cloud Applications backend service in the Tenant Settings page.
All visual applications in the tenant will use the Oracle Cloud Applications instance URL specified in Tenant Settings, but a visual application can be configured to use a different Oracle Cloud Applications backend service by specifying a different instance URL in the Backends tab (which you access from the Navigator's Services tab). The tenant-level backend configuration is ignored if you or a visual application developer configures a different Oracle Cloud Applications backend service in a visual application’s Backends tab.
- Basic Auth: Uses a fixed username and password for authentication.
- Oracle Cloud Account: Needs federation between Oracle Cloud Applications and Visual Builder.
- Delegate Authentication (previously called Propagate Current User Identity): Same as Oracle Cloud Applications. That is, it needs federation between Oracle Cloud Applications and Visual Builder.
- None: This assumes your Oracle Cloud Applications REST API can be called without any authentication, which is not usually the case.
See About Authentication and Connection Type in Developing Applications with Oracle Visual Builder.
If the necessary prerequisites for setting a tenant-level Oracle Cloud
Applications backend service are not available, then a visual application developer can set up a backend service at the visual application level where more options are available. Another option is for you (the service administrator) to configure the Oracle Cloud
Applications backend with None and let the visual application developer override the authentication setting at the visual application level.
To specify an Oracle Cloud Applications service for the tenant:
Add a Connection to Process Cloud Service
Administrators can use the instance’s Tenant Settings page to add a connection to an instance of Oracle Process Cloud Service as a backend service.
To add a connection to an instance of Oracle Process Cloud Service as a backend service, the instance of Oracle Process Cloud Service should be co-hosted with Visual Builder because the authentication types that Visual Builder supports for this configuration is Oracle Cloud Account or Propagate Current User Identity. In most cases, this backend service (Oracle Process Cloud Service) will be preconfigured for your Visual Builder instance.
If you are using multiple Visual Builder instances, for example, development and production instances, you might need to add connections to Oracle Process Cloud Service in more than one instance.
To add a connection to an Oracle Process Cloud Service instance:
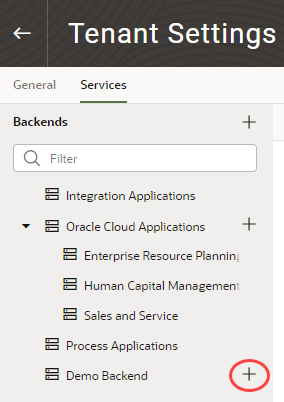
Add a Connection to a Custom Backend
You can create your own backend to map to a custom server other than the Oracle Integration, Process, and Oracle Cloud Applications backend services. You can create a custom backend with a free-form URL, or create a custom ADF backend when you know the Describe URL that points to an ADF Describe service.
To add a connection to a custom backend:
Create a Child Backend
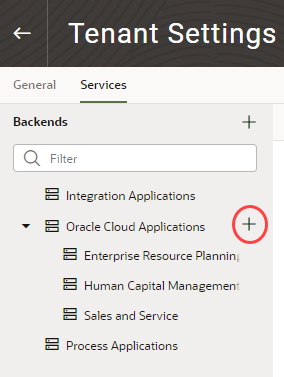
You can create child backends to extend the functionality provided by the top-level Oracle Cloud Applications or custom backend registered to your Visual Builder instance.
A child backend inherits the parent backend's definition, which you can override as required. Its server URL is derived from the top-level backend, with vb-catalog://backends/ as the base URL. Continuing the Oracle Cloud
Applications example, the Sales and Service child backend adds to the top-level Oracle Cloud
Applications backend and has vb-catalog://backends/fa/crmRestApi/resources as its server URL.
Child backends can be created only for the Oracle Cloud Applications backend and custom backends that use a OpenAPI/Swagger service specification.
- To create a child backend for the Oracle Cloud
Applications backend:
- To create a child backend for a top-level custom backend:
Edit Authentication for a Backend Service
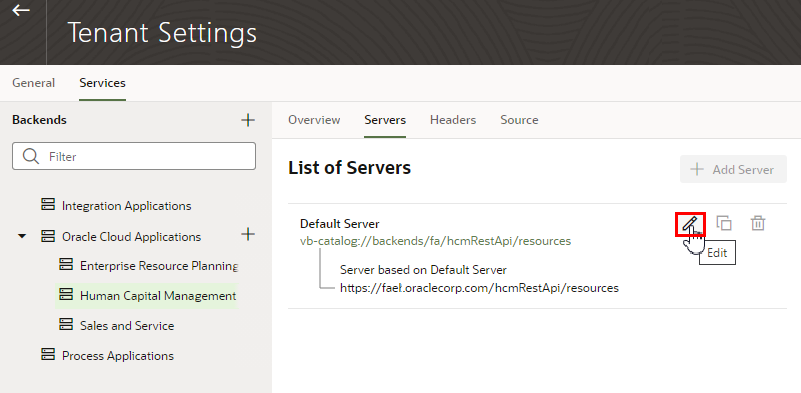
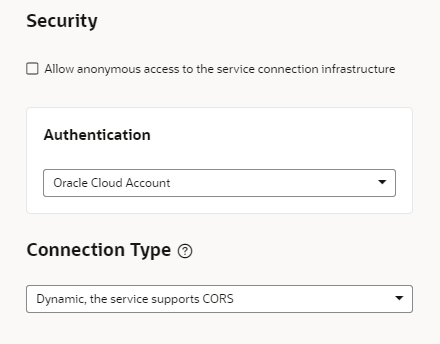
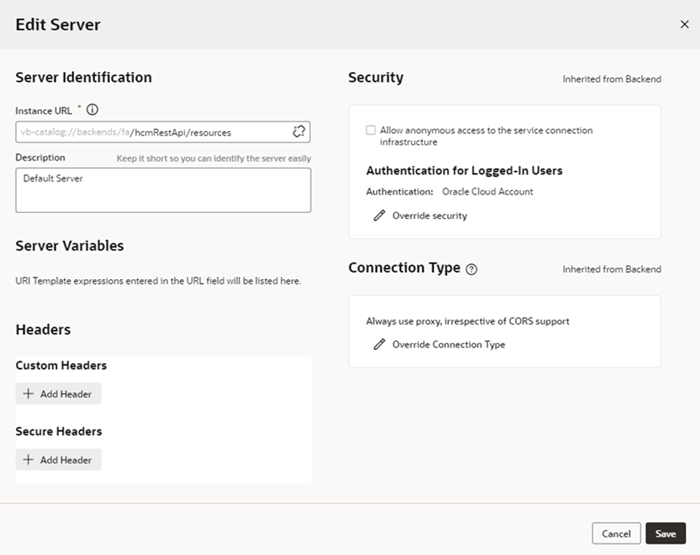
Administrators can use the Services tab in the Tenant Settings page to edit the authentication and connection settings for the backend services available in the tenancy. Once a backend service is added, you can edit its details. In the case of child backends, you can also override the settings inherited from the backend service, for example, to allow connections to the child HCM backend to use basic authentication instead of using the Oracle Cloud Account authentication for logged-in users set at its parent backend.
For a description of the authentication options, see About Authentication and Connection Type in Developing Applications with Oracle Visual Builder.
To edit the connection details for a backend service:
Manage Self-signed Certificates
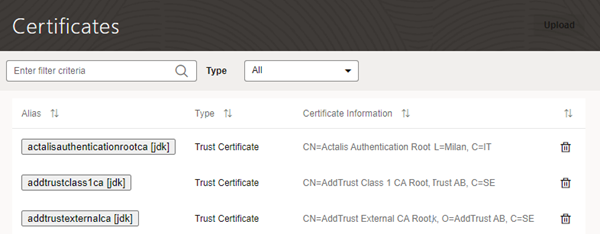
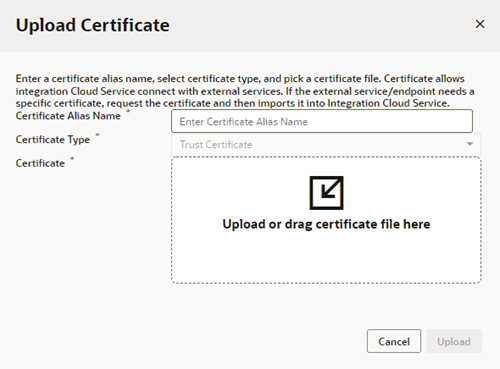
Administrators can use the Certificates page to upload and manage the self-signed certificates used by the instance to enable inbound and outbound SSL communications to a service’s REST APIs
When creating connections to REST services that use self-signed certificates, you might need to add an API’s certificate to your Visual Builder instance to validate SSL connections to that service. You can use the Certificates page to upload and remove certificate files (.pem) for services. Uploading a service’s certificate file to the keystore will allow all applications in the instance to communicate with that service. The Certificates page displays a list of certificates that have been added. You can click the Delete button in a row to remove the certificate.
Note:
Your staged or published apps might stop working if they use service connections with self-signed certificates and the certificates have expired. Any certificates issued after 2020-09-01T00:00:00.00Z will automatically expire 398 days after they have been issued. If your apps use certificates issued before 2020-09-01T00:00:00.00Z, the certificates will not expire, but you should update them with a newer certificate.
To avoid disruptions, you should plan regular updates to refresh the self-signed certificates before they expire (for example, every 6 months). It's not recommended to use self-signed certificates in production apps.
To upload a self-signed certificate:
