Configure Support for a Custom Domain
If you want your customers to see a different URL than the one generated by Visual Builder, you can map a custom domain to your instance.
A custom domain is a customer-provided hostname and domain (FQDN) created by adding a subdomain to your domain. After configuring your instance to use a custom domain, app users accessing the app using the custom domain will not see the typical Oracle domain (for example, myvbinstance-accountname.builder.ocp.oraclecloud.com) in the URL, but instead would see something like mycustom.example.org.
Note:
For the custom domain to work, you must set the custom domain in the visual application's Settings editor and publish the app. See Specify a Custom App URL in Developing Applications with Oracle Visual Builder.After configuring a custom domain:
- Users can access a single web app by typing just the custom domain URL in the browser, for example,
mycustom.example.org. The app is loaded from the custom domain root ("/"), and no additional path information or query parameters are required in the URL. httpcan be redirected tohttps, so if a user types "mycustom.example.com", this will resolve tohttps://mycustom.example.com, and load the default web app.- For applications that contain business objects, the Business Object REST API can also use the custom domain configuration.
- Developers can access the Designer in Visual Builder using a custom domain.
- If you create and stage an application from a custom domain (
https://mycustom.example.com/ic/builder/designer), you'll be automatically redirected to the custom domain (https://mycustom.example.com/ic/builder/rt/appid/version/...) when you open the app using a URL that isn't the application's custom domain (for example, your instance's URLhttps://servicename.oraclecloud.com/ic/builder/rt/appid/version/...).
Multiple custom domains can be configured for an instance, but each custom domain must be mapped to a different visual application. For example, if the visual application myvisualapp1 is mapped to the subdomain mysubdomain1, if you want to map mysubdomain2 to an application it must be mapped to a different visual application (myvisualapp2).
Custom domains are also subject to other limitations:
- A custom domain can only access a published app. It will not work for apps that are only staged.
- If you publish a different web app in your visual application, it immediately becomes the default app for the custom domain, and the previous web app will no longer be available at the custom domain.
- A custom domain can only be used to access one live app (in the visual application configured for the root URL). You can access other live apps in the same instance only by using the full Oracle Cloud URL or by creating and configuring a different custom domain and visual application.
- If a visual application contains more than one web app, only one of them can be accessed using the custom domain. It's not possible to specify which app in a visual application will be available at the custom domain because the domain is configured in the Settings for the visual application, not for individual web apps. If you are going to use a custom domain, it is recommended that the visual application only contain one web app to ensure that the correct app is loaded.
- Mobile and PWA apps are not supported at this time. Custom domains can only be used for web apps.
To configure a custom domain for your instance:
- You must be the registered owner of the domain and have access to its SSL certificate bundle information.
- You must have an Oracle Visual Builder instance.
Note:
Custom domains are also supported on Oracle Integration instances, but only if you're on Generation 2.
Depending on whether you're on Oracle Integration Generation 2, Visual Builder, Visual Builder Generation 2, or a Visual Builder instance that was provisioned as part of a SaaS order, the process for enabling custom URLs varies. To enable a custom domain:
- For a Visual Builder Generation 2 instance, use the instructions in Create and Configure a Custom Endpoint for Your Visual Builder Instance in Administering Oracle Visual Builder Generation 2.
- For a Visual Builder instance that is not Generation 2, but where you have access to the OCI Console, you'll need to:
- Create a WAF Policy in the OCI Console for your OCI account;
- Create and Configure a Subdomain and Configure SSL in the WAF Policy; and
- Log a service request with Oracle Support.
- For a Visual Builder instance provisioned as part of a SaaS order, you might not have access to the OCI Console for configuring WAF. In this case, you'll need to use the instructions in Create Custom Domain for Visual Builder Instance Provisioned as Part of a SaaS Order.
- For a Visual Builder in Oracle Integration Generation 2 instance, use the instructions in Configure a Custom Endpoint for an Instance in Provisioning and Administering Oracle Integration and Oracle Integration for SaaS, Generation 2.
Create a WAF Policy in the OCI Console
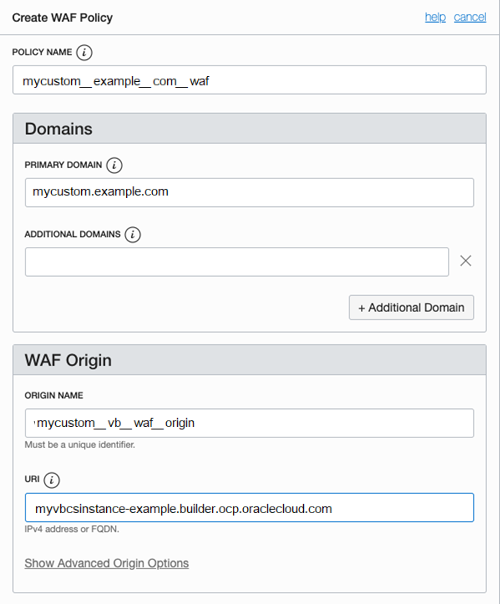
To create a custom domain for your Visual Builder instance, you'll need to create and configure an Oracle Cloud Infrastructure Web Application Firewall (WAF) policy for your OCI account in the OCI Console.
Note:
If you do not have access to the OCI Console, you'll need to use the instructions in Create Custom Domain for Visual Builder Instance Provisioned as Part of a SaaS Order.To create the WAF policy:
You still need to upload the SSL certificate for your domain to your WAF policy so you can enable HTTPS. You can get the SSL certificate when you configure your domain's DNS record.
Create and Configure a Subdomain and Configure SSL in the WAF Policy
To use a custom domain for your app you'll need to use your domain provider's tools to create a subdomain that points to the WAF CNAME target for your instance that was generated for you after you created the WAF policy.
Note:
If you do not have access to the OCI Console to create the WAF policy, you'll need to use the instructions in Create Custom Domain for Visual Builder Instance Provisioned as Part of a SaaS Order.Using the tools for administering your domain, you will need to edit your domain's DNS record to create or identify the subdomain and map it to the WAF CNAME of your Visual Builder instance. Your WAF CNAME will look similar to mycustom-example-com.b.waas.oci.oraclecloud.net. If you are unsure about how to create a subdomain and CNAME entry with your domain provider, please check with your organization's network administrator.
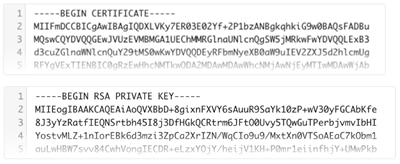
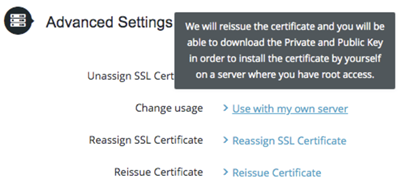
After editing the DNS record, you'll need to get the SSL certificate for the domain so you can upload it to your WAF policy. You'll then need to log a Service Request to configure the instance backend.
To create and configure a subdomain for your instance:
After these setup steps have been completed by you and Oracle, you can map your visual application to the custom domain.
Create Custom Domain for Visual Builder Instance Provisioned as Part of a SaaS Order
If your Visual Builder instance was provisioned as part of a SaaS order, you may not have access to the OCI Console for configuring WAF. In this case, you'll need to use your domain provider's tools to create a subdomain that points to your instance, and then log a Service Request with Oracle Support to configure the instance backend, and include the SSL certificate and associated private key for the subdomain with the service request.
Note:
Instances provisioned as part of a SaaS order will contain-ODCSVBCS- as part of the instance's URL. Contact your service administrator if you're not sure.
To create and configure a subdomain for your instance:
Once setup is complete you can map your visual application to the custom domain.


