Register the Fusion Applications Source

Register the Oracle Fusion Applications source.

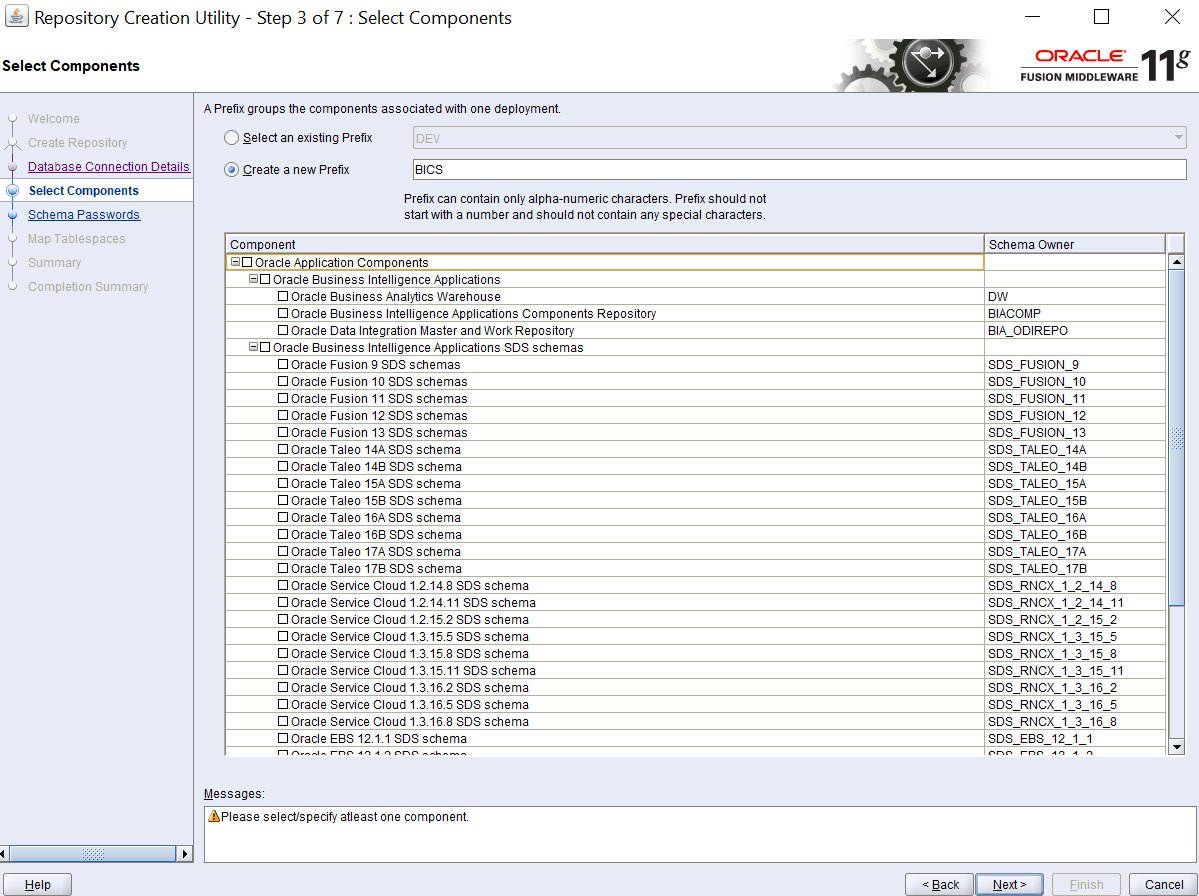
Ensure that the applicable SDS schemas have been created during installation and configuration of Oracle BI Applications. For Oracle Fusion Applications cloud source systems, ensure that you select the Oracle Fusion 11 SDS schema in the Select Components dialog of Oracle Fusion Middleware Repository Creation Utility as seen in the following image:

See Creating Schemas Using Business Analytics Applications Suite RCU

Note:

If you have not created the applicable SDS schemas during installation and configuration of Oracle BI Applications, then you can create them as a post-installation step. See Creating SDS Schema Post Installation

This task is part of the Fusion Applications Cloud Source System Deployment Roadmap.

To Register the Oracle Fusion Applications Source:
  1. Log in to Oracle BI Applications Configuration Manager as a user that has Enterprise Role -ASM_APPLICATION_IMPLEMENTATION_ADMIN_ABSTRACT.
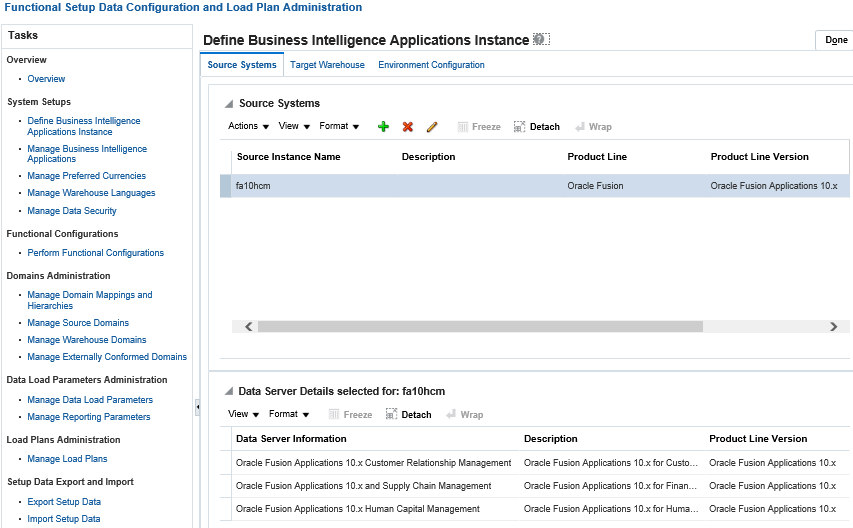
  2. In the Tasks pane under System Setups, select the Define Business Intelligence Applications Instance link to display the Source Systems tab.
  3. Click the Add icon (+) to display the Register Source dialog.
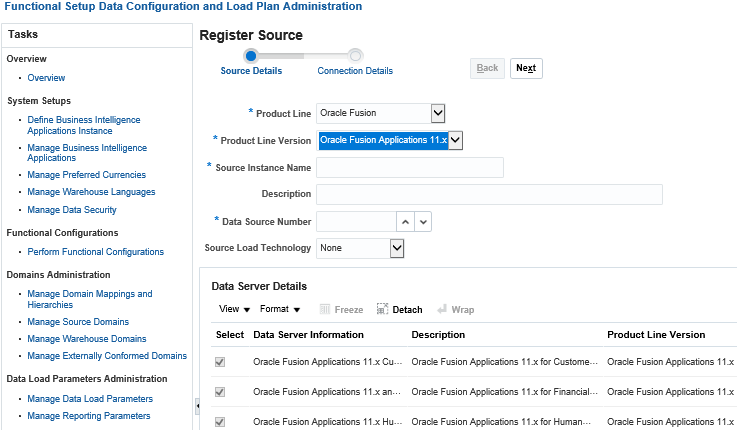
  4. In the Register Source in Configuration Manager page, specify this information:
    • In the Product Line drop-down list, select Oracle Fusion.

    • In the Product Line Version, select the Oracle Fusion version being used.

    • In the Source Instance Name field, specify a unique name to identify the source system.

    • Optionally, in the Description field, enter a short description to help administrators and implementers identify and use this data source in Configuration Manager.

    • In the Data Source Number field, enter an integer or use the spinner to specify a number to identify data in the Oracle Business Analytics Warehouse. This number must be unique within Configuration Manager.

    • In the Source Load Technology, select ODI External File to define the cloud adapter mode.

  5. Click Next to display the external file location details.
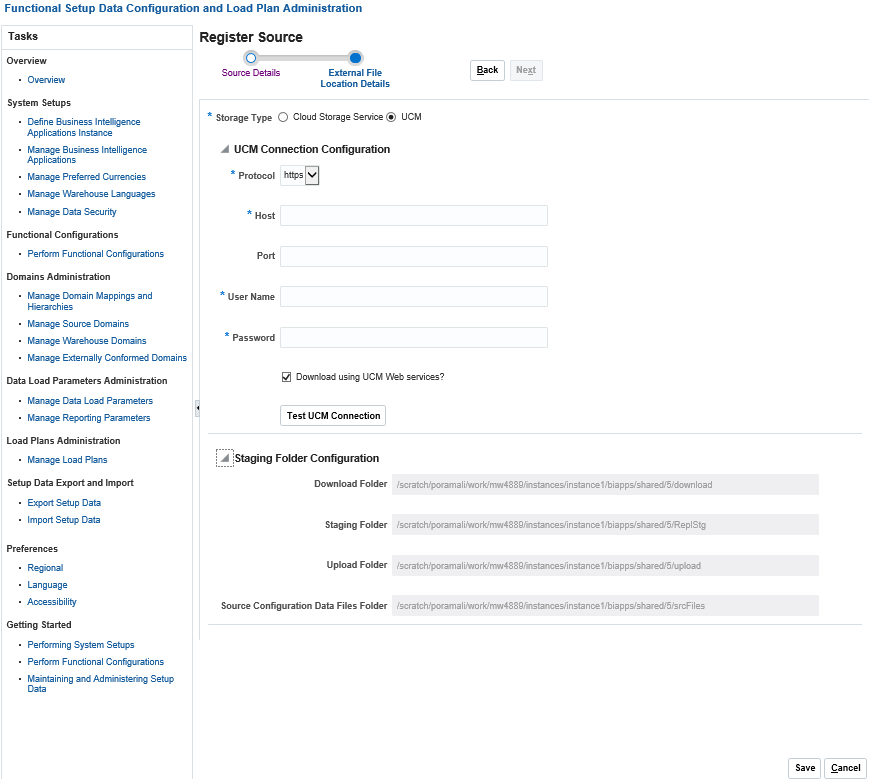
  6. In the External File Location Details dialog, select the UCM button, specify the following details, then click Save:
    1. Protocol – Select https.

    2. Host and Port – Specify the host and port details provided by the Oracle Cloud Services in your service request when it is closed.

    3. User Name and Password – Specify the user name and password of the user that you provisioned for export and import of BI data from Fusion Universal Content Management server. See Provisioning a User for Export and Import of BI Data from Fusion UCM.

    4. Download using UCM Web Services? – Do not change default selection.

    5. Download Folder – auto-populated. Do not change the default value.

    6. Staging Folder – auto-populated. Do not change the default value.

    7. Upload Folder – auto-populated. Do not change the default value.

    8. Source Configuration Data Files Folder - auto-populated. Do not change the default value.

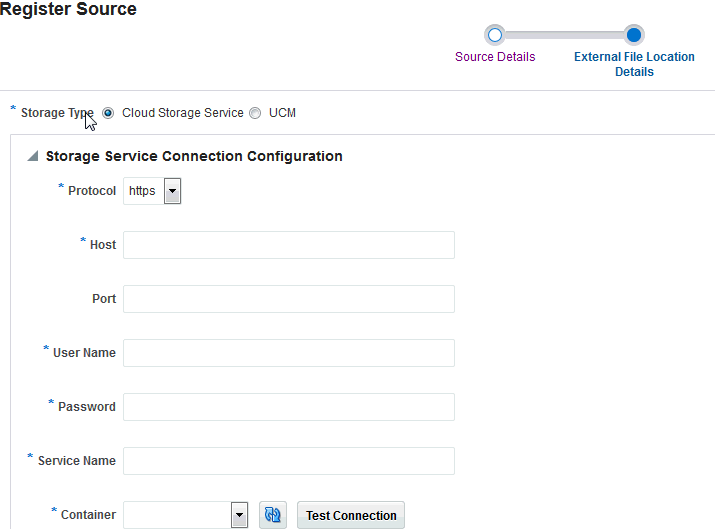
    Storage Service account is not provisioned by BI Apps and this option is only applicable when you have a Storage service account and choose to use that as external storage for Fusion BI data. If you meet this criteria, then in the External File Location Details dialog, select the Cloud Storage Service button, specify the following details, then click Save:
    1. Protocol – Select https.

    2. Host – Specify the host details provided by the Oracle Cloud Services in your service request when it is closed. For example, storage.us2.oraclecloud.com.

    3. Port- Specify the port details provided by the Oracle Cloud Services in your service request .

    4. User Name – Specify the Oracle cloud account user name that will be used to authenticate the Storage Servcie.

    5. Password- Enter the password for the Oracle cloud user account name that you specified in the User Name field.

    6. Service Name- Identifies the specific service to upload files to. This is a concatenation of the service name and the identity domain, separated by a dash, for example: storageservicename-identitydomainname. You can obtain this service name from the Service REST Endpoint data field in the storage service’s details area in Oracle Cloud My Services. It is the last part of the address, after the last forward slash.

    7. Container- Name of the container to upload data to in the storage service. This should be the same container specified in Configuration Manager where the Fusion data source was registered (that is, in Configuration Manager navigate to System Setups\Define Business Intelligence Applications\Source Systems tab.

    Note:

    You can register both Fusion 10 and Fusion 11 with UCM or register both with Cloud Storage Service. If you register Fusion 11 with UCM, you can not register Fusion 10 with Cloud Storage Service. For Fusion, support is provided only for one technology.