Release 2.0.3
A54088-01
Library |
Product |
Contents |
Index |
| Oracle Security Server Guide Release 2.0.3 A54088-01 |
|
![]()
![]()
This chapter details how a security administrator (SA) uses the Oracle Security Server Manager to define elements to the Oracle Security Server. The following topics are discussed:
The first step is to launch the Oracle Security Server Manager program from the Oracle Security Server program group on your desktop.
The Login Information window (Figure 4-1) appears in response.
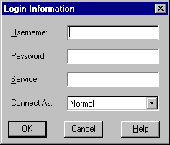
Perform the following steps to log in to the Oracle Security Server Manager:
The Oracle Security Server Manager window (Figure 4-2) appears in response.
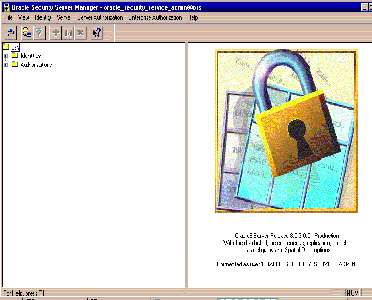
Three components of this window are discussed in the following subsections.
A menu bar (Figure 4-3) appears at the top of the Oracle Security Server Manager window.

Several of the pulldowns represented on this bar are discussed in separate sections later in this chapter. (The File and View pulldowns are not relevant to this manual.)
Of particular interest here are Identity, Server, Server Authorization, and Enterprise Authorization.
All four of these pulldowns contain the following selections:
Note that none of these pulldowns contains any kind of "modify" option. Within the Oracle Security Server Manager, you must delete an item and define a new one if you need to change the information for that item.
A tool bar (Figure 4-4) appears in the upper lefthand area of the Oracle Security Server Manager window.

As you can see, not all of the buttons are enabled. The Oracle Security Server Manager only enables a button when it is appropriate for you to be performing the corresponding function.
The two leftmost buttons are not of concern to you. The functions associated with the other five buttons, reading from left to right, starting with the funnel), are:
The remaining area of the Oracle Security Server Manager window is divided into two parts. The left part contains a tree structure; the right part is where you will be doing the data entry involved in defining entities to the system.
Note that the figures within this section make use of an Oracle Security Server Repository that has been configured with sample data.
You can perform three types of operations on the tree structure:
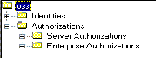

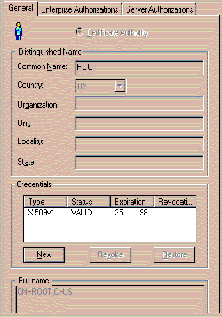
An Identity is a representation of any entity that does business with the Oracle Security Server. This includes users, programs or other systems, and the Certification Authority (CA). (See Chapter 1, Oracle Security Server Concepts, for more information about the CA.)
An Identity has two basic elements: a distinguished name (DN) (see "Distinguished Names (DNs)" within Chapter 1), and credentials, which are based on an X.509 certificate (see "Oracle Security Server Certificates," also within Chapter 1).
The tasks that you can perform with regard to Identities are described in the following subsections.
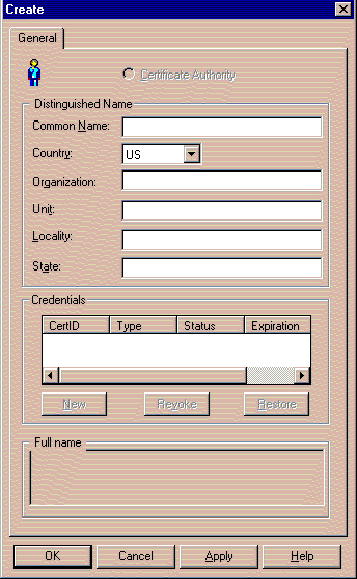
If you wish to define a new Identity to the Oracle Security Server, select Create from the Identity pulldown on the Oracle Security Server Manager window.
The window shown in Figure 4-8 appears in response.
Refer to the on-line help for information about how to use this window. To bring up help for this topic, click the Help button on the window.
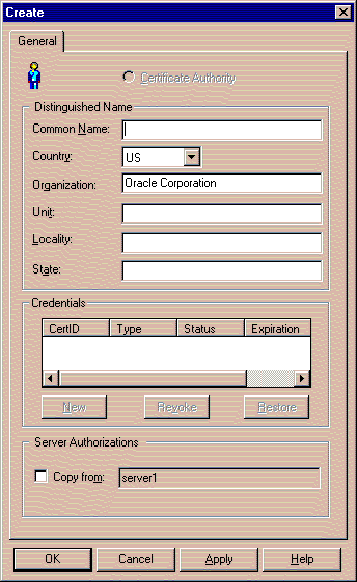
If you wish to define a new Identity based on an existing Identity:
The window shown in Figure 4-9 appears in response.
The window contains all of the information that you defined for the existing Identity except for its Common Name. Add and/or change field values as desired. Note that you can also tell the system to assign, to the new Identity, the Server Authorizations and Enterprise Authorizations that have been granted to the existing Identity, by clicking on the box next to Copy from within the Attributes area of the window.
Refer to the on-line help, which is the same as for the Create function, as necessary.
Once you have clicked the OK button on the Create Identity Window, the window shown in Figure 4-10 appears in response.
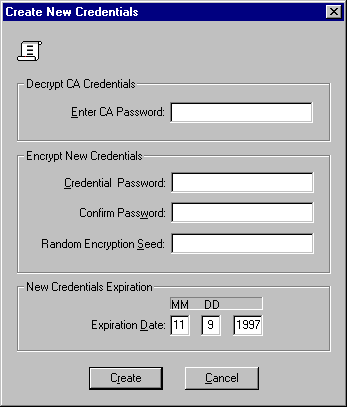
Refer to the on-line help for information about how to use this window. To bring up help for this topic, click the Help button on the window.
Once you have finished defining a new Identity, it should be present in the tree structure, within the appropriate folder under oss/Identities/Approved.
If you wish to approve credentials for an entity that has been defined outside of the Oracle Security Server (for instance, by an Oracle WebServer), click on that Identity within the oss/Identities/Requested folder of the tree structure.
The window shown in Figure 4-11 appears in response.
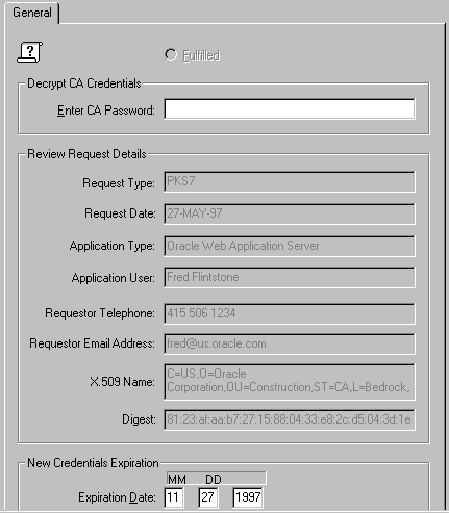
Note that the data within Figure 4-11 is sample data; the data that appears within this window on your system will vary.
Refer to the on-line help for information about how to use this window. To bring up help for this topic, click the Help button on the window.
Once you have approved credentials for an externally defined Identity, that Identity should have moved, within the tree structure, from a folder under oss/Identities/Requested to one under oss/Identifies/Approved.
If you wish to revoke the credentials for a particular Identity (because, for instance, the Identity is associated with a user who no longer works at your company), click on the symbol for that Identity within the tree structure.
The window shown in Figure 4-8 appears in response.
Click on the line that appears within the Credentials area, and then click the Revoke button.
If you wish to restore the credentials for a particular Identity, click on the symbol for that Identity within the tree structure.
The window shown in Figure 4-8 appears in response.
Click on the line that appears within the Credentials area, and then click the Restore button.
If you wish to delete an Identity:
The window that appears in response asks if you are sure that you want to remove the specified Identity. Click Yes if you are sure, or No to return to the main window without performing the delete.
If you decide to go ahead with the deletion, the given Identity will no longer appear within the tree structure.
|
WARNING: If you delete the CA's Identity, you will have to re-establish all of the other Identities that you have defined to the Oracle Security Server, because they contain the CA's digital signature. (As you can see on Figure 4-7, the Certificate Authority radio button is filled in on the Identity window associated with the CA.) The only reason you should ever consider doing this is if the CA's private key is somehow compromised. The Oracle Security Server Manager will ask you if you are absolutely sure before proceeding. |
A server, in this context, is simply a representation of an Oracle8 Server.
If you wish to define a new Server to the Oracle Security Server, select Create from the Server pulldown on the Oracle Security Server Manager window.
The window shown in Figure 4-12 appears in response.
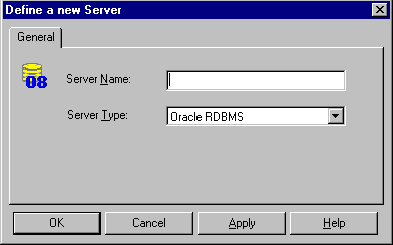
Refer to the on-line help for information about how to use this window. To bring up help for this topic, click the Help button on the window.
Once you have finished defining a new Server, it should be present in the tree structure, within the oss/Authorizations/Server Authorizations folder.
If you wish to delete a server:
The window that appears in response asks if you are sure that you want to remove the specified Server. Click Yes if you are sure, or No to return to the main window without performing the delete.
If you decide to go ahead with the deletion, the given Server will no longer appear within the tree structure.
A server authorization is a representation of a role that has been "identified globally" at an Oracle8 Server.
If you wish to define a new Server Authorization to the Oracle Security Server, select Create from the Server Authorization pulldown on the Oracle Security Server Manager window.
The window shown in Figure 4-13 appears in response.

Refer to the on-line help for information about how to use this window. To bring up help for this topic, click the Help button on the window.
Once you have finished defining a new Server Authorization, it should be present in the tree structure, within the Roles folder under the entry for each of the Servers with which the new Server Authorization is associated. These Server entities reside under the oss/Authorizations/Server Authorizations folder.
If you wish to delete a Server Authorization:
The window that appears in response asks if you are sure that you want to remove the specified Server Authorization. Click Yes if you are sure, or No to return to the main window without performing the delete.
If you decide to go ahead with the deletion, the given Server Authorization will no longer appear within the tree structure.
If you wish to grant and/or revoke Server Authorizations in association with a particular Identity:
The window shown in Figure 4-14 appears in response.
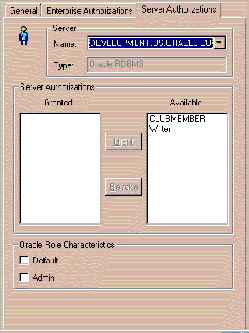
Refer to the on-line help for more information about Server Authorization granting and revocation. To bring up help for this topic, click the Help button on the window.
You can also assign a Server Authorization to an Identity using "drag and drop," by dragging the symbol for the given Server Authorization to the symbol for the Identity to which you wish you assign the authorization.
An enterprise authorization is a role that a global user can perform across multiple Oracle8 databases.
If you wish to define a new Enterprise Authorization to the Oracle Security Server, select Create from the Enterprise Authorization pulldown on the Oracle Security Server Manager window.
The window shown in Figure 4-15 appears in response.
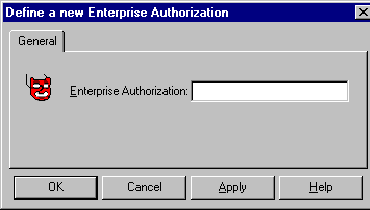
Refer to the on-line help for information about how to use this window. To bring up help for this topic, click the Help button on the window.
Once you have finished defining a new Enterprise Authorization, it should be present in the tree structure, within the oss/Authorizations/Enterprise Authorization folder.
If you wish to delete an Enterprise Authorization:
The window that appears in response asks if you are sure that you want to remove the specified Enterprise Authorization. Click Yes if you are sure, or No to return to the main window without performing the delete.
If you decide to go ahead with the deletion, the given Enterprise Authorization will no longer appear within the tree structure.
If you wish to add Server Authorizations to, and/or delete Server Authorizations from, a particular Enterprise Authorization:
The window shown in Figure 4-16 appears in response.
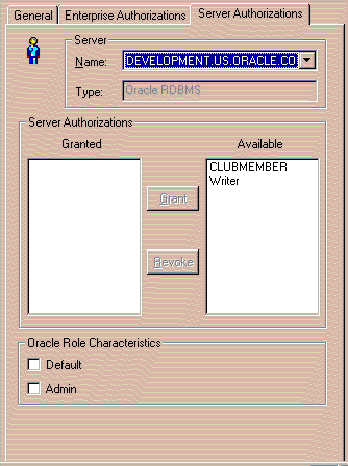
Refer to the on-line help for more information about adding and deleting Server Authorizations. To bring up help for this topic, click the Help button on the window.
You can also assign a Server Authorization to an Enterprise Authorization using "drag and drop," by dragging the symbol for the Server Authorization to the symbol for the Enterprise Authorization to which you wish you assign the authorization.
If you wish to nest one or more Enterprise Authorizations within a given Enterprise Authorization:
The window shown in Figure 4-17 appears in response.
Refer to the on-line help for more information about nesting Enterprise Authorizations. To bring up help for this topic, click the Help button on the window.
Once you have nested an Enterprise Authorization within another Enterprise Authorization, the system shows that Enterprise Authorization within the Enterprise Authorizations folder under the given Enterprise Authorization within the tree structure. A deletion results in an Enterprise Authorization disappearing from that folder.
|
CAUTION: Be careful not to nest Enterprise Authorizations within each other. In other words, if you nest Enterprise Authorization X within Enterprise Authorization Y, do not later nest Y within X. The results are unpredictable. |

If you wish to grant and/or revoke a particular Enterprise Authorization in association with a particular Identity:
The window shown in Figure 4-18 appears in response.
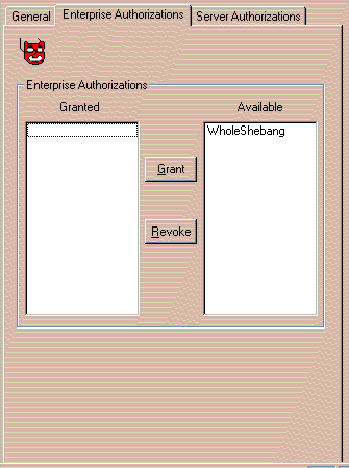
Refer to the on-line help for more information about Enterprise Authorization granting and revocation. To bring up help for this topic, click the Help button on the window.
Once you have granted an Enterprise Authorization to an Identity, the system shows that Enterprise Authorization within the Enterprise Authorizations folder under the given Identity within the tree structure. A deletion results in an Enterprise Authorization disappearing from that folder.
You can also assign an Enterprise Authorization to an Identity using "drag and drop," by dragging the symbol for the Enterprise Authorization to the symbol for the Identity to which you wish you assign the authorization.