Release 1 (9.0.1)
Part Number A89868-02
Home |
Book List |
Contents |
Index | Master Index | Feedback |
| Oracle9i Real Application Clusters Installation and Configuration Release 1 (9.0.1) Part Number A89868-02 |
|
![]()
![]()
This chapter describes using the Oracle Database Configuration Assistant (DBCA) to create and delete Real Application Clusters databases. It explains how to decide whether to manually create your database and how to use the DBCA to delete Real Application Clusters databases. This chapter also briefly discusses migration and multiple Oracle homes issues.
The topics in this chapter include:
Oracle9i Real Application Clusters Administration for procedures on using the DBCA to add and delete instances
See Also:
The DBCA creates your database using the optimal flexible architecture (OFA). This means the DBCA creates your database files, including the default server parameter file, using standard file naming and file placement practices. The primary phases of DBCA processing are:
|
See Also:
|
Oracle Corporation recommends that you use the DBCA to create your database. This is because the DBCA preconfigured databases optimize your environment to take advantage of Oracle9i features such as the server parameter file and automatic undo management. The DBCA also enables you to define arbitrary tablespaces as part of the database creation process. So even if you have datafile requirements that differ from those offered in one of the DBCA templates, use the DBCA. You can also execute user-specified scripts as part of the database creation process.
The DBCA and the Oracle Net Configuration Assistant also accurately configure your Real Application Clusters environment for various Oracle high availability features and cluster administration tools.
To manually create your Real Application Clusters database, refer to Chapter 5. The remainder of this chapter discusses using the DBCA to create a database.
If you do not create a database during installation, you can create one later using the DBCA in standalone mode. To do this, you must have configured each raw device as described in Chapter 2. In addition, you must have configured your network using the OracleNet Configuration Assistant, or you can configure it manually. The Global Services Daemon (GSD) must also be running on each node in your cluster before you create the database in standalone mode.
If you use one of the Universal Installer's database configuration types or one of the DBCA's templates that uses preconfigured datafiles, then during database creation the DBCA first verifies that you created the raw devices for each tablespace. If you have not properly set up the raw devices, the DBCA cannot create your database.
To start the DBCA, on one of the nodes:
The following section describes how to use the Database Configuration Assistant to create a database for Real Application Clusters. When you run the DBCA, the first page displayed is the Database Configuration Assistant Welcome page for Real Application Clusters as shown in Figure 4-1. The DBCA only displays this page when it detects that your Cluster Manager (CM) software is running.
If the DBCA does not display the Real Application Clusters Welcome page with the Oracle Cluster Database option, then perform clusterware diagnostics by executing the lsnodes -v command and analyzing its output according to the following platform-specific instructions.
For UNIX platforms, execute the lsnodes -v command from the $ORACLE_HOME/bin directory. Refer to your vendor's clusterware documentation if the output indicates that your clusterware is not properly installed. Resolve the problem and then restart the DBCA.
For Windows NT and Windows 2000 platforms, execute the lsnodes -v command from the %ORACLE_HOME%\bin directory.
lsnodes -v
Refer to your clusterware documentation if the detailed output indicates that your clusterware is not running. Resolve the problem and then restart the DBCA.
To create a Real Application Clusters database:
After you click Next, the DBCA displays the Operations page shown in Figure 4-2.

After you click Next, The DBCA displays the Node Selection page shown in Figure 4-3.
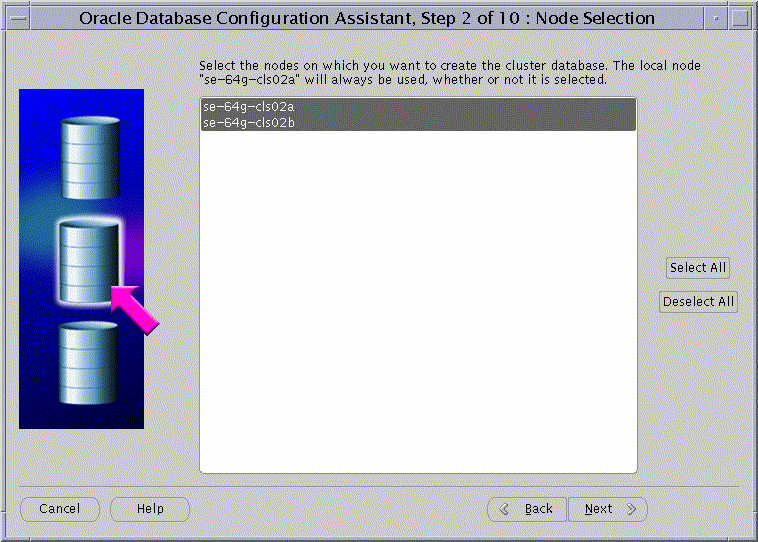
The Node Selection Display page shows the nodes that the DBCA detects in your cluster.
If the GSD daemon is not running on any of the nodes, then the DBCA displays a dialog explaining how to start the daemon.
After you click Next, the DBCA displays the Database Template Selection page as shown in Figure 4-4.
Text description of the illustration dbtempla.gif
Select one of the four database templates shown on this page. These include the Data Warehouse, Transaction Processing, and General Purpose templates. These templates include datafiles. However, the fourth template, New Database, does not include datafiles.
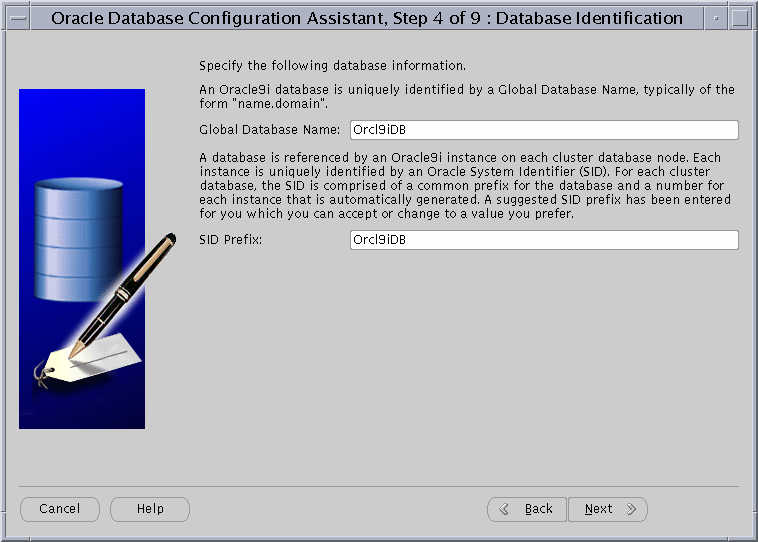
After you click Next, the DBCA displays the Database Identification page as shown in Figure 4-5.
After you click Next, if you have selected the New Database template the DBCA displays the Database Options page as shown in Figure 4-6. If you selected one of the other preconfigured database options, then after you click Next the DBCA displays the Initialization Parameters page as shown in Figure 4-8.
After you click Next, if you have selected the New Database template the DBCA displays the Database Connections Options page as shown in Figure 4-7.
After you click Next, the DBCA displays the Initialization Parameters page as shown in Figure 4-8.

If you select the Create persistent initialization parameter file (spfile) option, which is equivalent to the server parameter file, then you may need to modify the location for the server parameter file depending on the type of file system you use:
field in the center of the Initialization Parameters page as shown in Figure 4-8.
When you click All Initialization Parameters, the DBCA displays the All Initialization Parameters dialog in Figure 4-9.

Instance-specific parameter settings for your Real Application Clusters database appear at the bottom of this dialog. The sid prefixes for these entries appear in the left-hand column.
Oracle only places parameter entries from the All Initialization Parameters Dialog into the server parameter file if the entries have check marks in the Included (Y/N) column. Also note the following points about the All Initialization Dialog:
After you click Next, the DBCA displays the Database Storage page in Figure 4-10.
Use the Database Storage page to enter file names for each tablespace such as SYSTEM, USERS, TEMP, DRSYS, TOOLS, INDX, and so on. The Storage page displays these file names in the Datafiles folder.
Platform-specific issues for entering file names in the Database Storage page are:
DBCA_RAW_CONFIG environment variable, then the DBCA displays default datafile names. You must override these names to provide file names for the control files, datafiles, and redo log groups on this page.
If you select a template that includes datafiles, the Storage page does not display tablespace information. Instead, the Storage page displays temporary datafile names that you must rename. If you are creating a database with a preconfigured database template, then the Storage page does not allow you to change tablespace sizes.
After you click Next, the DBCA displays the Creation Options page on which you can select the database creation options you want to use. For example:
After you click Finish on the Creation Options page, the DBCA displays a summary page similar to the page in Figure 4-11.
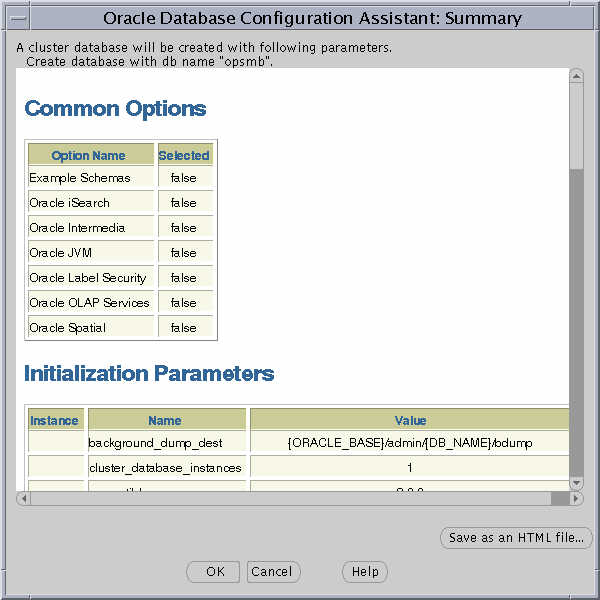
At this point in the installation process you have:
This section explains how to use the Database Configuration Assistant (DBCA) to delete a database.
Using the DBCA to delete a database removes a database's initialization parameter files, instances, OFA structure, and network configuration. However, the DBCA does not remove datafiles if you placed the files on raw partitions.
To delete a database with the DBCA:
dbca command from the $ORACLE_HOME/bin directory
The Welcome page appears as shown earlier in this chapter in Figure 4-1.
After you click Next, The DBCA displays the Operations page as shown in Figure 4-12.
After you click Next, the DBCA displays the List of Databases page similar to the one in Figure 4-13.
After you click Finish, the DBCA displays an alert dialog showing the database name and associated instances that the DBCA is going to delete. This alert dialog also displays the node or nodes on which the instances exist as shown in Figure 4-14:
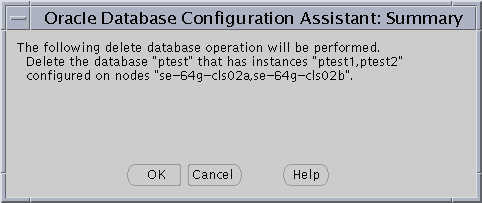
When you click OK, the DBCA continues the operation and deletes all the associated instances for this database. The DBCA also removes the parameter files, password files, OracleServicesid services, and oratab entries.
If the Oracle Universal Installer (OUI) detects an earlier version of Oracle, the Installer prompts you to migrate or upgrade the database to release 1 (9.0.1).
|
Important: Do not click Migrate an Existing Database because the Oracle Data Migration Assistant does not support Oracle9i Real Application Clusters. Instead, use the Migration utility to migrate after installation as described in the document Oracle9i Database Migration. |
|
Note: Migrating or upgrading on Windows NT and Windows 2000 involves disabling the OracleCMService and starting and shutting down the operating system-dependent clusterware (OSD) layer at a specific point during migration. These instructions are covered in the Oracle9i Database Migration guide. However, refer to the Oracle9i Database installation guide for Windows for Windows-specific issues to understand before following the instructions in the Oracle9i Database Migration guide. |
Whether different versions of Oracle can exist on the same cluster depend on your operating system platform.
For UNIX operating systems, whether different versions of Oracle can exist on the same cluster is platform-dependent. Refer to your platform-specific Oracle documentation for more information about version co-existence.
For Windows NT and Windows 2000, as long as your Oracle database software versions are greater than 8.1, they can co-exist on the same cluster when you install them in different locations with different Registry keys. This means that you cannot have different versions of Oracle older than release 8.1 on the same cluster. For example, a release 8.0 and a release 8.1 Real Application Clusters database cannot co-exist on the same cluster.
For Windows NT and Windows 2000, operating system-dependent (OSD) layers from release 1 (9.0.1) can co-exist with previous versions.
The term rolling upgrades refers to upgrading different databases or different instances of the same database in Oracle9i Real Application Clusters one at a time, without stopping the database. Release 1 (9.0.1) of Oracle9i Real Application Clusters does not support rolling upgrades.
Oracle9i Real Application Clusters on UNIX and Windows NT and Windows 2000 supports multiple Oracle homes, just as an Oracle9i Enterprise Edition database does. The multiple homes feature enables you to install one or more releases on the same machine in multiple Oracle home directories.
|
|
 Copyright © 1996-2001, Oracle Corporation. All Rights Reserved. |
|