Oracle9i Application Server Installation Guide
Release 1 (v1.0.2.2) for Sun SPARC Solaris

Part Number A90215-01

Library

Contents

Index

Go to previous page Go to next page

3
Minimal Edition

This chapter guides you through the installation steps for the Minimal Edition of Oracle9i Application Server. The following topics provide detailed installation steps, and basic postinstallation tasks:
Installation

The following instructions guide you through the Minimal Edition of Oracle9i Application Server.

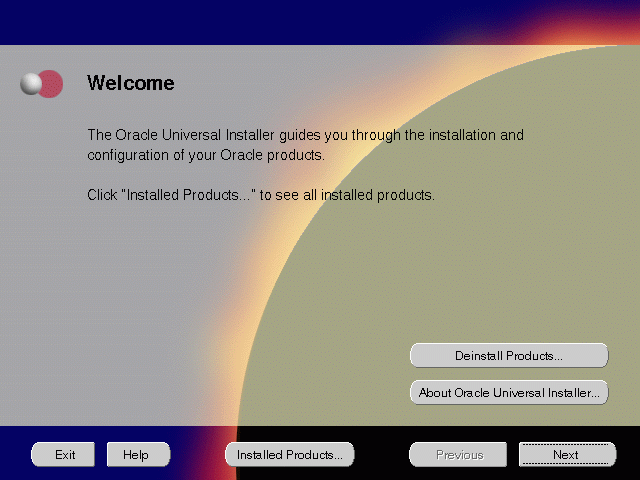
  1. Review the Oracle Universal Installer Welcome screen and click Next.

    Figure 3-1 Welcome Screen


    Text description of wel.gif follows.
    Text description of the illustration wel.gif

    The Welcome screen provides information about the Oracle Universal Installer.

    The following function buttons appear on the installation screens.

    • Deinstall Products: Deinstall individual components or the entire product. This button appears only on the Welcome screen.

    • About Oracle Universal Installer: View the version number of the installer in use.

    • Exit: Quit the installation process and exit the installer.

    • Help: Access detailed information about the functionality of each screen.

    • Installed Products: View currently installed products or to deinstall the entire product or components.

    • Previous: Return to the previous screen.

    • Next: Move to the next screen.

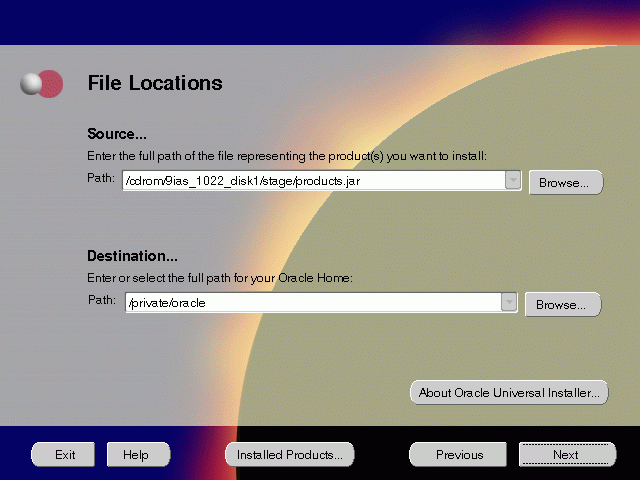
  2. Verify the source and destination paths and click Next. If you have not previously installed Oracle products on your machine, the "OraInventory Location screen" appears after you click Next. Enter the complete location path for oraInventory directory and click OK.

    Figure 3-2 File Locations Screen


    Text description of filloc.gif follows.
    Text description of the illustration filloc.gif

    The File Locations screen allows you to enter the full path for the source and destination locations of Oracle9i Application Server.

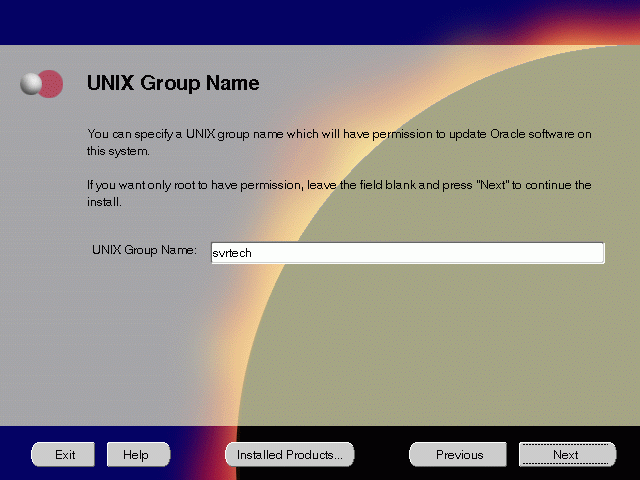
  3. This screen appears only the first time you run Oracle Universal Installer on your machine. Take note of the default value if it appears. Enter a UNIX group name and click Next.

    Figure 3-3 UNIX Group Name Screen


    Text description of grpnm.gif follows.
    Text description of the illustration grpnm.gif

    The UNIX Group Name screen grants permission for the oraInventory directory to the group specified. For more information, refer to "UNIX Group Name for the Oracle Universal Installer Inventory" .

    UNIX Group Name:

    • Enter a UNIX group name for those who have permission to configure all the functionality of Oracle9i Application Server. Verify your group name by entering this command from the UNIX prompt the installer was launched from:

      prompt> id
      
      
    • Run the orainstRoot.sh script from your Oracle home to grant permissions to the root user only. You must have root privileges to run this script. The script creates pointers to the components as the installer installs them in the system so that they can be identified later in the installation procedure. It produces the /var/opt/oracle/oraInst.loc file, which provides a pointer to the oraInventory directory.

      After you have run the script, click Retry to continue.
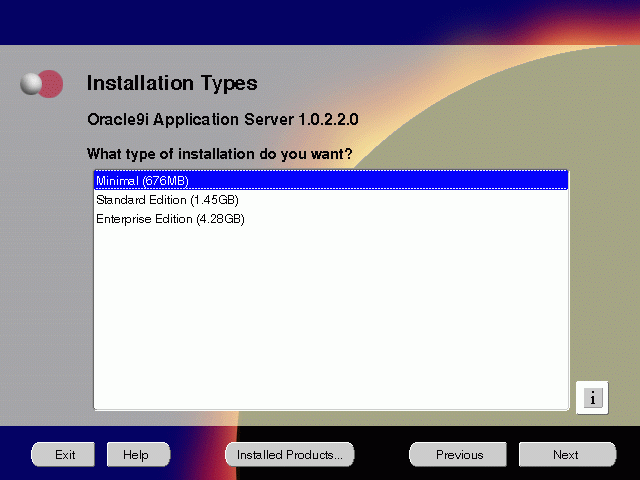
  4. Select Minimal Edition and click Next.

    Figure 3-4 Installation Types Screen


    Text description of ainstype.gif follows.
    Text description of the illustration ainstype.gif

    The Installation Types screen allows you to select the Oracle9i Application Server installation option that you are licensed to use.
    See Also:

    Table 2-1, "Oracle9i Application Server Components" for a complete list of components. 

    • Minimal Edition: Installs Oracle9iAS Portal, Oracle9iAS Wireless, Oracle Enterprise Manager Client, and Oracle HTTP Server.

    • Standard Edition: Installs Oracle9iAS Portal, Oracle9iAS Wireless, Oracle Enterprise Java Engine, Oracle Enterprise Manager Client, Oracle HTTP Server, and Oracle Internet File System.

    • Enterprise Edition: Installs Oracle9iAS Database Cache, Oracle9iAS Discoverer, Oracle9iAS Forms Services, Oracle9iAS Portal, Oracle9iAS Reports Services, Oracle9iAS Web Cache, Oracle9iAS Wireless, Oracle Enterprise Java Engine, Oracle Enterprise Manager Client, Oracle HTTP Server, Oracle Internet File System, and Oracle Management Server.

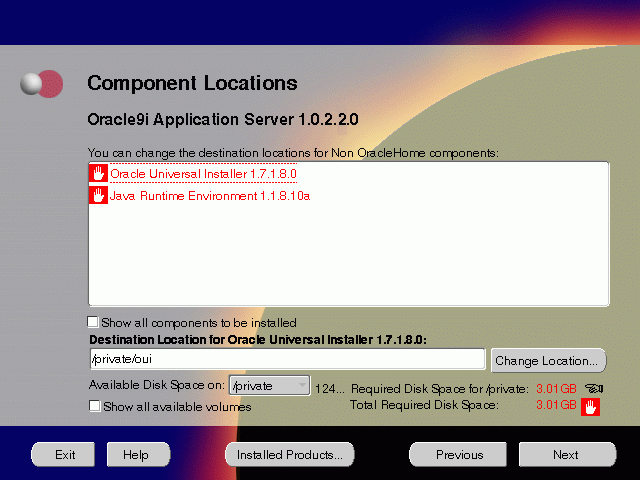
  5. This screen appears only if Oracle Universal Installer has detected insufficient disk space in the Oracle home directory. If needed, verify and change the locations of the components displayed on the screen, and click Next.

    Figure 3-5 Component Locations Screen


    Text description of entcploc.gif follows.
    Text description of the illustration entcploc.gif

    The Component Locations screen allows you to select alternative locations for some components.


    Note:

    Insufficient disk space is indicated in red with a hand icon next to it. 


    • Show all components to be installed: To view the complete list of components chosen for installation. Select check box to display component list.

    Click individual components to view and change destination location path. The installer enables you to change the destination location of the components displayed on the screen.

    • Destination Location: To view the full path of the selected component.

    • Change Location: To browse for alternate locations for the selected component.

    • Available Disk Space: To view available disk space in the current directory. The installer also provides information about the total disk space required for the installation of additional components.

    • Required Disk Space for directory_name: To view the total disk space required for installation in the selected directory.

    • Total Required Disk Space: To view the total disk space required for the product to be installed.

    • Show all available volumes: To browse through file system for available disk space. Select check box to display the file system.

  6. This screen appears if the installer detects insufficient TMP space. Remove unneeded files from the swap directory to provide sufficient space for installation and click Next. If your swap space is smaller than 500 MB, click Exit and correct the problem.
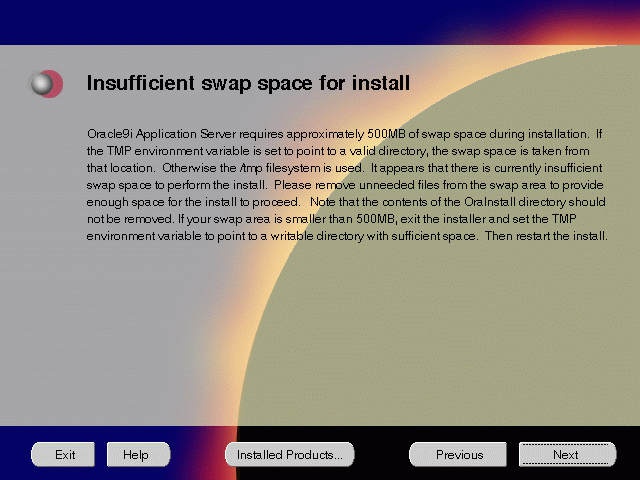
    Figure 3-6 Insufficient Swap Space for Install Screen


    Text description of tmpwarn.gif follows.
    Text description of the illustration tmpwarn.gif

    The Insufficient Swap Space for Install screen indicated inadequate space in the swap directory. You have two options:

    • If you have more than 500 MB swap space, then remove unneeded files from your swap space to create room for installation and click Next to proceed.

    • If you have less than 500 MB swap space, then Exit the installer and set TMP environment variable to point to a writable directory with sufficient space.

    For detailed information on TMP directory, refer "TMP".
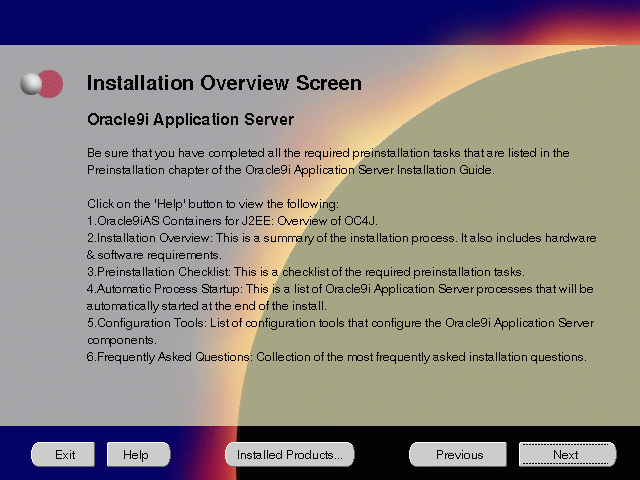
  7. Click the Help button to verify that all the preinstallation tasks have been performed, and then click Next.

    Figure 3-7 Installation Overview Screen


    Text description of preinsta.gif follows.
    Text description of the illustration preinsta.gif

    The Installation Overview screen gives you an overview of the installation process. Click on the Help button for information on the installation process, preinstallation checklist, automatic process startup, configuration tools, and frequently asked questions.

  8. Select the components you wish to configure during the installation process and click Next. These components will automatically start up after installation. If you wish to configure the components later, do not select them.

    Figure 3-8 Component Configuration and Startup Screen


    Text description of sstart.gif follows.
    Text description of the illustration sstart.gif

    The Component Configuration and Startup screen allows you to select the components that you want the installer to configure and start after installation. This screen offers two configuration options:

    • If you select a component here, then the installer prompts you for any or all configuration information required by that component. After installation, the installer starts that component.

    • If you de-select a component here, then the installer installs it, but does not configure or start it. later on, if you decide to use that component, then manually launch the configuration assistant to configure that component.

    You can select or de-select multiple components by holding down the Control key while clicking on the component name.
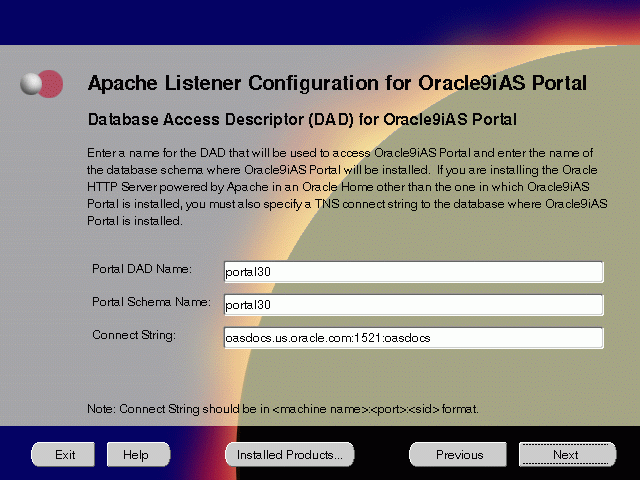
  9. This screen will appear only if you selected Oracle9iAS Portal in the Component Configuration and Startup screen. Enter or accept the default Portal DAD and Schema names. Also, enter the database connection information. Click Next.

    Figure 3-9 Apache Listener Configuration for Oracle9iAS Portal (DAD and Schema name) Screen


    Text description of portdad.gif follows.
    Text description of the illustration portdad.gif

    The Apache Listener Configuration for Oracle9iAS Portal screen allows you to enter the name of the Database Access Descriptor (DAD) that will be used to access Oracle9iAS Portal, and the name of the database schema where Oracle9iAS Portal will be installed. It also enables you to enter the database connection information if Oracle9iAS Portal and Oracle HTTP Server are installed in different Oracle homes. The information you enter here is used to create the PL/SQL Gateway settings which you can access upon installation from the following location: http://machine_name:port/pls/admin_/gateway.htm

    • Portal DAD Name: Enter the name of the DAD for each instance you installed in the database. A Database Access Descriptor (DAD) is a set of values that specify how the Apache Listener connects to your Oracle database server to fulfill an HTTP request. Based on this DAD name, the installation automatically sets other DAD-related and default settings such as the name and location of the document table. The default DAD name is portal30.

    • Portal Schema Name: Enter the name of the database schema that will contain Oracle Portal. A schema is a collection of components and database objects under the control of a given database user. Each Oracle Portal application maps to an Oracle database schema. The default schema name is portal30.

    • Connect String: Enter the origin database connection information in the form host:port:sid.

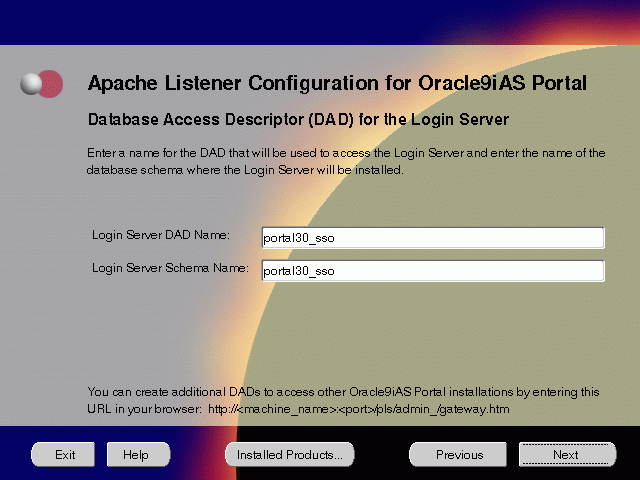
  10. This screen will appear only if you selected Oracle9iAS Portal in the Component Configuration and Startup screen. Enter or accept the default Login Server DAD and Schema names. Click Next.

    Figure 3-10 Apache Listener Configuration for Oracle9iAS Portal (Login Server) Screen


    Text description of portlog.gif follows.
    Text description of the illustration portlog.gif

    The Apache Listener Configuration for Oracle9iAS Portal screen allows you to enter the Login Server DAD and Schema Name, with a _sso extension for easy recognition. The Login Server provides an enterprise-wide Single Sign-On (SSO) mechanism that enables an Oracle Portal user to log in securely to Oracle Portal and any partner and external applications using a single user name and password.

    • Login Server DAD Name: Enter the name of the DAD for each instance you installed in the database.The default DAD name is portal30_sso.

    • Login Server Schema Name: Enter the name of the database schema that will contain Oracle Portal.The default schema name is portal30_sso.

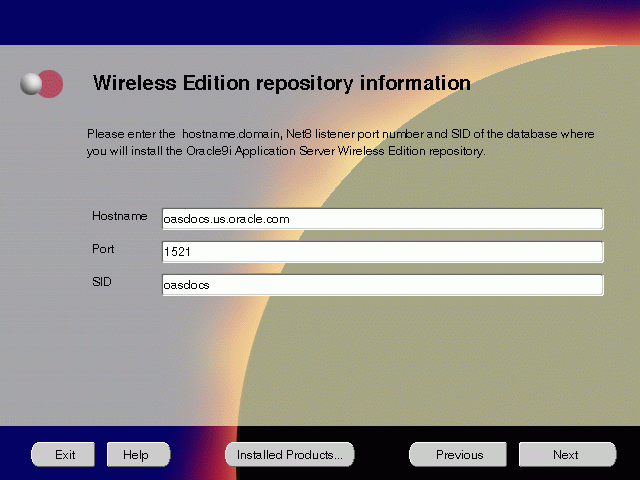
  11. Enter the hostname, port number, and SID of the origin database where you will install the Oracle9iAS Wireless, and click Next. If you are upgrading from Oracle9i Application Server, version 1.0.2.1, then an "Upgrade Installation Detected" screen will appear. Review the content on the screen and click Next or Exit accordingly. If you click Next, then the installation will continue and the following screen will appear.

    Note:

    Do not enter Oracle9iAS Database Cache hostname, port number, and SID in this screen. 


    Figure 3-11 Wireless Edition Repository Information Screen


    Text description of repinf.gif follows.
    Text description of the illustration repinf.gif

    The Wireless Edition Repository Information screen allows you to enter the hostname, Net8 Listener port number, and SID of the database where you will install the Oracle9iAS Wireless repository.
    • Hostname: Enter the hostname.domain of the database where you will install the Oracle9iAS Wireless.

    • Port: Enter the Net8 Listener port number.

    • SID: Enter the System Identifier (SID) of the database where you will install the Oracle9iAS Wireless repository.

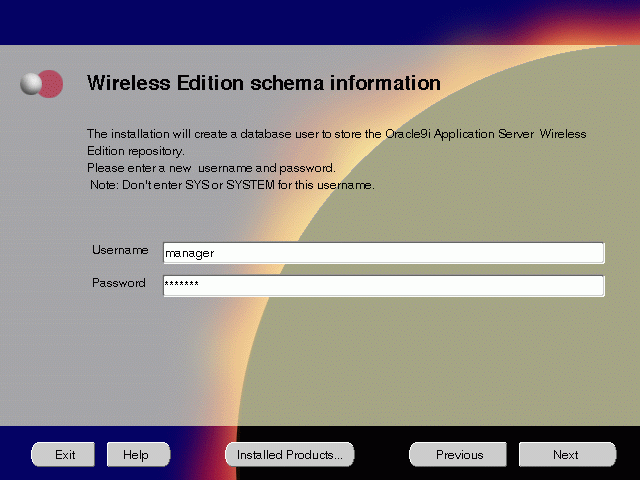
  12. Enter the new username and password for the database user to store the Oracle9iAS Wireless repository, and click Next. If you are upgrading from Oracle9i Application Server, version 1.0.2.1, then the "Oracle9iAS Wireless Schema Information Screen" will be slightly different. Enter the existing Oracle9iAS Wireless username and password, and click Next.


    Note:

    Do not use an existing database user, (that is, SYS, SYSTEM, or any other existing database user) as the username. 


    Figure 3-12 Wireless Edition Schema Information Screen


    Text description of schema.gif follows.
    Text description of the illustration schema.gif

    The Wireless Edition Schema Information screen allows you to create a database user to store the Oracle9iAS Wireless repository.

    • Username: Enter a new user name for the database user to store the Oracle9iAS Wireless repository.

    • Password: Enter a password for the database user.

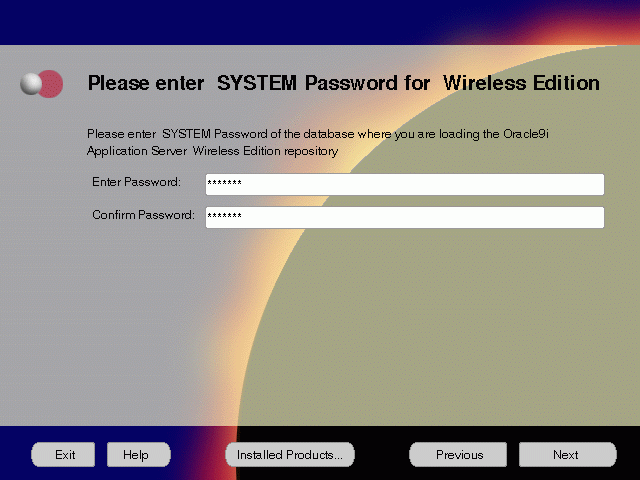
  13. Enter and confirm the SYSTEM password of the database, and click Next. If you are upgrading from Oracle9i Application Server, version 1.0.2.1, then a "Wireless Edition Administrator Password Information" screen appears. Enter and confirm the "Administrator" password, and click Next.

    Note:

    Do not enter the database schema owner password. 


    Figure 3-13 System Password for Wireless Edition Screen


    Text description of system.gif follows.
    Text description of the illustration system.gif

    The System Password for Wireless Edition screen allows you to enter and confirm the SYSTEM password of the database where you are loading the Oracle9iAS Wireless repository.
    • Enter Password: Enter the SYSTEM password of the database where you will install the Oracle9iAS Wireless.

    • Confirm Password: Re-enter the SYSTEM password as entered above for verification.

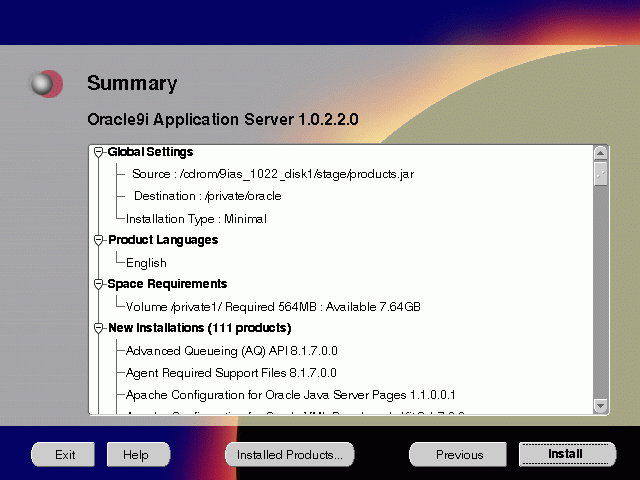
  14. Review the summary and click Install to begin the installation process.

    Figure 3-14 Summary Screen


    Text description of asumm.gif follows.
    Text description of the illustration asumm.gif

    The Summary screen allows you to review all the settings before the actual installation process. These settings include source, destination, installation type, product language, space requirements, and a list of components.

    When you click Install, the installation process begins.
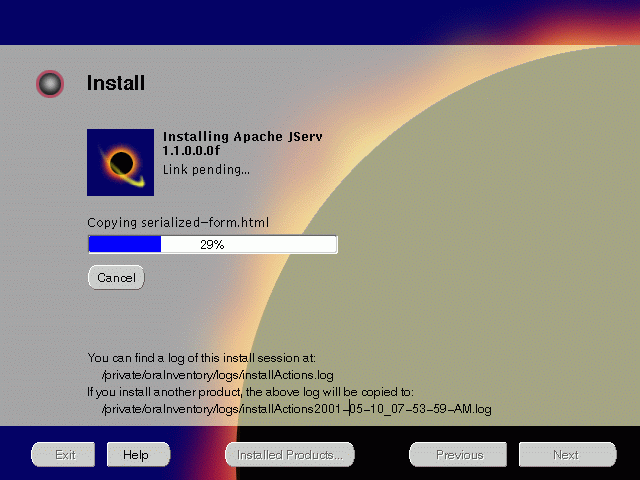
  15. Monitor the installation process and after the installer finishes, click Next.

    Figure 3-15 Install Screen


    Text description of inst.gif follows.
    Text description of the illustration inst.gif

    The Install screen appears while the product is installing. Installation operations include executing actions such as file copy and linking, and executing decision points and calculations. It also displays the full path of the installation log.

    • Cancel: To discontinue the installation process. You can then choose to stop the installation of an individual component or the entire product.

    For more information about installation log, refer to "oraInventory Directory".

    Changing Disks

    During installation, the installer prompts you to switch between Disks 1 through 5. Use these steps to change disks and continue the installation process.
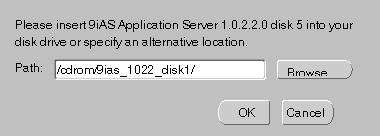
    Figure 3-16 Changing Disks Dialog


    Text description of disk2.gif follows.
    Text description of the illustration disk2.gif

    1. Eject and unmount the current disk.

      If you are using Solaris Volume Management software and Disk1 was automatically mounted, then this can be done with the following command:

      prompt> eject cdrom


      If you are not using Solaris Volume Management software, then you must manually eject and unmount the disk. For further instructions, refer to your operating system documentation

    2. Insert the next disk into the CD-ROM drive and mount it.

      If you are using the Solaris Volume Management software, then the next disk will be automatically mounted.

      If you are not using Solaris Volume Management software, then you must manually mount the disk. For further instructions, refer to "Starting Oracle Universal Installer".

    3. Click the Browse button on the changing disks dialog, and navigate to /cdrom/9ias_1022_diskx. This directory may be different depending on where the original disk was mounted.

    4. Click OK to continue the installation process.

    Running root.sh

    After installation is completed, the installer prompts you to run root.sh script. Use these steps to run the root.sh script.

    1. Log on as the root user.

    2. Go to the Oracle home directory.

      prompt> cd ORACLE_HOME
      
      
    3. Run the root.sh script.

      prompt> ./root.sh


    Once you see "Finished running generic part of the root.sh script" and "Now product-specific root actions will be performed," exit root user and return to the Install screen.

    The root.sh script detects:
    • Settings of ORACLE_OWNER, ORACLE_HOME and ORACLE_SID environment variables.

    • Full path of local bin directory. You can accept the default or change to a different local bin directory.

  16. Start the origin database if it has been shut down during installation. Verify the list of configuration tools and click Next. This screen appears only if you select components to configure and start in the Components Configuration and Startup screen.


    Note:

    The installer has completed copying and linking the necessary files. Be sure to start the database if it had been shut down for the installation process. The configuration tools such as Oracle9iAS Portal Configuration Assistant need to connect to an active database for configuration purposes. 


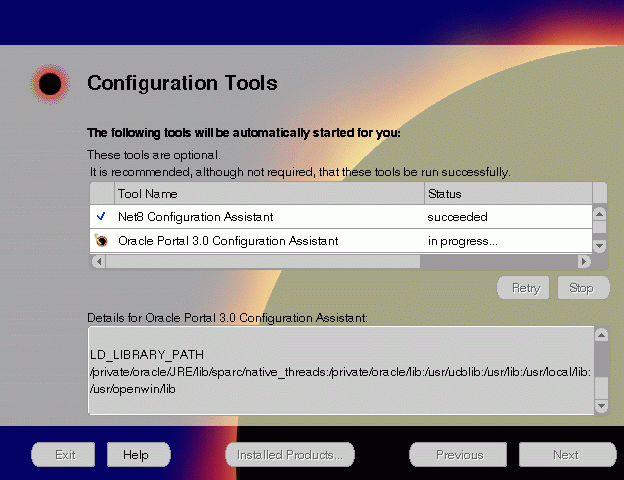
    Figure 3-17 Configuration Tools Screen


    Text description of acftool.gif follows.
    Text description of the illustration acftool.gif

    The Configuration Tools screen lists the configuration tools for all installed components.

    Scroll down the list to review the configuration status of each tool. The status changes as each component is configured.

    The installer performs the following functions in this screen:

    • Executes a configuration tool for each component selected previously in the Component Configuration and Startup screen.

    • Displays all the configuration settings in the display window below as it executes a configuration tool for each component.

    • Enables you to view configuration settings after all configuration tools are executed. Click on each component to review all the changes made.

    • Allows you to view data for failed executions in the display window. You can either fix the error and click Retry to execute the configuration tool again, or ignore the error and click Next to proceed to the next screen.

    • Retry: To re-execute the configuration script if the configuration of a component fails.

    • Stop: To quit the configuration process.

    Configuration Tools

    This installation option launches the following configuration tools:

    Net8 Configuration Assistant - This configuration assistant enables you to connect and configure the Oracle client/server network environment.

    See Also:

    Net8 Administration's Guide in the Oracle Database Documentation Library for information on running Net8 Configuration Assistant. 

    Oracle9iAS Portal Configuration Assistant - This configuration assistant loads necessary database objects for Oracle9iAS Portal to run.

    See Also:

    "Oracle9iAS Portal Configuration Assistant" for instructions on running Oracle9iAS Portal Configuration Assistant. 

    Starting HTTP Server - This starts Oracle HTTP Server.
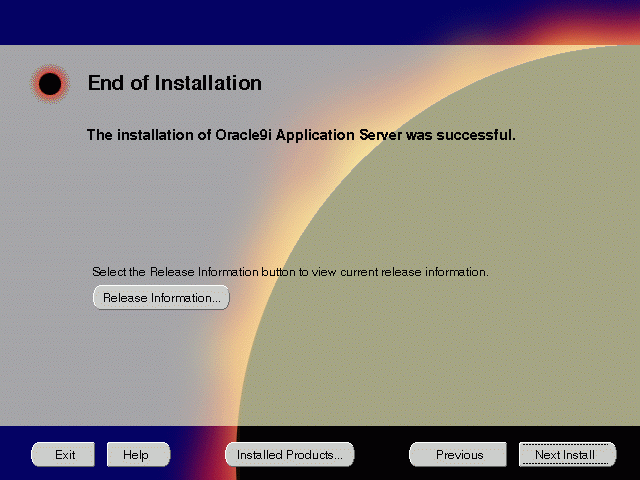
  17. Ensure that the installation was successful. Click Exit to quit the installer.

    Figure 3-18 End of Installation Screen


    Text description of end.gif follows.
    Text description of the illustration end.gif

    The End of Installation screen appears at the end of the installation process. It notifies you whether the installation was successful or unsuccessful.

    • Release Information: To view the latest release information.

    If the installer detects that specific port numbers such as 7777, are occupied, it will display the alternate port numbers on the end of Installation screen. For Oracle HTTP Server port number information, refer to "Port Allocation".

You have successfully installed the Minimal Edition of Oracle9i Application Server. Proceed to "Postinstallation" to complete the installation process.

Postinstallation

The following instructions guide you through the basic postinstallation tasks for Oracle9i Application Server. Before performing these tasks, install, if needed, Oracle9i Application Server Client from the Oracle9i Application Server Administrative and Development Client CD included in the Oracle9i Application Server CD pack.

See Also:

Appendix B, "Installing Oracle9i Application Server Administrative and Development Client CD-ROM" 

The postinstallation contains the following sections:

Starting and Stopping Components

Table 3-1 lists the commands needed to individually start and stop Oracle HTTP Server.

Table 3-1 Starting and Stopping Components
Component Function Command

Oracle9iAS Wireless Web Integration Server

Start

ORACLE_HOME/panama/WebIntegration/Server/bin/server.sh

Stop

Go to http://hostname.domainname:5555 and click on shutdown.

Oracle HTTP Server

Start

ORACLE_HOME/Apache/Apache/bin/apachectl start

Stop

ORACLE_HOME/Apache/Apache/bin/apachectl stop

Oracle HTTP Server SSL-enabled

Start

ORACLE_HOME/Apache/Apache/bin/apachectl startssl

(Log in as root user)

Stop

ORACLE_HOME/Apache/Apache/bin/apachectl stop

(Log in as root user)

Component Web Sites

Table 3-2 lists Web sites for Oracle9i Application Server components.

Table 3-2 Component Web sites
Component Web Site

Oracle9iAS Portal

http://hostname.domain:listener_port/pls/portal30

Oracle9iAS Wireless Web Integration Server

http://hostname.domain:5555

(Log on as Administrator/manage)

Oracle HTTP Server
Oracle HTTP Server (SSL-enabled)

http://hostname.domain:listener_port
https://hostname.domain:listener_port

Component Port Numbers

Table 3-3 lists the default port numbers on which requests are received for each component.

Table 3-3 Port Numbers

Components

Port Number

Oracle9iAS Portal

Oracle9iAS Portal uses the same port number as Oracle HTTP Server

Oracle9iAS Wireless

Oracle9iAS Wireless Web Integration Server

Oracle9iAS Wireless uses the same port as Oracle HTTP Server

5555

Oracle HTTP Server
Oracle HTTP Server (SSL-enabled)
Oracle HTTP Server Jserv Servlet Engine

For information on port numbers, refer to "Port Allocation".

8007

Additional Documentation

For further information on postinstallation and configuration tasks, refer to component-specific documentation. For information on viewing and installing the documentation, refer to Appendix F, "Installing Documentation Library".


Go to previous page Go to next page
Oracle
Copyright © 2001 Oracle Corporation.

All Rights Reserved.

Library

Contents

Index