Skip Headers

Oracle9iAS InterConnect Adapter for SAP R/3 Installation and User's Guide
Release 2 (9.0.2)

Part Number A95438-01
Go To Documentation Library
Home
Go To Table Of Contents
Contents
Go To Index
Index

Go to previous page Go to next page

6
Runtime

This chapter describes how to use the Configuration Editor to configure the SAP adapter. The Configuration Editor is only used at runtime. The following topics are discussed:

Configuration Editor


Note:

Throughout this section, reference to launching the Configuration Editor is expressed as: Type configeditor and press Enter. However, if you are using a Unix machine, you must type configeditor.sh and press Enter.


Using the R/3 Configuration Editor, you can customize the settings to specify how your development machine and components interact with your R/3 system.


Note:

Before using any BAPI interfaces, you must configure the Remote Function Call. BAPI and Remote Function Call share their configuration information.


You can make changes to the login, ALE, Inbound, and Outbound to R/3 settings in the Configuration Editor. To access the Configuration Editor, from a command line:

  1. Change directories to the Configuration Editor installation directory.

  2. Type configeditor and press Enter.

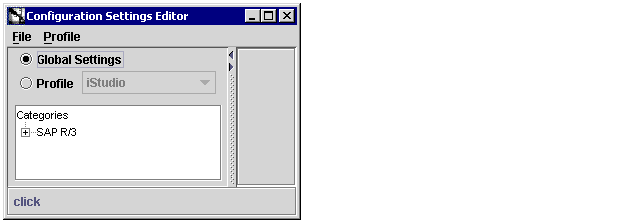
    The Configuration Editor displays.

Figure 6-1 Configuration Settings Editor

Text description of runtime3.gif follows

Text description of the illustration runtime3.gif

Creating SAP Host Definitions in Global Settings

Before specifying the settings for the adapter, you must create SAP host definitions under Global Settings. When the Configuration Editor is launched, by default, the radio button for Global Settings is selected. To create an SAP host:

  1. Double-click SAP R/3.

  2. Select SAP Host Definitions.

    Control functions display in the right panel.
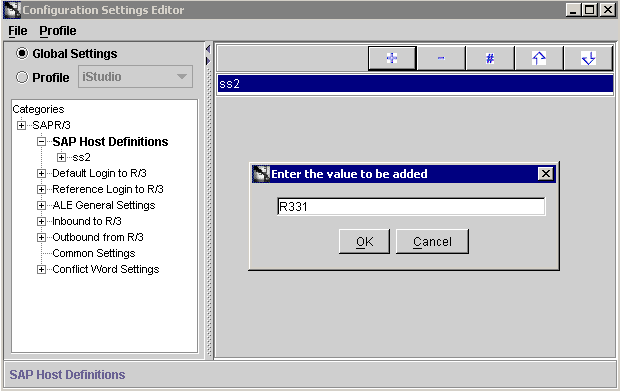
    Figure 6-2 Configuration Editor Host Definition

    Text description of ce_host.gif follows.

    Text description of the illustration ce_host.gif

  3. Click PLUS (+) on the right panel to add a host.

  4. Type the name of the new Host definition.

    This can be a descriptive name recognizable as being set for a specific system, for example, R331 is for an R/3 Version 3.1 system.

  5. Click OK.

    New host name displays in the right panel.
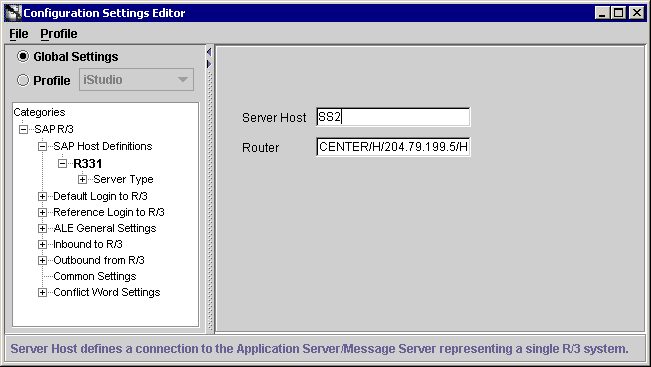
  6. Expand SAP Host Definitions in the left panel.

  7. Click the Server Host name.

    Figure 6-3 Configuration Settings Editor Server Type

    Text description of ce_servertype.gif follows.

    Text description of the illustration ce_servertype.gif

  8. Enter the Server Host identification in the Server Host field.

    This is the actual link to the server.

  9. Specify a Router, if required.

    This is a Destination router to connect to the application server or Message Server, for example /H/UNICENTER/H/204.79.199.5/H.

  10. Expand Server Type and select your server type.

  11. Specify the system number if the server type is Application Server in the System Number field.

    The system number further identifies the Host to a specified Service level. The service is the TCP/IP service name (a port number through c:\winnt\system32\drivers\etc\services). For example, using ss1:00 as the connecting host, the 00 is what SAP calls the system number.
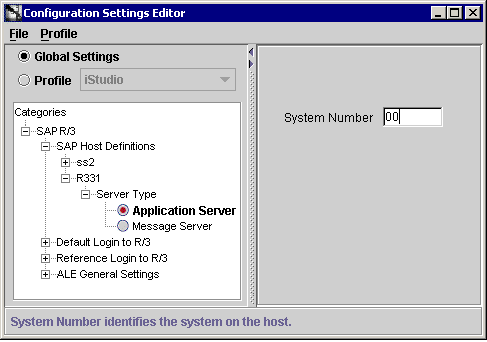
    Figure 6-4 Configuration Settings Editor Application Server

    Text description of ce_appserver.gif follows.

    Text description of the illustration ce_appserver.gif

    If the server type is Message Server, specify the following:
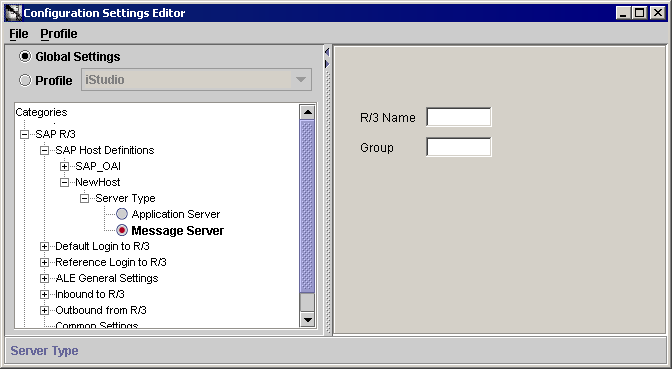
    • R/3 Name--The system ID that identifies the SAP System, for example D15.

    • Group--The Message Server Group if your message servers belong to a group, for example, PUBLIC.

    Figure 6-5 Configuration Settings Editor Message Server

    Text description of configedmessageserver.gif follows.

    Text description of the illustration configedmessageserver.gif

Default Login to R/3

The Default Login to R/3 group allows you to program your development application to automatically connect to R/3 servers. The Default Login to R/3 authenticates your runtime credentials. From the Configuration Editor main menu:
  1. Click Profile and select iStudio.


    Note:

    Under some circumstances you may wish to run your adapter under a profile other than iStudio. This may be needed for example, in case you want to run two instances of the SAP adapter on the same machine. You may want to have two instances of the same type of adapter if these instances need to connect to different backend system installations. To accomplish this you need to create a new profile using the configuration editor and fill in the settings for this new profile. The name of the new profile should be the same as the name of the application. For example if your application is called APP2, create a profile called APP2. Now APP2 will use the settings in the profile called APP2 whenever it runs.


  2. Expand the SAP R/3 tree.

  3. Expand Default Login to R/3.

  4. Expand Use Global Settings.

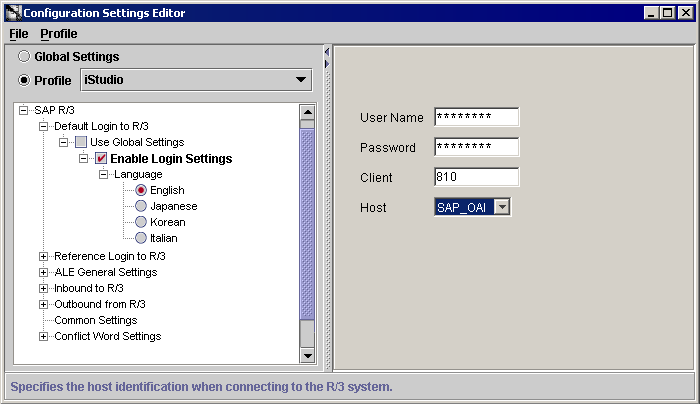
  5. Expand Enable Login Settings and check that box. The right panel displays the default login fields to specify.

Figure 6-6 Configuration Editor Enable Login

Text description of ce_enablelogin.gif follows.

Text description of the illustration ce_enablelogin.gif

Table 6-1 Enable Login Settings Panel Configuration Editor
Enable Login Settings Panel Field Field Description

User Name

Your user ID for the R/3 system.

Password

Your user password for the R/3 system.

Client

Your client number ID for the R/3 system.

Host

Specifies the Host ID when connecting to the R/3 system.

Select a Host ID from the dropdown list. All the Host IDs created for the SAP Host Definition setting in Global Settings are shown in this list.

For Inbound to R/3: the value of Host is that of the Application Server or the Message Server to be contacted.

Language

Required by R/3. By default, the Language parameter retrieves the language information from your operating system.

Reference Login to R/3

The Reference Login to R/3 authenticates your runtime credentials. All the parameters for this group are identical to those logging into R/3 for a regular session.

When using Oracle9iAS InterConnect with multiple R/3 systems, it is possible to have one of the systems act as a reference system while calling into other systems. This means that data elements, function signatures, and BAPI parameters are taken from the reference system rather than from the one that you are calling. This is useful in cases where different systems are running different versions of R/3. For example, suppose you have the following three systems:

billing:00 running R/3 version 3.1H
billing:01 running R/3 version 3.1I
billing:02 running R/3 version 4.0C

Previously, you would have needed one set of clients to call the 3.1 systems, and another client to call the 4.6 system, because of new parameters added to the 4.6 signature of certain function modules. You can use the reference login feature to indicate that the repository information should always be read from only one of the machines. In this particular example, you might select billing:00 since it is the oldest machine. If you set billing:00 as your reference machine, calls to billing:01 or billing:02 are made according to the information in billing:00's repository. As long as the changes have been made in a backward-compatible manner (with optional parameters, for instance), the same client is usable with all three machines. Reference a local server but make client calls against a remote server on a slow connection.

Inbound to R/3

The Inbound group contains configurable parameters pertaining to the R/3 system when it behaves as a server.

  1. Click to expand Inbound to R/3.

    The Inbound to R/3 selection is highlighted in the left pane and Additional Connection Parameters field displays in the right panel.
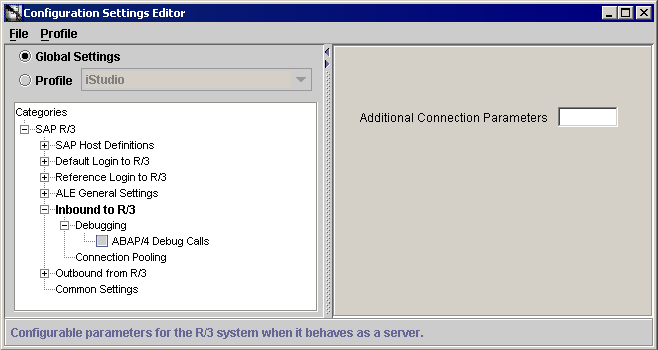
    Figure 6-7 Inbound to R/3 Configuration Settings Editor

    Text description of ce_inbound.gif follows.

    Text description of the illustration ce_inbound.gif

    Table 6-2 Inbound to R/3 Configuration Settings Editor
    Inbound to R/3 Settings Values Value Descriptions

    Debugging

    This feature is useful for debugging or diagnostic purposes. However, it is of limited use in a production environment, as the message does not display on the client machine. ABAP/4 Debug Calls are also known as Remote Function Call Debug Calls. Use this selection when you are debugging Function Modules. Selecting ABAP/4 Debug Calls automatically sets the ABAP_DEBUG connection parameter allowing Function Module calls to go through the SAPGUI debugger.

    Connection Pooling - Max Concurrent Connections

    The default value is 50.

    This setting controls the maximum concurrent connections to the SAP R/3 system.

    Additional Connection Parameters

    Passes additional string connection parameters to RfcOpenEx when Control Broker acts as an Remote Function Call Client connecting to the R/3 Server.

Outbound from R/3

The Outbound from R/3 group contains parameters pertaining to the R/3 system when R/3 is calling other systems through SAP adapter.

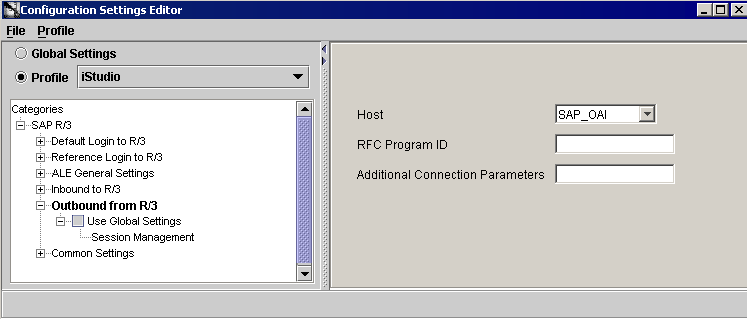
  1. Click to expand Outbound from R/3.

    Outbound from R/3 is highlighted in the left panel. The Host, RFC Program ID, and Additional Connection Parameters fields display in the right panel.
    See Also:

    Table 6-3

Figure 6-8 Outbound from R/3 Configuration Settings Editor

Text description of ce_outbound.gif follows.

Text description of the illustration ce_outbound.gif

Table 6-3 Outbound from R/3 Configuration Settings Editor
Outbound from R/3 Settings Fields Panel Field Descriptions

Host

The host is used in the login process to an R/3 system. You select a Host ID from the drop down list. All the Host IDs created for SAP Host Definition setting in Global Settings are shown in this list.

The value of Host specifies the TCP/IP host running the Remote Function Call Gateway containing the registered Agent, for example, usually it is the machine where the SAP System is installed.

Remote Function Call Program ID

Specifies the Remote Function Call Program ID that the Control Broker acting as an Remote Function Call server uses to register itself with the Remote Function Call Gateway.

A unique identification assigned to an SAP Server to partition the application. Each Destination Host on the SAPGUI has a corresponding Program ID assigned by the System Administrator. This name is case-sensitive.

For example, the program ID is a named port into R/3 corresponding to an Remote Function Call destination. When writing an R/3 application, the destination must be specified in order to send requests.

Additional Connection Parameters

Passes additional string connection parameters to RfcAccept when the SAP adapter acts as an Remote Function Call Server to an R/3 Client.

Common Settings

The Common Remote Function Call Settings group allows you to set the Remote Function Call directory into which all Remote Function Call trace files are written. For example, all dev_rfc.trc, all rfc .trc files.

The SAP adapter writes trace messages in trace files whose name are of the form rfc?????_????.trc, where each ? is a digit between 0 and 9. Each Remote Function Call Connection creates a different trace file.

  1. Expand to Common Settings.

    Common Settings is highlighted in the left panel and the RFC Trace Directory field displays in the right panel.
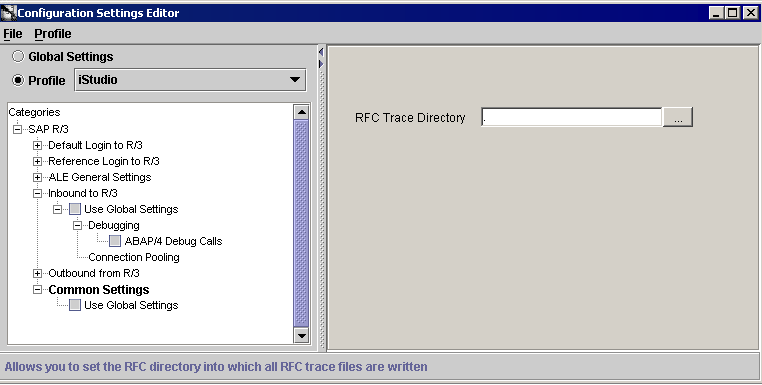
Figure 6-9 Configuration Editor Common Settings

Text description of ce_commonsettings.gif follows.

Text description of the illustration ce_commonsettings.gif

The RFC Trace File Directory specifies the full path of the Remote Function Call trace file. In the RFC Trace Directory field, enter a temporary path to hold your temporary files. You also use the browse button to activate a directory selection dialog to select a temporary directory.

By default, trace files are written into the current working directory.

Exiting Configuration Editor

When the correct parameters are entered, the Configuration Editor can be exited. When the Configuration Editor is exited, the parameters entered are saved. You can also select File -> Save settings to save your changes before exiting the program.

To exit the Configuration Editor:

  1. Click the X in the upper right corner.

    The following prompt displays:

    Some of the settings in have been changed in this session. Would you Like to 
    save the changes?
    
  2. Click YES.

    The following prompt displays:

    The settings you've changed will take affect after restart.
    
  3. Click OK.

    The program terminates and closes.


Go to previous page Go to next page
Oracle
Copyright © 2002 Oracle Corporation.

All Rights Reserved.
Go To Documentation Library
Home
Go To Table Of Contents
Contents
Go To Index
Index