10g (9.0.4)
Part Number B10407-01
Home |
Solution Area |
Contents |
Index |
| Oracle Application Server InterConnect Adapter for PeopleSoft 7.5x Installation and User's Guide 10g (9.0.4) Part Number B10407-01 |
|
This chapter provides information specific to PeopleSoft. The following topics are discussed:
OracleAS InterConnect provides a complete framework for e-Business application integration across Application to Application, Active Server Pages (Microsoft), and Business to Business domains. PeopleSoft users often configure PeopleSoft to employ OracleAS InterConnect connectivity. For this reason, a PeopleSoft 7.5x adapter can be installed with your PeopleSoft component.
To use PeopleSoft, you must import the OracleAS InterConnect PeopleSoft message definition project. You can import the message definition project into your PeopleSoft environment.
To automatically import the project, you must have an existing Source Database and a Target Database. The Source Database is the *.dat file supplied with OracleAS InterConnect, containing the current objects that you want to copy to another database. The Target Database is the database where you want to copy your objects.
Regardless of how you create the project, you must create a class of operators and assign permissions.
To import the OracleAS InterConnect project you will need:
The goal of this section is to place the objects from a source database into a project. This involves the following:
psosa.DAT file from the install_directory\OAI\9.0.4\PeopleSoft directory into the Application Update Database using Data Mover.
The Project Name specified is used throughout the moving process.
install_directory\OAI\9.0.4\PeopleSoft\psosa.DAT file to the c:\Temp directory or to the directory defined by the TEMP Environment Variable setting.
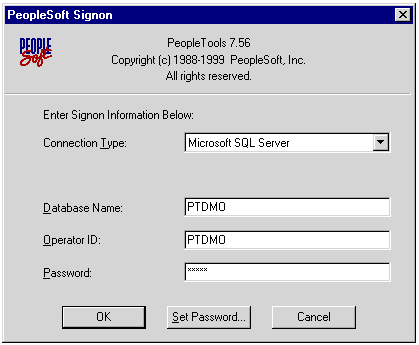
The PeopleSoft Signon dialog displays.
The PeopleSoft Installation and Administration Guide if you do not have an Application Update Database
See Also:
Aurefrsh.dms located in the /Scripts directory to refresh the Application Update Database.
Auimport.dms located in the /Scripts directory to import your project into the Application Update Database.
The Replace dialog displays.
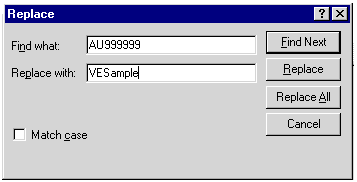
Text description of the illustration pssamplereplacetext.gif
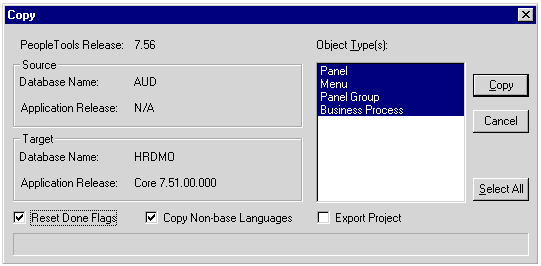
The following steps copy the business process definition and the activity definition from the Application Update Database to the target database.
Verify that the Source database, Target database, and Object Types are correct.
To verify the object exists, you must first log on to PeopleSoft.
You have successfully imported the objects into your target database. The Business Process Object and its related object, Activity, are now in the target database.
The following steps guide you through manually creating the OracleAS InterConnect project for 7.5.6.
Select the grid by clicking on it and placing it on the panel. Click and hold the mouse. Drag the mouse to increase the size the grid then release the mouse after finishing your resize of the grid.
PSMSGAGTDEFN in the Main Record input field.
PSOSA_MESSAGENAMES, and click OK.
PSOSA_MESSAGENAMES in the Name input field and click Insert.
PSMSGAGTDEFN as the search record.
PSOSA_MESSAGENAMES and click OK.
PSOSA_MESSAGENAMES, in the input field labeled Name and click Select.
PSOSA_MNU and click OK.
PSOSA_MNU), the bar name (USE), the item name (GETMESSAGSNAMES), the action name, (&Update/Display), and the search record name (PSMSGAGTDEFN).
PSOSA_BP.
PSOSA_PRJ.
"Creating a New Operator Class and Assigning Permission" for instructions on creating a class of operators and assigning permissions
See Also:
Regardless of how you import the OracleAS InterConnect Message Agent Project, either automatically or manually, you must give access to the new menu and panel by creating a class of operators and assigning permission. You then assign the new class with the permissions to the PeopleSoft 7.5x adapter operator. The following steps describe this process.
A new PeopleSoft dialog displays.
The Select Menu Items dialog displays.
PSOSA_OP.
This saves the class of operators under the name of PSOSA_OP.
PSOSA_OP.
A new dialog displays.
The new panel displays the list of messages defined in your Peoplesoft database.
The following is additional information for the PeopleSoft 7.5x adapter pre-installation tasks.
If an error happens during a call, the exception field generally contains a detailed description of the error that occurred. You can then propagate this error string to the calling application.
For example, setup PeopleSoft on one side, an OracleAS InterConnect hub in the middle, and a Web front end on the other side. If the Web front end tries to add a record to the PeopleSoft side and a record with the same primary key already exists in PeopleSoft, a non-retryable error occurs. The exception field contains the exception data can then be propagated back to the Web front end.
exception: E-OAI0003: Exception occurred during call to AddWidget@PeopleSoft://Messages/WidgetStore User defined exception Exception occurred:Source: WidgetStore::AddWidgetCause: PeopleSoft://Messages/exception=MsgAgentException (Unique ID <none>)Exception occurred: Source: WidgetStore::AddWidget Cause: PeopleSoft://Messages/exception=MsgAgentException (Unique ID <none>)Exception data:struct MsgAgentExceptionData = String Source = "PSMsgProcessMessage(WidgetStore::AddWidget)" String ErrorText = "Row exists in ADD or DATAENTRY mode (81,10)" String Explanation = "The specified search keys resulted in an existinglevel 0 row found when in ADD or DATAENTRY mode."
Using the PeopleSoft Message Agent, PeopleSoft panel groups can be accessed outside the PeopleSoft environment. Each panel in a PeopleSoft panel group is used to enter and retrieve data. Access to PeopleSoft panels is gained through a set of Application Programming Interfaces (APIs) together with a message definition. A message definition creates the mapping between fields in the message definition and fields on a PeopleSoft panel. This is the way PeopleSoft programs are exposed. The PeopleSoft 7.5x adapter acts as the client message agent program, which allows you to access and call all message agent definitions within a PeopleSoft application server. The PeopleSoft 7.5x adapter communicates with the Message Agent Server when a client sends an inbound call via the adapter.
Open Query allows you to call queries that exist on the PeopleSoft application server through the standard ODBC interface. The iStudio browser allows you to graphically explore all Open Query definitions on an application server with the Component Selector. This simplifies the process of invoking the queries by exposing them as objects with a single execute method.
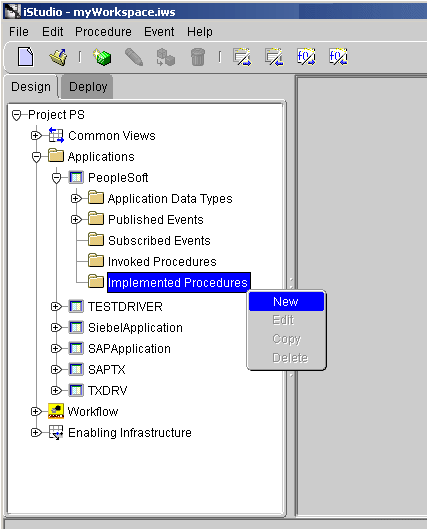
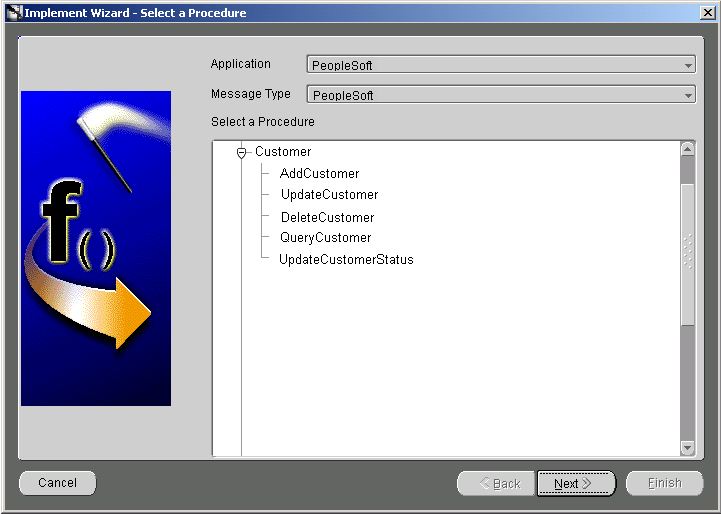
The Implement Wizard--Select a Procedure dialog displays.
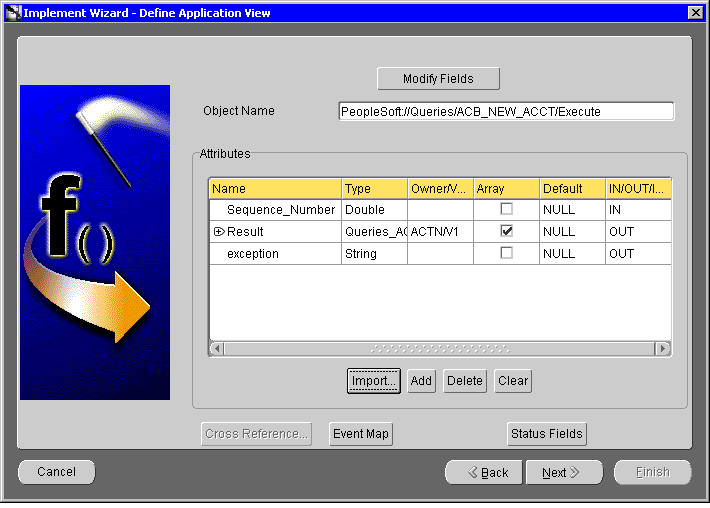
The Define Application View dialog displays. Use this dialog to import attributes from PeopleSoft. To import attributes, you must log in to PeopleSoft.
After logging in to PeopleSoft and importing attributes, the Define Application View dialog is populated with the selected components.
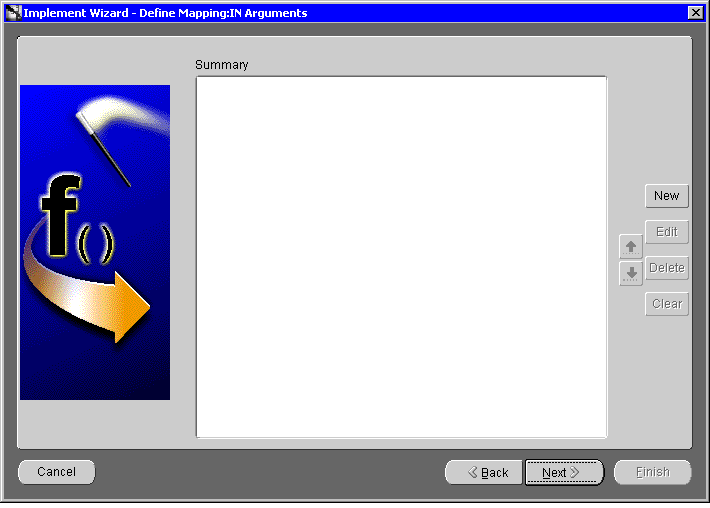
The Define Mapping Arguments dialog displays.
To import attributes from PeopleSoft:
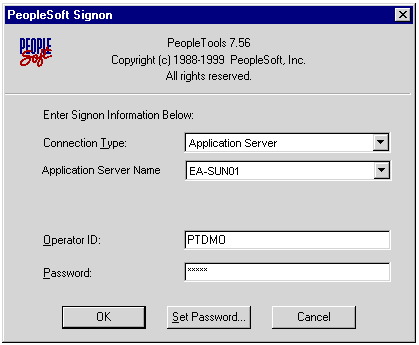
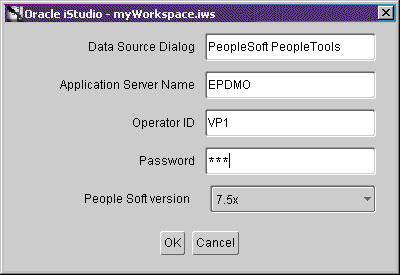
The PeopleSoft Login dialog displays.
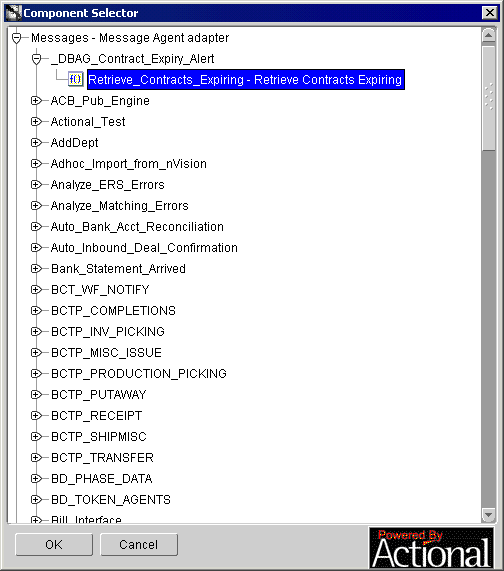
The Component Selector dialog displays.
The selected component and its attributes display on the Define Application View dialog.
|
Note: When publishing an event, the Component Selector displays the Events folder. Select an Event to import and click OK. |
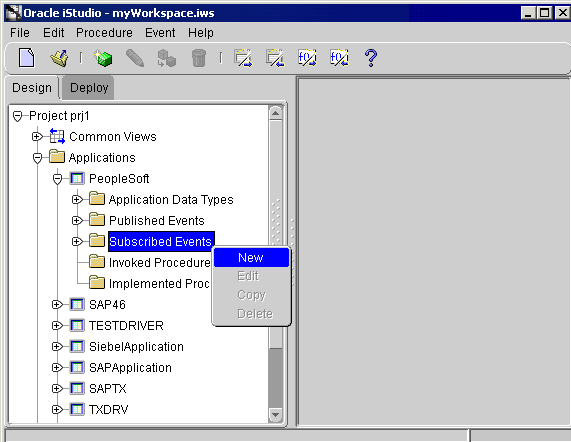
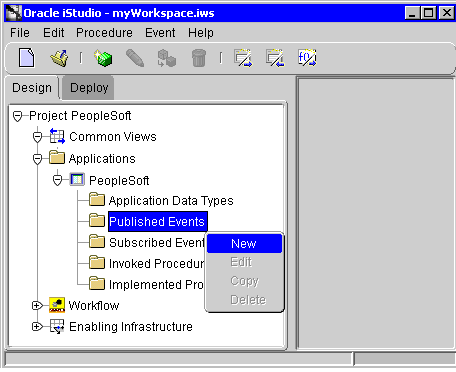
To create a subscribed event in iStudio:
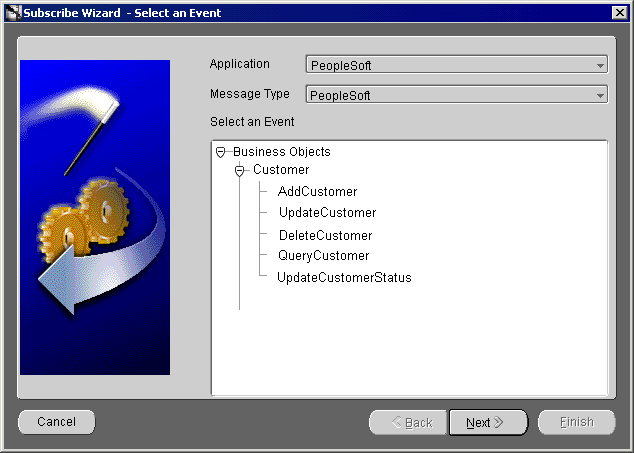
The Subscribe Wizard--Select an Event dialog displays.
The Define Application View dialog displays.
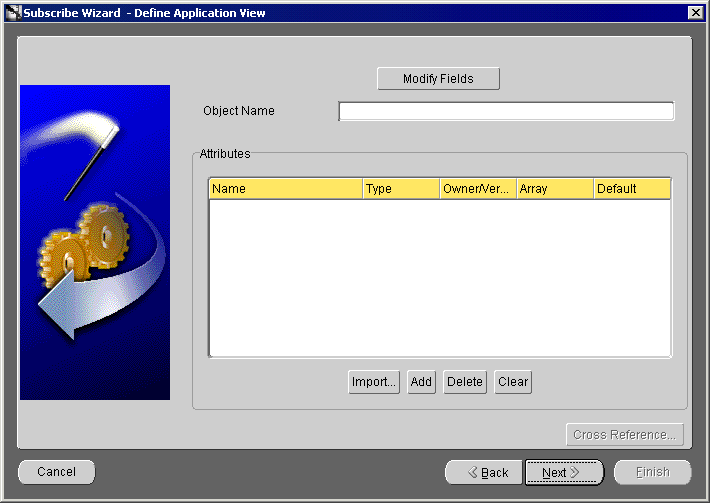
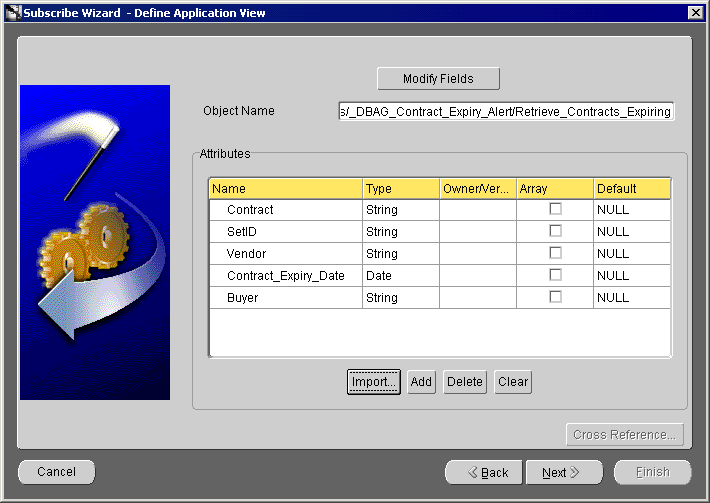
The Define Application View dialog displays. Use this dialog to import attributes from PeopleSoft. To import attributes, you must log in to PeopleSoft.
After logging in to PeopleSoft and importing attributes, the Define Application View dialog is populated with the selected components.
The Define Mapping dialog displays.
To publish an event from PeopleSoft, there is a configuration step that must be completed. You need to define a published event in the publishing database for the PeopleSoft 7.5x adapter. These definitions can be created using the pubmgr tool.
To publish an event using iStudio:
The Publish Wizard--Select an Event dialog displays.

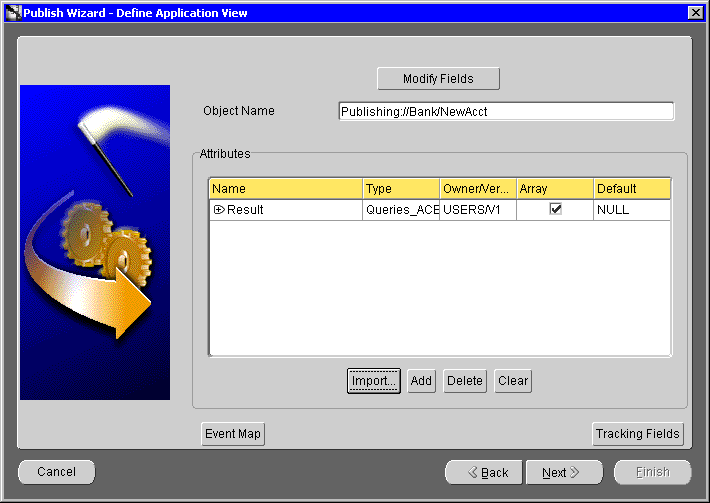
The Define Application View dialog displays. Use this dialog to import attributes from PeopleSoft. To import attributes, you must log in to PeopleSoft.
After logging in to PeopleSoft and importing attributes, the Define Application View dialog is populated with the selected components.
The Define Mappings dialog displays.
|
|
 Copyright © 2002, 2003 Oracle Corporation. All Rights Reserved. |
|