10g (9.0.4)
Part Number B10419-01
Home |
Solution Area |
Contents |
Index |
| Oracle Application Server InterConnect Adapter for PeopleSoft 8 Installation and User's Guide 10g (9.0.4) Part Number B10419-01 |
|
This chapter provides PeopleSoft-specific information for accessing PeopleSoft Component Interfaces using OracleAS InterConnect. This chapter discusses the following topics:
OracleAS InterConnect provides a complete framework for e-Business application integration. PeopleSoft users often configure PeopleSoft to employ OracleAS InterConnect connectivity.
When invoking a method on a Component Interface, the following warning message may display:
java.lang.NullPointerException: PSProperties not loaded from file
This message indicates the pstools.properties file cannot be found in the CLASSPATH. For PeopleSoft 8 adapter to include this file, update the service_classpath parameter in adapter.ini file.
|
See Also:
You can find more information on this error in your PeopleSoft Customer Support Web site. The resolution ID for this issue is 703269. |
If an error occurs during a call, the exception field contains a detailed description of the error. You can then propagate this error string to the calling application.
For example, if a client application tries to add a record to the PeopleSoft server and the record with the same primary key already exists, a non-retryable error occurs. The exception field contains the exception data, which can then be propagated back to the client application.
A Component Interface declares the set of methods and properties that a Component Interface supports, but it does not implement the behavior or properties. The OracleAS InterConnect PeopleSoft 8 adapter provides five standard methods for Component Interfaces:
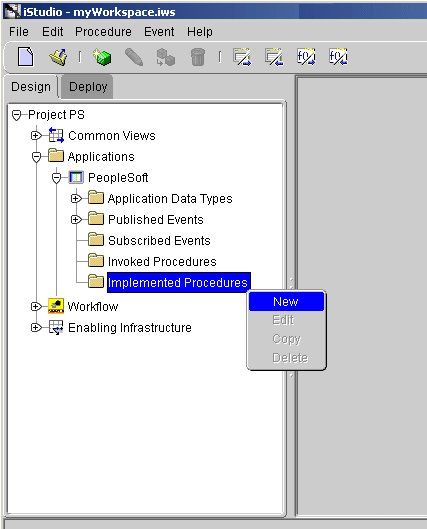
Before using Component Interfaces you must upload a custom Component Interface.
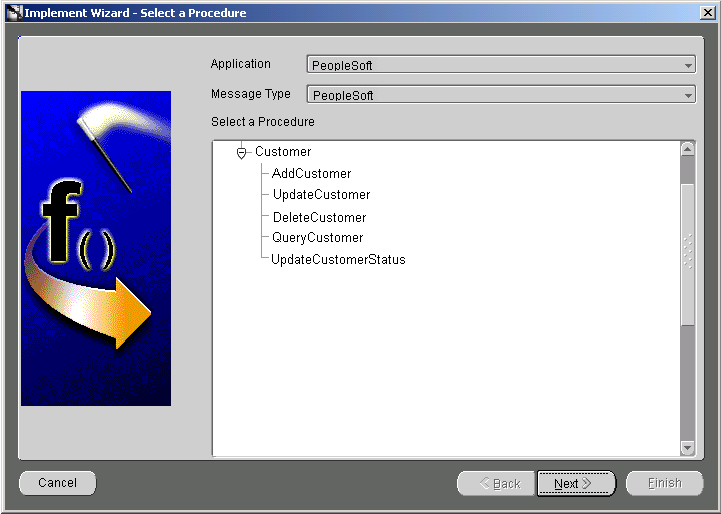
The Implement Wizard--Select a Procedure dialog box is displayed.
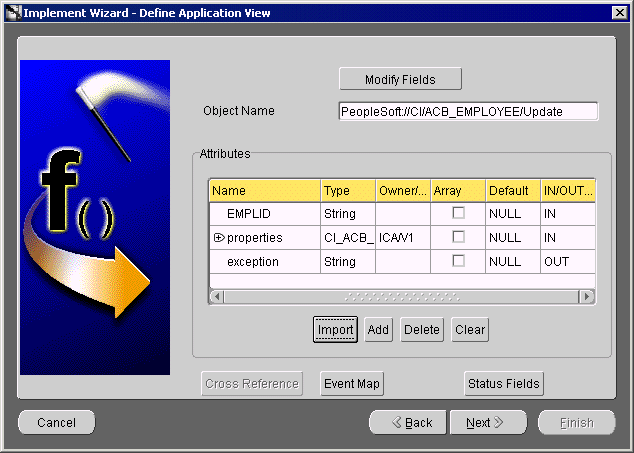
The Define Application View dialog box is displayed. Use this dialog to import attributes from PeopleSoft. To import attributes, you must log in to PeopleSoft.
After logging in to PeopleSoft and importing attributes, the Define Application View dialog box is populated with the selected components.
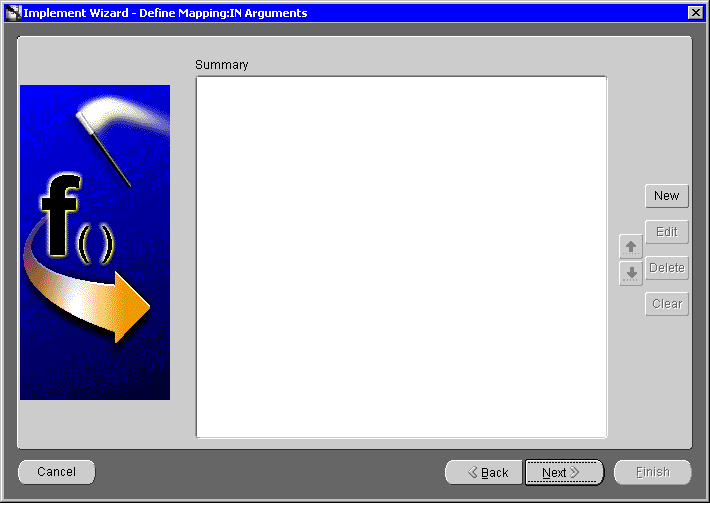
The Define Mappings Arguments dialog box is displayed.
To import attributes from PeopleSoft:
The PeopleSoft Login dialog box is displayed.
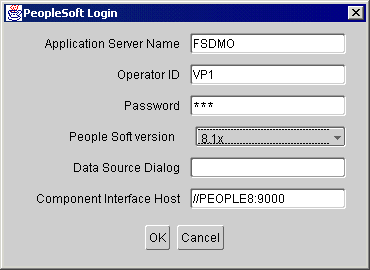
This disables the Data Source Dialog and enables the Component Interface Host.
//PEOPLE8:9000.
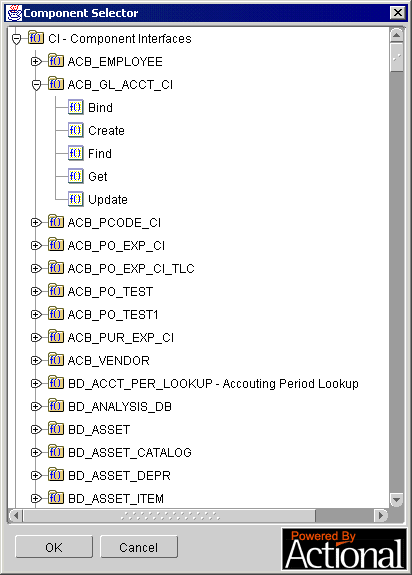
The Component Selector is displayed.
The selected method and its attributes display on the Define Applications View dialog.
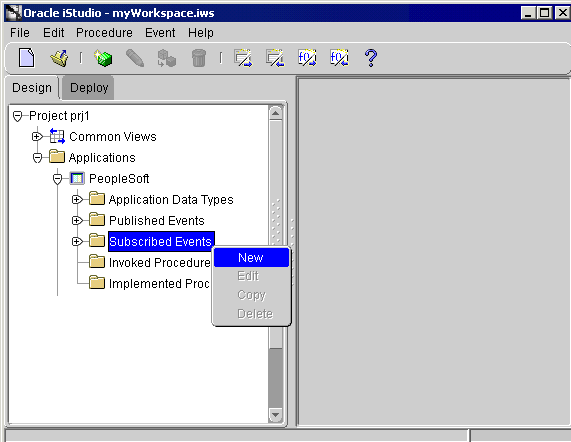
To create a subscribed event in iStudio:
The Subscribe Wizard--Select an Event dialog box is displayed.

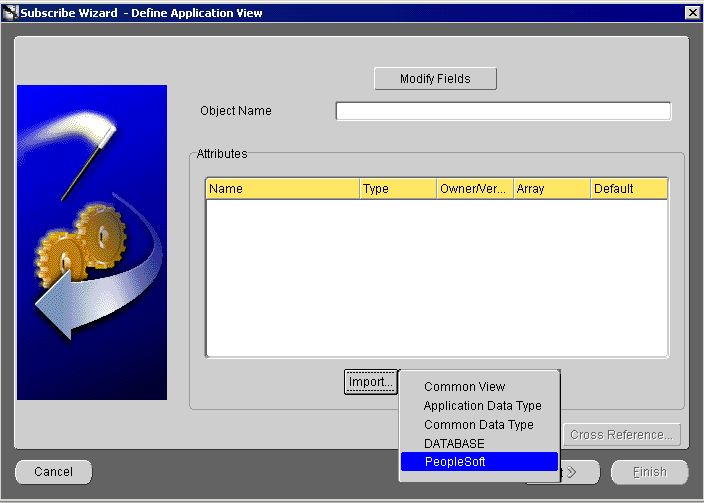
The Define Application View dialog box is displayed.
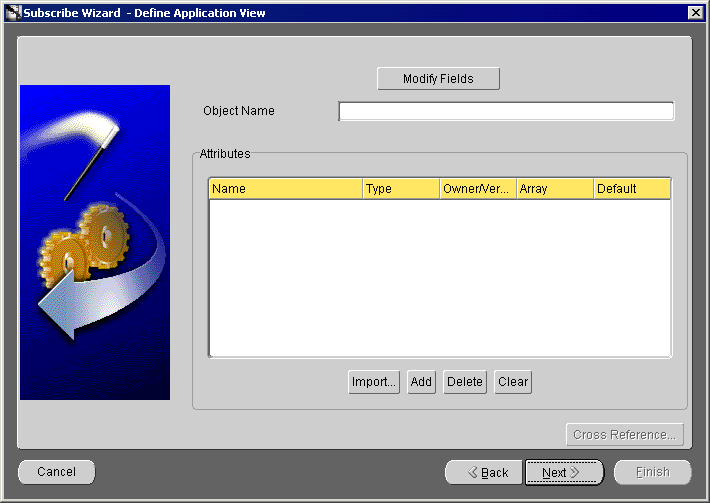
The Define Application View dialog box is displayed. Use this dialog to import attributes from PeopleSoft. To import attributes, you must log in to PeopleSoft.
After logging in to PeopleSoft and importing attributes, the Define Application View dialog box is populated with the selected components.
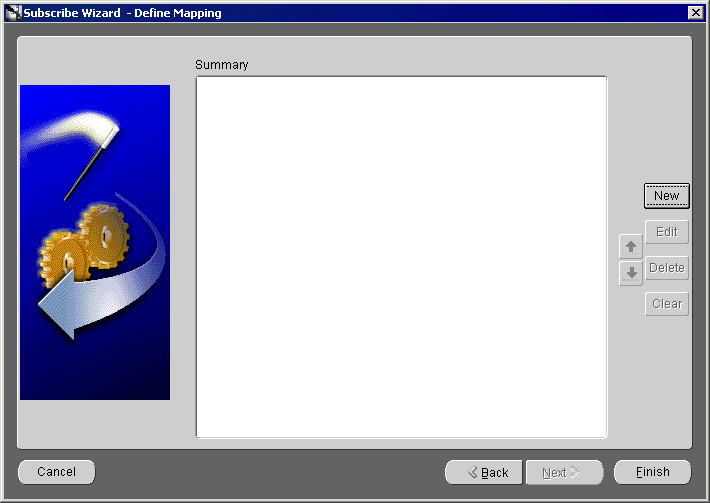
The Define Mapping dialog box is displayed.
|
|
 Copyright © 2002, 2003 Oracle Corporation. All Rights Reserved. |
|