6
Using the Configuration Editor
This chapter describes how to use the Configuration Editor to configure the PeopleSoft 8 adapter to use Component Interfaces. The Configuration Editor is only used at runtime. This chapter discusses the following topics:
Configuration Editor
To configure settings for the PeopleSoft 8 adapter you must access the PeopleSoft Configuration Editor as follows:
- Change directories to the installation directory using a command prompt.
- Type
configeditor and press Enter.
The Configuration Editor displays.
- Select PeopleSoft to edit the PeopleSoft configuration settings for your profile.
Note:
Under some circumstances you may wish to run your adapter under a profile other than iStudio. For example, running the adapter under a different profile is required if you run two instances of the PeopleSoft 8 adapter on the same machine. You can have two instances of the same type of adapter if these instances connect to different back-end system installations. To accomplish this, create a new profile using the configuration editor and enter the settings for this new profile. The name of the new profile should be the same as the name of the application. For example, if your application is called APP2, create a profile called APP2. Now APP2 uses the settings in the profile called APP2, whenever it runs.
|
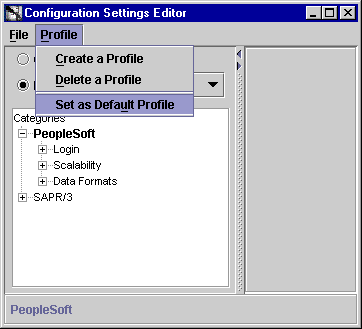
- Click Profile.
- Select Set As Default from the Profile drop down menu.
- Select your new profile.
Figure 6-1 Configuration Settings Editor

Text description of the illustration istudioconfigsettings.gif
- Click OK.
- Select File > Exit to exit the Configuration Editor after completing the setup.
PeopleSoft Login
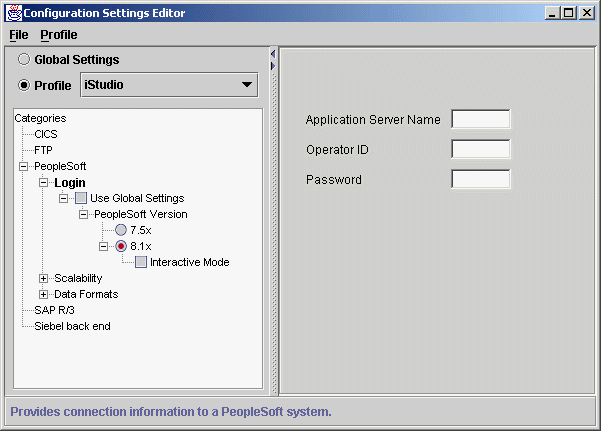
The Login branch is only available for user-defined profiles and provides connection information to a PeopleSoft system. You must specify the Application Server Name, Operator ID, and the Password.
Figure 6-2 Login Panel

Text description of the illustration configmain.gif
Table 6-1 Login Panel Configuration Settings
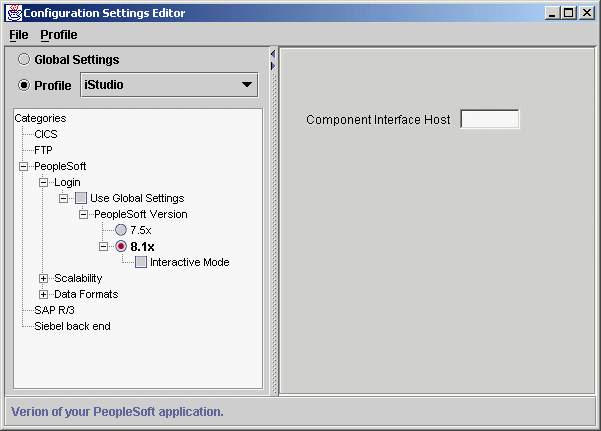
Once the PeopleSoft version is selected, the following page displays in the right panel.
Figure 6-3 Login Screen - Component Interface

Text description of the illustration configci.gif
Table 6-2 Login Panel Component Interface Configuration Settings
Note:
PeopleSoft scalability only applies to PeopleSoft 7.5
|
Data Formats
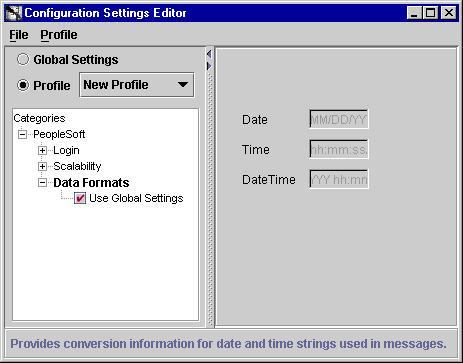
The Data Formats page provides conversion information for date and time strings used in messages. This page is for those applications requiring a date, for example, Automation applications. The information is determined by the PeopleSoft system.
Figure 6-4 Data Format Panel

Text description of the illustration istudiodataformats.gif
Table 6-3 Data Format Panel Configuration Settings


