10g (9.0.4)
Part Number B10356-01
Home |
Solution Area |
Contents |
Index |
| Oracle® Application Server Portal Configuration Guide 10g (9.0.4) Part Number B10356-01 |
|
External content sources can be syndicated by Oracle Application Server Syndication Services into OracleAS Portal as a syndicated channel (subscription) by the Portal administrator using the Syndication Channel Administration portlet. A syndication channel is the means by which content configured to use a syndication offer can be subscribed to and placed in a Portal folder in the Oracle Application Server Metadata Repository. (A folder in this case refers to a Portal page containing a default region of type item.) Once a channel is established, subsequent updates received through administrative pull or automatic push operations will keep the destination Portal folder in sync with the offer content. A Portal administrator can then grant page designers access to the Portal folder containing the syndicated content.
This chapter contains the following sections:
The Portal administrator using this Syndication Channel Administration portlet can:
Note that offers for a content provider must have already been created using Oracle Enterprise Manager Syndication Services Administration pages before you can create a Syndication Channel Administration portlet. See Oracle Application Server Syndication Services Developer's and Administrator's Guide for more information.
Oracle Application Server comes with a set of Provider Groups, one of which contains the Syndication Portlet Provider. In order to use the Syndication Channel Administration portlet, the Syndication Portlet Provider must be registered.
To register the Syndication Portlet Provider, perform the following steps:
The following sections describe how to build the Syndication Channel Administration page and set up the Portal privileges on destination folders.
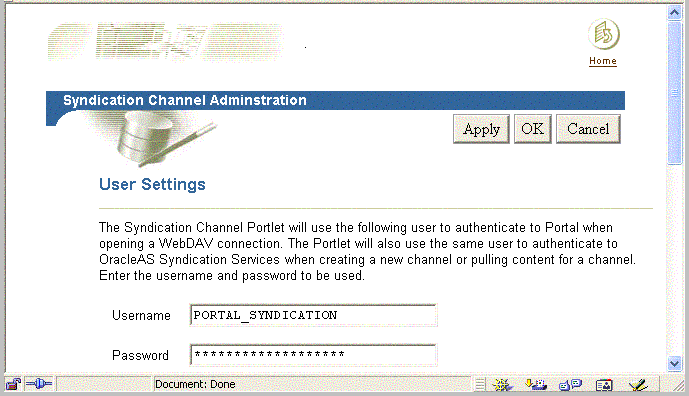
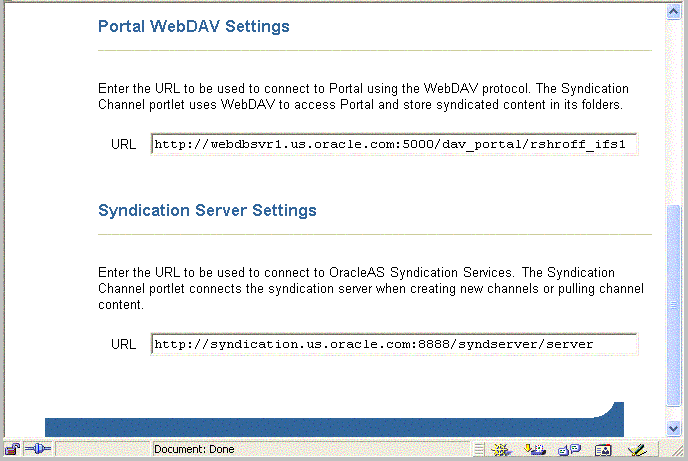
To build the Syndication Channel Administration home page, you must perform the following steps:
The channels created through the Syndication Channel Administration portlet transfer the syndicated content from external sources into Portal Pages. In order to accomplish this goal, some privileges need to be granted to the portal user used by the channel application. As an administrator, you must add manage all permission for the Syndication Channel Administration Portlet user (see Step 2 in Section 11.3, "Using Syndication Channel Administration Portlet") on the destination pages or page-groups that will be used by the channels.
To access and use the Syndication Channel Administration portlet:
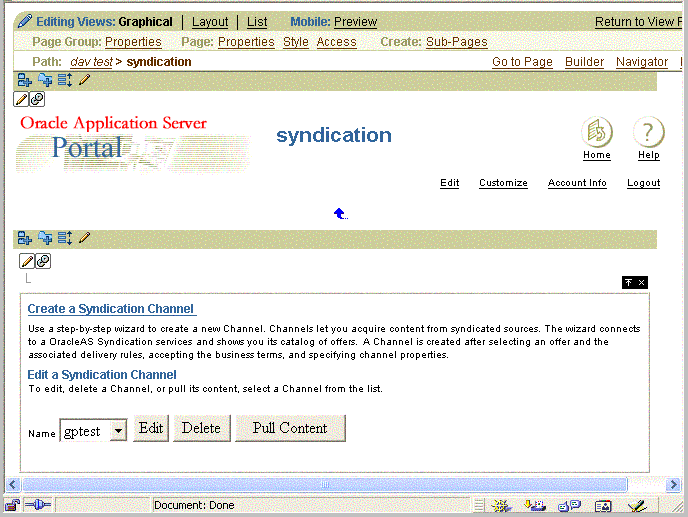
At the Syndication Channel Administration home page, shown as follows, you can perform the following tasks:
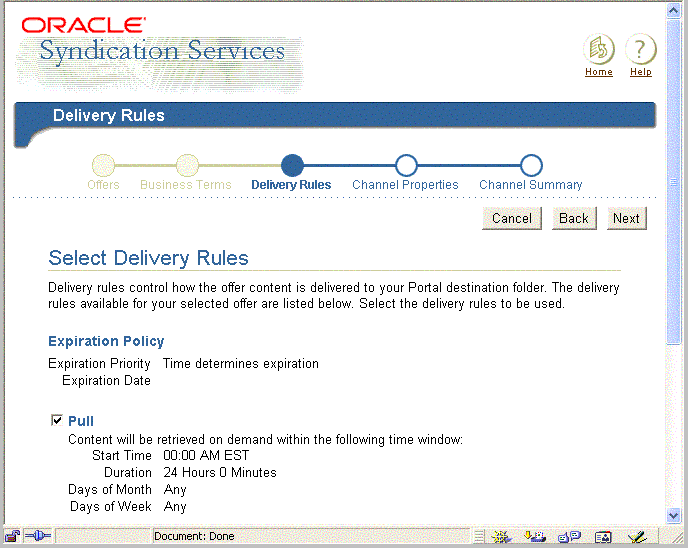
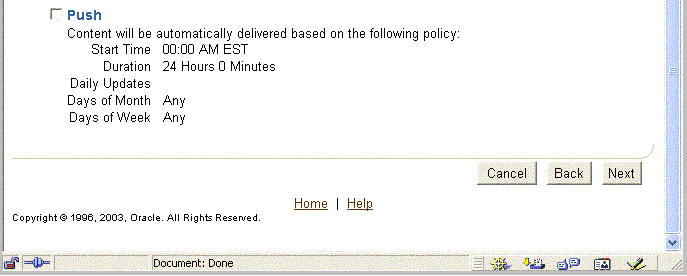
On this page:
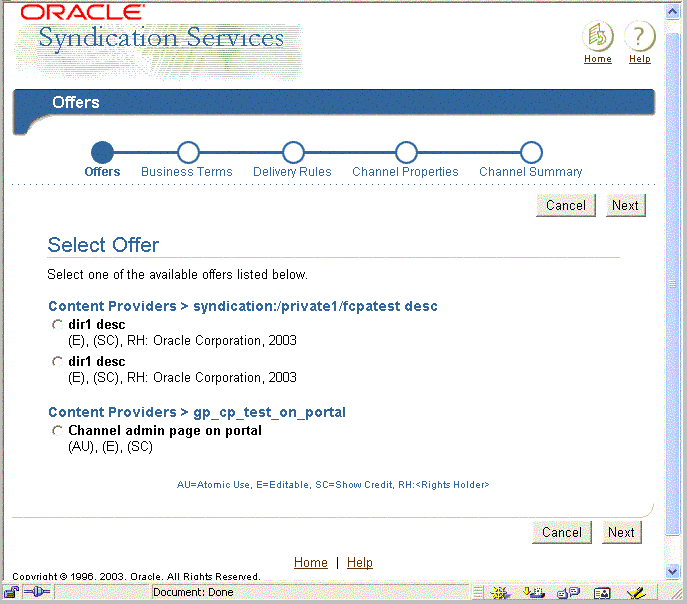
The first step of this wizard, the Offers page is displayed.
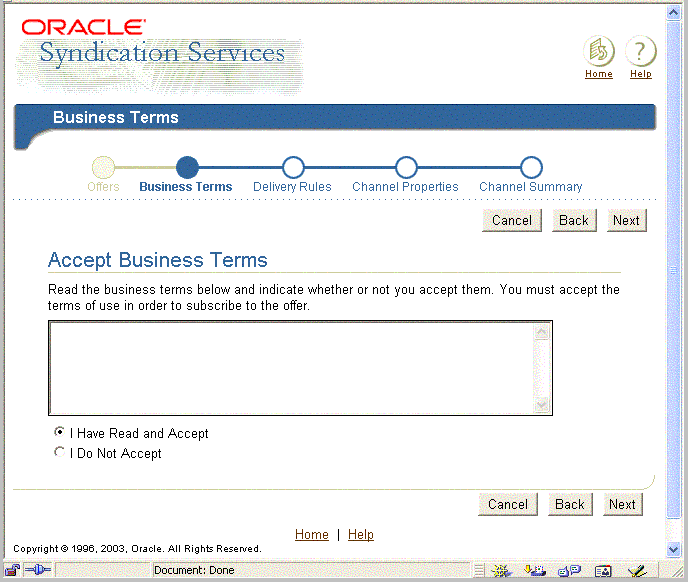
If the business terms are acceptable, click the radio button I Have Read and Accept, then click Next to continue to the next step. If the business terms are not acceptable, click Back to return to the Offers page and find another offer whose business terms are acceptable.
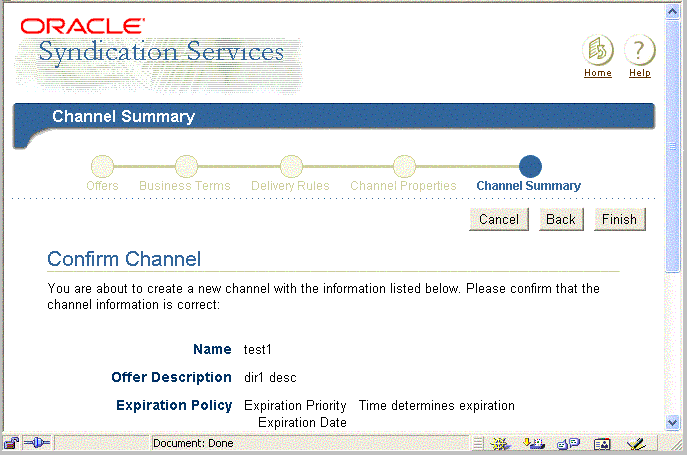
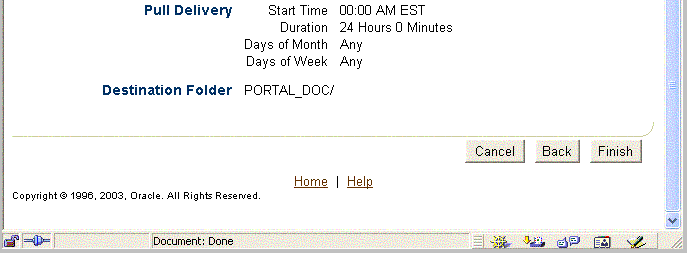
If the information is not correct, click Back to return to the appropriate create syndication channel page where you can make the necessary change or changes, then click Next to return to this Channel Summary page to review a summary of the syndication channel information again.
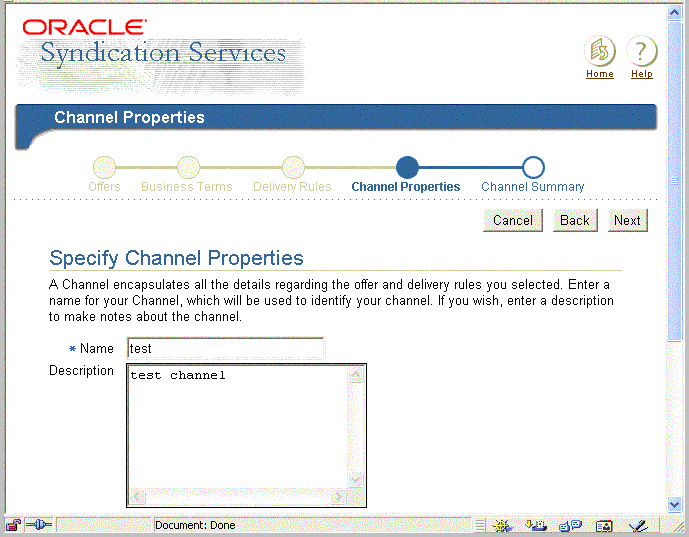
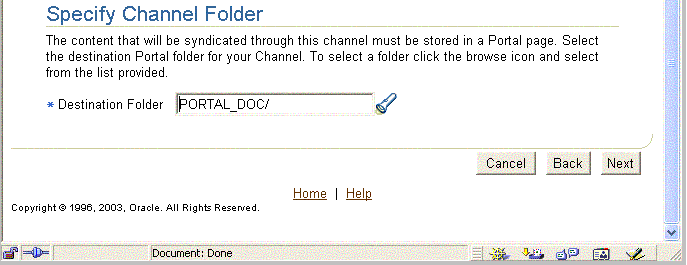
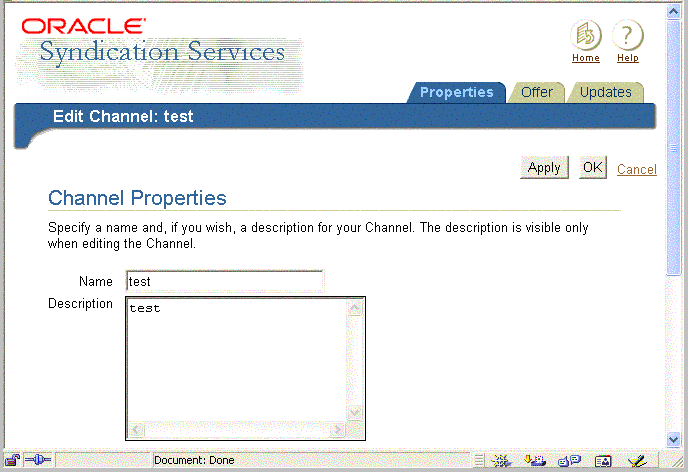
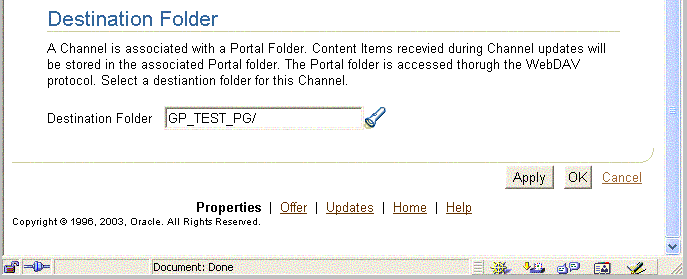
<channel-name> page, shown as follows (the top half of the page followed by the bottom half of the page).
In the Channel Properties section, you can edit the syndication channel name and its description. In the Destination Folder section, you can select another Portal destination folder as the destination folder. If no changes are necessary, click Cancel; if changes are necessary, make your changes, then click OK.
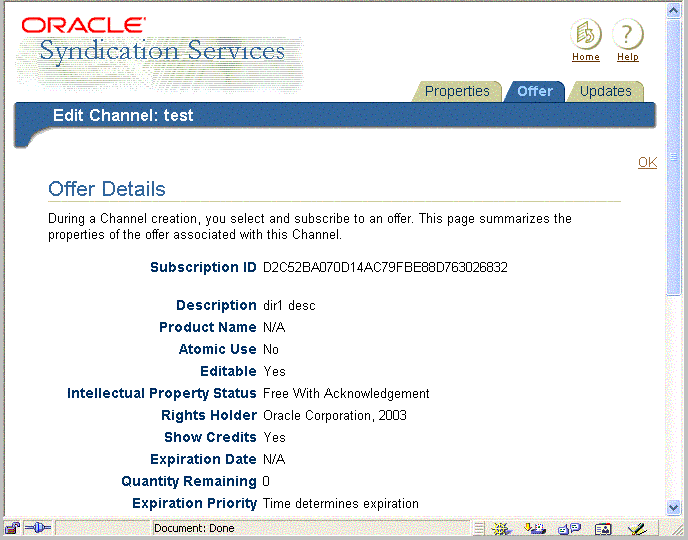
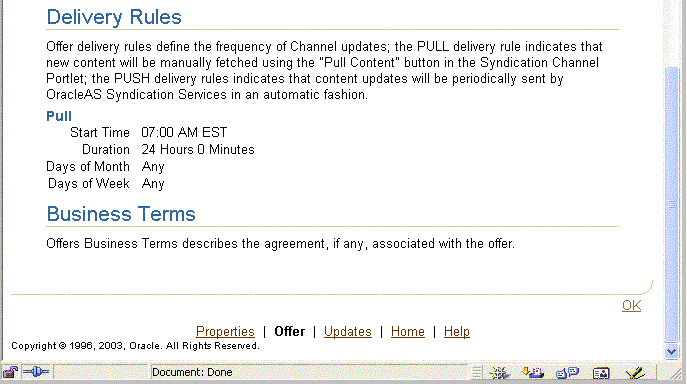
<channel-name> page, shown as follows (the top half of the page followed by the bottom half of the page).
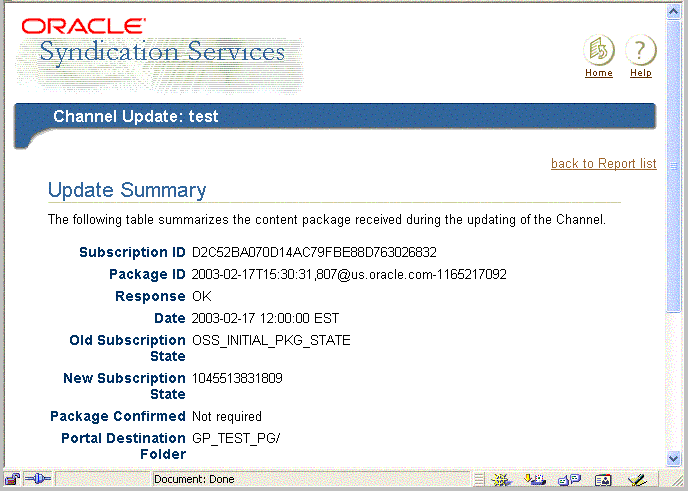
The Edit Channel:<channel-name> page includes the Offer Details section, the Delivery Rules section, and the Business Terms section. Review the summary of properties for this offer configured to use this syndication channel. The subscription ID is the unique identifier assigned when the subscription is created. The subscription ID can be cross-referenced to the list of subscriptions in Oracle Enterprise Manager Syndication Services Administration --> Subscriptions page. Click OK when your review is complete.
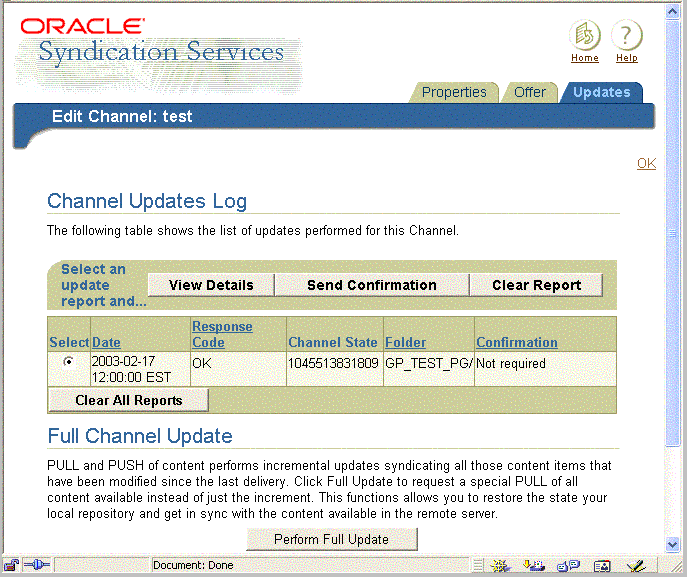
<channel-name> page, shown as follows. This page displays the ChannelUpdates Log section and the Full Channel Update section.
There is a known issue in Syndication Services with propagation of deleted items. If a content provider is registered using a content connector that cannot detect deleted items, removal of any item at the content source will never be revealed to the subscriber, and as an effect, such items will be retained on the subscriber site. See Section 4.1.4 "Content Packages Built" in Oracle Application Server Syndication Services Developer's and Administrator's Guide for more information.
A second known issue is if you delete an item in the destination folder (that still exists in the source) the item is not re-created during a regular pull or push operation. A Perform Full Update operation is required for the item to be created in the destination folder.
A third known issue is that using OracleAS Portal as a content source for a content provider (configured on the portal page using a WebDAV content connector), Portal item attributes are not retained. For example, item level security information, item versioning, expiration changes, deletion of time, and hiding of items do not change for an item after pulling.
Note:
confirmed. If the confirmation state says Not required, the send confirmation operation is not necessary and will be ignored. If the delivery of a package requiring confirmation encounters an error the report will report the error description. Sending a confirmation for an update report having a code of Error will result in the update not getting confirmed and leaving the state as it is. This means that the package was received with an error, so at the next package delivery the same update will be sent again.
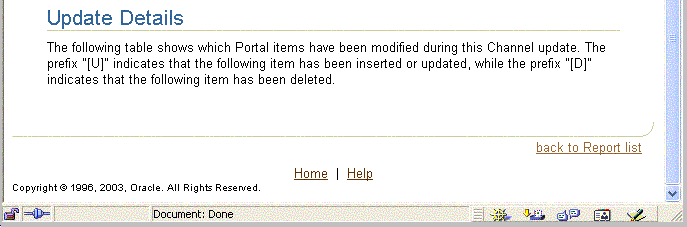
<channel-name> Updates page is displayed as follows, showing the Update Summary section as the top half of the page followed by the Update Details section as the bottom half of the page). When you are through reviewing the contents of this page, click back to Report list to return to the Edit Channel:<channel-name> Updates page.
An update report can be deleted one at a time by clicking Clear report, or all reports can be deleted by clicking Clear all reports.
This completes the tasks that the Portal administrator can perform using the Syndication Channel Administration portlet.
This section describes the advanced configuration parameters that can be used to support secure socket layer (SSL) encryption on the channel communication with OracleAS Syndication Services and with the Portal distributed authoring and versioning (DAV) entry point.
Table 11-1 shows the initialization parameters (<init-params>) that can be set on the channel Web application's web.xml file (channel/WEB-INF/web.xml in the syndprovider application on UNIX or channel\WEB-INF\web.xml in the syndprovider application on Windows). The value of Parameter is the <param-name> value.
Table 11-2 shows the parameters that can be set for the listener Web application, the one responsible for incoming push deliveries of content, the web.xml file (listener/WEB-INF/web.xml in the syndprovider application on UNIX or listener\WEB-INF\web.xml in the syndprovider application on Windows). The value of Parameter is the <param-name> value.
|
|
 Copyright © 2002, 2003 Oracle Corporation. All Rights Reserved. |
|