10g (9.0.4)
Part Number B10271-01
Home |
Contents |
Index |
| Oracle Discoverer Administrator Tutorial 10g (9.0.4) Part Number B10271-01 |
|
It will probably take you about 10 minutes to complete this lesson.
In this lesson you will improve the association between folders by learning how to create the necessary joins between folders in the business area.
Data analysis often requires information that resides in more than one folder. In order for analysis to occur over multiple folders, the folders must be linked by a join. Joins are part of both the database and business area design. As the Discoverer manager, you can create joins to provide the information that end users need for business analysis.
Note: End users cannot create joins, therefore if you want end users to create reports that combine information from multiple folders, you must make sure that the folders are joined.
This lesson consists of the following exercise:
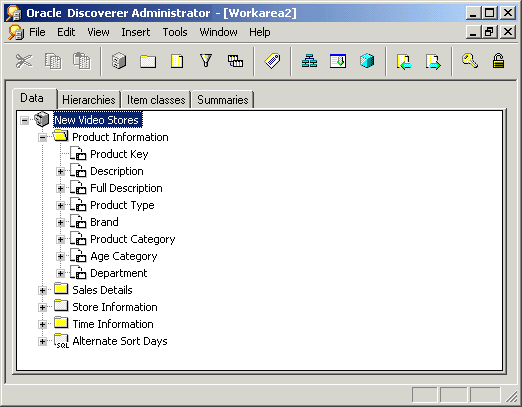
In this exercise you will create joins between folders in the business area by associating the data between the folders that you loaded in "Lesson 2: Connecting to Discoverer Administrator, using the Load Wizard and the Workarea".
You will create joins for each folder by joining a key from the master table to the corresponding key of the detail table.
To create joins between the folders:
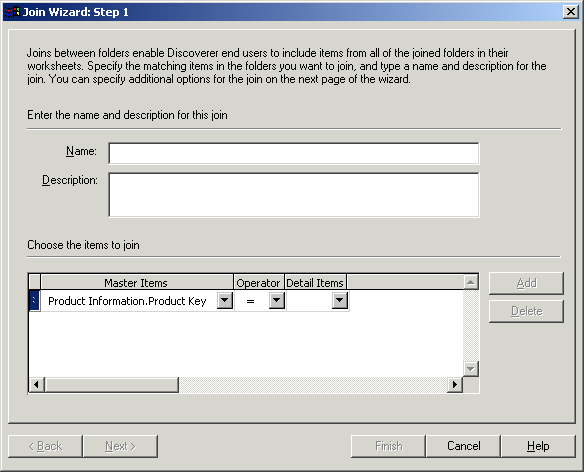
The New Join Wizard: Step 1 dialog already displays the Product Information.Product Key as the master item.
This list displays the types of joins that you can create. The = sign represents an equi-join, that combines rows with equivalent values for the specified items.
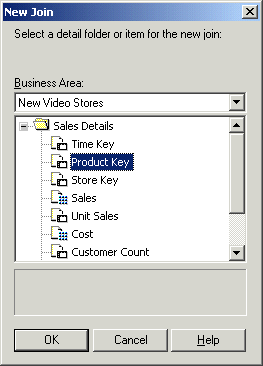
The New Join dialog lists the folders in the New Video Stores business area and enables you to select the folder and item that you want to use for the detail part of the join.
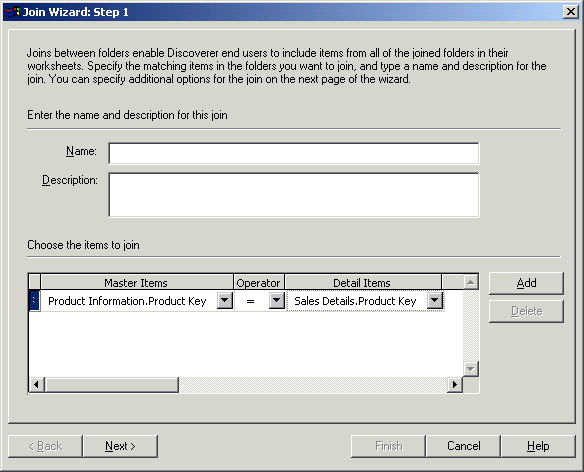
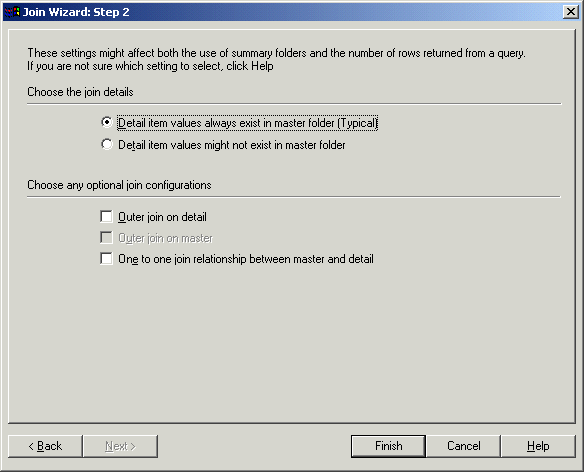
Note: You do not need to enter a name for the join, Discoverer Administrator automatically creates a default name for the join when you click OK.
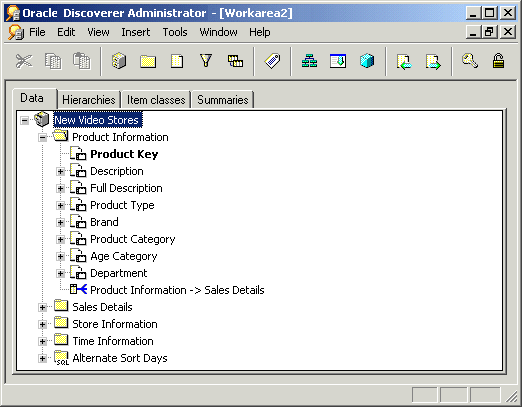
Note: The icon displayed next to the Product Information folder indicates that the Product Information.Product Key is the master item and the Sales Details.Product Key is the detail item. In this one-to-many relationship, for each product record there are many sales details records.
Note: When creating joins for the above folders, use the appropriate master and detail folder/key values as shown in the table below:
Once you have created joins between the Product Information, Store Information, Time Information and the Sales Details folders, they can be used for analysis in Discoverer Plus and Discoverer Viewer.
Note: You must create joins in Discoverer Administrator to make folders available to end users of Discoverer Plus and Discoverer Viewer. When an end user selects an item or folder to create a worksheet, only the folders that are joined to the selected folder are available. Therefore, if you have not created a join between two folders, neither the unselected folder nor its items will be available to the worksheet.
For more information about creating and editing joins, click Help.
In this exercise you created joins between folders in the business area by associating the data between the folders that you loaded in "Lesson 2: Connecting to Discoverer Administrator, using the Load Wizard and the Workarea".
In this lesson you improved the association between folders by learning how to create the necessary joins between folders in the business area.
In this lesson you learned how to create the necessary joins between folders in the business area, and completed the following exercise:
In the next lesson you will learn how to customize items in a business area.
|
|
 Copyright © 1996, 2003 Oracle Corporation. All Rights Reserved. |
|