|
Oracle® Business Intelligence Discoverer Plus User's Guide
10g Release 2 (10.1.2.0.0) Part No. B13915-01 |
|
 Previous |
 Next |
|
Oracle® Business Intelligence Discoverer Plus User's Guide
10g Release 2 (10.1.2.0.0) Part No. B13915-01 |
|
 Previous |
 Next |
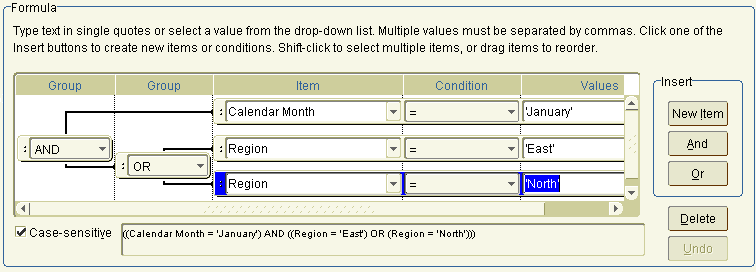
You use nested conditions to display only data that matches a specific set of condition statements that you cannot apply in a single or multiple condition.
To create a nested condition:
Open the worksheet that you want to analyze.
Create a multiple condition (see "How to create multiple conditions").
In the New Condition dialog, click Advanced.
Discoverer adds Insert buttons for New Item, And, and Or. You use these buttons to create the nested conditions.

Use the grouping button (AND, OR, NOT AND, or NOT OR) to add a new condition statement line under the currently selected Group.
Enter the condition statement details.
When you have finished, click OK to save the nested condition and close the dialog.
The new condition appears in the Conditions dialog and is turned on.
Click OK to close the Conditions dialog and return to the worksheet.
Discoverer filters the worksheet to display only data that matches the condition. Data that does not match the condition is not displayed.
Notes
You can also create a new condition in the following ways:
If the Available Items pane is displayed, select the New Condition option on the Available Items toolbar (for more information, see "Available Items pane").
If the Available Items pane is displayed, right-click in the Conditions tab and select New Condition.
To create a nested condition, you might also edit an existing single or multiple condition.