|
Oracle® Business Intelligence Discoverer Plus User's Guide
10g Release 2 (10.1.2.0.0) Part No. B13915-01 |
|
 Previous |
 Next |
|
Oracle® Business Intelligence Discoverer Plus User's Guide
10g Release 2 (10.1.2.0.0) Part No. B13915-01 |
|
 Previous |
 Next |
You drill to detail to analyze all worksheet items in a folder or to analyze the individual rows that make up summary values. For example, you might want to drill from a worksheet item called Month to analyze a folder called Monthly Sales Analysis in a separate window. Or you might want to click on a summary Sales value and analyze the individual values that contribute to the sales total.
To drill to detail:
(optional) Select the worksheet item you want to drill from.
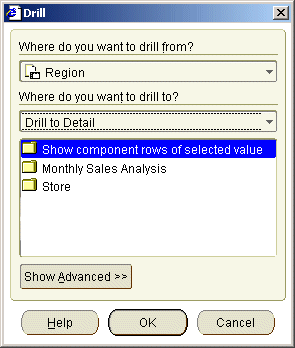
Choose Tools | Drill to display the "Drill dialog".

Hint: You can also display the Drill dialog by right-clicking on a worksheet cell and selecting the Drill... option.
Select Drill to Detail from the Where do you want to drill to? drop down list.

The list shows the Drill to Detail options available.
Select a Drill to Detail option from the list of available options.
(optional) If you want to change the default worksheet style for the Drill to Detail data, click Show Advanced and select a worksheet style from the Advanced options.
Click OK.
Discoverer displays the folder you selected in a new worksheet (unless you changed the advanced settings on the Drill dialog). If you want to save the new worksheet, you must save the Discoverer workbook (for more information, see "How to save workbooks").