10g (9.0.4)
Part Number B10316-01
Home |
Solution Area |
Contents |
Index |
| Oracle Application Server TopLink Mapping Workbench User's Guide 10g (9.0.4) Part Number B10316-01 |
|
Use the Oracle Application Server TopLink Sessions Editor to easily manage your sessions.xml file information. You can work with this file outside of the OracleAS TopLink Mapping Workbench, if necessary.
Use the sessions.xml file to configure one or more sessions for the OracleAS TopLink project, and associate the sessions with the project. This approach allows you to configure the following elements for each project:
Refer to the Oracle Application Server TopLink Application Developer's Guide for more information.
Use one of the following methods to start the OracleAS TopLink Sessions Editor:
<ORACLE_HOME>\toplink\
bin\sessionsEditor.sh file.
The splash screen appears, followed by the OracleAS TopLink Sessions Editor window.
The OracleAS TopLink Sessions Editor window contains similar parts as the OracleAS TopLink Mapping Workbench window (see Figure 1-2). The Navigator pane contains the project tree for all open projects (see "Using the Navigator Pane"). Click the plus or minus ( + or - ) symbol next to an object (or double-click the object) to expand and collapse the tree. When you select an object in the Navigator pane, its properties appear in the Editor pane.
The OracleAS TopLink Sessions Editor displays each configuration's session and connection pool information in the Navigator pane on the left side of the editor.
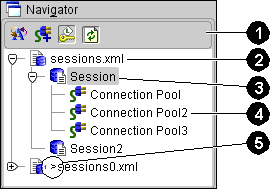
Text description of the illustration navpane.gif
Figure 8-1 calls out the following user-interface components:
<toplink-configuration> tag)
<session> tag)
<connection-pool> tag)
> ) - Appears beside elements that have been changed, but not yet saved.
Click the + or - symbol next to the item, or double-click the item name, to expand and collapse an item.
When you select an item in the Navigator pane, its properties appear in the Editor pane (see "Using the Editor Pane").
You can perform specific functions for an item by right-clicking the item in the Navigator pane and choosing the function from the pop-up menu. (see "Pop-Up Menus").
If a session element contains an error, a warning icon

Text description of the illustration catnicon.gif
appears beside the descriptor's icon in the Navigator pane, and a message displays in the status bar detailing the error.
To rename an element, select the element in the Navigator pane, then click the Rename

Text description of the illustration renambtn.gif
button. The Rename dialog box appears.
The OracleAS TopLink sessions configuration file (named sessions.xml, by default) is an XML (extensible markup language) file that contains all sessions associated with a project. Each OracleAS TopLink project belongs to an OracleAS TopLink session. To deploy beans that belong to different projects, add an appropriate OracleAS TopLink session (see "Working with Sessions") to the configuration.
Refer to the book Oracle Application Server TopLink Application Developer's Guide for a sample sessions.xml configuration file.
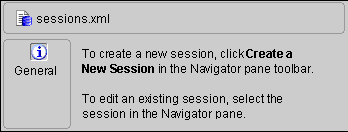
The OracleAS TopLink Sessions Editor displays configurations and their contents in the Navigator pane. When you select a configuration, its attributes display in the Editor pane.
Use this procedure to create a new OracleAS TopLink session configuration.

Text description of the illustration newsesbt.gif
on the toolbar. The Create New Session Configuration dialog box appears.You can also choose File > New from the menu.
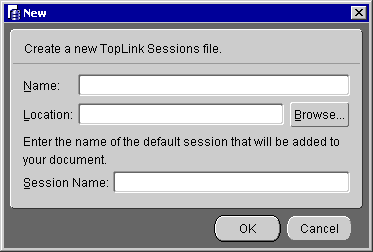
sessions.xml by default), select a directory Location in which to save the file, enter a default Session Name, and click OK.
The OracleAS TopLink Sessions Editor appears, showing the configuration name in the Navigator pane.
Use this procedure to open an existing session configuration.
Click the Open Configuration button

Text description of the illustration openbtn.gif
on the toolbar. The Create New Session Configuration dialog box appears.You can also choose File > Open from the menu.
The OracleAS TopLink Sessions Editor does not automatically save your project. Be sure to save your project often to avoid losing data.
Click the Save button

Text description of the illustration savebtn.gif
or Save All button
Text description of the illustration saveall.gif
to save your project(s).You can also choose File > Save, or File > Save All from the menu.

Text description of the illustration saveasbt.gif
or choose File > Save As. The Save As dialog box appears.
Use session brokers to allow OracleAS TopLink to access multiple databases. With a session broker, you can store the objects within one application on multiple databases.
If the Session Broker tab is not visible for the session, click the Session Broker button

Text description of the illustration sesbkbtn.gif
on the Navigator toolbar. You can also create brokers by right-clicking on the configuration element in the Navigator pane and selecting Advanced > Session Brokers from the pop-up menu.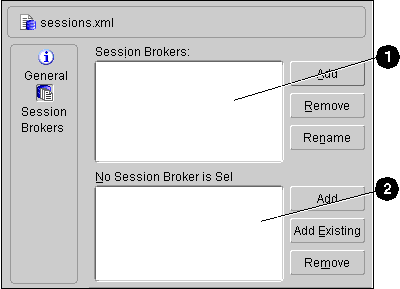
Text description of the illustration sesbrok.gif
Figure 8-4 calls out the following user-interface components:
To delete a session broker, select the session broker and click Remove. To rename a session broker, select the session broker and click Rename (see "Renaming Elements").
To delete a session, select the session and click Remove. To rename a session, select the session and click Rename (see "Renaming Elements").
A OracleAS TopLink session describes how OracleAS TopLink communicates with the datasource at runtime. When using the OracleAS TopLink Sessions Editor to configure the session options, choose Default to use the values specified in the Oracle Application Server TopLink Foundation Library. Refer to the Oracle Application Server TopLink Application Developer's Guide for more information.
Use one of the following methods to create a new session:

Text description of the illustration sessbtn.gif
button.
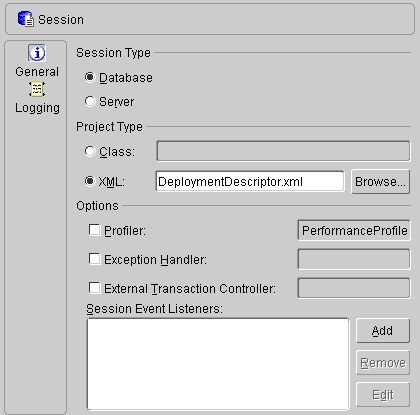
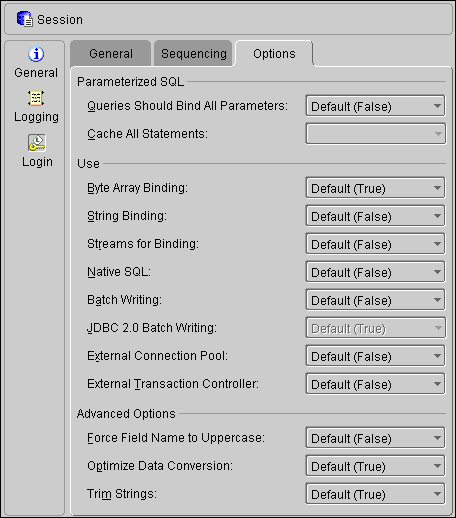
Each session contains tabs and specific properties. By default, sessions contain the following properties:
In addition, you can specify advanced properties (see "Working with Advanced Session Properties") for each session.
Refer to the Oracle Application Server TopLink Application Developer's Guide for more information.
Refer to the Oracle Application Server TopLink Application Developer's Guide for more information.
OracleAS TopLink sessions may contain advanced properties to specify login and clustering (cache synchronization) information. Select one of the following methods to display the advanced properties:

Text description of the illustration loginbtn.gif
or Clustering
Text description of the illustration cachbtn.gif
on the Navigator pane toolbar.
If the Login advanced property is not visible for the session, click the Login button
Text description of the illustration loginbtn.gif
on the Navigator toolbar.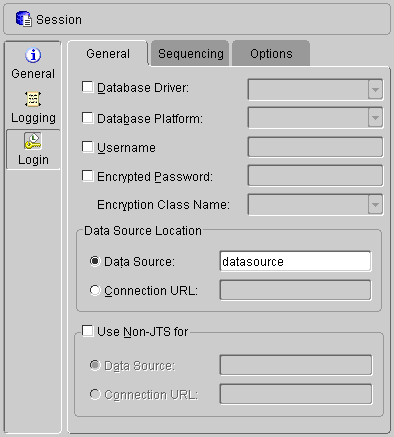
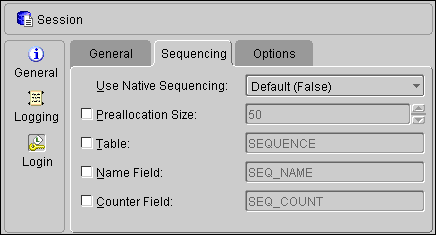
If the Clustering advanced property is not visible for the session, click the Clustering button
Text description of the illustration cachbtn.gif
in the Navigator toolbar.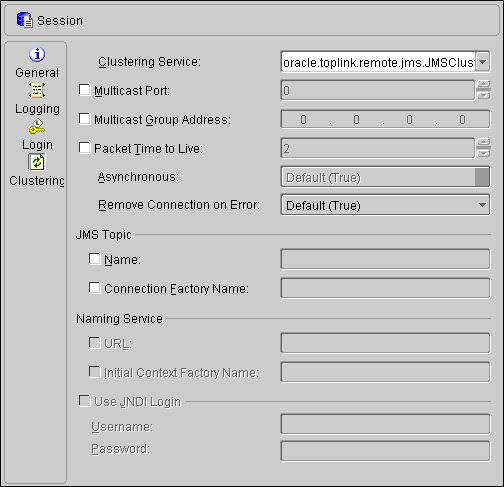
Refer to the Oracle Application Server TopLink Application Developer's Guide for more information.
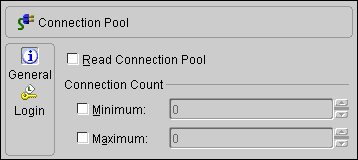
OracleAS TopLink uses connection pools to manage and share the connections used by the server and client sessions among multiple clients. This feature reduces the number of connections required by the application server and allows the server to support many clients.
To create a new connection pool, right-click a session element in the Navigator pane and choose New > Connection Pool from the pop-up menu, or click the Connection Pool

Text description of the illustration conpolbt.gif
button.
Refer to the Oracle Application Server TopLink Application Developer's Guide for more information.
Use this procedure to display the source code in the sessions.xml configuration at any time.
Select a configuration in the Navigator pane and choose View > Source from the menu. The Sessions Configuration Editor opens the configuration in your editor.
If you have not selected a text editor (see "General Preferences" ), the OracleAS TopLink Sessions Editor prompts you select a text editor.
|
|
 Copyright © 1997, 2003 Oracle Corporation. All Rights Reserved. |
|