8
Generating a Paper Report
Estimated Completion Time: 15 minutes
This chapter describes how to create a paper version of the Web report you just created. Here, you will use the Report Wizard to create a paper layout using the same data model you created in Chapter 2, "Adding Data to a Report".
If you already know how to use the Report Wizard, refer to Appendix A.4, "Entries for the Report Wizard"for a quick reference guide.
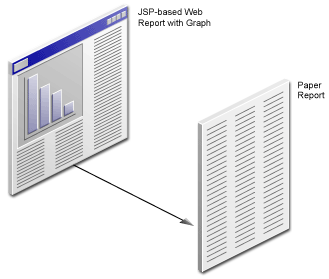
Figure 8-1 Generating a Paper Report from a JSP-based Web Report Data Model

Text description of the illustration paper_xg.gif
8.1 Generate a paper report based on your data model
In this section, you will learn how to generate a paper layout based on the same data model you created in Chapter 2, "Adding Data to a Report".
Note:
You must be connected to the same database you used, and access the Human Resources (HR) schema. If you do not know the connection information for the database, contact your database administrator.
|
To generate a paper report: using the Report Wizard:
- In the Object Navigator, make sure the report you created in Chapter 6, "Creating a Graph for the Web Report" called
emprevb_<your initials>.jsp is open.
Note:
If you don't want to create a JSP-based Web report first, and just want to learn how to generate a paper layout for a JSP-based Web report, open the file we've provided, called emprevb.jsp.
|
- In the Object Navigator, right-click the report name.
- From the pop-up menu, choose Report Wizard.
- Let's choose the Paper Layout since we're generating a paper report. We don't need to select a Web Layout since we've already done that in Chapter 3.
In the Report Wizard, on the Report Type page, select the Create Paper Layout only radio button.
- On the Style page, make sure the Group Above radio button is selected, and that the title is "My Team's Salaries."
- Click the Data tab.
The data model you created in Chapter 2, "Adding Data to a Report" should display in the SQL Query Statement text box.
- On the Fields page, move all the fields back to the Available Fields list, then move the following fields to the Displayed Fields list by selecting the field, then clicking >.
- emp_name
- mgr_name
- SALARY
- SumSALARYPermgr_name
- On the Labels page, in the Label field for the emp_name field, type
Employee Name.
- In the Label field for the mgr_name field, type
Manager Name.
- In the Label field for the SumSALARYPermgr_name field, type
Total Salary.
- On the Templates page, make sure the Beige template is selected.
- Click Finish.
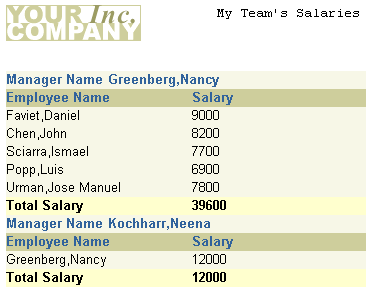
The report displays in the Paper Design view, and should look something like this:
Figure 8-2 Final Paper Report

Text description of the illustration paper_fin.gif
- Choose File > Save As.
- Change the name to
emprev_paper_<your initials>.rdf, and make sure "rdf" is selected.
- Click Save.
8.2 Modifying a report in the Paper Design view
Reports Builder provides you with numerous tools you can use in the Paper Design view to modify the look and feel of your report. Because you are editing live data, you can see exactly how the end result of your report will appear. This section describes how to enhance your report using some of the most commonly used formats:
- aligning columns
- setting format masks
- manipulating objects
- editing text
- modifying visual attributes
- highlighting data
- inserting page numbering
- inserting current data and time
To modify the appearance of your report in the Paper Design view:
- In the Paper Design view, click the Flex Off button in the toolbar.
- Align the title with the logo.
Click the report title "My Team's Salaries" and drag it 1.5 inches to the left, and 0.25 inches down.
- While the object is selected, choose Format > Font, then choose Arial, Bold, 12pt to format the text.
|
Tip:
If the text no longer fits within the object area, click the text object again, and drag one of the black squares to the right.
|
- Your report title should now look like this:
Figure 8-3 Formatted title of the paper report

Text description of the illustration paper_title.gif
- Click the number column beneath the Salary label. Notice how all the number values are selected.
- In the toolbar, click the Currency button once, click the Commas button once, then click the Add Decimal Place button twice.
- While the number values are still selected, click the Align Right button in the toolbar.
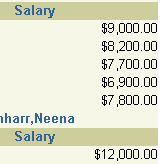
- The Salary column should now look like this:
Figure 8-4 Formatted numbers in the Salary column

Text description of the illustration paper_sal.gif
- Since the salary numbers are aligned to the right, now align the Salary label to the right.
To do so, click the Salary label, then click the Align Right button in the toolbar.
- Now, format the Total Salary numbers in the same way the Salary numbers are formatted.
- Add space between the Manager label and the manager's name. To do so, click a manager's name (e.g., Greenberg,Nancy). While the object is selected, use the right arrow on your keyboard to move the field to the right.
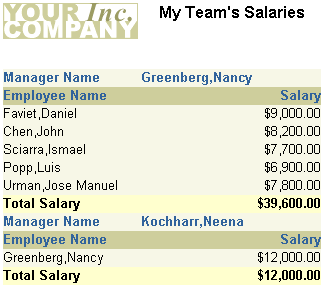
Your report should now look something like this:
Figure 8-5 Final formatted paper report

Text description of the illustration paper_form.gif
8.3 Summary
Congratulations! You have now generated a paper report based on the data model you created for a JSP-based Web report. You now know how to:
- Open the Report Wizard for an existing JSP-based Web report
- Create a paper layout for your report
- Produce a paper version of your Web report
- Format a paper report to make it more readable
For more information on generating a paper report based on an existing data model, see the Reports Builder online help.


