| Oracle® Database Express Edition 2 Day Plus .NET Developer Guide 10g Release 2 (10.2) Part Number B25312-01 |
|
|
View PDF |
| Oracle® Database Express Edition 2 Day Plus .NET Developer Guide 10g Release 2 (10.2) Part Number B25312-01 |
|
|
View PDF |
This chapter explains how to use Oracle Developer Tools.
This chapter contains the following sections:
To connect to an Oracle Database from Visual Studio .NET, follow these steps:
Follow instructions in Section "Startinga New Project ". Name the C# project HR_ODT_CS. If starting a VB project, name it HR_ODT_VB.
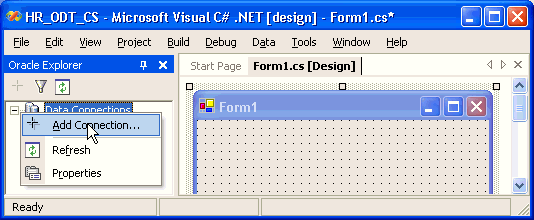
In Oracle Explorer, right-click Data Connections. From the menu, select Add Connection.
In the Add Connection window, enter the following information:
Data source name: Use the Local Database if you are connecting to a database on the same machine. Otherwise, use the alias of the remote database instance.
Select the Use a specific user name and password option.
For Password, enter hr, or the password that was set when unlocking and setting up the hr account.
To save the password for future sessions, check the Save password box.
Ensure that Role is set to Default. This refers to the default roles that have been granted to the user hr.
The Connection name should be generated automatically from the Data source name and the User name values.
Click the Apply Filters tab, and check that the HR schema is in the Displayed schemas column. Only the schema objects (tables, views, and so on) from the schemas selected in the Apply Filters tab are displayed when you expand the schema category nodes in the data connection.
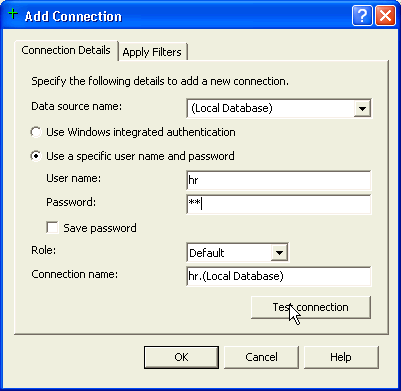
Click the Connection Details tab, and then click Test connection.

The test should succeed. Click OK.
If the test fails, it may be due to one or more of the following issues that you must address before proceeding with further steps:
The database is not started.
The database connectivity is not properly configured.
You do not have the correct user name, password, and role.
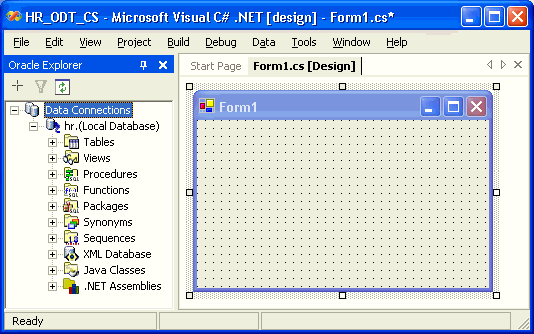
Oracle Explorer should now contain the hr.(Local Database) connection. Expand the connection to show the contents of the hr schema. You should see Tables, Views, Procedures, Functions, and so on.
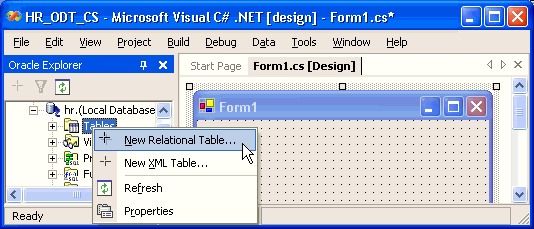
In Oracle Explorer, right-click Tables and select New Relational Table.
In design view, enter DEPENDENTS for Table name.
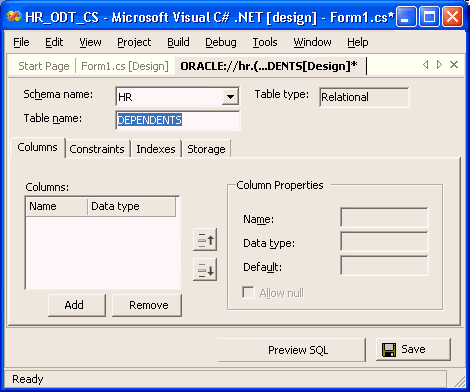
Add the LASTNAME column. Click the Add button under the Columns area. Under Column Properties, enter Name LASTNAME, Data Type VARCHAR2, and Size 30. Leave all other properties at their default values.
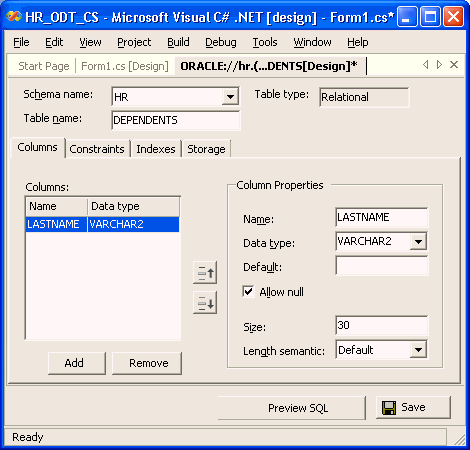
Add the FIRSTNAME column. Click the Add button under the Columns area. Under Column Properties, enter Name FIRSTNAME, Data Type VARCHAR2, and Size 30. Leave all other properties at their default values.
Add the BIRTHDATE column. Click the Add button under the Columns area. Under Column Properties, enter Name BIRTHDATE, Data Type DATE, and leave all other properties at their default values.
Add the RELATIONSHIP column. Click the Add button under the Columns area. Under Column Properties, enter Name RELATIONSHIP, Data Type VARCHAR2, and Size 20. Leave all other properties at their default values.
Add the EMPLOYEEID column. Click the Add button under the Columns area. Under Column Properties, enter Name EMPLOYEEID, Data Type NUMBER, deselect Allow null, enter Precision 6 and Scale 0.
Add the DEPENDENTID column. Click the Add button under the Columns area. Under Column Properties, enter Name DEPENDENTID, Data Type NUMBER, deselect Allow null check box, enter Precision 4 and Scale 0.
Click Preview SQL. The SQL statement for constructing the table, as shown in Example 5-1, appears in the Preview SQL window.
Example 5-1 Generated SQL Form of the New Table
CREATE TABLE "HR"."DEPENDENTS" ("LASTNAME" VARCHAR2(30) NULL,
 "FIRSTNAME" VARCHAR2(30) NULL,"BIRTHDATE" DATE NULL,
 "RELATIONSHIP" VARCHAR2(20) NULL,"EMPLOYEEID" NUMBER(6,0) NOT NULL,
 "DEPENDENTID" NUMBER(4,0) NOT NULL);

Click OK to close the Preview SQL window.
Now you must create an index for the DEPENDENTS table.
Click the Add button under the Indexes area. Under Index properties, enter Name DEPENDENTS_INDEX, and leave all other properties in their default state.
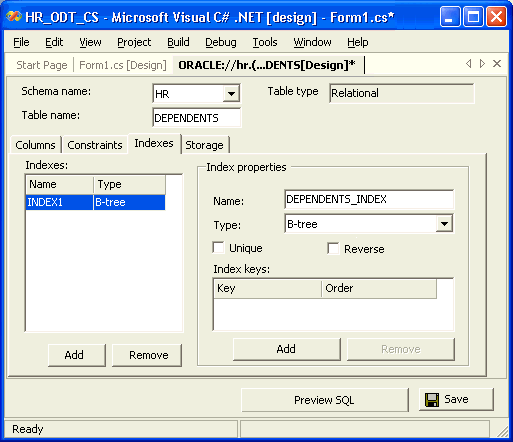
Under Index keys, from the Key column, select DEPENDENTID from the drop-down list.
Click Preview SQL. A Preview SQL window appears, displaying the SQL statement that constructs the index, as shown in Example 5-2.
Example 5-2 Creating a Table Index in SQL
CREATE INDEX "HR"."DEPENDENTS_INDEX" ON "HR"."DEPENDENTS" ("DEPENDENTID" );

Now you must add constraints to the new table.
To create a foreign key to the EMPLOYEES table, click the Constraints tab. Note that depending on your configuration, there may already be default check constraints in the list.
Under the Constraints area, click Add.
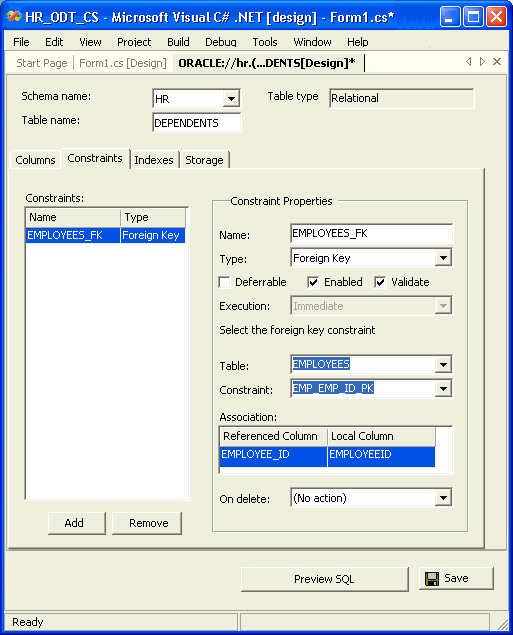
Under Constraint Properties, enter Name EMPLOYEES_FK, select Type Foreign Key from the drop-down list, select Table EMPLOYEES and Constraint EMP_EMP_ID_PK.
Under Association, select EMPLOYEE_ID as Referenced Column and EMPLOYEEID as Local Column.
Leave all other properties at their default values.
To create a primary key for the new table, DEPENDENTS, under the Constraints area click Add.
Under Constraint Properties, enter Name DEPENDENTS_PK and select Type Primary Key from the drop-down list.
Under Constraint Properties, click Add.
Under Primary Key Columns, select DEPENDENTID. Leave all other properties at their default values.
Click Preview SQL. A Preview SQL window appears. Example 5-3 shows the code generated for constraints on table DEPENDENTS. Note that addition of both constraints is an ALTER TABLE command, because the constraints change the definitions of columns DEPENDENTID and EMPLOYEEID.
Example 5-3 Adding Foreign Key and Primary Key Constraints to a Table
ALTER TABLE "HR"."DEPENDENTS" ADD (  CONSTRAINT "EMPLOYEES_FK" FOREIGN KEY
 ("EMPLOYEEID") REFERENCES "HR"."EMPLOYEES" (EMPLOYEE_ID)  ENABLE  VALIDATE  );
ALTER TABLE "HR"."DEPENDENTS" ADD (  CONSTRAINT "DEPENDENTS_PK" PRIMARY KEY
 ("DEPENDENTID")  ENABLE  VALIDATE  );

In the table design view, click Save.
Notice that if you expand the DEPENDENTS table in the Oracle Explorer, all the columns, constraints and indexes of the table are visible.
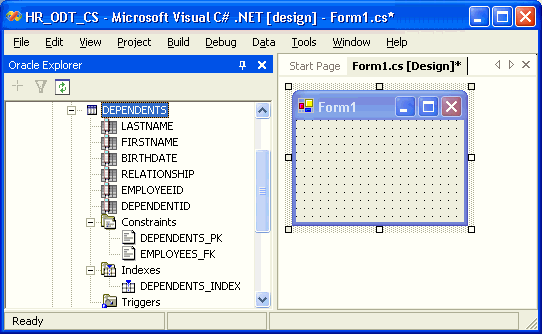
You must now add data to the new DEPENDENTS table.
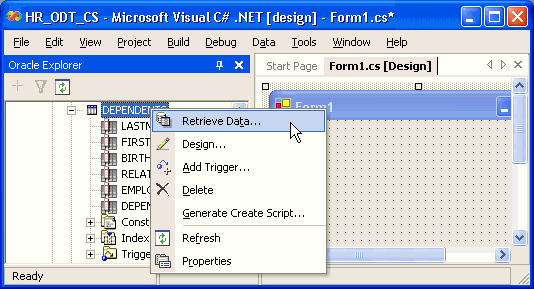
In Oracle Explorer, right-click the DEPENDENTS table and select Retrieve Data.
Enter the four records listed in Table 5-1 into the table grid.
Table 5-1 New Data for the DEPENDENTS Table
| LASTNAME | FIRSTNAME | BIRTHDATE | RELATIONSHIP | EMPLOYEEID | DEPENDENTID |
|---|---|---|---|---|---|
|
Martin |
Mary |
06-MAY-80 |
daughter |
104 |
1 |
|
Littlefield |
Sue |
12-JUL-88 |
daughter |
130 |
2 |
|
Griffiths |
David |
02-APR-97 |
son |
104 |
3 |
|
Young |
Aaron |
31-AUG-99 |
son |
111 |
4 |
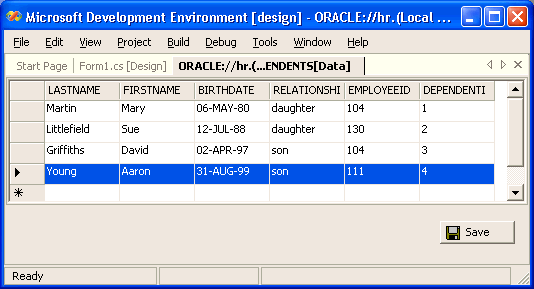
Note that the data is automatically saved as you move between rows.
To explore the content of table DEPARTMENTS, we will build a form that uses a simple table query.
Switch to the Form1 design view (Shift+F7 keyboard shortcut).
In Oracle Explorer, expand Data Connections, expand hr. (Local Database), and finally expand the Tables component.
Using your mouse, select the DEPARTMENTS table. Drag and drop the table onto Form1 in the Designer window.
A Microsoft Development Environment pop-up window will ask if you wish to save the connection password in the generated code. While it is not advisable to save connection password within your form in clear text for security reasons, we will do it in this demonstration. Click Yes.
You will notice that this action creates an OracleConnection object, departmentsOracleConnection1, and an OracleDataAdapter object, departmentsOracleDataAdapter1. Both appear under the Design window.
These objects represent automatically generated code for Form1.
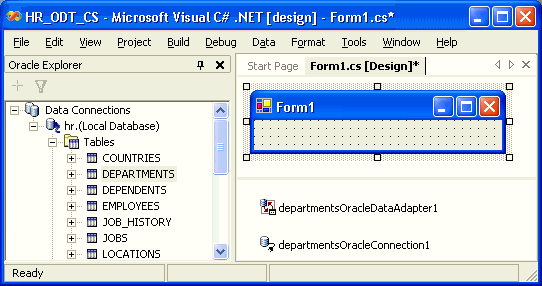
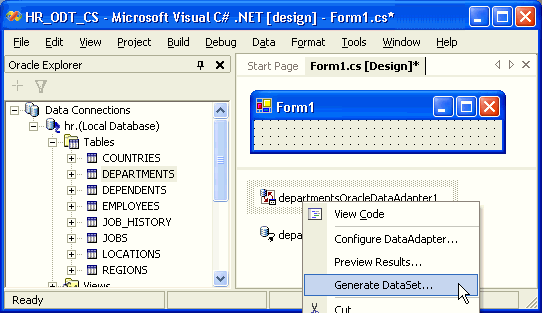
Right-click the departmentsOracleDataAdapter1, and select Generate DataSet.
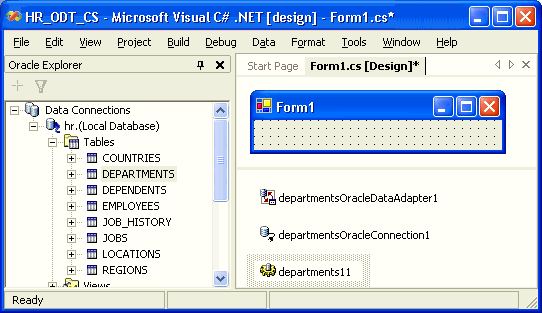
The object departments11 is now added to your Design window.
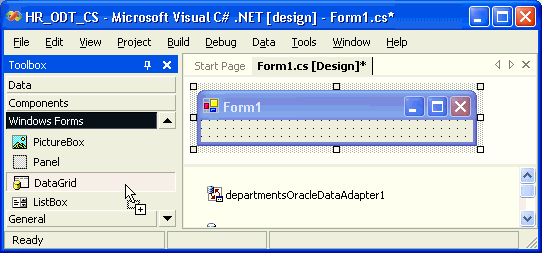
From the Toolbox, under Window Forms, select DataGrid and drag it onto Form1.
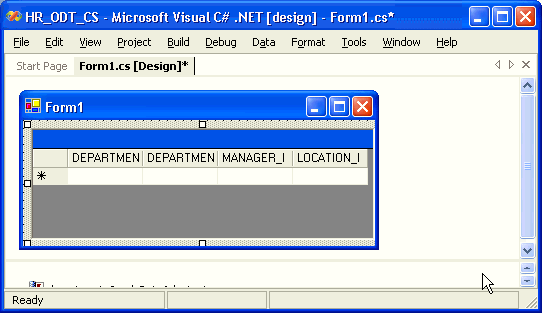
In the Properties window, under Data, set the DataSource parameter to departments11.Departments from the drop-down list.
The DataGrid now contains the column headings from the table DEPARTMENTS.
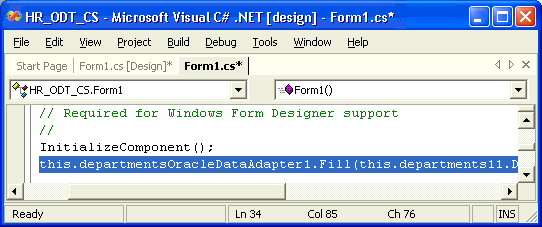
Immediately after the InitializeComponent(); command, add the code in Example 5-4 or Example 5-5.
Example 5-4 Filling Data into the Form: C#
this.departmentsOracleDataAdapter1.Fill(this.departments11.Departments);
Example 5-5 Filling Data into the Form: VB
Me.departmentsOracleDataAdapter1.Fill(Me.departments11.Departments)
Run the application (use the F5 keyboard shortcut).
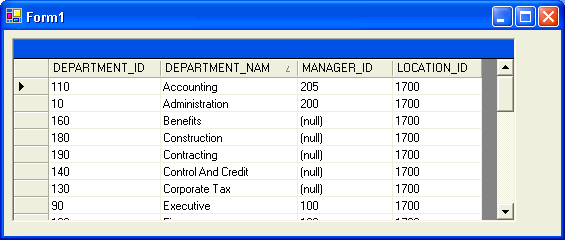
You may need to increase the width of the columns to see all the data.
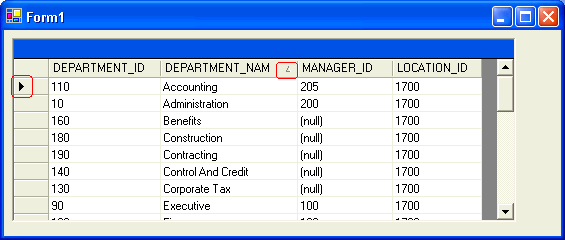
You can navigate across data returned by the application by clicking the mouse down the data set; the current record will be marked by the cursor.
You can also sort the records, either in ascending or descending order, on any of the columns, by clicking on the column heading (notice the direction indicator in the DEPARTMENT_NAME column).
Close the application.
From Section "Using theDataSet Class with Oracle Data Provider for .NET", follow Steps 6 through 9 to create a Save button.
Double-click Save.
The code view appears, with focus on the new and empty save_Click() method.
Change the code of the save_Click() method to bind the table update event to the button, as shown in Example 5-6 and Example 5-7.
Run the application (F5 keyboard shortcut).
Your Form1 application window should appear.
To use the application, follow the instructions in Section "Inserting, Deleting and Updating Data".